How to install and configure ADFS 3.0 with inSync Cloud
Overview
This topic provides information on how to install and configure ADFS 3.0 with inSync Cloud.
Before you begin
- Register your Windows Server 2012 server as a member server of existing domain.
- Log on to server as Domain Administrator.
Procedure
To install ADFS 3.0
- Start Server Manager.
- On the Menu bar, click Manage > Add Roles and Features.
Add Roles and Features wizard is launched. - On the Before you begin page, click Next.
- On the Select installation type page, click Role-based or feature-based installation, and then click Next.
- On the Select destination server page, click Select a server from the server pool, and then click Next.
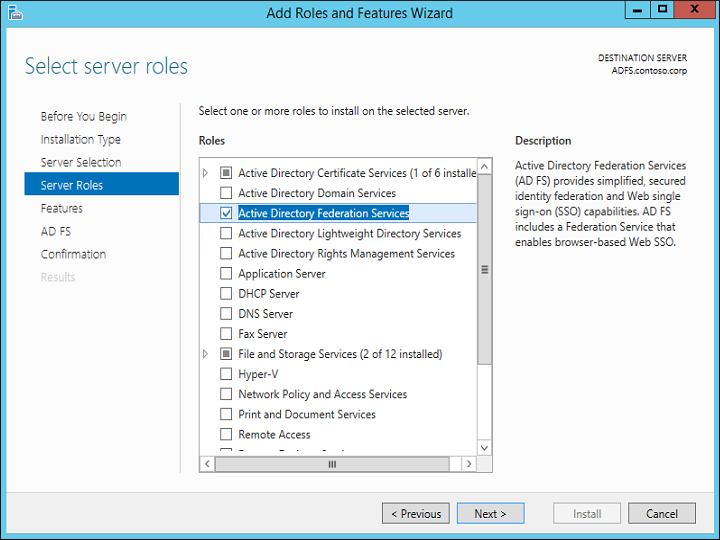
- On the Select server roles page, select Active Directory Federation Services, and then click Next.
- On the Select features page, click Next.
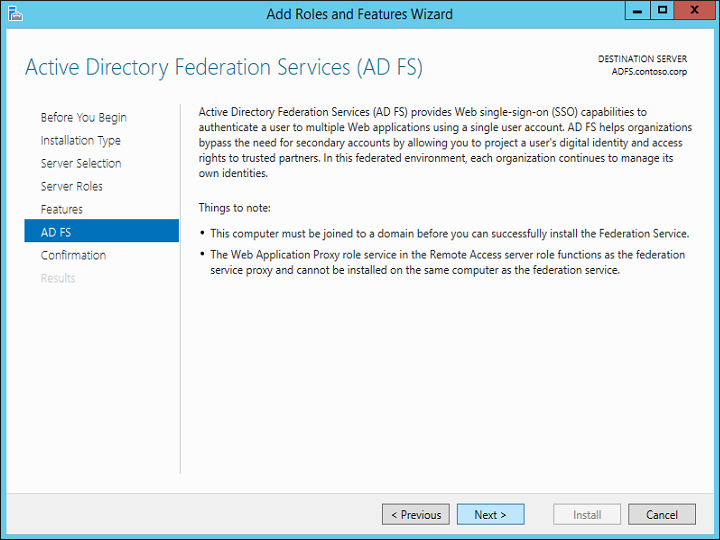
- On the Active Directory Federation Services (AD FS) page, click Next.
- On the Confirm installation settings page, verify the information, and click Install.
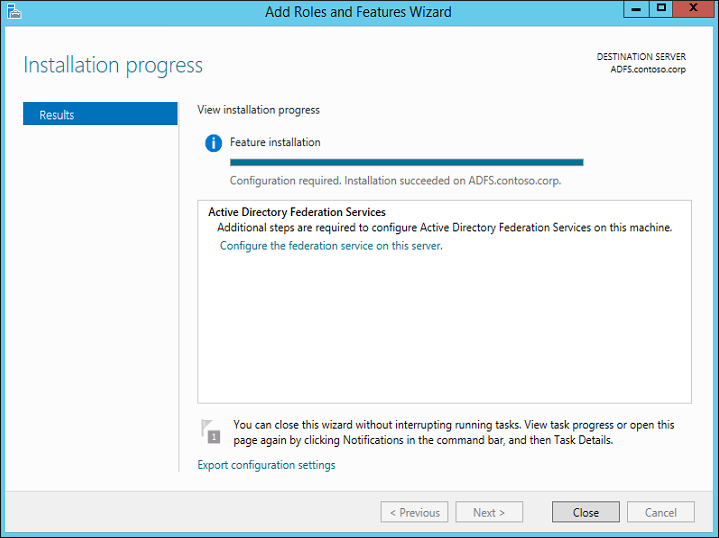
- On the Installation progress page, you can view the installation progress. Verify the installed component, and click Close.
Configure the federation server
To configure the federation server
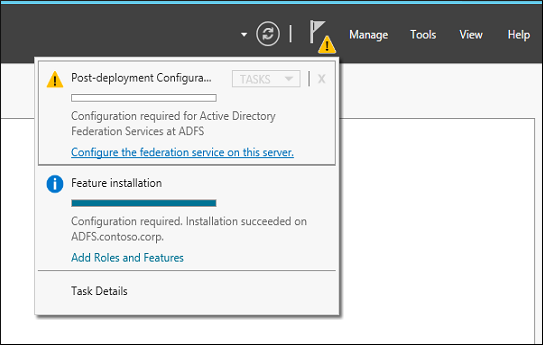
- On the Server Manager Dashboard page, click the Notifications flag, and then click Configure the federation service on the server. The Active Directory Federation Service Configuration Wizard is launched.
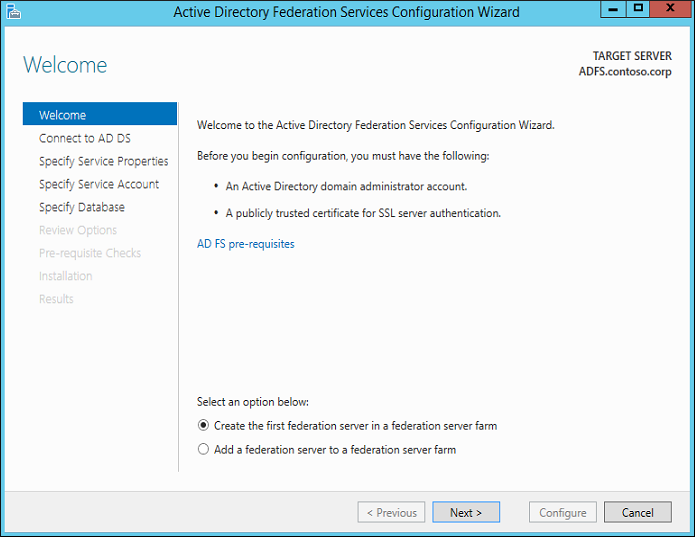
- On the Welcome page, select Create the first federation server in a federation server farm, and click Next.
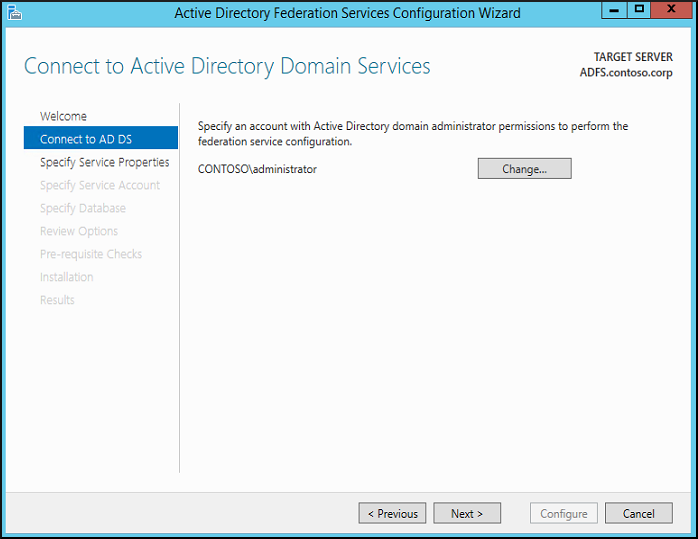
- On the Connect to Active Directory Domain Services page, specify an account with domain administrator rights for the Active Directory domain that this computer is joined to, and then click Next.
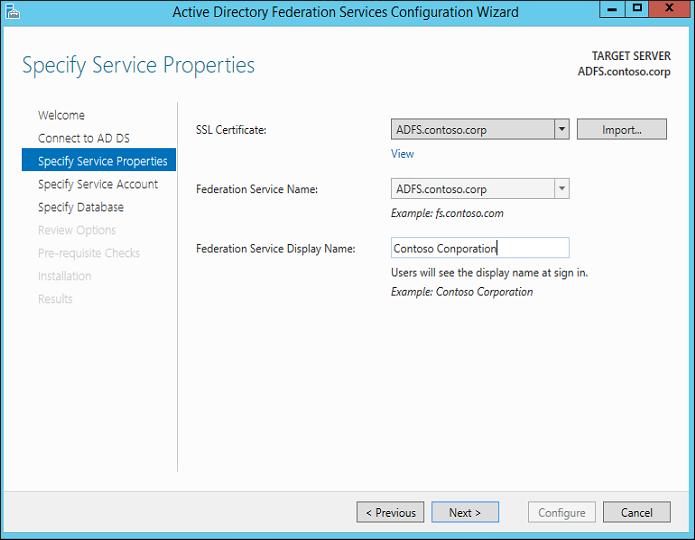
- On the Specify Service Properties page, enter the following details, and click Next
- Browse to the location of your SSL certificate and import it.
- Type a Federation Service Name. This value is the same value that you provided when you enrolled an SSL certificate in Active Directory Certificate Services (AD CS).
- Type a Federation Service Display Name.
- On the Specify Service Account page, select Use an existing domain user account, and click Next.
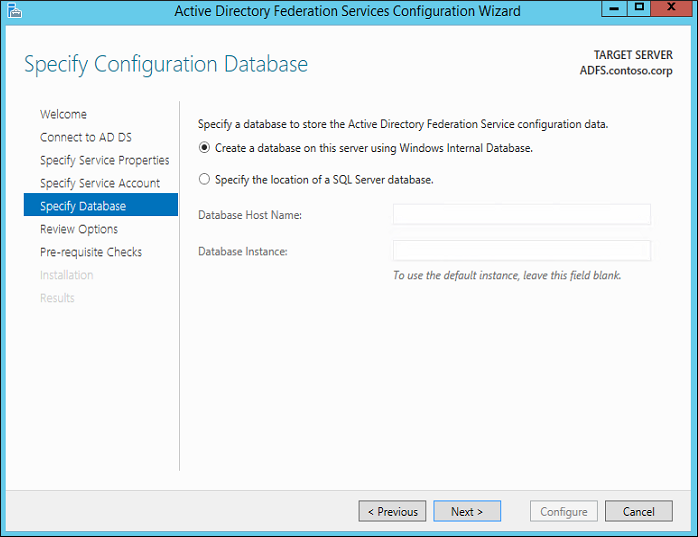
- On the Specify Configuration Database page, select Create a database on this server using Windows Internal Database, and then click Next.
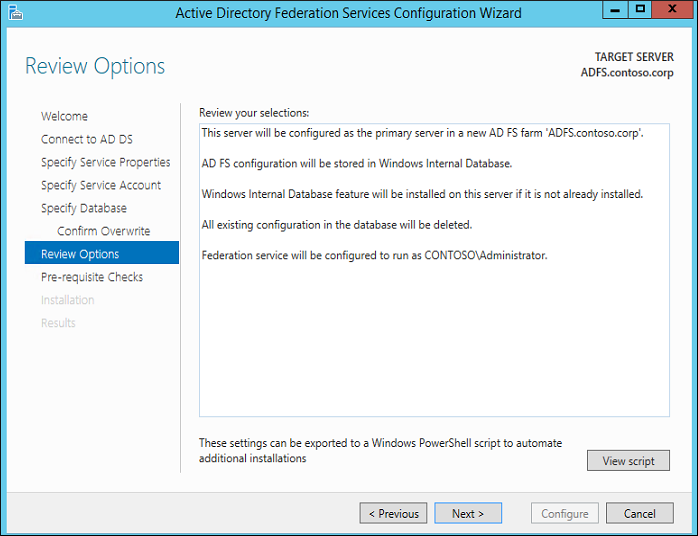
- On the Review Options page, verify your configuration selections, and then click Next.
- On the Pre-requisite Checks page, verify that all prerequisite checks were successfully completed, and then click Configure.
- On the Results page, review the results, check whether the configuration has completed successfully.
Configure ADFS to integrate with inSync Cloud
After you have installed ADFS 3.0, perform the following actions:
- Create trust between inSync Cloud and ADFS by configuring ADFS with a relying party rule, which is inSync Cloud.
- Configure inSync Cloud to trust ADFS 3.0. The trust allows ADFS 3.0 to send claims to inSync Cloud.
- Set up a web application and site to consume these claims.
Create a relying party
After you have set up the Federation Server, the next step is to create a relying party.
To create a relying party
- On the Start menu, click Administrative Tools > ADFS 3.0 Management. The ADFS 3.0 window appears.
- Expand the Trust Relationships node.
- In the right pane, click Add Relying Party Trust. The Add Relying Party Trust Wizard appears.
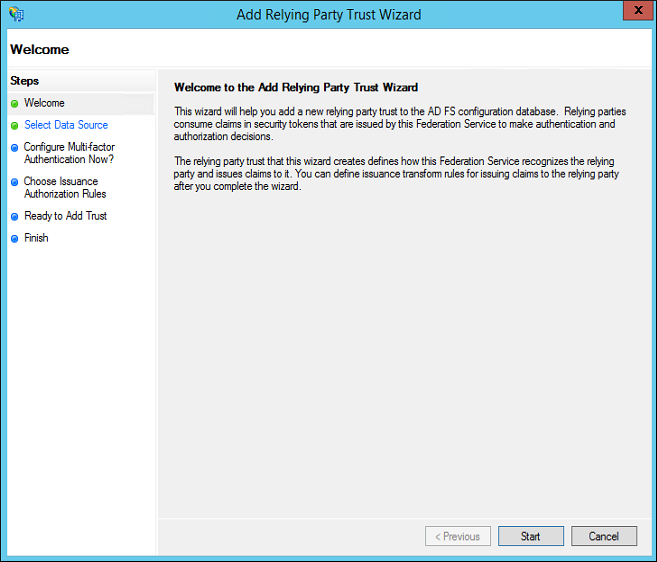
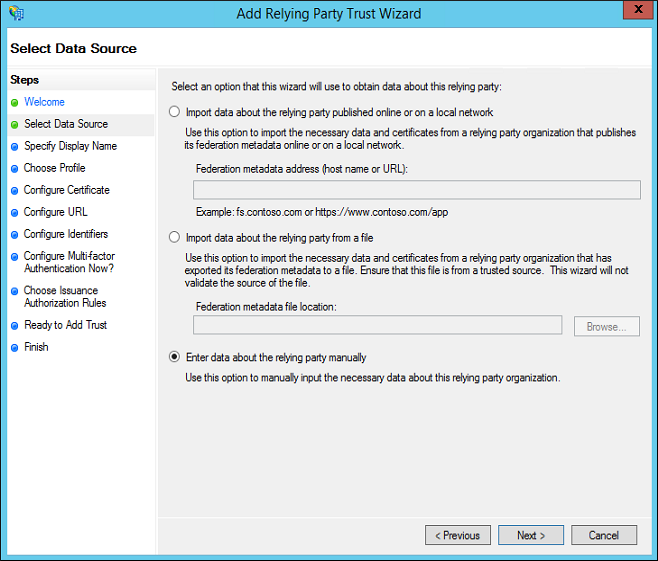
- Click Start. The Select Data Source page appears.
- Click Enter data about the relying party manually, and then click Next. The Specify Display Name page appears.
- Provide the appropriate information for each field, and click Next.
Field Action Display Name Type a display name for the relying party.
For example, Druva inSync.
Notes Type a description for the relying party. 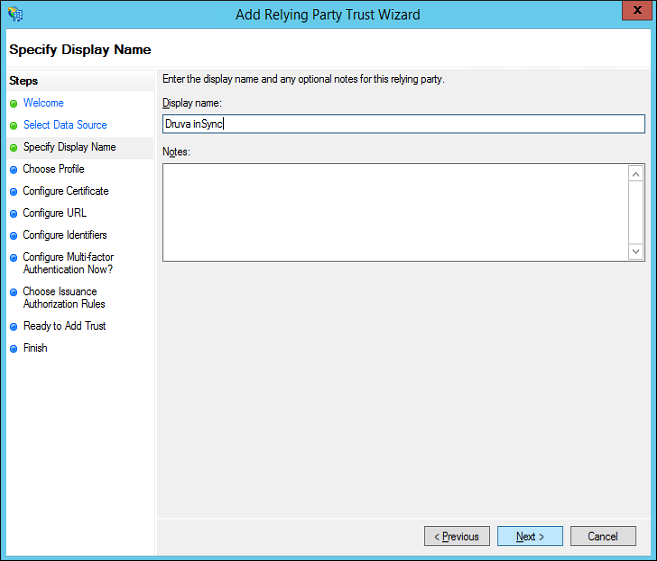
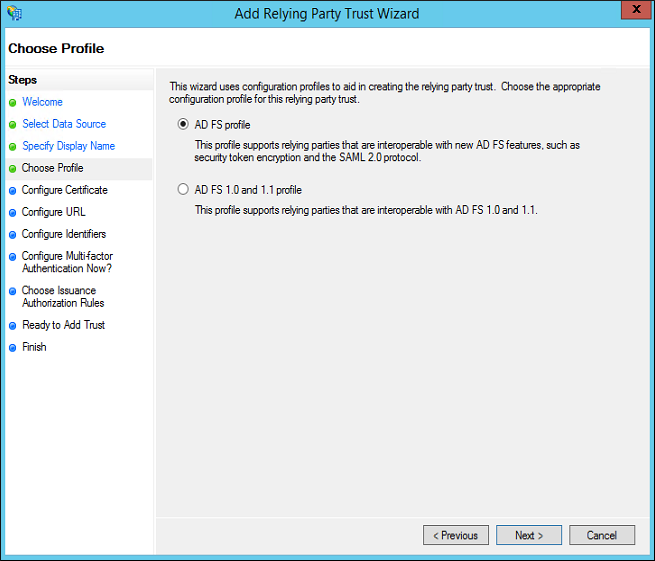
The Choose Profile page appears. - Select AD FS profile and click Next. The Configure Certificate page appears.
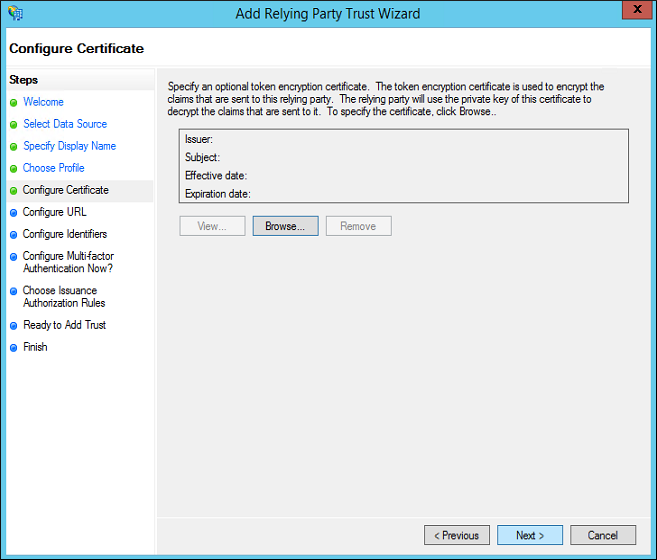
- (Optional) If you want to encrypt the SAML token, browse and select the certificate, and then click Next. However, ADFS establishes a secure SSL connection to Druva inSync, which ensures the token is encrypted. Click Next.
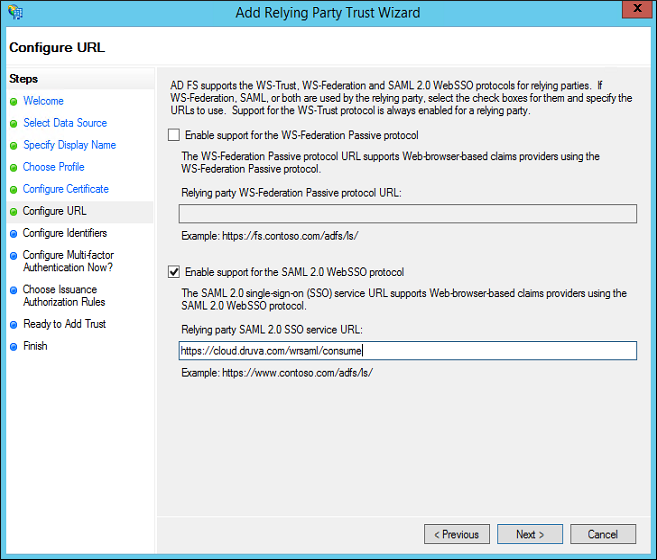
- The Configure URL page appears.
- Select the Enable support for the SAML 2.0 WebSSO 2.0 protocol check box.
- In the Relying party SAML 2.0 SSO service URL box, provide the following URL
https://cloud.druva.com/wrsaml/consume
inSyng GovCloud users can provide: https://govcloud.druva.com/wrsaml/consume - Click Next. The Configure Identifiers page appears.
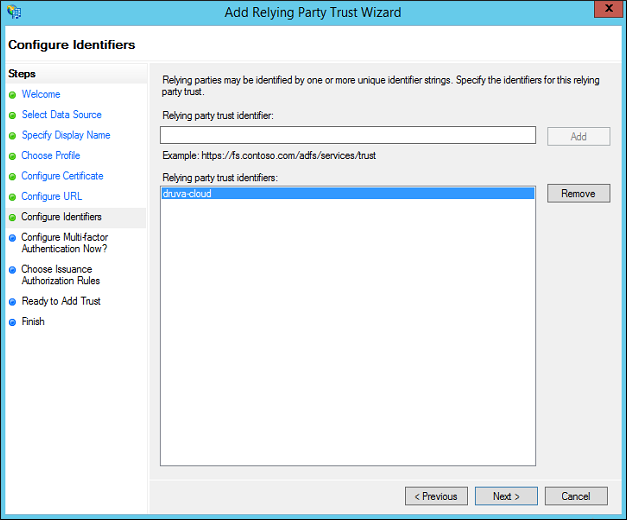
- In the Relying party trust identifier box, type druva-cloud.
The web application passes this realm to the ADFS when users log into the web restore URL.Note: If you are using inSync Gov Cloud as the relying party, type druva-govcloud.
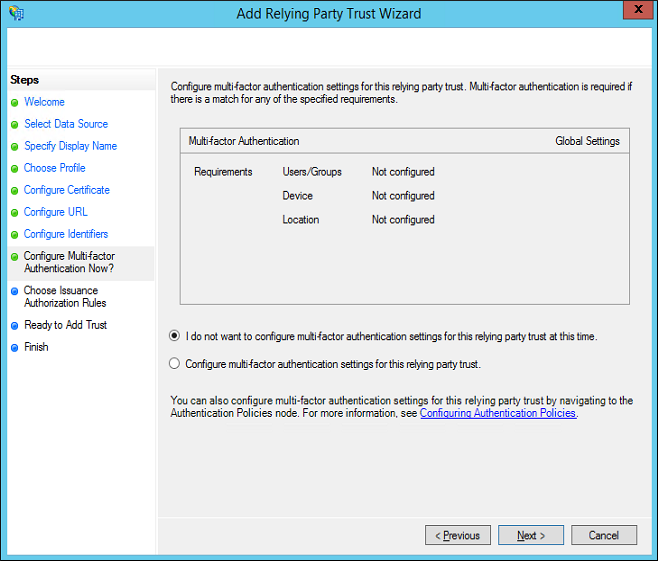
- Click Next. The Configure Multifactor Authentication Now? page appears. Select I do not want to configure MFA settings for this relying party trust at this time and click Next.
Note: If you want to configure Multifactor Authentication, you can do it at a later stage.
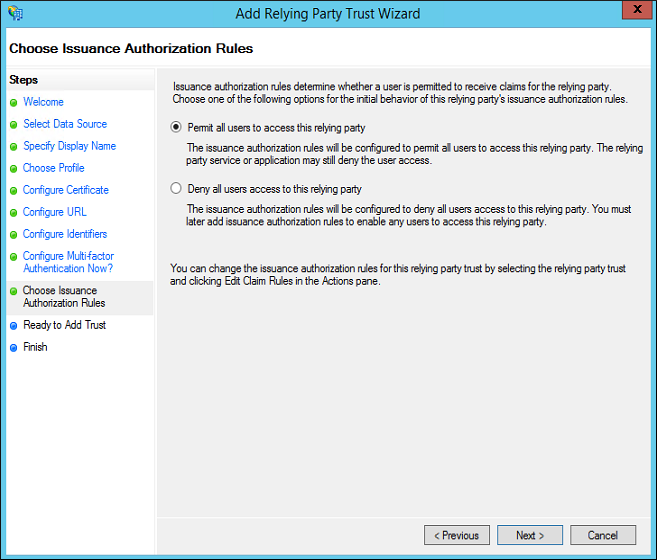
- Click Next. The Choose Issuance Authorization Rules page appears.
- Click Permit all users to access this relying party and then click Next. The Ready to Add Trust page appears.
- Review and if required update the settings that you have configured, and then click Next. The Finish page appears.
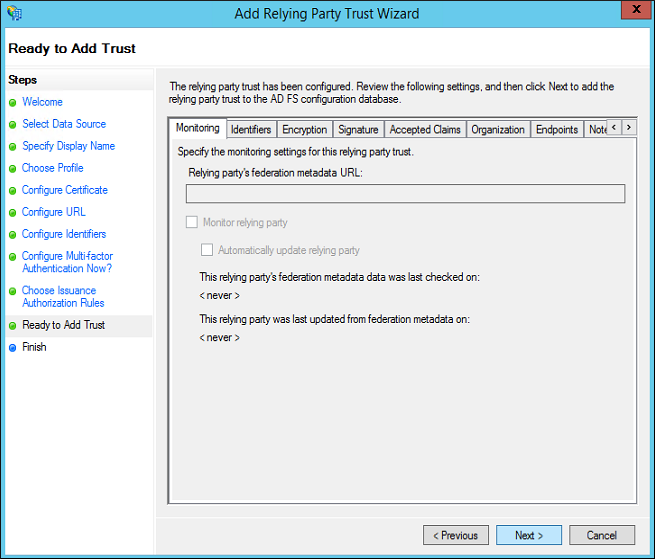
- Ensure that the Open the Edit Claim Rules dialog for this relying party trust when the wizard closes check box is by default selected.
- Click Close.
Create a new claim
To create a new claim
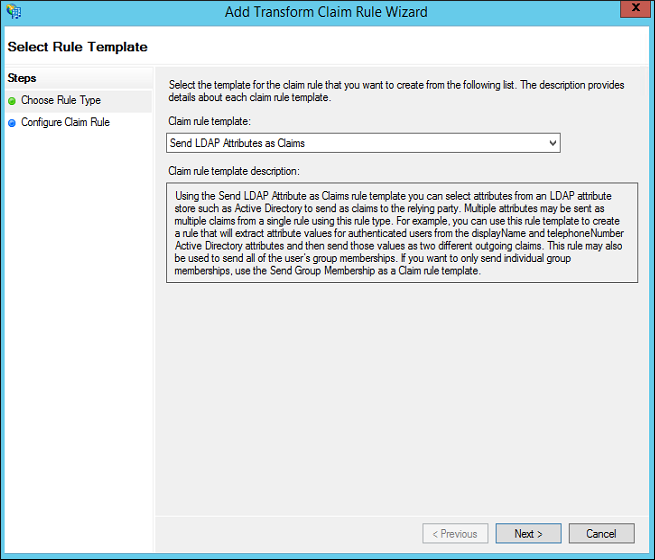
- On the Edit Claim Rules window, under the Issuance Transform Rules tab, click Add Rule. The Select Rule Template page appears.
- In the Claim rule template list, select Send LDAP Attributes as Claims, and then click Next. The Edit Rule – LDAP EMAIL window appears.
- Provide the appropriate information for each field.
Field Action Claim rule name Type a name for the claim rule. Attribute store In the list, select Active Directory Mapping of LDAP attributes to outgoing claim types LDAP Attribute Map it to Outgoing claim type. E-mail Addresses Map it to Name ID. E-mail Addresses Map it to E-mail Address. User-Principal-Name Map it to Name. 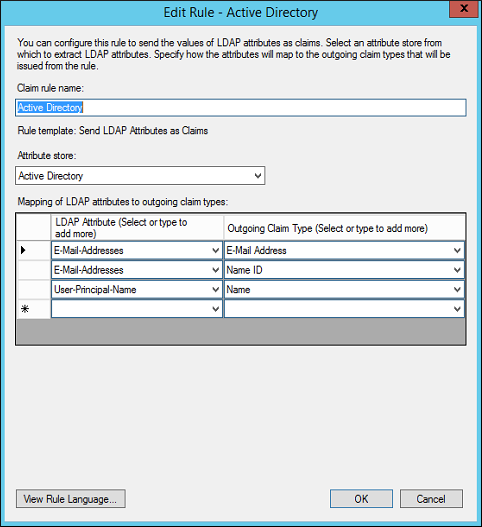
- Click Finish.
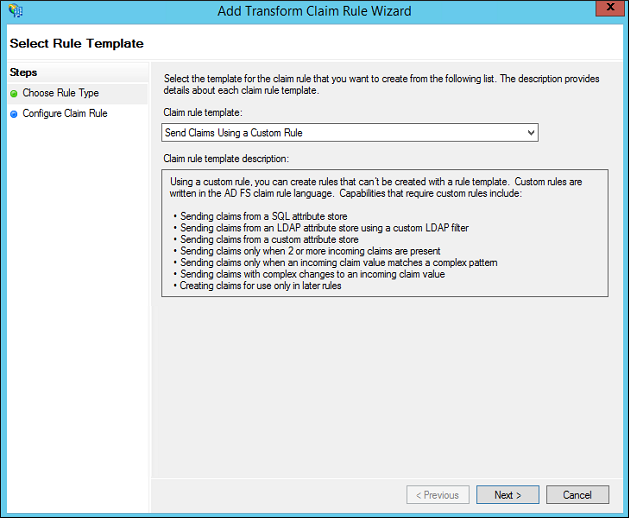
Create a custom rule
To create a custom rule
- On the Edit Claim Rules window, under Issuance Transform Rules tab, click Add Rule. The Select Rule Template page appears.
- In the Claim rule template list, select Send Claims Using a Custom Rule, and then click Next. The Edit Rule – LDAP EMAIL window appears.
- Provide the appropriate information for each field.
Field Action Claim rule name Type a name for the custom rule. Custom rule Type,
=> issue(Type = "insync_auth_token", Value = "value of SSO Token generated from inSync Console");
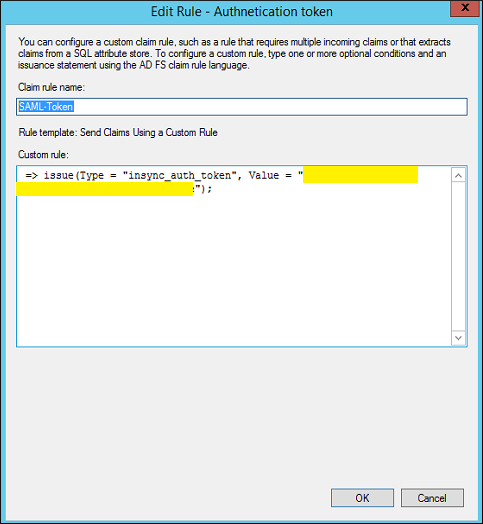
- Click OK.
Configure Single sign-on
Only a Druva Cloud administrator can set up Single Sign-on.
Configure Single Sign-on based on the applicable scenarios:
- New inSync customers (on-boarded after July 14th, 2018), must configure Single Sign-on using the Druva Cloud Platform Console. For more information, see Set up Single sign-on.
- Existing inSync customers who have not configured Single Sign-on until July 14th, 2018, must configure Single Sign-on using the Druva Cloud Platform Console. For more information, see Set up Single sign-on.
- Existing Phoenix customers with Single Sign-on enabled and have purchased inSync license, must replicate the Phoenix Single Sign-on settings to inSync.
Before you begin
Before you configure the single sign-on settings with inSync Cloud, ensure that you have an ID provider certificate. If you do not have an ID provider certificate, follow these steps:
- On the Start menu, click Administrative Tools > ADFS 3.0 Management. The ADFS 3.0 Management window appears.
- Expand to the Service folder.
- Click Certificates. The Certificates view appears in the right pane.
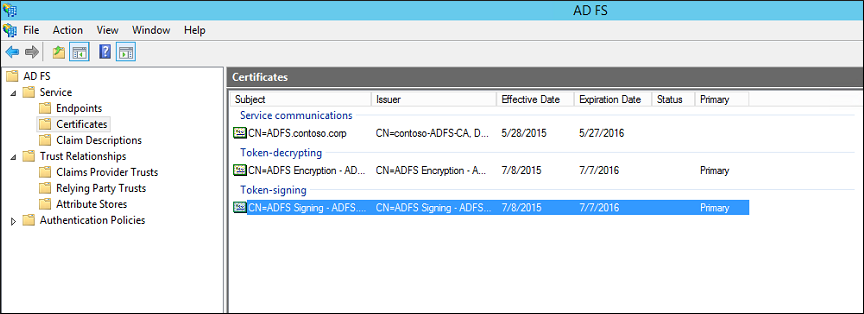
- Under the Token-signing area, right-click the certificate. A list with additional options appears.
- In the list, click View Certificate. The Certificate window appears.
- Click the Details tab and then click Copy to file. The Certificate Export Wizard appears.
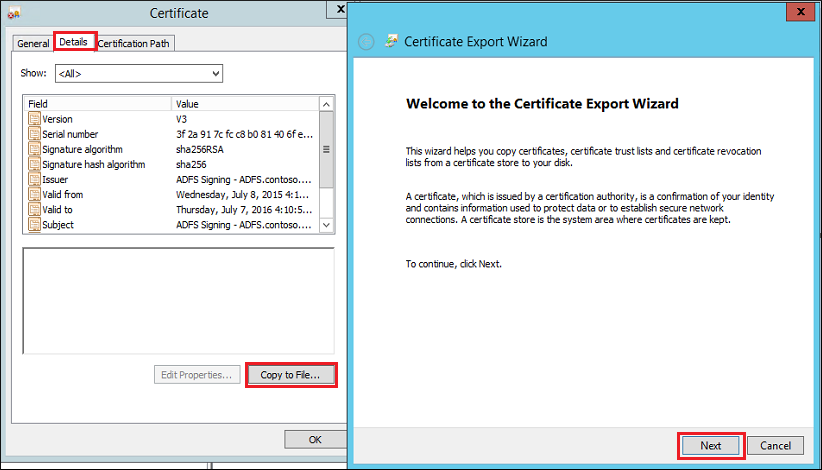
- On the Certificate Export Wizard, click Next. The Export File Format page appears.
- Select DER encoded binary X.509 (.CER), and then click Next.
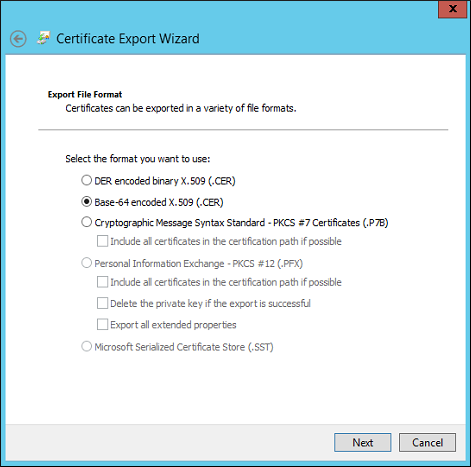
- On the File to Export page, type the file name as Cert.cer, and then click Next.
- Click Finish.
- Open and edit the cert.cer file in a Notepad. The certificate opens in the following format:
“-----BEGIN CERTIFICATE-----
………. …..
-----END CERTIFICATE-----"
- Copy the content of the cert.cer certificate and provide it when you configure the single sign-on settings by using the inSync Master Management Console.
Configure the single sign-on settings
To configure the single sign-on settings
- On the inSync Master Management Console menu bar, click
> Settings.
- Click the Single Sign-on tab and then click Edit.
- Provide the following appropriate information.
SAML Attribute Description and value ID Provider Login URL Type,
https://{fqdn-name of the ADFS server}/adfs/ls
ID Provider Certificate Provide the content of the cert.cer certificate. For more information see, Before you begin. AuthnRequests Signed Select this checkbox, if you want signed SAML Authentication Requests. By default, SAML Authentication Requests are not signed.
Want Assertions Encrypted Select this checkbox, if you want to enable encryption for the SAML assertions. By default, encryption is disabled.
- Click Save.