Archiving and restoring an inSync Server 5.x using Windows 2008 R2 Server backup
Summary
The article describes how to use the Windows 2008 R2 Server Backup utility for inSync Server archival and restore.
This may be useful for tape archival or server/storage migration.
Note – inSync version 4.x and above are VSS-compatible and do not require any downtime of services while backing up using VSS (Microsoft Volume Shadow Copy Services).
What is covered -
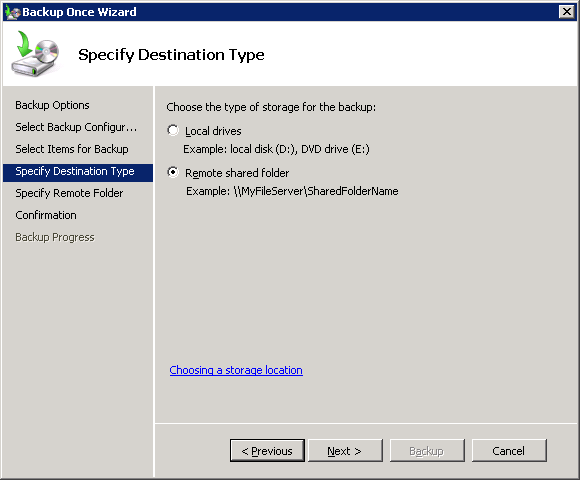
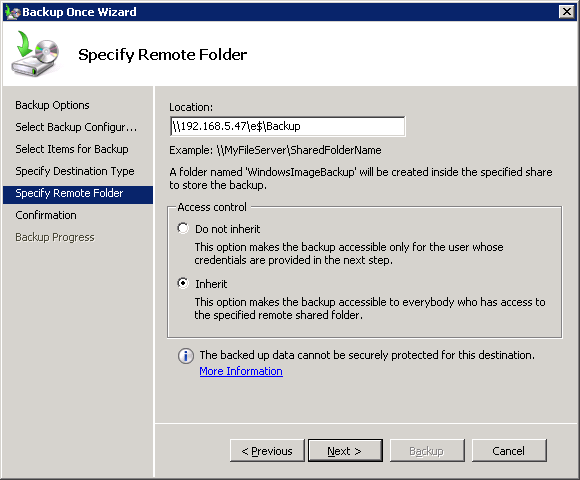
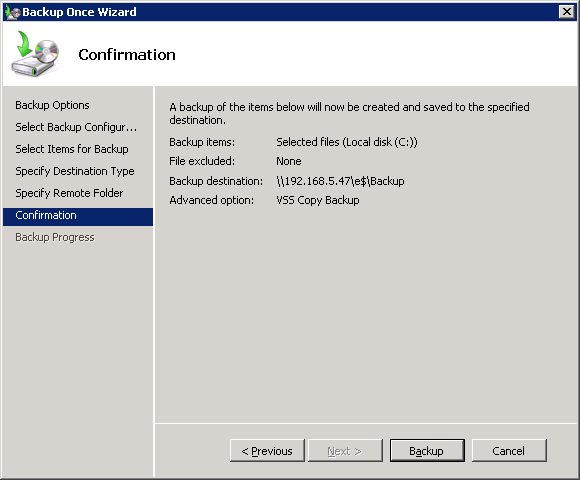
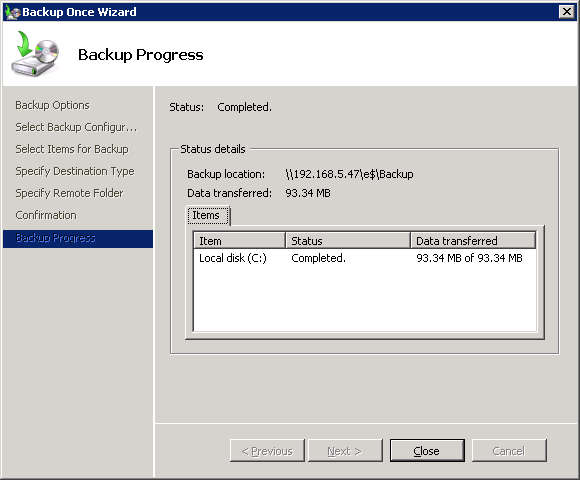
Archival using Windows 2008 R2 Server backup
Archival using Windows 2008 R2 Server backup
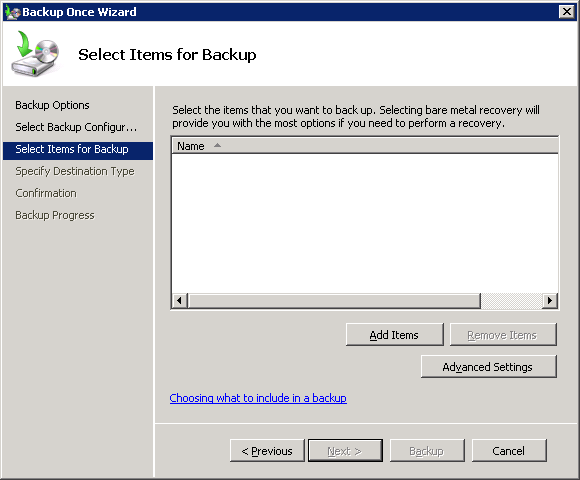
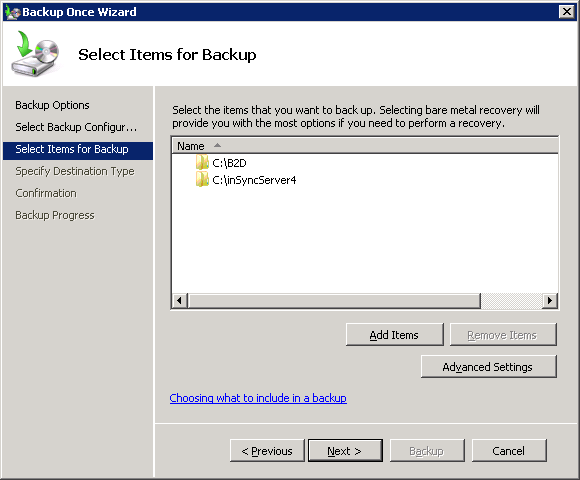
When archiving an inSync server, you need to archive the folders for inSync installation (inSyncServer4) and the inSync Storage Base folders (__drstdata__, __drstdb__ and __drstlog__).
To back up an inSync server using the Windows Server Backup utility:
1. Launch the utility by clicking Start > Programs > Administrative Tools > Windows Server Backup.This will open up a window with options for backup and restore.
2. Select Backup once for single backup or select Backup Schedule to auto schedule the backup at a specific time daily and then click Next. In this case, Backup Once has been selected.

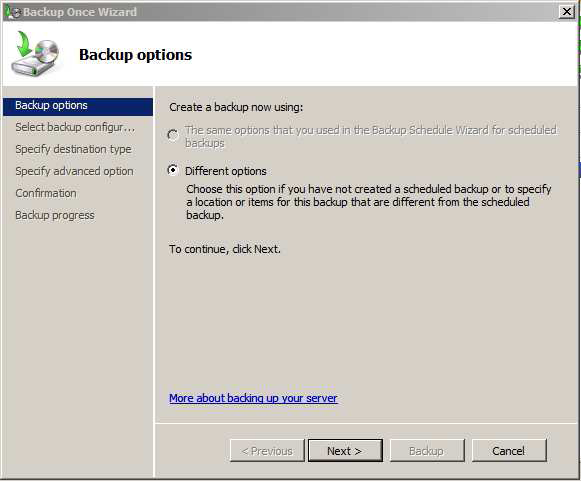
3. Select Different options and click Next.
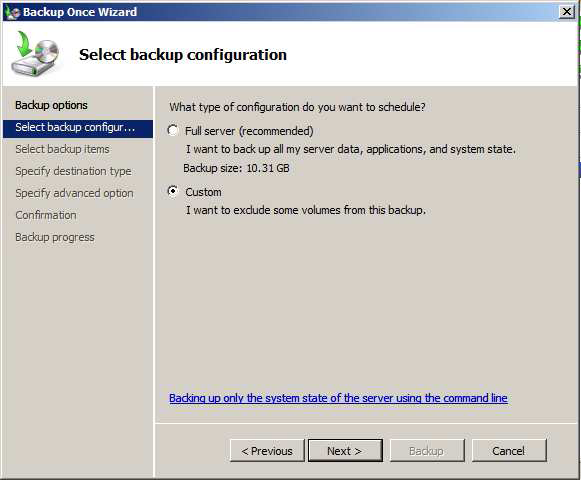
4. In the Select backup configuration window, select Custom and click Next.

Restore using Windows 2008 R2 Server backup
The archived inSync Server and Storage folder can be restored on a Windows 2008 Server which is already running an inSync Server or on a new Windows 2008 server.
Restore on an existing inSync Server
Before you start restoring on an existing server:
1. Stop Druva inSync Server Control Panel service.
2. Stop Druva inSync Server service.
To restore the inSync Server archive on an existing active server:
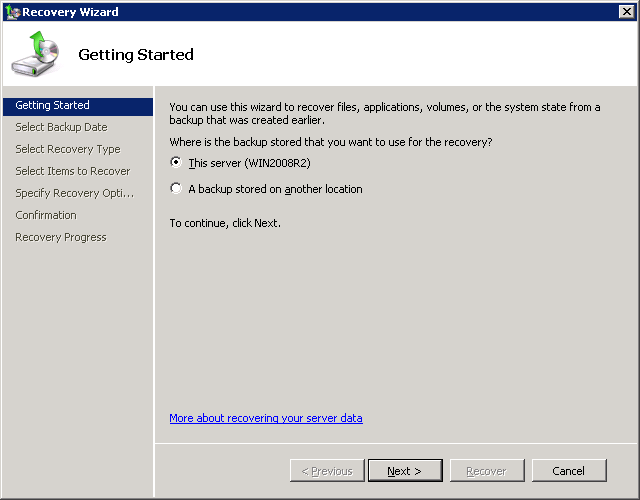
1. Launch the Windows Server Backup utility by clicking Start > Programs > Administrative Tools > Windows Server Backup.
2. Click Recover to restore the already archived inSync Server.
3. Select "This server" (where the inSync Server was archived).
4. Choose the Media where inSync Server was archived.
5. Select the Backup location where inSync was archived.
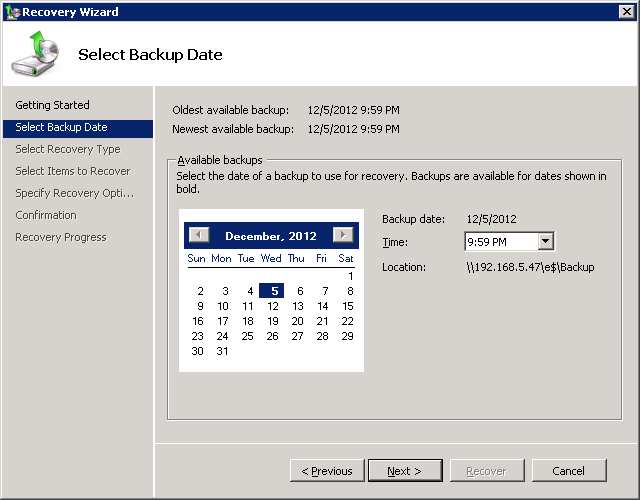
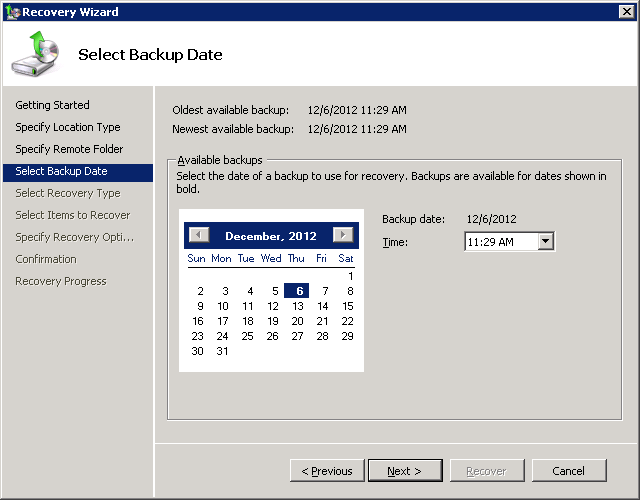
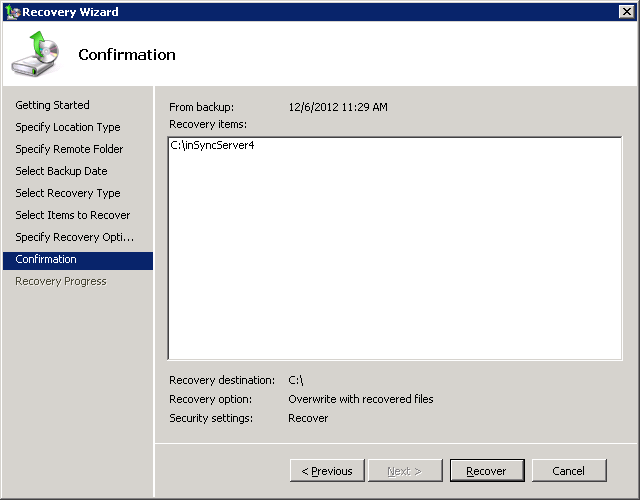
6. Select the appropriate restore point which was created for each inSync Server archive. Select the date from the Calendar and the restore point time from the Time list, if multiple backups were taken for the inSync Server. Click Next to proceed.
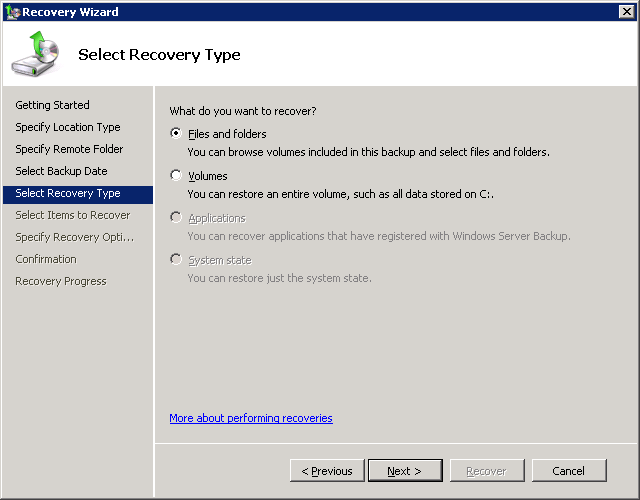
7. Select the Recovery type as Files and Folders and click Next.

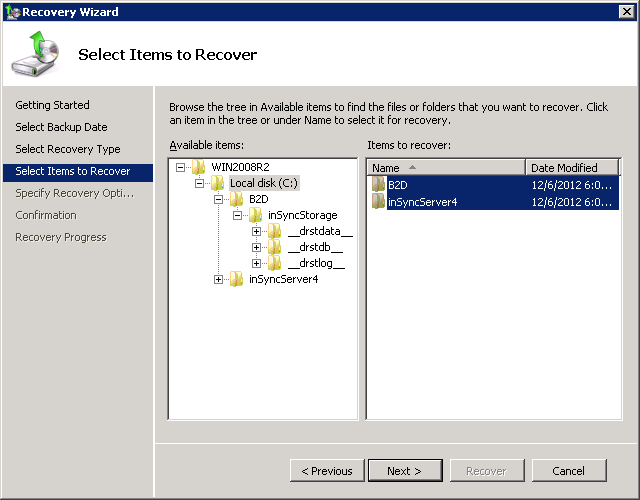
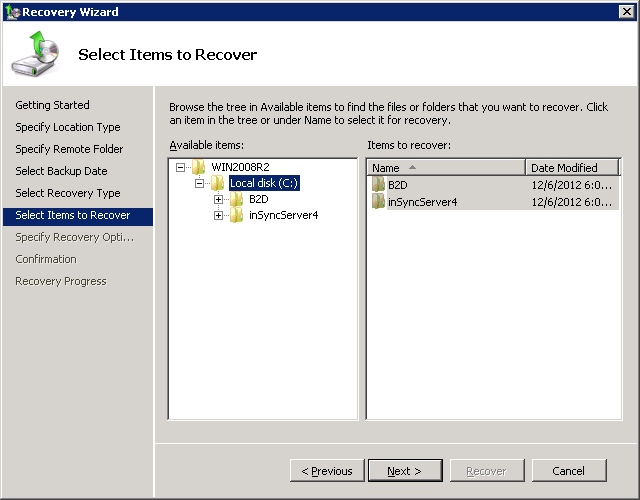
8. You need to restore the following folders one at a time.
- C:\inSynServer4
- The base folders for the Storage's, Database and Database Logs
To restore “C:\inSyncServer4”, select Local disk (C:) then select inSyncServer4 and click Next to proceed.
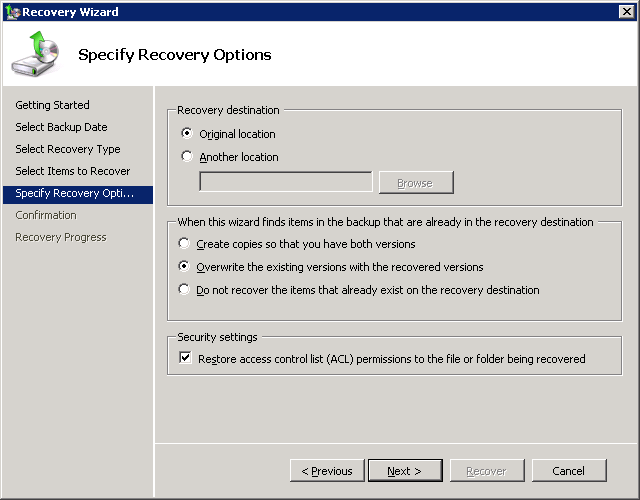
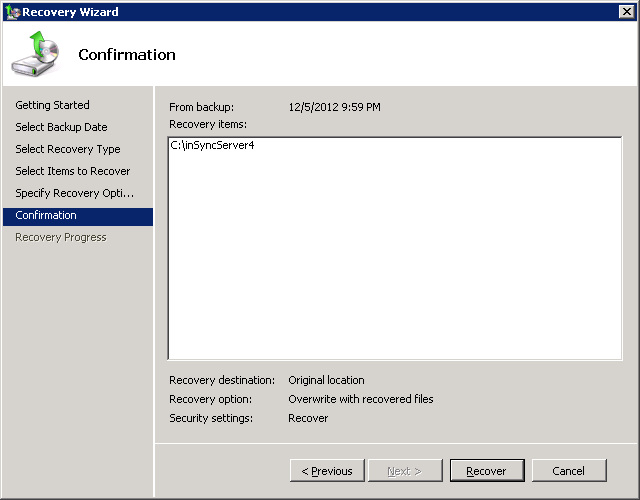
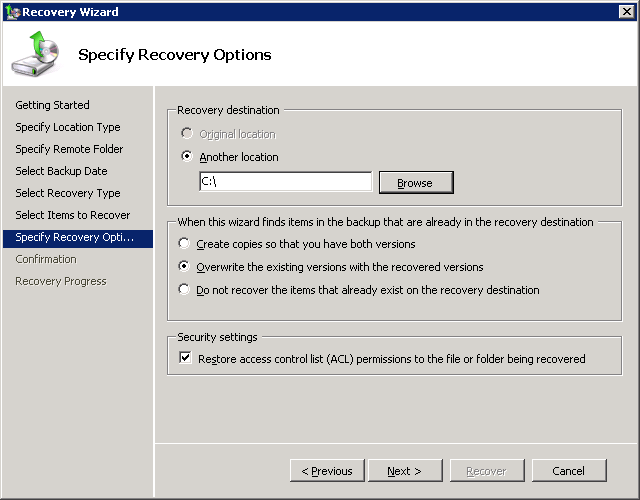
9. In Specify Recovery Options window, select the Recovery Destination as Original Location and select Overwrite the existing versions with the recovered versions. Select Security settings to restore security settings. Click Next to proceed.
10. Re-verify the folders that need to be restored and click Recover to start the restoration.
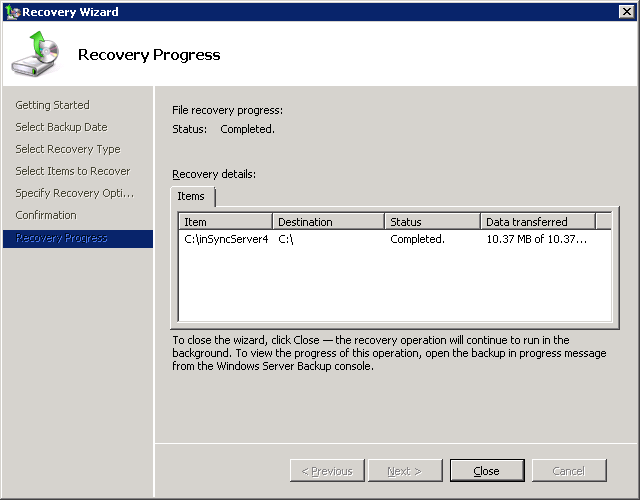
11. Once the first restore i.e. restore of “C:\inSyncServer4” folder is complete, click Close.
12. Now repeat the same steps (3 to 11) to recover the Storage, Database and Database Logs Base Folders.
Note: Assign the same drive letter to the Storage, Database and Database Logs folder as it was the old inSync Server before archiving.
13. Provide full security permissions for System user on following folders and sub folders and files:
- C:\inSyncServer4.
-Storage, Database and Database Logs Base folders.
14. Now start the services in following order:
- Druva inSync Server
- Druva inSync Server Control Panel
- Druva inSync Share Control Panel
Restore on a new server
Before you restore the archive on a new Windows server:-
1. Install the latest version of inSync Server you are running.
2. Stop the inSync Server service and inSync Server Control Panel service.
To create a new inSync server using an existing archive:
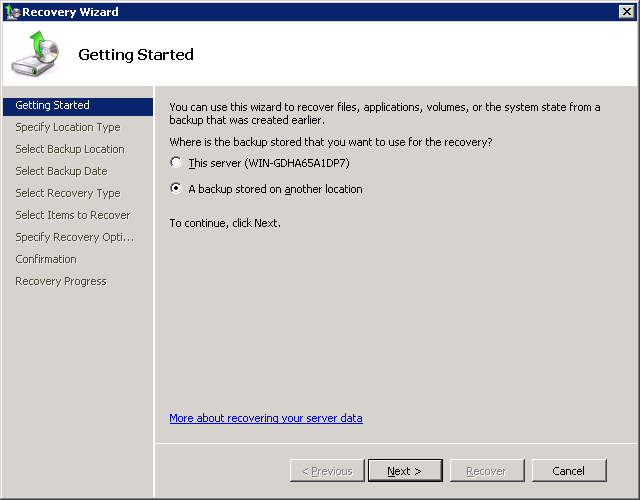
1. Start the Restore process using the Windows 2008 Server Backup utility, by clicking Start > Programs > Administrative Tools > Windows Server Backup.
2. Select A backup stored on another location.
3. Select the backup source. E.g. stored on the network location.
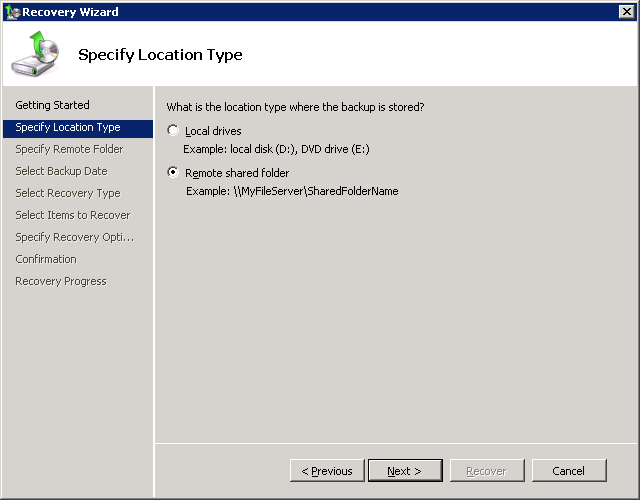
4. Type the path for the backup stored on network location.

5. Select the appropriate restore point which was created for each inSync Server archive. Select the date from the Calendar and the restore point time from the Time list, if multiple backups were taken for the inSync Server. Click Next to proceed.
6. Select the Recovery type as Files and Folders and click Next.
7. You need to restore the following folders one at a time.
- C:\inSynServer4
- The base folders for the Storage, Database and Database Logs.
To restore “C:\inSyncServer4”, select Local disk (C:) then select inSyncServer4 and click Next to proceed.
9. In Specify Recovery Options window, select the Recovery Destination as another Location at C:\ drive (Original location would be greyed out) and select Overwrite the existing versions with the recovered versions. Select Security settings to restore security settings. Click Next to proceed.
10. Re-verify the folders that need to be restored and click Recover to start the restoration.
11. Once the first restore i.e. restore of “C:\inSyncServer4” folder is complete, click Close.

12. Now repeat the same steps (3 to 11) to recover the Storage, Database and Database Logs Base Folders.
Note: Assign the same drive letter to the Storage, Database and Database Logs folder as in the old inSync Server before archiving.
13. Provide full security permissions for System user on following folders and sub folders and files:
- C:\inSyncServer4.
- Storage, Database and Database Logs Base folders.
14. Now start the services in following order:
- Druva inSync Server
- Druva inSync Server Control Panel
- Druva inSync Share Control Panel
Post restoration tasks
After restoring a server, you need to load a new license and check the Published IP Address settings on the inSync Server Web Control Panel.
Open the inSync Web Control Panel. If you do not remember the old password, please start the inSync Initial Configuration Wizard by clicking Start > All Programs > Druva inSync Server > inSync Server Management Console.
Enter the New Username and Password and click Finish.
Loading a new license
In the inSync Web Control Panel Manage- Settings- inSync License.
This will display a license error. Contact Druva Support for a new license key and load it.
Setting the public IP addresses
In the inSync Server Web Control Panel, change the Published IP addresses and Web/App restore IP address to reflect the changed IP address of the new server (if any).
To set the Published IP Address and Web/App restore IP Address:
1. In the inSync Server Control Panel, click Settings > Network >Published IP Addresses and Web/App Restore IP Address.
2. Click Edit and enter the new IP address of the new server for both the fields.
3. Delete the old IP address.
Note: It is recommended to retain the IP address of the archived inSync Server by assigning the old static IP address to the new Windows Server, because it will not require reissuing the key to all inSync clients.
If you want to provide the restored inSync Server with a new IP address, you need to notify the clients. You can do this by either:
a. Re-generating keys for the users and asking users to load the new key OR
b. Changing the configuration on the inSync client. Under the Advanced tab, add the new server IP address and remove the old one.
Assigning the same/old IP address to the new server should be the very last step.
Verify the restore
Please perform below steps to verify restore.
- Verify a successful restoration and also initiate a new backup request for any one of the clients to verify data consistency.
- Check the inSync server log file at C:\inSyncServer4\inSyncServer.log for any errors.
Note:
- Base folders for storage consist of both Data and Database. Ensure that you back up both the folders in case they are configured at two different locations.
- Install the same version of inSync Server Binaries as that of the old inSync Server.
- In case you have configured separate SSD storage, you need to back that up as well.
In case of any queries or concerns, please feel free to contact us via Support Portal.