Archiving and Restoring an inSync Server on Windows Server 2003 using Microsoft NTBackup - for inSync v5.x
Summary
This article describes how to use the Microsoft Windows NTBackup utility to archive and restore an inSync server. This may be useful for tape archival or server/storage migration.
Note: Version 4.0 and later of inSync are VSS-compatible and do not require any downtime of services.
What is covered:
Archiving Using NT Backup
Restoring an inSync 5.1.x Server to an existing Server
Restoring an inSync 5.1.x Server to a New Server
Post Restore Settings
Archiving using NTBackup
To archive an inSync server using the NTBackup utility:
1. Launch the Windows NTBackup utility from Start > All Programs > Accessories> System Tools > Backup.
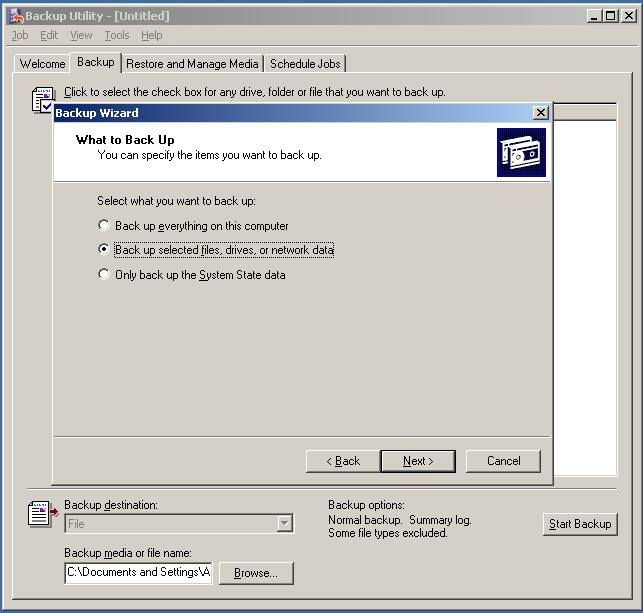
2. The Backup wizard is displayed. In the wizard, select the Backup selected files, drives or network data option. Click Next.
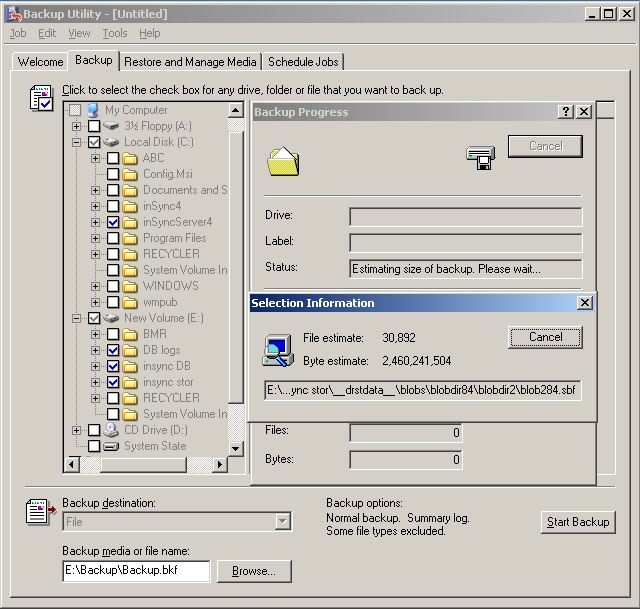
3. Select inSync Server folders to be backed up:
- C:\inSyncServer4.
- the Storage base folders which comprises of Data, Database and Database log folders.
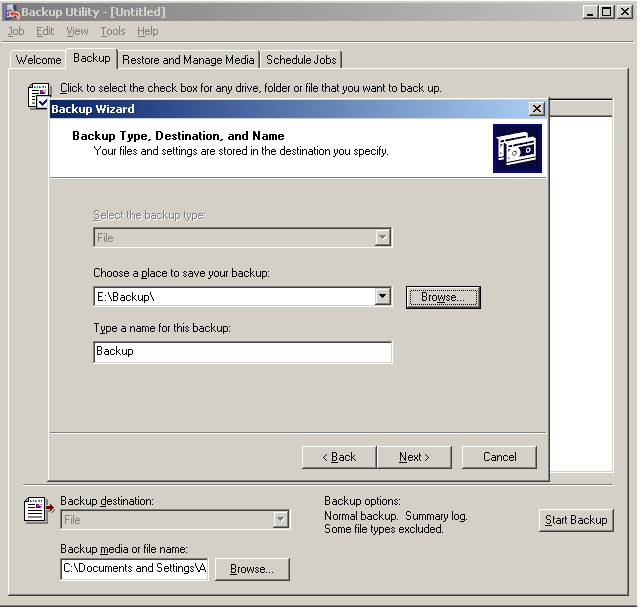
4. Complete the Backup wizard steps and click Finish. The Backup wizard starts backing up the data.
Restoring an inSync Server to an existing server
Make sure that the Druva inSync installation is not corrupt and is working fine. Else uninstall the bad setup and install latest version of 5.1.x
Note: Make sure that the backed up data is accessible from this machine before an attempt is made to restore.
1. Stop inSync Services.
- Stop the Druva inSync Server service.
- Stop the Druva inSync Server Control Panel service.
- Stop the Druva inSync Share Control Panel service.
2. Run the Windows 2003 Backup tool. Click Start > All Programs > Accessories > System Tools >Backup.
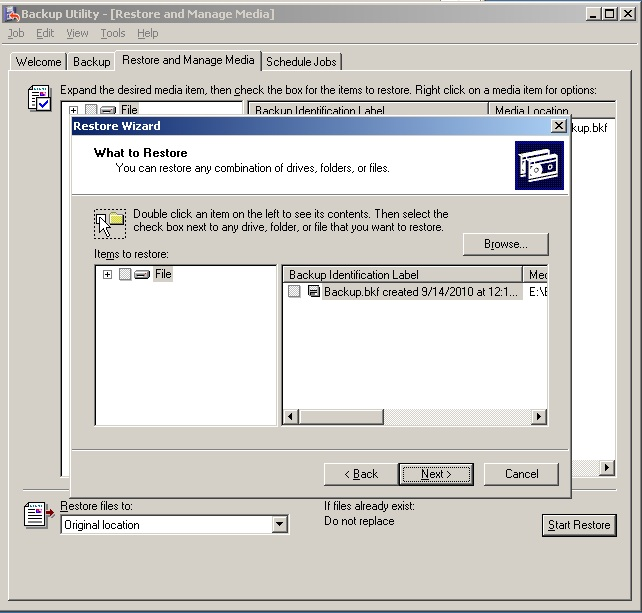
3. The Backup Utility screen displays. Click Restore Wizard (Advanced).
4. The Restore Wizard screen displays. Click Next.
5. Select the folders and files to be restored: typically C:\inSyncServer4 and the storage base folders.
6. Select the Original Location from Restore files to. Click Next.

7. Select Replace existing files. Click Next.
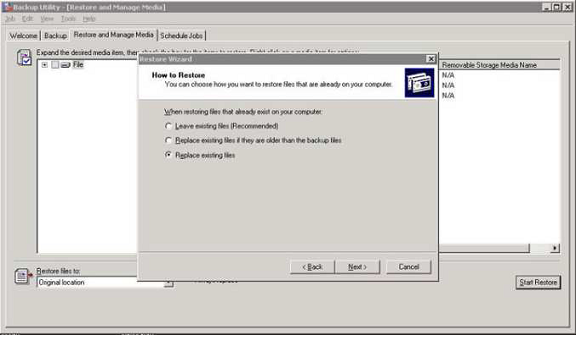
8. Click Next, and then click Finish. The Restore wizard starts restoring files.
9. After restoration is complete:
- Start the Druva inSync Server service.
- Start the Druva inSync Server Control Panel service.
- Start the Druva inSync Share Control Panel service.
Restore inSync server to a new server
To rebuild an inSync 5.1.x server using an existing archive:
1. Install the latest version of inSync 5.1.x Server.
2. Make sure that the system has appropriate drives as compared to old server.
3. Repeat the restore process given in the ‘Restoring an inSync Server to an Existing Server’ section from step 1 to 9.
Note: Make sure that the backed up data is accessible from this machine before an attempt is made to restore.
Post restoration steps
After restoring the inSync server, you need to re-install the license and re-configure the published IP address settings under the Druva inSync Server Control Panel.
License settings
1. Open the inSync Web Control panel and log in.
2. Click Manage >Settings > inSync License.
3. Under the summary the “inSync license” field depicts - “The license is not valid for this Server ID.”
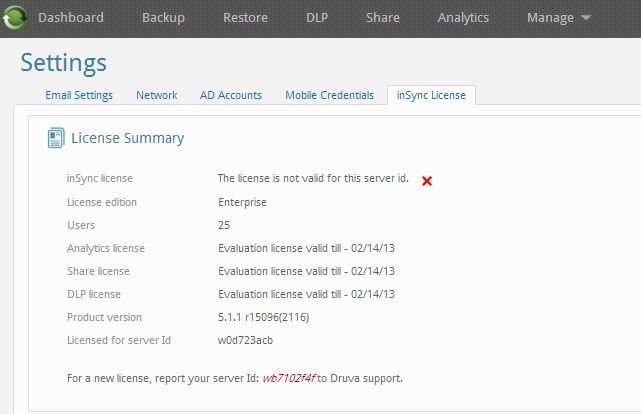
4. Send the uncropped screenshot of the Druva license page to the Technical Support Team via our Support Portal.
Network Settings
On the Web Control Panel, click Manage -> Settings -> Network -> Server IP Address and edit the Published IP addresses, in case of any changes to the Server’s IP address.
If yes, you will need to reactivate all the users so they can connect to the new Server IP address. In order to reactivate the inSync client , Right click on the inSync icon under the system tray > Configure > Settings >Reactivate > Replace an existing device.