How to import Active Directory users into inSync v5.2
Summary
An IT administrator can register an Active Directory (AD) account and import AD users into inSync 5.2. To import users from a domain controller, the administrator needs to authenticate using an AD account with sufficient privileges to search the user database. Once the authentication succeeds, the wizard allows import of users. The imported users will be created using either a Common name or Windows Log in ID/Name. This article lists the steps to be followed when importing AD users into inSync.
This article lists the steps to be followed when importing AD users into inSync.
Register your AD with inSync
Register your AD with inSync. On the inSync Control Panel, click Manage > Settings > AD Accounts > Register AD Account.
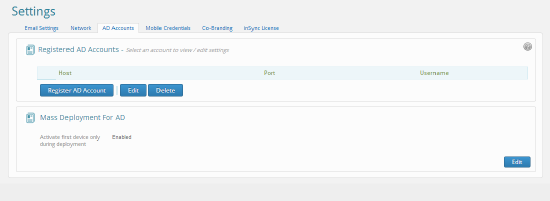
Enter the details like IP address of Domain Controller / host, Active Directory port (389 by default), user name and password that will allow inSync to read users from Active Directory.

Click Ok to save the settings.
On the inSync Control Panel, click Manage > AD Mappings > Create New.
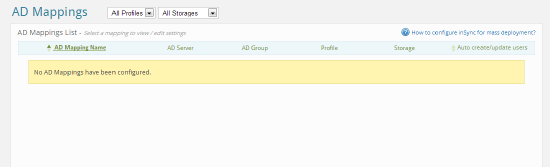
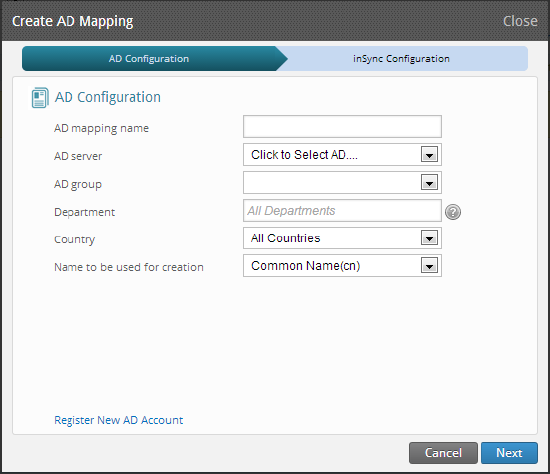
Provide name for AD Mapping. You can also filter users using Department or Country.
Note – This fields are configured in user details in Active Directory.
Click next to continue.
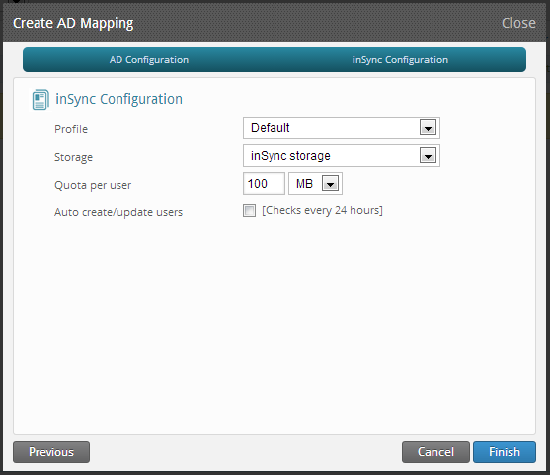
Select the inSync profile where you wish to import users to and the desired storage. Select Auto create/update users option to auto import / update users from Active Directory.
Import AD Users
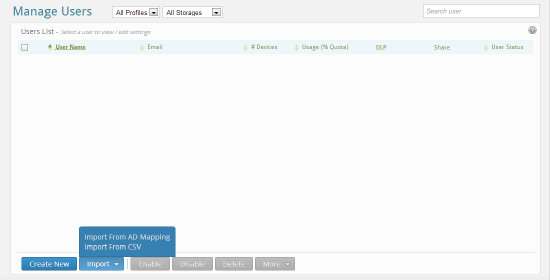
Once Active Directory settings are added and configured you can import user by navigating to Quick Links > Manage Users > Import > Import from AD.
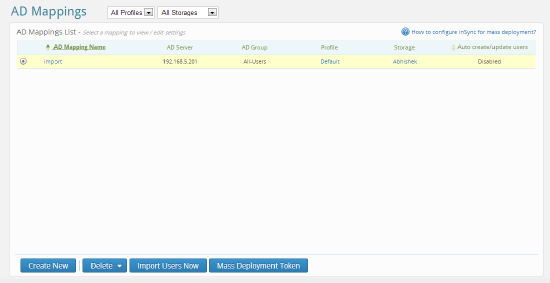
Select AD mapping from where you wish to import users and click on Import Users Now.
Select the users for import.
Note – User must have email address field mentioned in Active Directory. If user does not have email address specified, users will not be visible during the import process. Email address field is a mandatoryfield.
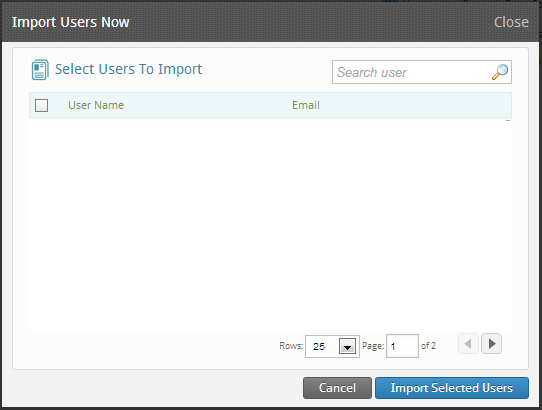
Select the User to be imported.
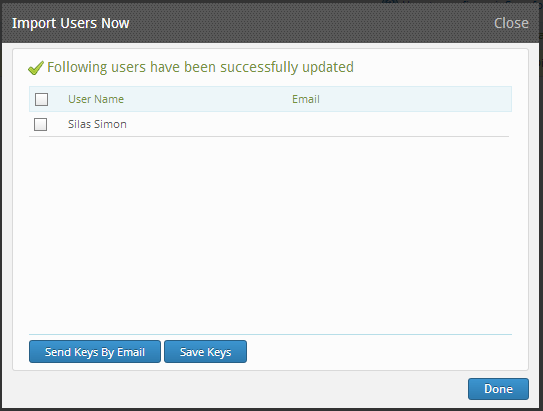
Click Save keys to save the authentication keys locally without sending them to end users via email or click Send Email to send the authentication keys via email.
Click on Done to close the import wizard.

Imported users are visible after successful import.
For any further queries or concerns reach us via Support Portal.