Archiving and restoring an inSync Server 4.x/5.x on Linux
Summary
The article describes how to archive and restore an inSync server running on Linux to an existing inSync server or a new server. This may be useful for tape archival or server/storage migration.
Archiving an inSync Server
To archive an inSync server to Disk/Tape Media:
1. Stop the inSync Service using the command:
# /etc/init.d/inSyncSrv stop
2. Use the tar utility to backup the inSync server configuration and inSync storage folders.
Command for CentOS/Redhat/Fedora Core
# tar -cf /path/to/new/tarball/insync-backup.tar /etc/inSyncServer /var/log/inSync /var/inSyncServer /<Path to storage base folders for storage1> /<Path to storage base folders for storage2 (if you have any)>
Note: Storage base folders stands for Data, Database, and Database log folders for storage. You need to backup all the folders.
Command for Ubuntu
# tar -cf /path/to/new/tarball/insync-backup.tar /etc/inSyncServer /var/log/inSync /var/inSyncServer /<Path to storage base folders for storage1> /<Path to storage base folders for storage2 (if you have any)>
Note: Storage base folders stands for Data, Database, and Database log folders for storage. You need to backup all the folders.
Once the tar utility exits successfully, the backup is available as a single tar file.
Restoring the inSync Server
The restore has two possible scenarios:
a) Restoring data over existing, active setup.
b) Rebuilding an inSync server from scratch.
This is outlined in the next two sections.
Restoring on an existing inSync Server
To restore the inSync server over an existing active server:
1. Stop the inSync Server service using this command.
# /etc/init.d/inSyncSrv stop
2. Change path to ‘/’ and restore from the archive created earlier. Replace existing files if asked.
#tar -xvpf /path/to/new/tarball/insync-backup.tar
3. Start the inSync Server service with the following command:
# service inSyncSrv start
Restoring on a new Server
To rebuild an inSync server from scratch:
1. Install the inSync Server.
2. Stop the inSync Server service.
# /etc/init.d/inSyncSrv stop
3. Change path to ‘/’ and restore from an existing archive.
#tar -xvpf /path/to/new/tarball/insync-backup.tar
4. Start the inSync Server service with the following command:
# service inSyncSrv start
Post restoration tasks
After restoring an inSync server, you need to re-install the license and re-configure the Published IP Address settings on the Web Control Panel.
Open the configuration console. You will be prompted for an invalid license. Click OK, and proceed.
License page on a 4.x sever GUI (Server GUI -> Settings -> License) :
License page on a 5.x sever GUI (Server GUI -> Manage -> Settings -> inSync License) :
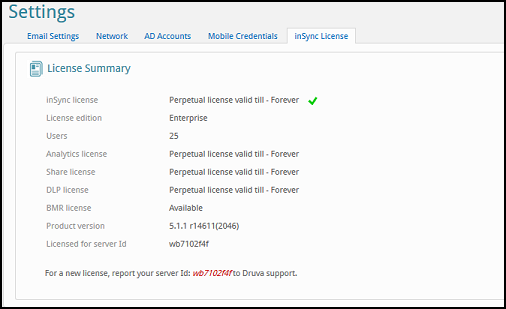
Install a new license provided by the Druva support.
Setting the public IP dddress
In the inSync Server Web Control Panel, change the Published IP addresses and Web/App restore IP address to reflect the changed IP address of the new server (if any).
To set the Published IP Address and Web/App restore IP Address:
1. (a)For 4.x, launch inSync Server Control Panel, click Settings > Network > Published IP Addresses and Web/App Restore IP Address.
(b) For 5.x, launch inSync Server Control Panel, click Manage > Settings > Network > Server IP Address section and Network Settings section
2. Click Edit and enter the new IP address of the new server for both the fields.
3. Delete the old IP address.
Note: It is recommended to retain the IP address of the archived inSync Server by assigning the old static IP address to the new Windows Server, because it will not require reissuing the key to all inSync clients.
If you want to provide the restored inSync Server with a new IP address, you need to notify the clients. You can do this by either:
a. Re-generating keys or resetting password for the users and asking users to re-authenticate OR
b. For 4.x only: Change the configuration on the inSync client. Under the Advanced tab, add the new server IP address and remove the old one.