How to configure SSO for inSync On-Premise using the IDP Azure AD
This article applies to:
- OS: Windows
- Product edition: inSync On-Premise
Overview
This article describes the steps to configure SSO for Druva inSync On-Premise using the IDP Azure AD.
Configure SSO for Druva inSync On-Premise
The SSO is configured in the following order:
- Configure a custom App for Druva inSync on Azure Portal
- Configure Azure AD single sign-on
- Configure Druva inSync On-Premise to use Azure AD login
- Assigning Users/Groups in Azure AD to use Druva inSync app.
- Enabling single sign-on in inSync for Users and Administrators.
Configure a custom App for inSync on Azure Portal
- Log on to the Azure Portal (URL: portal.azure.com) using Azure Administrator account.
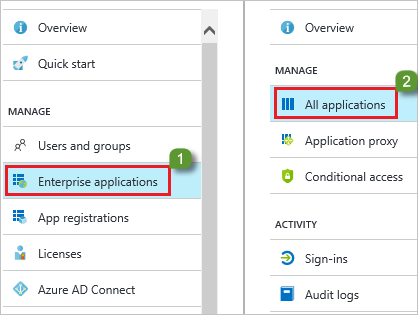
- Navigate to Azure Active Directory > Enterprise applications.
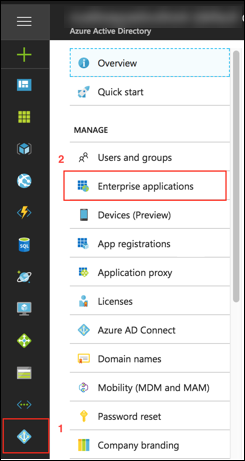
- On the Enterprise applications page, click New application.
Note: You must have an Azure AD Premium account to access and create a new application.
- Click All > Non-gallery Application.
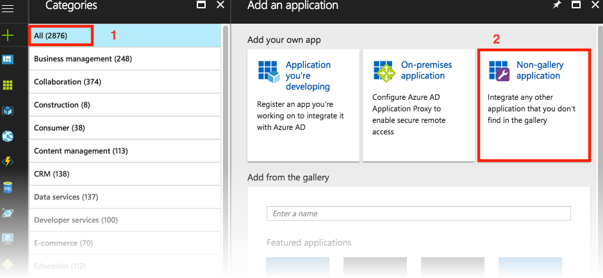
- Enter a Display Name of the Application as Druva inSync and click Add. The Application will be added.
- You can now configure the Application Settings by navigating to Azure Active Directory -> Enterprise Applications -> All Applications
- To configure the Application Settings, navigate to Azure Active Directory > Enterprise Applications > All Applications.
- Click Druva inSync Application and it will take you to the app configuration page.
- Navigate to Manage > Properties. Configure the settings as shown in the image below.
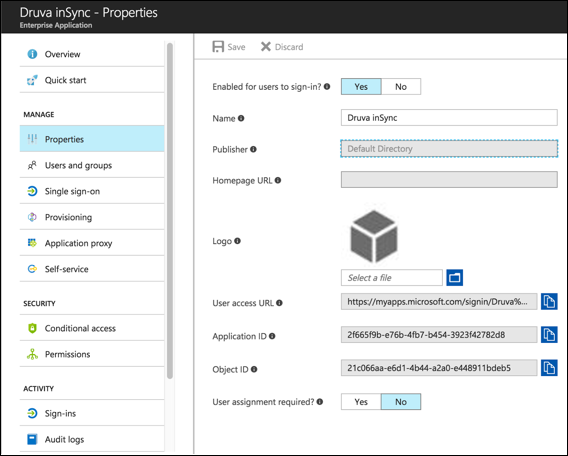
- Upload a Druva inSync Logo to identify the application easily and click Save.
Configure Azure AD single sign-on
- To configure Azure AD single sign-on with Druva, perform the following steps:
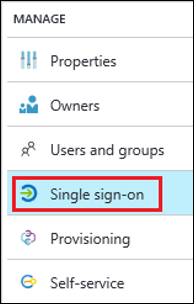
- On the Azure Portal, on the Druva inSync application integration page, click Single sign-on.
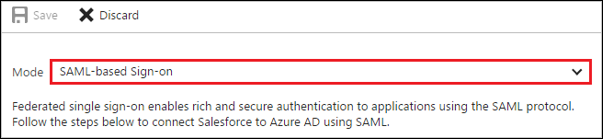
- On the Single sign-on dialog, select Mode as SAML-based Sign-on to enable SSO.
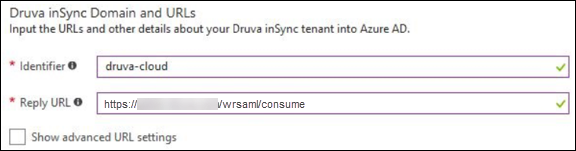
- Under the Druva Domain and URLs section, enter the following values.
Identifier: druva-cloud
Reply URL: https://<ip of the Server or FQDN of the Server>/wrsaml/consume
- Under User Attributes, set User Identifier to user.mail and select View and edit all other user attributes.

- Under SAML Token Attributes, delete all the attributes that are added by default.
- Add the attributes mentioned in the table below to ensure that the order of attributes and case of the Attribute Name is preserved.
Attribute Name Value emailAddress user.mail userPrincipalName user.userprincipalname insync_auth_token Enter the token generated - To add an attribute, follow the below steps.
- Click Add attribute to open the Add Attribute window.
- In the Name field, enter the attribute name shown for that row.
- In the Value list, enter the attribute value shown for that row. (The token generated value is explained later in the tutorial.)
- Click Ok.
- To generate SSO token please refer to the below document.
https://docs.druva.com/010_002_inSync_On-premise/inSync_On-Premise_5.9.6/030_Get_Started_Backup_Restore/020_Configure_single_sign-on_for_inSync/050_Generate_SSO_token

- To add an attribute, follow the below steps.
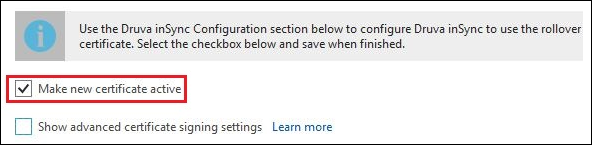
- On the SAML Signing Certificate section, click Metadata XML and then save the certificate file locally on your system.

- Select Make new certificate active.
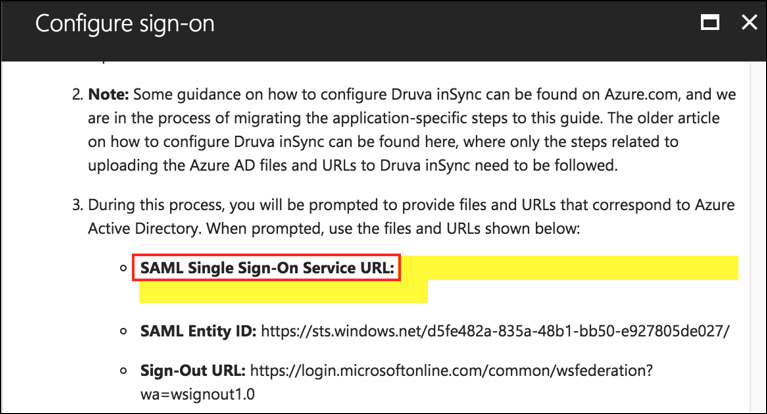
- On the Druva Configuration section, click Configure Druva to open Configure sign-on window.

- Copy the SAML Single Sign-On URL from the Quick Reference section.
Configure Druva inSync On-Premise Server to use Azure AD login
- In a separate web browser window, log on to https://<ip of the Server or FQDN>/admin as an administrator.
- Navigate to
 > Settings.
 - On the Single Sign-On Settings window, add the details as described below:
ID Provider Login URL Enter the SAML Single Sign-On URL copied earlier. ACS FQDN/IP Enter the IP address of the inSync Master or Edge Server ID Provider Certificate Open your Druva inSync.xml file in notepad, copy its content in the ID Provider Certificate text box. AuthenRequests Signed Clear the checkbox Want Assertions Encrypted Clear the checkbox 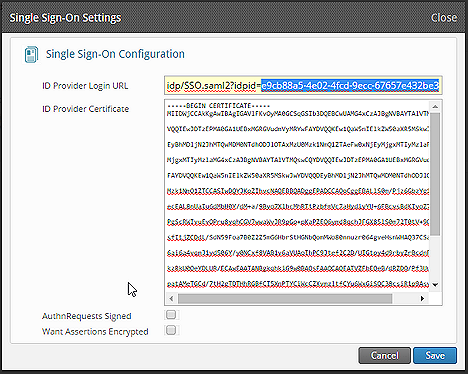
- Click Save.
Assigning Users/Groups in Azure AD to use Druva inSync app
- On the Azure portal, open the applications view.
- Navigate to the directory view > Enterprise applications and click All applications.
- In the applications list, select Druva inSync.
- In the menu on the left, click Users and groups.
- Click Add and select Users and groups on Add Assignment window.
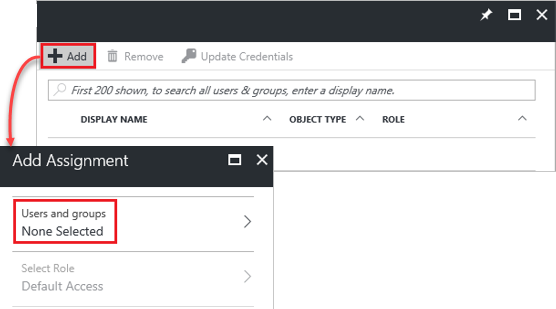
- On the Users and groups window, select the Users or Group that you want to assign the Druva App, in the Users list.
- Since Auto-provisioning the users using Azure AD is not configured, ensure that the User or Admin account selected has a corresponding account created in inSync.
- Click Select button on the Users and groups window.
- Click Assign on the Add Assignment window.
Enabling single sign on in inSync for Users and Administrators
Enable single sign-on for User Logon
https://docs.druva.com/010_002_inSyn..._SSO_for_users
Enable Single Sign-on for Administrators
https://docs.druva.com/010_002_inSyn...administrators