How to set up automatic certificate enrollment in Active Directory
License editions: To understand the applicable license editions, see Plans & Pricing.
Overview
This topic describes the procedure to set up automatic certificate enrollment in Active Directory.
Before you begin
- Your user account must be part of Enterprise Admins and Cert Publishers group.
- You must logon to Active Directory Certificate Server (AD CS).
Step 1 - Create a security group
To create a security group on Active Directory
- On DC1, click Start > Administrative Tools, and then click Server Manager.
- In the navigation pane, expand Roles, expand Active Directory Domain Services, expand Active Directory Users and Computers, expand contoso.com, right-click Users, click New, and then click Group.
- In the New Object - Group dialog box, in the Group name text box, type a name for the group. Example: AutoEnrollGroup.
- Click OK. Leave Server Manager running with the Computers container shown in the results pane.
Step 2 - Create a certificate template to enroll
To create a certificate template
- Open the Certificate Templates Console
- From the Start menu, click Run.
- Type certtmpl.msc in the text box and click OK. Certificate Templates Console window appears on the page.
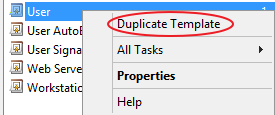
- Right-click the User template, and then click Duplicate Template.
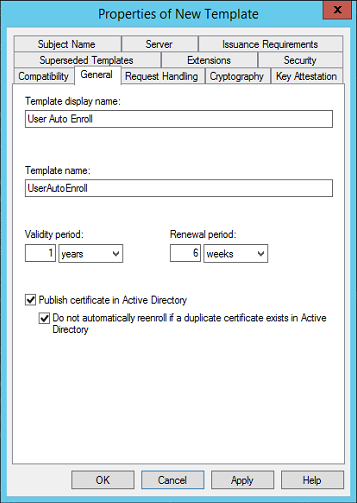
- Under General tab,
- Type a Template display name. For example, User Auto Enroll.
- (Optional) Modify the default Validity Period and Renewal Period as per your requirements.
- Select Publish certificate in Active Directory check box.
- Select Do not Automatically reenroll if duplicate certificate exists in Active Directory check box.
- Under Request Handling tab,
- Ensure Allow private key to be exported check box is clear.
Important: This ensures that the downloaded user certificates are useless by preventing a possible compromise of the server's private key.
- Select Enroll Subject without requiring any user input option.
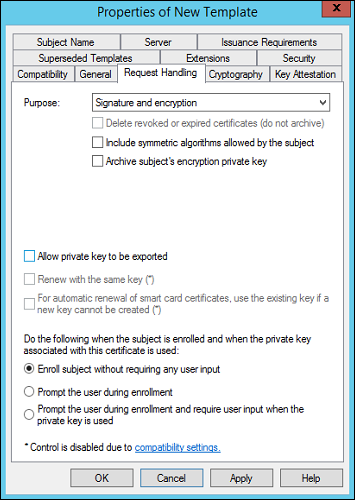
- Ensure Allow private key to be exported check box is clear.
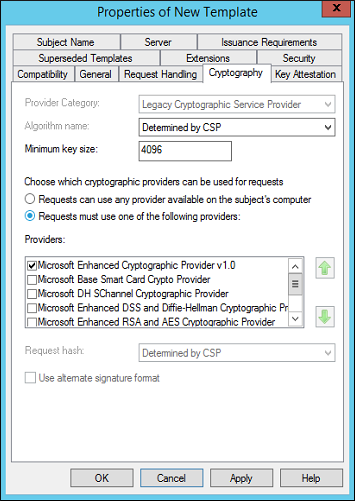
- Click the Cryptography tab, enter Minimum key size as 4096.
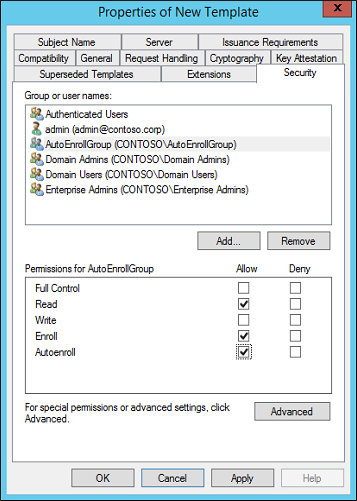
- Under Security tab,
- In the Group or user name, click Add and type the name or browse to select the security group. For example, Auto Enroll group.
- Select the security group and under Permissions dialog box, select the Read, Enroll, and Autoenroll check boxes.
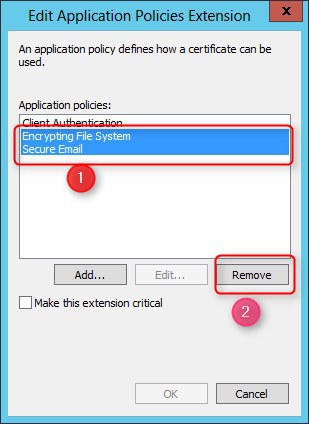
- Under Extensions tab,
- Select the Application Policies extension, and click Edit.
Edit Application Policies Extension dialog box appears on the page. - Select and remove all other application policies except the Client Authentication application policy.
- Click OK.
- Select the Application Policies extension, and click Edit.
- Click Apply and then click OK.
- Close the Certificate Templates Console.
Step 3 - Add certificate template to the certification authority
To add certificate template to the certification authority
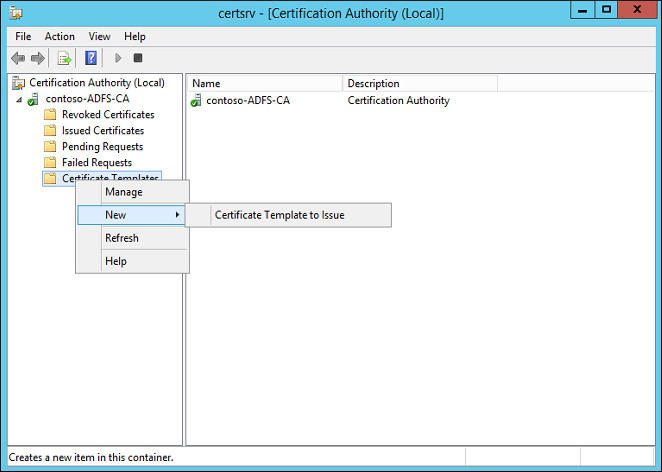
- Open the Certificate Authority.
- From the Start menu, click Run.
- Type certsrv.msc and click OK.
- Right-click Certificate Templates, click New, and then click Certificate Template to Issue.
- Select the certificate template, for example - 'User Auto Enroll' in this case, and click OK.
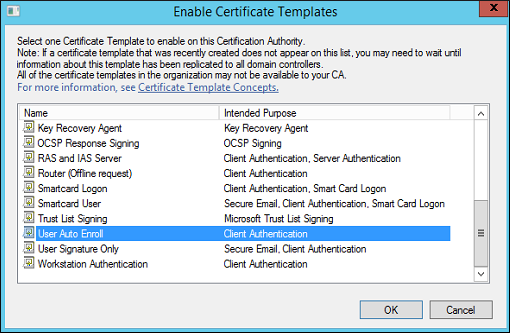
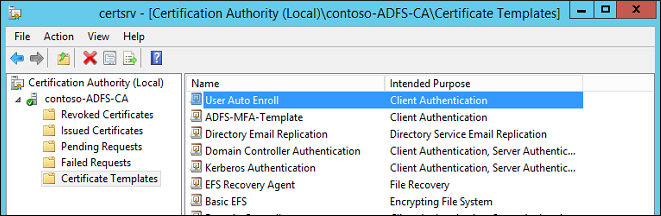
- Ensure the certificate template is added to your Certification Authority.
Step 4 - Create group policy for auto enrollment
To create a group policy for auto enrollment
- Launch the Group Policy Management console.
- From the Start menu, click Run.
- Type gpmc.msc in the text box, and click OK.
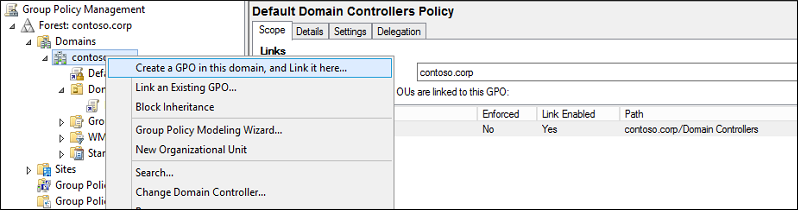
- In the left pane, on the Domain Controller, right-click and select Create a Gpo in this domain, and Link it here. New GPO dialog box appears on the page.
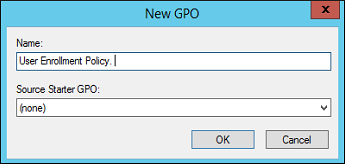
- Type a Name for the group policy and click OK.
- Right-click on the newly created group policy, and click Edit.
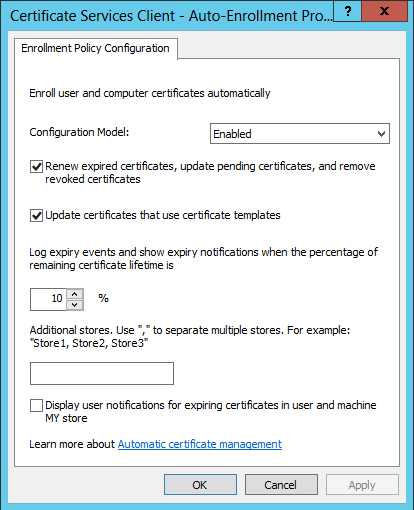
- Go to User Configuration > Windows Settings > Security Settings > Public Key Policies and then under Object Type section in the right pane, select Certificate Services Client - Auto-Enrollment.
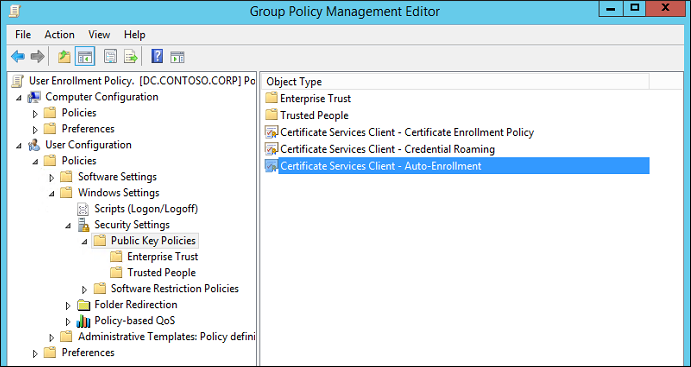
- Right-click on Certificate Services Client - Auto-Enrollment and click Properties.
- Under Enrollment Policy Configuration tab,
- For Configuration Model, select Enabled from the drop-down list.
- Select the following check boxes,
- Renew expired certificates, update pending certificates, and remove revoked certificates
- Update certificates that use certificate templates
- Click OK.
- Save your changes and close the Group Policy Management console.