Set up Google Directory user provisioning
Overview
This guide contains detailed instructions for integrating your Google Directory with inSync. Integrating Google Directory allows seamless user provisioning and management for customers.
To set up Google Directory user provisioning in Druva:
-
Register your Google Workspace tenant in Druva.
-
Enable Cloud Key Management Service (KMS) in Druva.
-
Select Google Directory as the user provisioning method in Druva.
-
Create user mappings to define how users should be imported from Google Directory.
-
Sync users.
Let's dive into integrating Google Directory for user provisioning
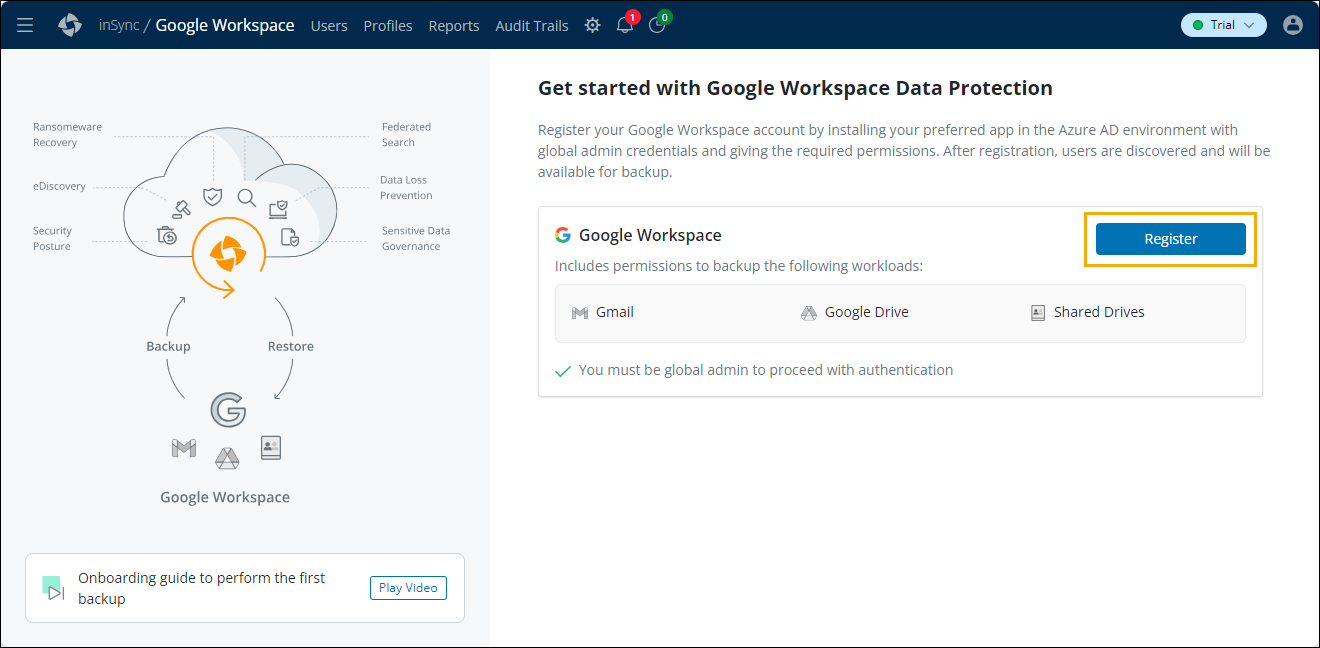
Step 1: Register your Google Workspace tenant
To connect inSync to your Google Workspace tenant, you need to register your tenant. Use your global admin credentials to consent to the required permissions during registration. See the documentation to learn more.
(Optional) Step 2: Enable Cloud Key Management (KMS)
When KMS is enabled, scheduled user imports and backups will start. By default, KMS is enabled for data protection.
Important - Once enabled, KMS cannot be disabled. However, you can skip this step for now and enable it later by following the steps below:
Procedure:
-
Go to Settings > Cloud Key Management Service.
-
Click Enable KMS.
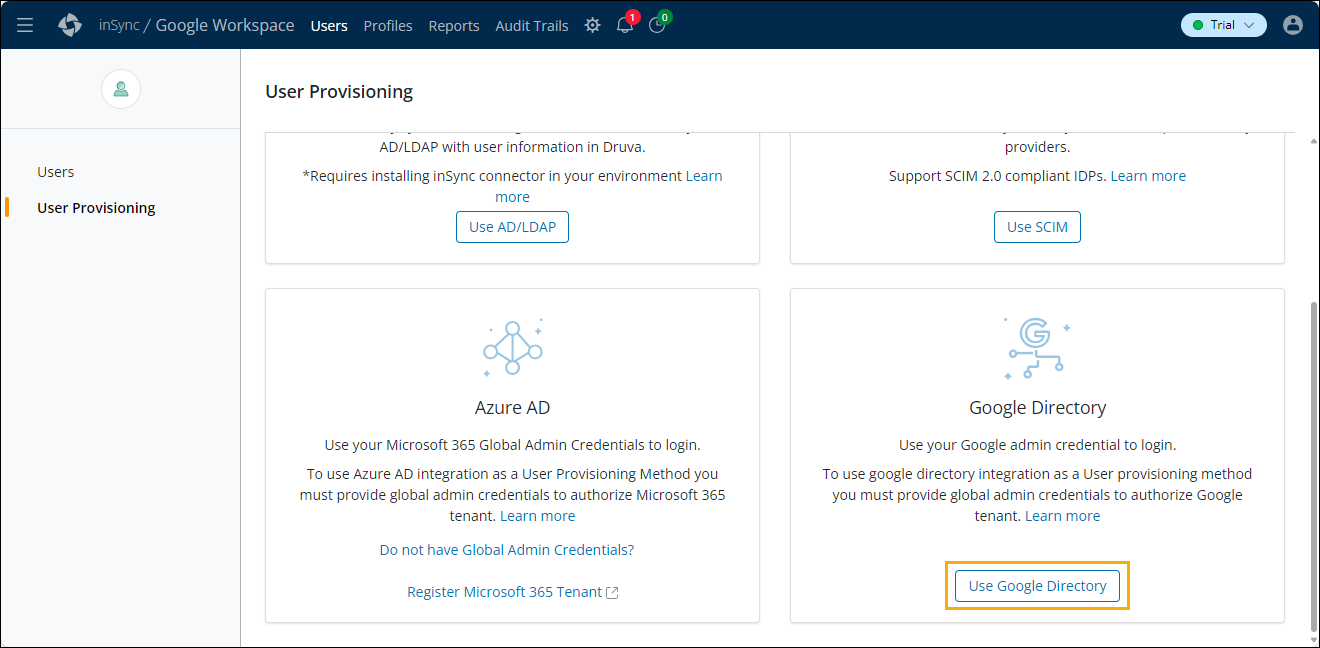
Step 3 - Select Google Directory as the user provisioning method
-
Go to Users > User Provisioning.
-
Under User Provisioning Method, select Use Google Directory.
-
On the confirmation message pop-up, click Continue.
-
Click Save.
Step 4 - Create user mappings
You can create mappings to classify users and allocate them to a different profile, and storage region.
Procedure:
-
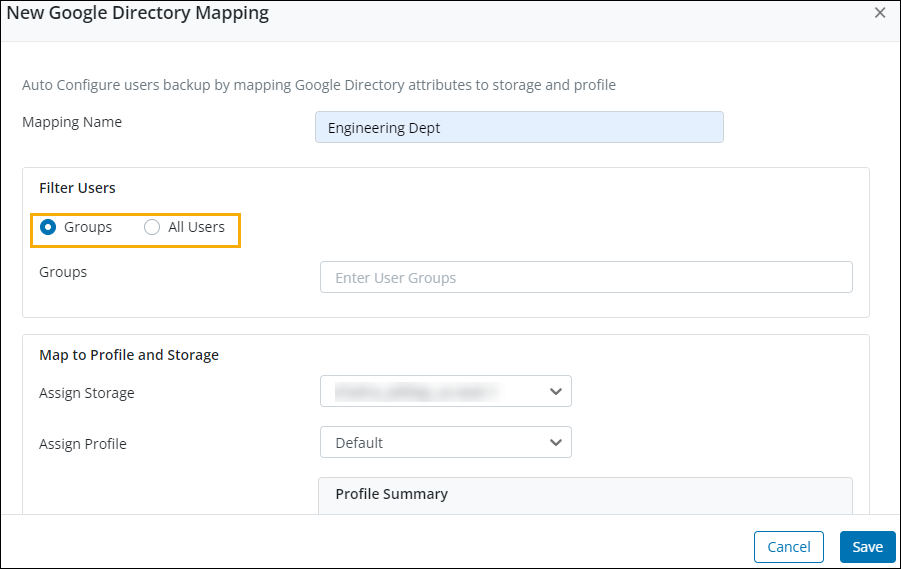
On the Google Directory Provisioning page, click New Mapping.
-
Specify a name for the mapping.
-
Select the filter that you want to use to import users. You can filter users by Groups or All Users.
-
Specify the storage on which the user data should be saved.
-
Specify the profile to which the users should be assigned.
-
Click Save.
A dialog appears that shows the “Mapping successfully created” message
Note: You cannot import a user if the user is suspended or archived on the Google Directory side.
Step 5 - Sync users
You get two options to sync users that are auto-sync and on-demand. During a sync, user accounts are automatically imported, preserved, or reactivated based on their current status in the Google Directory. This reduces the need for manual input and saves time for administrators.
Auto-sync users
This feature ensures that user information stays current and consistent without manual intervention. When you create a Google Directory mapping, inSync performs the following actions:
-
Imports any new user added to Google Directory and creates a new user in Druva.
-
Updates user details of users managed using Google Directory.
Note
After being added to Google Directory and mapped in inSync, users will be imported within 24 hours. If users are not imported in the current schedule, they will be imported in the next schedule.
Sync users on-demand
This feature helps administrators update the changes in user accounts or new user additions without waiting for scheduled sync intervals.
Procedure:
-
Go to the Users page from the Google Workspace console.
-
Select the User Provisioning tab.
-
In the summary section, click the three-dot menu and select the Sync Users option.
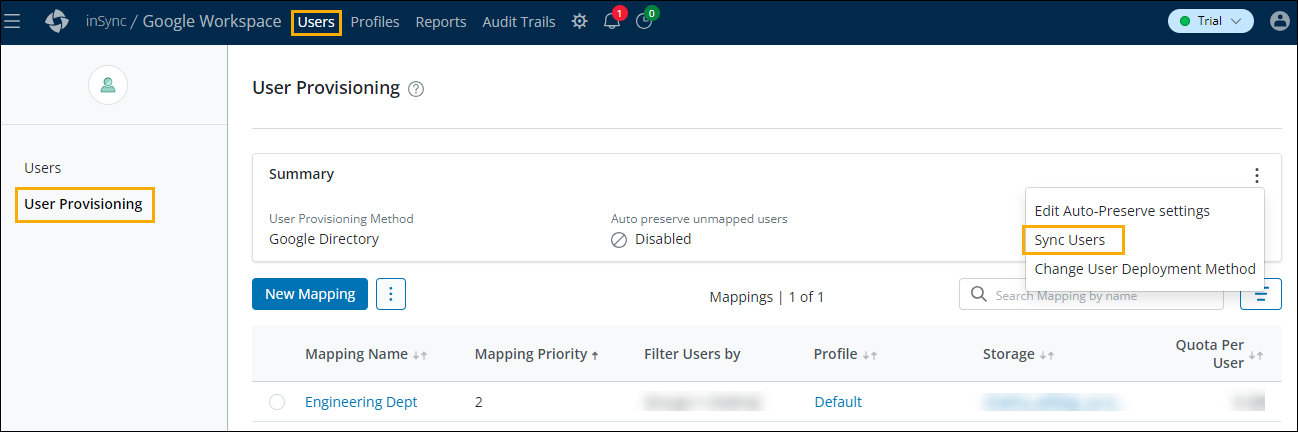
Druva will sync users from Google Directory based on the user mappings that you have created.
Note:
Ensure that you have at least one active inSync product license to use sync user functionality.
Once you have completed these steps, you can manage your users from the Druva Management Console. To know more about user management, refer to the documentation.