Restore OneDrive data
Overview
An inSync Cloud administrator can restore OneDrive data to the following locations using the inSync Management Console:
- To the same user's account from where the data was backed up.
- User's desktop or to a custom location on the user's device. If the user has multiple devices, you can choose the device on which you want to restore the OneDrive data.
- Different user's account.
An inSync end user can restore OneDrive data using the inSync Web.
For restore, you can use search to easily find and restore selected files and emails.
Note:
- You cannot restore Microsoft 365 data to a mobile device.
- Administrator will be able to see the snapshots of OneDrive devices in UTC time zone.
Procedure
- On the inSync Management Console menu bar, click Users.
- Click the user name of the user whose data you want to restore.
- Click the Backups tab and select the snapshot which you want to restore.
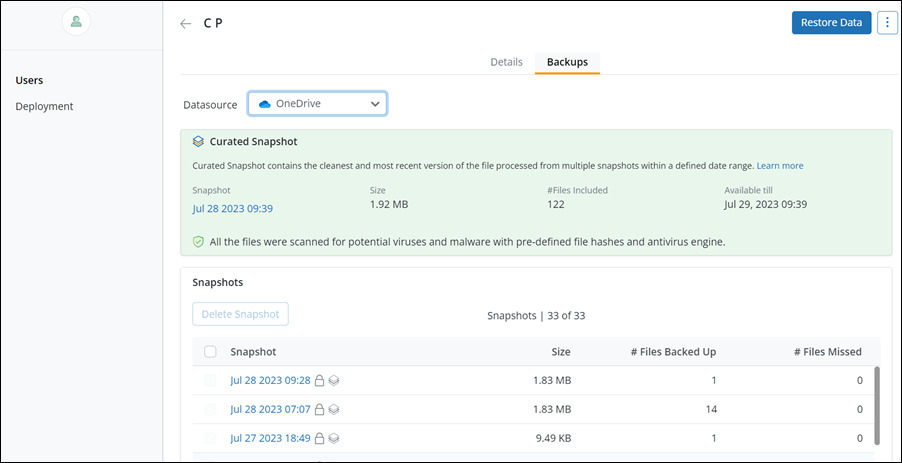
Note: By default, Curated Snapshot is selected for restoring OneDrive data if the Ransomware Recovery service is enabled for your organization and administrators have created a Curated Snapshot for OneDrive users.
Note: The quarantined snapshot is marked with
icon, and the latest unquarantined (clean) snapshot is marked with
icon that you cannot delete. For more information, see Ransomware Recovery for M365.
- Click Restore Data and select OneDrive data source.
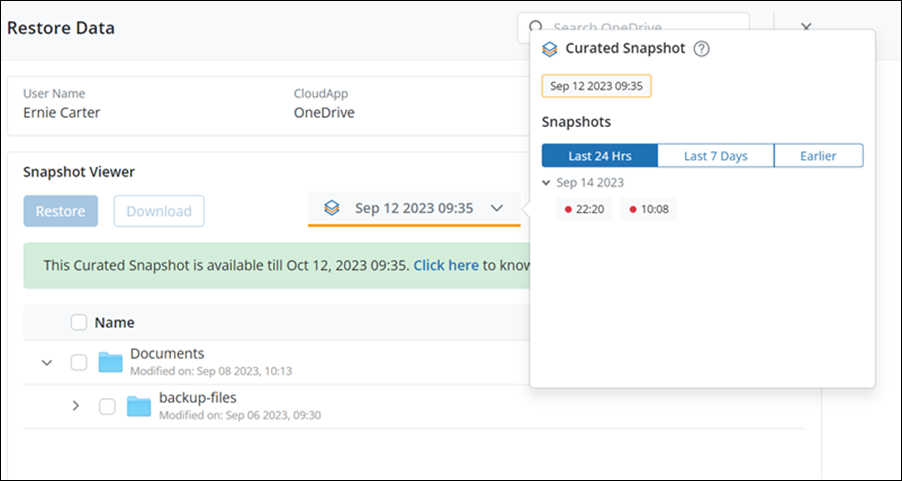
- In the Snapshot Viewer window, select the snapshot which you want to restore and click Restore.
Note: By default, Curated Snapshot is selected for restoring OneDrive data if the Ransomware Recovery service is enabled for your organization and administrators have created a Curated Snapshot for OneDrive users.
- Curated Snapshot - Curated Snapshot contains the cleanest and the most recent version of the file processed from multiple snapshots within a defined date range. Select this snapshot to restore data that is completely sanitized, 100% secure, and free of malware or viruses, which in turn helps mitigate ransomware attacks. For more information, see Curated Snapshot for Microsoft 365.
Note: We support single curated snapshot per user per device.
- On the Restore Data window, select the snapshot from which you want to restore.
- Snapshots - Click Last 24 Hrs, Last 7 Days, or Earlier to select the snapshot from which you want to restore the data.
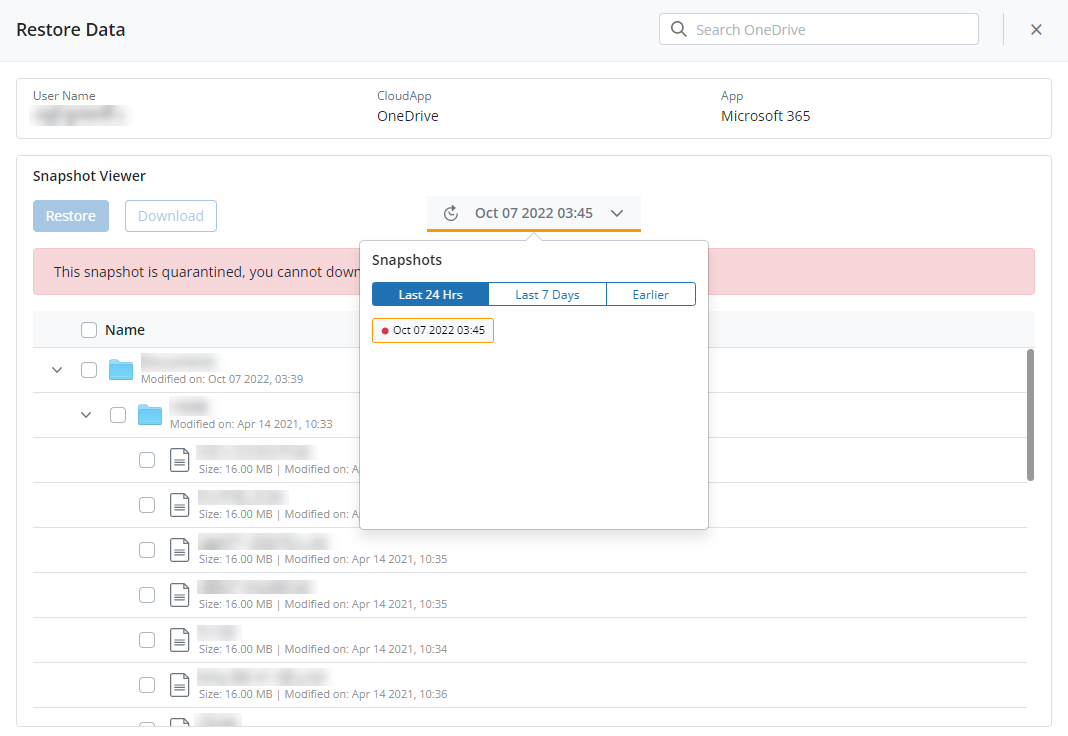
Note: The quarantined snapshot is marked with
icon and you cannot restore or download data from the quarantined snapshot.
- Select the files or folders that you want to restore, and click Restore. The Restore OneDrive window appears.
Note: When restoring data to a device, you cannot restore files with the same names simultaneously.
Alternatively, you can use Search to search for files that you want to restore.
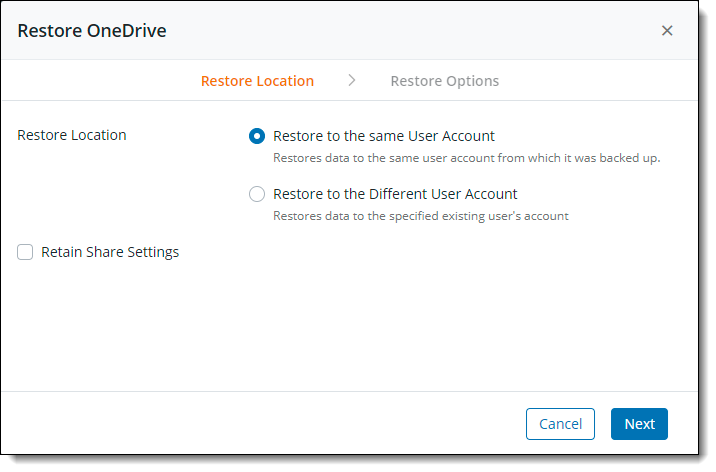
- On the Restore OneDrive window, provide details for the following:
| Field | Action |
|---|---|
|
Restore to |
From the drop-down list, select the restore location. You can restore the data either to the same user's account or a different user's account or any device owned by the user. |
|
Restore to Location |
You can restore data to a desktop or custom location only if Devices is enabled for your account. If you want to restore data to a desktop, click Desktop. If you want to restore data to a custom location, click Custom Location.
|
|
Specify custom location |
If you want to restore data to a custom location, enter the location in the Specify custom location box.
|
|
Restore Options |
Select how you want to restore the data. The following options are available:
|
|
Retain share settings |
Select if you want to retain the file sharing settings for selected data. By default, inSync does not retain the sharing settings during OneDrive data restore.
|
|
Select user |
Start typing the name of the user and inSync will auto-suggest usernames. Select the required username. inSync creates a new inSync-restore-<date stamp>-<time stamp> folder and restores the selected data to this folder.
|
- Click OK.
View restore details
After the restore operation is complete, click View Details to view the restore details. For example, the state of restore, number of files restored, and the number of files missed.