Configure Salesforce Data Archiver
Salesforce Data Archiver settings are stored as an Archival Set, which contains the following information:
- Project details
- Schedule and Retention
- Salesforce Object Query Language (SOQL) queries to select data
- Notifications
- Validations that you want to bypass
Before you begin
Ensure that you have the appropriate license for Salesforce Data Archiver. For details, see Licensing Details.
If you don't see the Data Archiver tab, additional configuration is required.
Configure Salesforce
If you are a new customer installing Salesforce App from Salesforce AppExchange, no additional steps are required. The Salesforce App managed package installation process sets the desired permissions for the standard profiles, such as System Administrator, Standard User, etc.
If you are already using Salesforce App, you may not see the Data Archiver tab if you upgrade the managed package installed from Salesforce AppExchange. The reason is that Salesforce does not allow updating permissions for the standard profiles, such as System Administrator, Standard User, etc. at the time of upgrade.
You need to manually configure the permissions for Salesforce environment, using any of the two ways:
-
Reinstall the managed package
-
Update the permissions for the profile manually.
Reinstall the managed package
Instead of upgrading the managed package, do a reinstall.
Note: Reinstallation will not delete any existing data or configuration. It will only update the permissions.
After this step, you will see the Data Archiver tab in Salesforce App.
Updating the permissions manually
Procedure
-
Log in to the Salesforce environment and go to Settings.
-
On the Quick Find search box on the left-hand side, start typing Profiles and select the profile you want to use for Salesforce Data Archiver.
-
Select Apex Class Access and click Edit
-
Add the DataArchivalAuraController class and click Save.
-
On the Quick Find search box on the left-hand side, start typing Profiles and select the profile you want to use for Salesforce Data Archiver.
-
Type Data Archiver in the profile's search box, click Edit, and change the Tab Settings to Default On.
External Resources
Create an archival set
Click Data Archiver and click New Archival Set on the Salesforce App console. Follow steps 1 through 5 to create a new Archival Set.
You can create as many archival sets as you need.
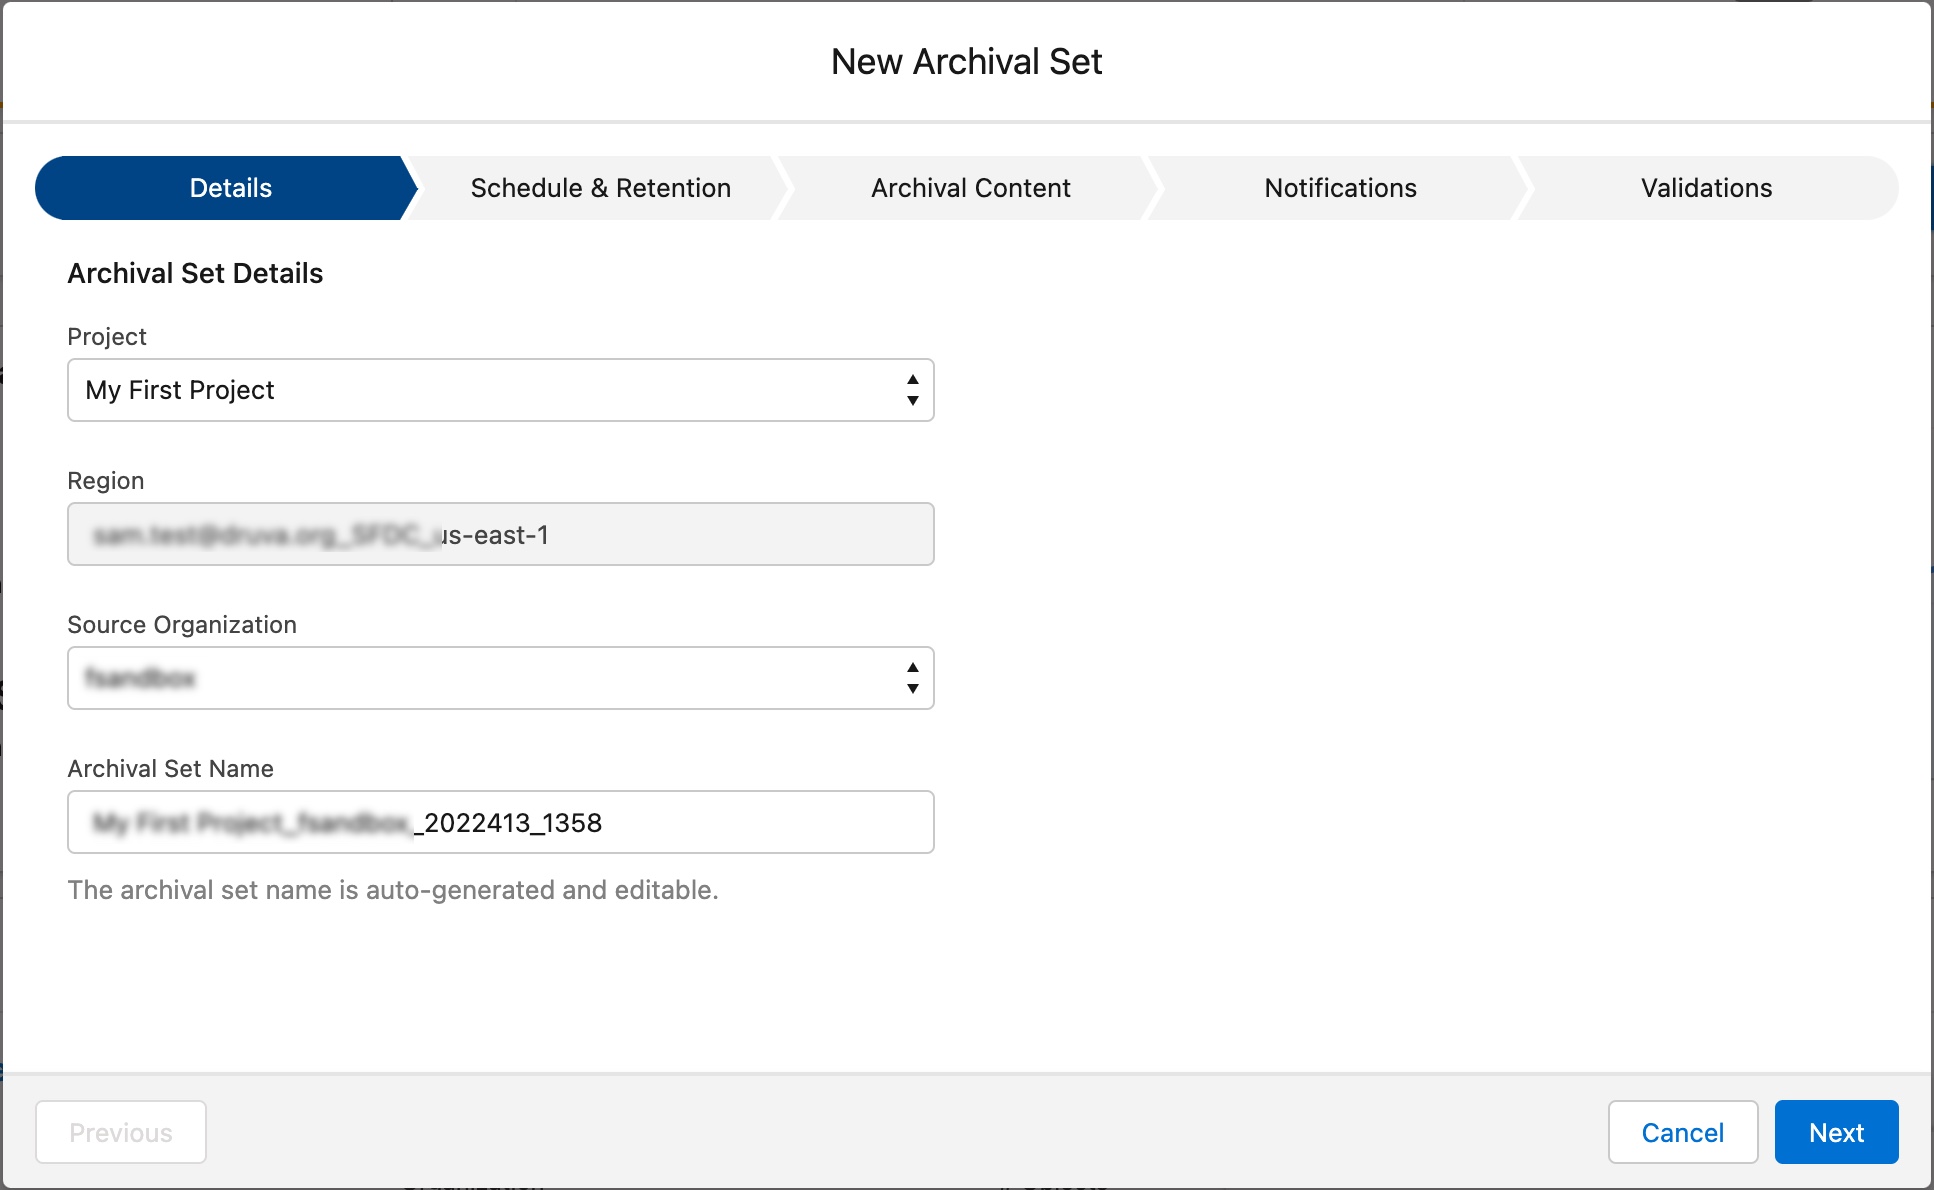
Step 1. Archival set basic details
| Option | Description |
|---|---|
| Project |
Select the project that you want to use for archival. To learn more about projects, see Creating Projects. |
| Region |
The storage region for the archived data cannot be changed because it is defined at the project level. To learn more about projects, see Creating Projects. |
| Source Organization | Select the organization containing the records you wish to archive. |
| Archival Set Name |
The archive set name is automatically generated, but it can be edited. |
Step 2: Specify the schedule and retention period
Use the Schedule and Retention tab to configure when the data archival will be executed and how frequently it will be repeated.
You can execute an archival task manually if you do not wish to wait for the scheduled job to run. For more information, see Trigger Manual Archival.
| Option | Description |
|---|---|
| Scheduling Frequency |
You can set the frequency to one of the following:
|
| Start Day and Start Time |
You can schedule the first run using the date and time selector.
|
| Retention |
The retention period can be anywhere between 1 and 10 years. You can also select forever.
|
Step 3: Select records to be archived
Use the Archival Content tab to configure the objects you want archived. In other words, create SOQL (Salesforce Object Query Language) query to select the records you want to be archived for each object.
Procedure
-
In the Select Archival Content field, select the required object for defining the archival content query.
The Define Query section is displayed.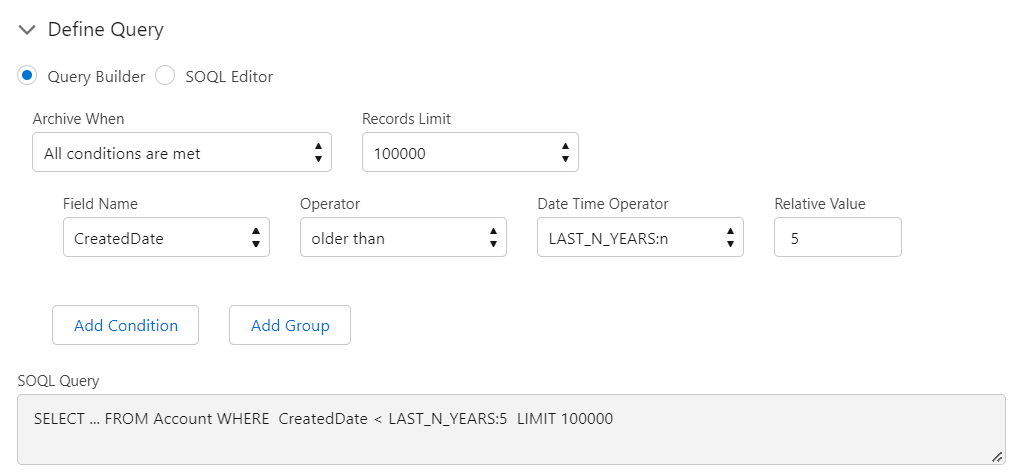
-
Specify the where clause of your query, archive when condition and the records limit.
For more details, see Using the archival content configuration. -
Specify advanced configuration, such as the fields you want to exclude, index fields, and child objects.
For more information, see Advanced configuration. -
Optionally, preview the records selected by this query.
For more information, see Preview Records. -
Repeat steps 1 through 4 until all the objects required to be archived are configured.
Using the archival content configuration
The archival content configuration creates the where clause of the SOQL query and records limit. Specifying individual fields is unnecessary, as all the fields will be archived.
Note: By default, all the fields will be selected. If you want to exclude specific fields, see Advanced Configuration.
After selecting the object, the archival content configuration offers two ways to choose the records you want to archive:
- Query Builder - Use the basic query builder to use a simple interface to build the where clause of SOQL query.
- SOQL Editor - Use the editor to write the where clause and record limit using SOQL syntax. You can also copy the query from the Query Builder option by clicking copy from query builder
 icon.
icon.
Archive When
| Option | Description |
|---|---|
| Archive When |
You can archive the selected object by selecting one of the two options:
|
Records Limit
|
Option |
Description |
|---|---|
|
Records Limit |
Select the maximum number of records you wish to retrieve using the query.
The maximum number of records archived will be determined by the records limit set in this step. |
Configuring Fields
The following options are available for each field you add:
|
Option |
Description |
|---|---|
|
Field Name |
The field names are available based on the object selected. |
|
Operator |
The operators are available based on the data type of the selected field.
All the operators may not work for every field type. Use the preview option to verify that your query is working as expected. |
|
Date Time Operator |
The available values are as follows:
|
|
Relative Value |
Specify the value for the Date Time operator. For example, to create a where clause which selects records older than five years, choose LAST_N_YEARS as the Date Time Operator and 5 as the Relative Value. |
|
Date |
Use the calendar icon to select the desired date. |
|
Value |
Specify the value for the Date Time operator selector earlier. |
|
Delete |
You can remove the field and associated selection criteria from your query. You will see a delete icon for each field. |
As you update the field values, you can see a preview of the SOQL query. You can use this query as a quick reference guide to validate if the query will select your desired records.
Logical operators and groups
You can add more fields by specifying one of the two logical operators – AND & OR.
You can also create a group that will create a pair of brackets. After that, you can add individual fields.
The AND & OR operators have some caveats in SOQL query syntax. For details, see Considerations.
Examples of SOQL queries with steps
The following examples assume that you have selected the Account object.
If you are using the Advanced option, do not begin the query with SELECT ... FROM Account WHERE. This will be added by the application. Similarly, do not use the Limit option. The query builder is only for building the where clause. This is applicable for both the Basic and Advanced options.
|
The query for the Advanced option |
Steps to Follow for the Basic option |
|---|---|
|
CreatedDate < LAST_N_YEARS:2 AND BillingState = 'TX' |
|
|
BillingState = 'TX' OR BillingState = 'SC' |
|
|
CreatedDate < LAST_N_YEARS:2 AND ( BillingState = 'TX' OR BillingState = 'SC') |
|
Note: When you delete an object from the query builder, you are only changing the query you are building. This action does not change any previously archived data.
Preview records
After specifying the fields using the Query Builder or SOQL Editor, you can preview the query result by clicking Preview & Verify Content.
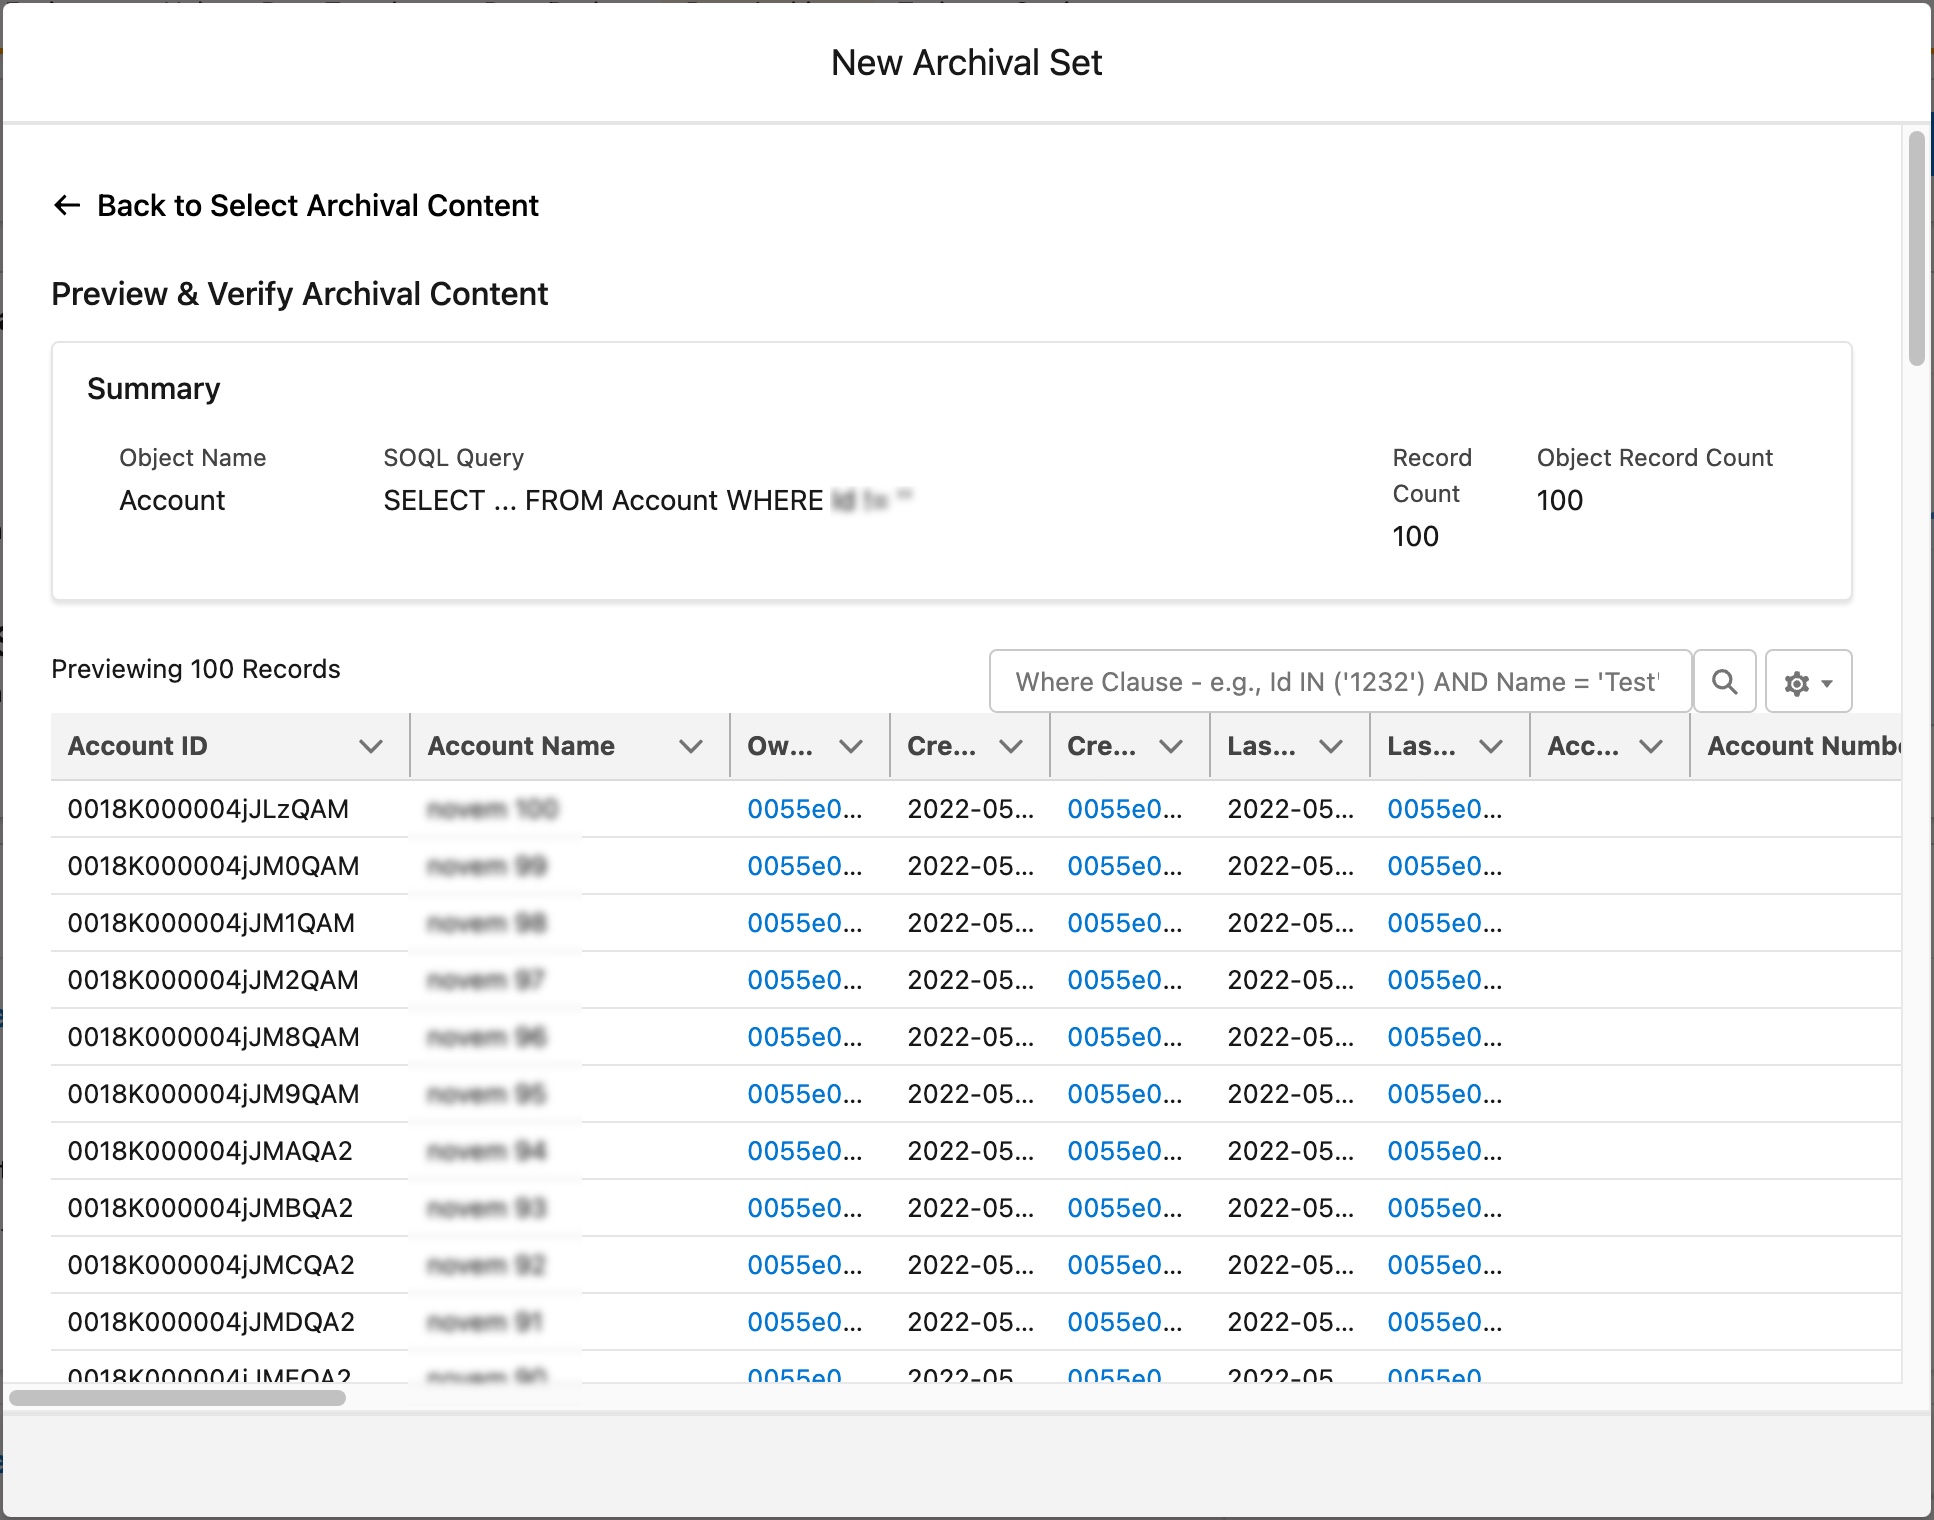
Ensure the written query is correct by clicking Preview & Verify Content. For more information, see Considerations.
The following fields are available on this screen:
|
Option |
Description |
|---|---|
|
Summary |
The first section shows the object name, SOQL query, and the total number of records selected |
|
Preview Table |
This table shows the records selected by the SOQL query.
|
|
Where Clause |
Use the where clause to view a subset of the selected records.
|
|
Column Selection |
You can customize the columns being displayed in the preview. |
Advanced configuration
You can specify the following configuration in this section:
|
Option |
Description |
|---|---|
|
Exclude Fields |
By default, all the fields are archived. If you wish to exclude certain fields from archival, select all those fields one by one. If you specify certain fields to be excluded from archival, the values in those fields will not be available in the archived data. The record will be deleted from Salesforce after the archival. As a result, this value will not be available anywhere. |
|
Index Fields |
Salesforce Data Archiver will index the following fields by default:
You can add up to four more fields for indexing. |
|
Child Objects to be Archived |
By default, the application will archive all the mandatory child objects. These objects will be preselected and highlighted. If you wish to archive any other child objects, you can select all those objects one by one.
|
Step 4: Notifications
Use the Notifications tab to configure who will be notified and when.
You can select the users who will receive the notifications in the following events:
- Successful Archival
- Failed Archival
- Successful Archival Restore
- Failed Archival Restore
You must select either SMS or Email for every user. Otherwise, the notifications will not be sent.
Step 5: Validations
Validations in Salesforce evaluate the data to meet defined field guidelines before saving the record. Disabling validations can be helpful if records are failing to be deleted from Salesforce during Archival processing.
Perform the following steps to disable validations.
-
Select the checkbox Disable validation during Archival
-
Select a Validation Type from the dropdown list. A metadata list appears for the selected validation type.
-
Select the items from the list.
-
Repeat steps 2 and 3 for all the desired validation types.
For more details, see Validations.
Step 6: Save Archival Set
Saving the archival set will schedule the archival jobs.
You can review the archived data and see the status of the archival jobs any time you wish. For more information, see Managing Archival Set.
The next archival job will run at the scheduled tab selected in the Scheduling tab.
Considerations
Validate SOQL Queries
A SOQL query cannot have an AND operator along with an OR operator unless these are grouped using parentheses. For example, the following query is not a valid SOQL query:
SELECT .. FROM Account WHERE type='Customer' AND BillingState='NY' OR ShippingState='NY'
You can create a valid query that uses both OR and AND operator by using parentheses:
SELECT .. FROM Account WHERE type='Customer' AND (BillingState='NY' OR ShippingState='NY')
The query builder will not stop you from creating an invalid query such as this one. Ensure that the queries you are building are valid SOQL queries. Salesforce Data Archiver can help validate the query using Preview and Verity Content option on the query builder page.
If you are unable to build the required query, type in the where clause of the query in the advanced query option.
Archival of ContentDocument Object
When you select an object for archival, such as Account, the child objects are also archived. All you need to do is ensure that the child objects are selected in the Advanced Configuration section of the query builder.
The ContentDocument object is an exception and must be selected for archival separately.
One archival set can contain queries for multiple objects. For example, you can select both Account and ContentDocument objects, on the Archival Content tab of the New Archival Set.