Multi-organization administration
The availability of the enable/disable organization feature is limited to Enterprise and Elite editions. To access this feature, contact your Account Manager or Support. This article/documentation is subject to change based on the continuous improvements to this feature.
In Druva, an organization (site) is an access-based control mechanism that helps segregate resources that do not share any data. An organization internally manages servers and policies within that organization. You can't access servers, administrative groups, and policies of one organization from other organizations. Organizations share storage, cloud administrators, and customer license.
By default, the All Organizations menu is disabled on the Management Console for all customers onboarded after November 22, 2021. You can enable the menu if your IT company requires different organizations to manage resources based on their geographical location, or grouping entities that need complete logical partitioning of their data and configuration like backup policies. However, you can use the centralized Management Console to track, manage, and audit activities of all entities and resources along with their storage and credit consumption, configured across various organizations.
Note: The existing customers onboarded before November 22, 2021, and who have configured single or multiple organizations in the Druva account can choose to disable the All Organizations menu on the Management Console. By disabling organizations, the protected workloads can directly be accessed without first selecting an organization on the Management Console. For more information, see Disable the All Organizations menu.
This topic describes the following sections:
- License requirements
- Administrator roles
- Benefits of multi-organization administration
- Use case
- Considerations
- Enable the All Organizations menu
- Select the Default organization
- Manage Organizations
- Disable the All Organizations menu
License requirements
The multi-organization administration is available only to Enterprise and Elite editions. If you are a Business edition customer and want to access this feature, contact your Account Manager or Support.
Administrator roles
Only a Druva Cloud Administrator can enable the All Organizations menu on the Management Console. For more information, see Enable the All Organizations menu. After the menu is enabled, a Druva Cloud Administrator can create new organizations and Organization Administrators as per the business requirements, and assign Organization Administrators to specific organizations ensuring site access controls to the organizations. The Organization Administrator has complete control over the assigned organization but not over the other organizations.
When you enable the All Organizations menu, Druva creates a default organization, Default Organization. Druva Cloud Administrator can rename an organization as required.
Benefits of multi-organization administration
Multi-organization deployments benefit IT companies in the following ways:
- Druva cloud administrators can use the All Organizations dashboard to get a unified view of the current status of the backup and restore status across workloads, top critical alerts, storage consumption, and savings across all your organizations.
- Organization administrators has the site-access control of the entities and resources configured in their organizations.
- The Organization Administrator has complete control over the assigned organization but not over the other organizations.
- Druva cloud administrators can track the day-to-day backup and restore operations for all organizations.
- Druva cloud administrators can monitor the health status of workloads deployed on the premises and in the cloud for all organizations.
- Druva cloud administrators can generate reports to determine the storage consumed by specific teams, departments, or remote offices based on the organization, assign a dollar value to this storage usage, and forecast the budget.
- Druva cloud administrators can view alerts generated for all the workloads configured across various organizations.
- Druva cloud administrators can view all administrator data activities ensuring complete transparency, traceability, and accountability of all the administrators.
Use case
You need to identify the geographical locations of all your resources and based on that decide on the organizations that you need to create. You can also create different organizations for the departments that do not share any data. Similarly, you can create organizations for the entities within a corporation that need complete partitioning of their data and other configuration entities, such as backup policies, but need a common dashboard for storage usage and credit consumption across such entities.
For example, suppose Druva customer is a central IT organization, which provides backup and restore to several internal groups. Servers and policies belonging to each internal group are independently managed within an organization. Servers, administrative groups, and policies in one organization cannot be accessed in other organization. Also, an organization administrator can be assigned to each organization who has complete control over that particular organization but not to other organizations.
Considerations
- Only a Druva Cloud Administrator can enable the All Organizations menu on the Management Console. For more information, see Enable the All Organizations menu. After the menu is enabled, Druva Cloud Administrator can create new organizations and Organization Administrator as per the business requirements, and assign Organization Administrators to specific organizations ensuring site access controls to the organizations. The Organization Administrator has complete control over the assigned organization but not over the other organizations.
- When you enable the All Organizations menu, Druva creates a default organization, Default Organization.
- Only a Cloud Administrator can disable the All Organizations menu on the Management Console. For more information, see Disable the All Organizations menu.
Enable the All Organizations menu
Select the Default Organization
-
Log in to the Management Console.
- Select the Default Organization if All Organizations menu is enabled.
Manage organizations
Add a new organization
If you are a cloud or a cloud-derived administrator, you can create a new organization to manage your servers. An organization or organization-derived administrator is created using the Manage Administrators page after clicking the Druva icon.
Prerequisites
- Only Enterprise and Elite customers can create new organizations.
- Only a cloud administrator can add new organizations.
Procedure
- Log in to the Management Console.
- If the organization is enabled, click All Organizations on the menu bar. For more information, see Enable or Disable Organizations.
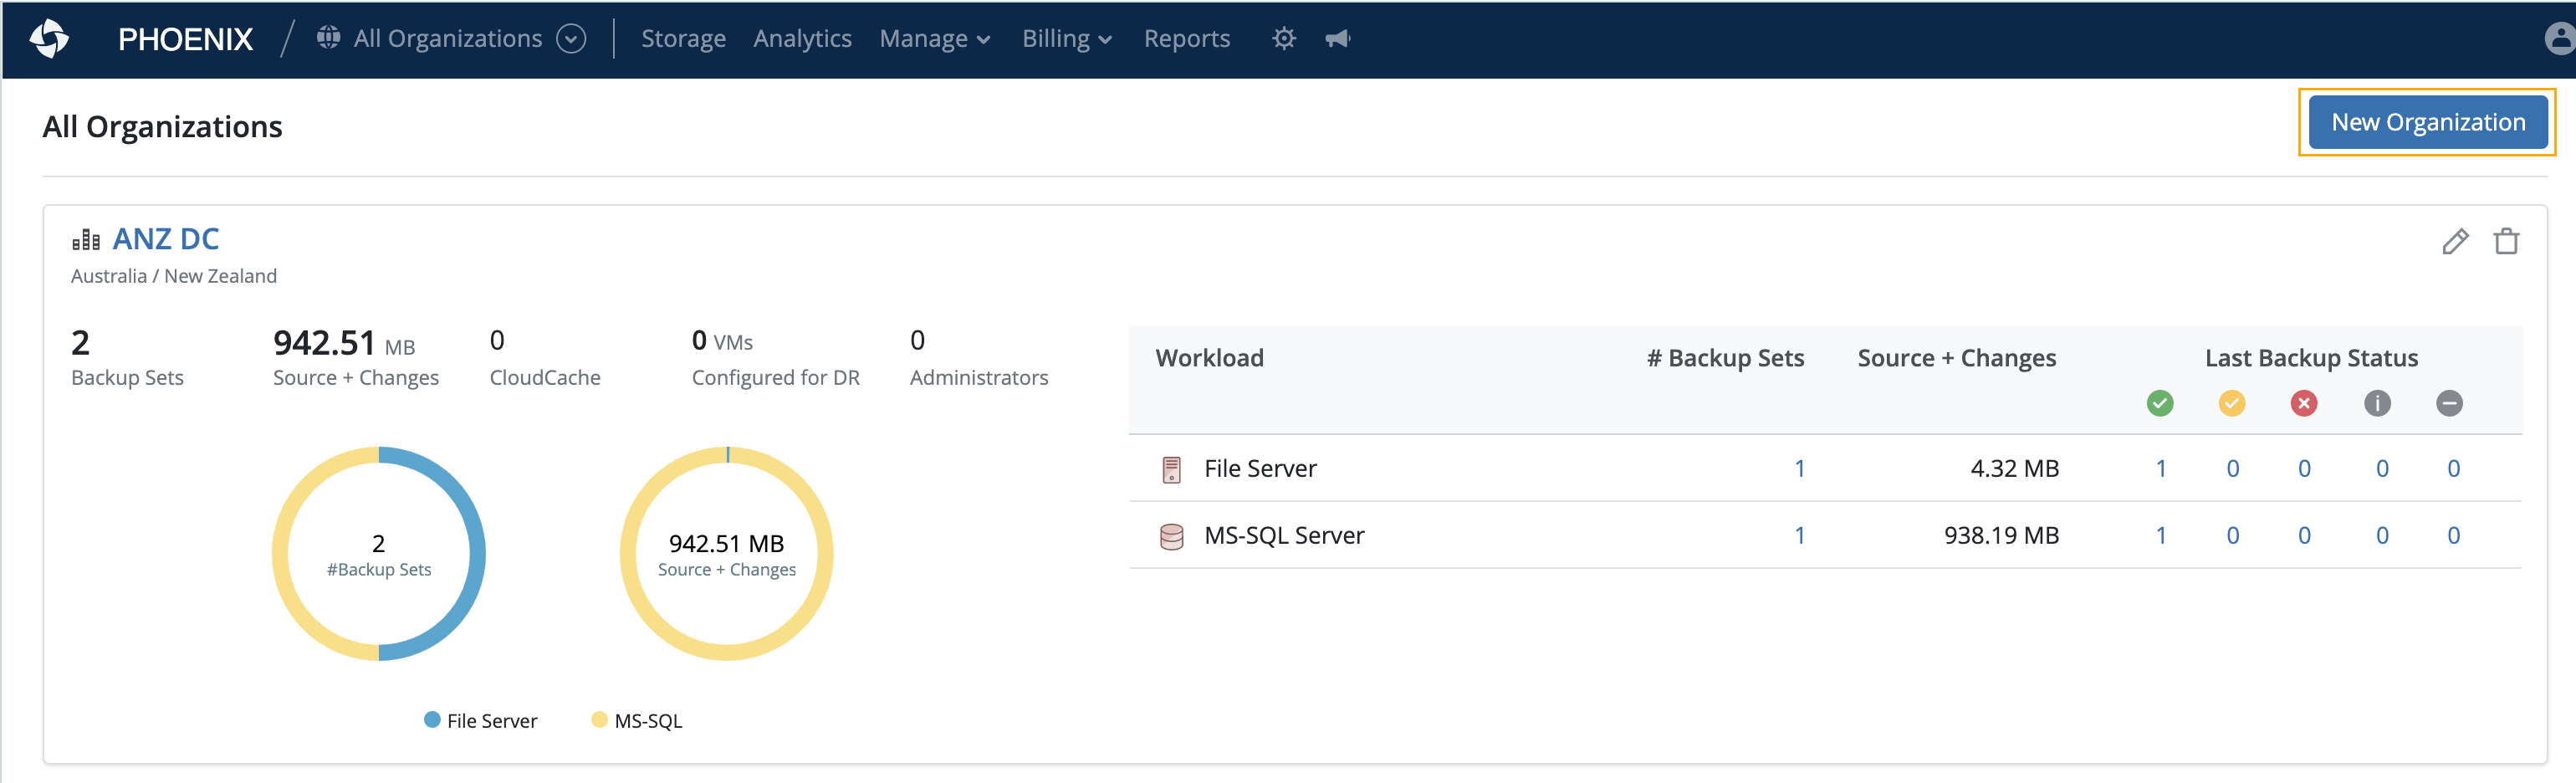
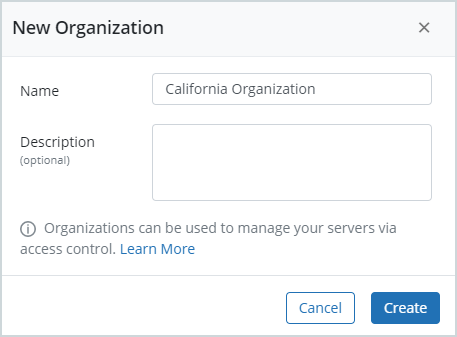
The All Organizations page is displayed. - In the top right corner, click New Organization and enter the following details:
| Field | Description |
|---|---|
| Organization Name | The unique name of the organization. |
| Description | An optional description of the organization. |
- Click Create.
View the All Organizations page
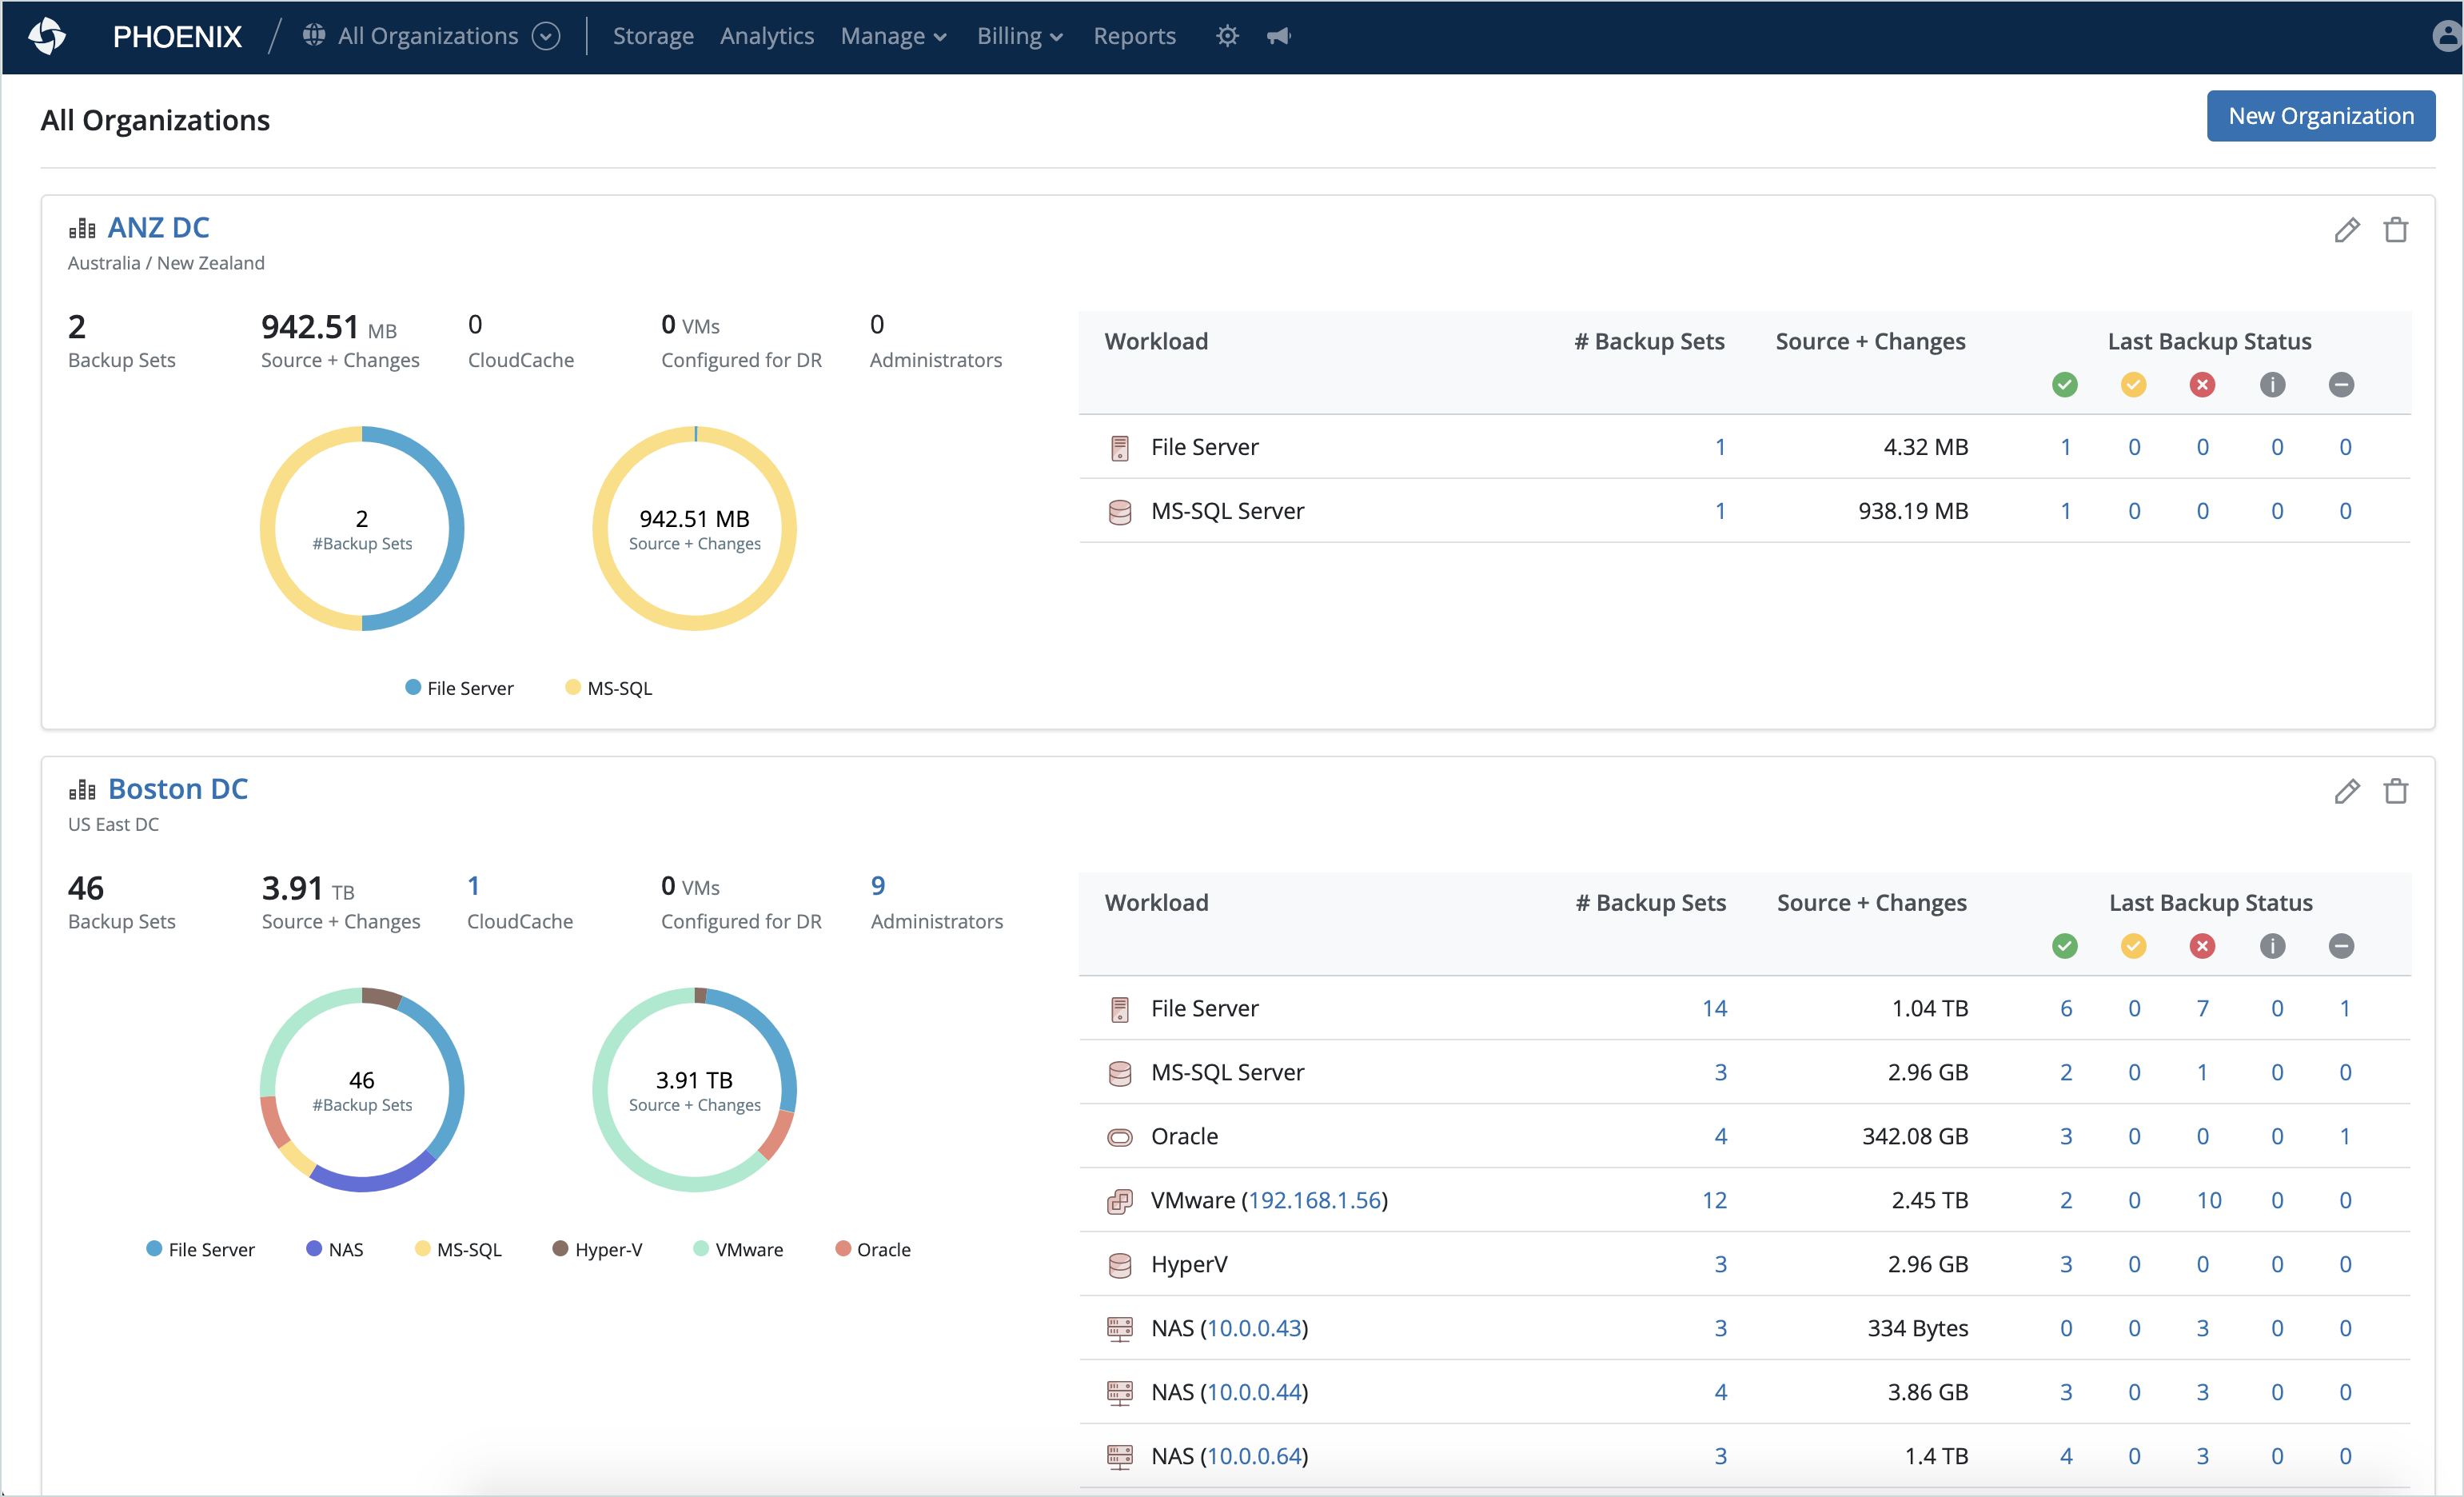
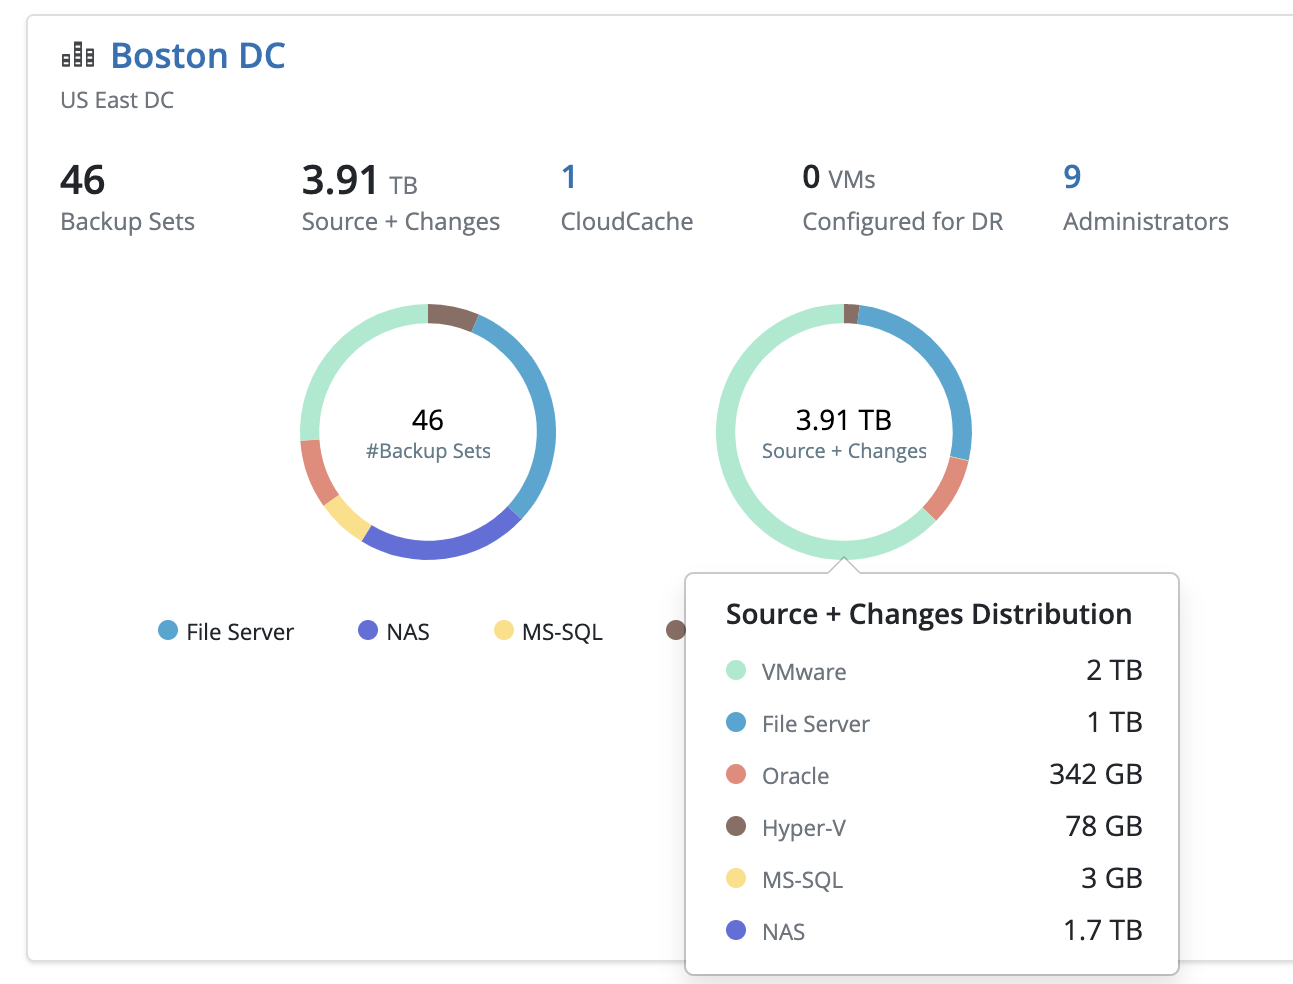
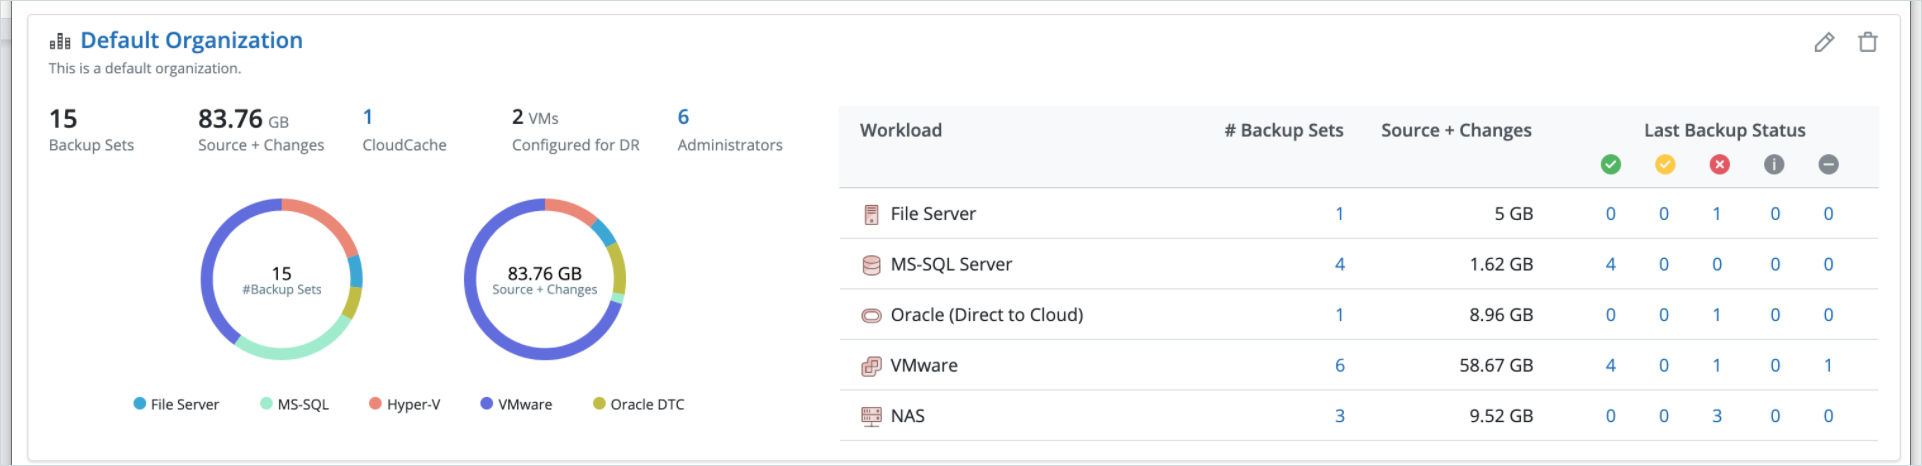
The All Organizations page provides details of all organizations configured in the environment. You can see all the workloads configured for backup in that organization. You can also see the number of configured backup sets, the source+changes data, and the last backup status for each workload.
Procedure
- Log in to the Management Console.
- If the organization is enabled, click All Organizations on the menu bar. For more information, see Enabling or Disabling Organizations.
The All Organizations page is displayed. The following table lists the fields displayed on the page.
| Field | Description |
|---|---|
|
Organization Name |
The name of the organization. Click the organization name to display the organization dashboard. |
| Description | An optional description of the organization. |
| Backup Sets |
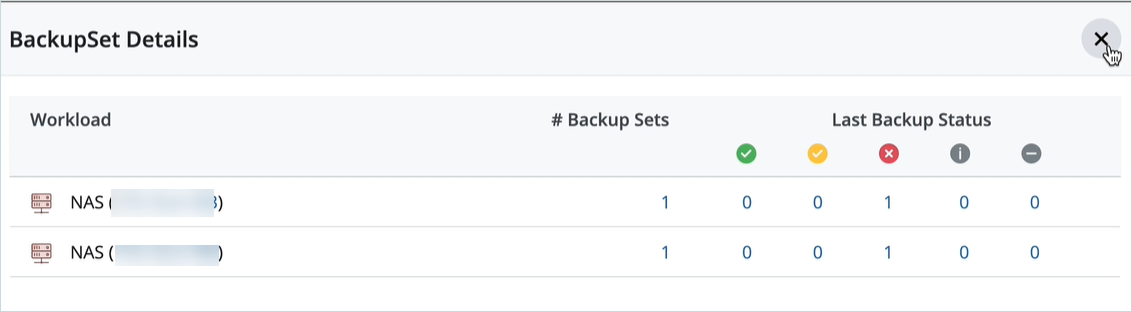
The total number of backup sets in the organization. Hovering over the donut chart corresponding to # Backup sets shows you the backup set distribution. The backup set distribution is the number of backup sets per workload. Clicking the numbers in the backup set distribution next to the workload takes you to the backup sets page for that workload. The backup set distribution information refreshes once in 24 hours.
|
| Source + Changes |
This is an aggregate of full and incremental backup data at the source for all configured workloads in the organization. Hovering over the donut chart corresponding to Source + Changes shows you the Source + Changes information per workload. The Source + Changes information refreshes once in 24 hours.
|
| CloudCache | The total number of registered CloudCache servers in the organization. Click the number of CloudCache servers to see the list of configured CloudCache servers. |
| Configured for DR |
The total number of VMware virtual machines configured for disaster recovery in the organization. This count excludes the virtual machines in your DR plan for which DR is not enabled. This count also excludes virtual machines for which DR is not configured.
|
| Administrators | The number of administrators in the organization. Clicking the number takes you to the Manage Administrators page. For more information, see Manage administrator accounts. |
| Tabular representation | |
| Workload |
The list of all workloads configured for backup in that organization.
|
| # Backup Sets | The number of backup sets per workload. Clicking the number takes you to the backup sets page for that workload. |
| Source + Changes | An aggregate of full and incremental backup data at the source per workload. The Source + Changes information refreshes once in 24 hours. |
| Last Backup Status |
The status of the last backup per workload. This column displays the total number of backups:
Clicking the numbers under the Last Backup Status column takes you to the Backup Sets page for that workload. The Backup Sets page is filtered to display all backup sets of the status that you clicked on. For example, if you clicked the number under Failed (Red Cross icon) for the Files workload, you are taken to the File Backup Sets page. This File Backup Sets page is filtered to show you all the backup sets whose last backup has failed. |

Rename an organization
If you are a DCP or cloud-derived administrator, you can edit the name of an organization.
Procedure
- Log in to the Management Console.
- If the organization is enabled, click All Organizations on the menu bar. For more information, see Enable or Disable Organizations.
The All Organizations page is displayed. - Click the Edit icon for the organization that you want to rename.
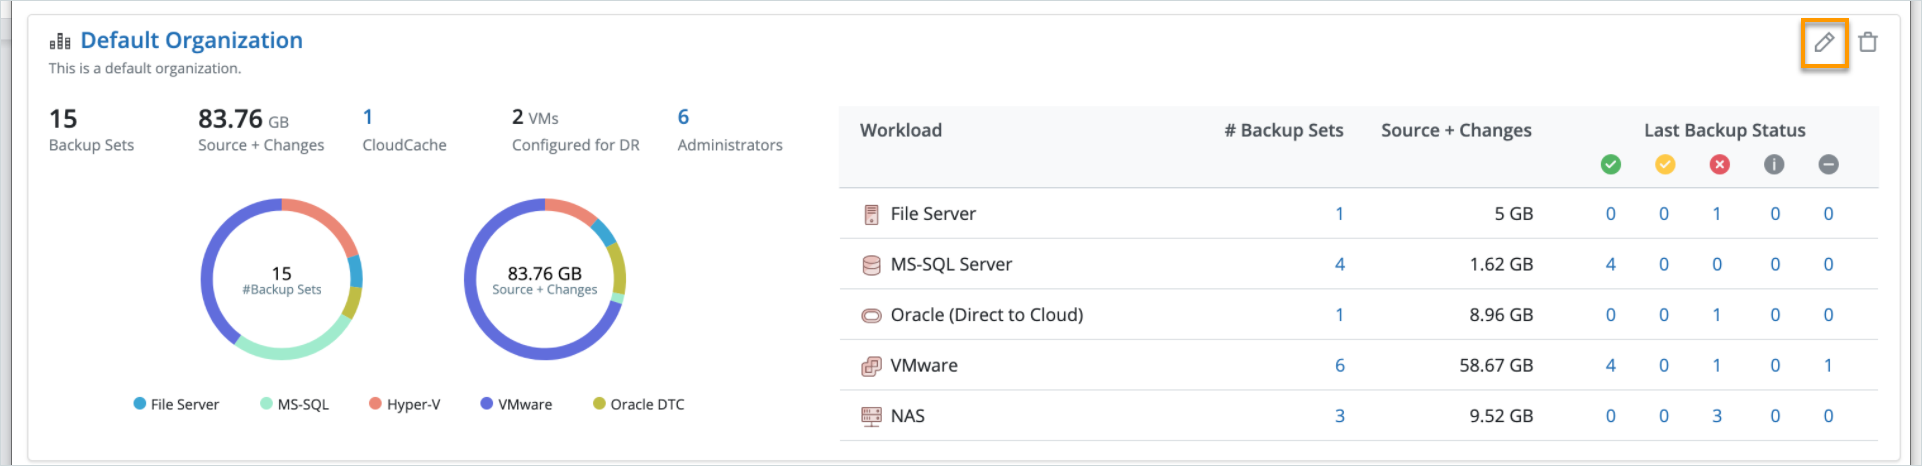
- In the Edit Organization dialog box, enter the new name and description of the organization, and click Save.
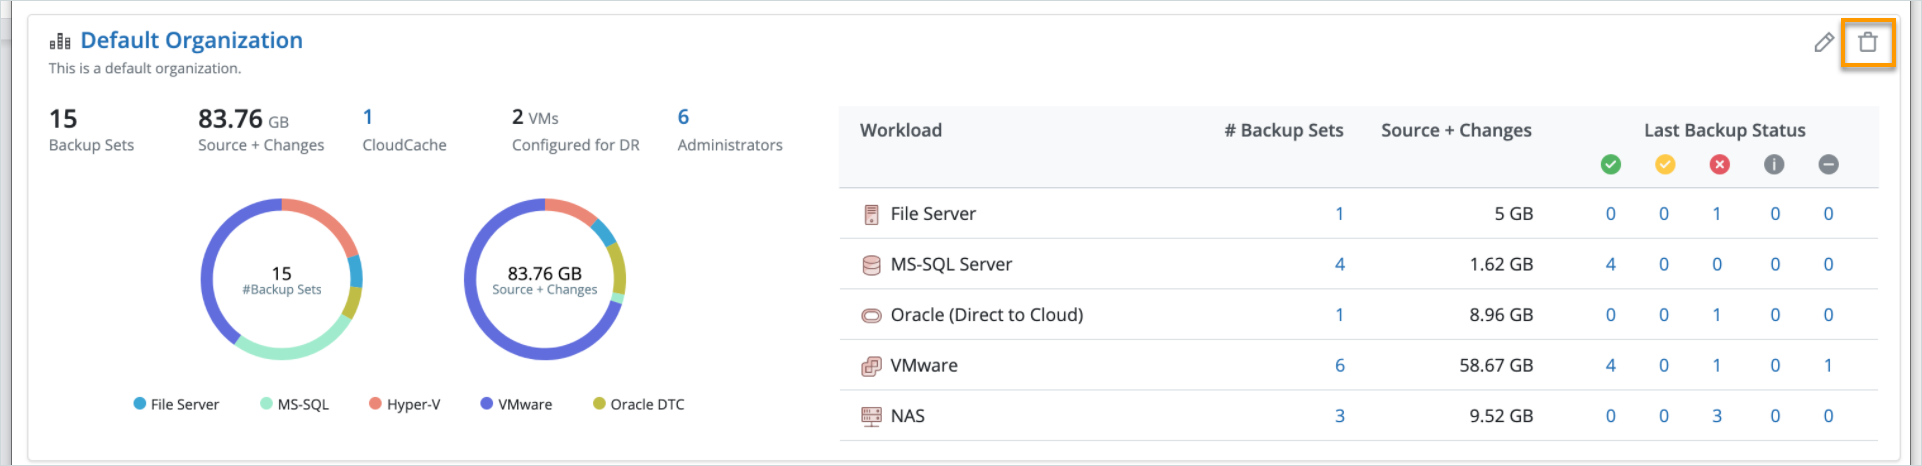
Delete an organization
You can delete an organization if you are a cloud or a cloud-derived administrator.
You cannot delete an organization associated with administrators, administrative groups, backup policies, backup sets, or resources. Associate the administrators, administrative groups, backup policies, backup sets, or resources with other organizations and then delete the organization.
Note: You cannot delete the default organization.
Procedure
- Log in to the Management Console.
- If the organization is enabled, click All Organizations on the menu bar. For more information, see Enable or Disable Organizations.
The All Organizations page is displayed. - Click the Delete icon for the organization that you want to delete.
4. In the Confirmation dialog box, click Yes.
Disable the All Organizations menu