Deploy AWS proxy
Enterprise Workloads Editions
❌ Business| ✅ Enterprise (Purchase Separately) | ✅ Elite
Deploying the Druva AWS proxy
Druva AWS proxy deployment comprises of the following steps:
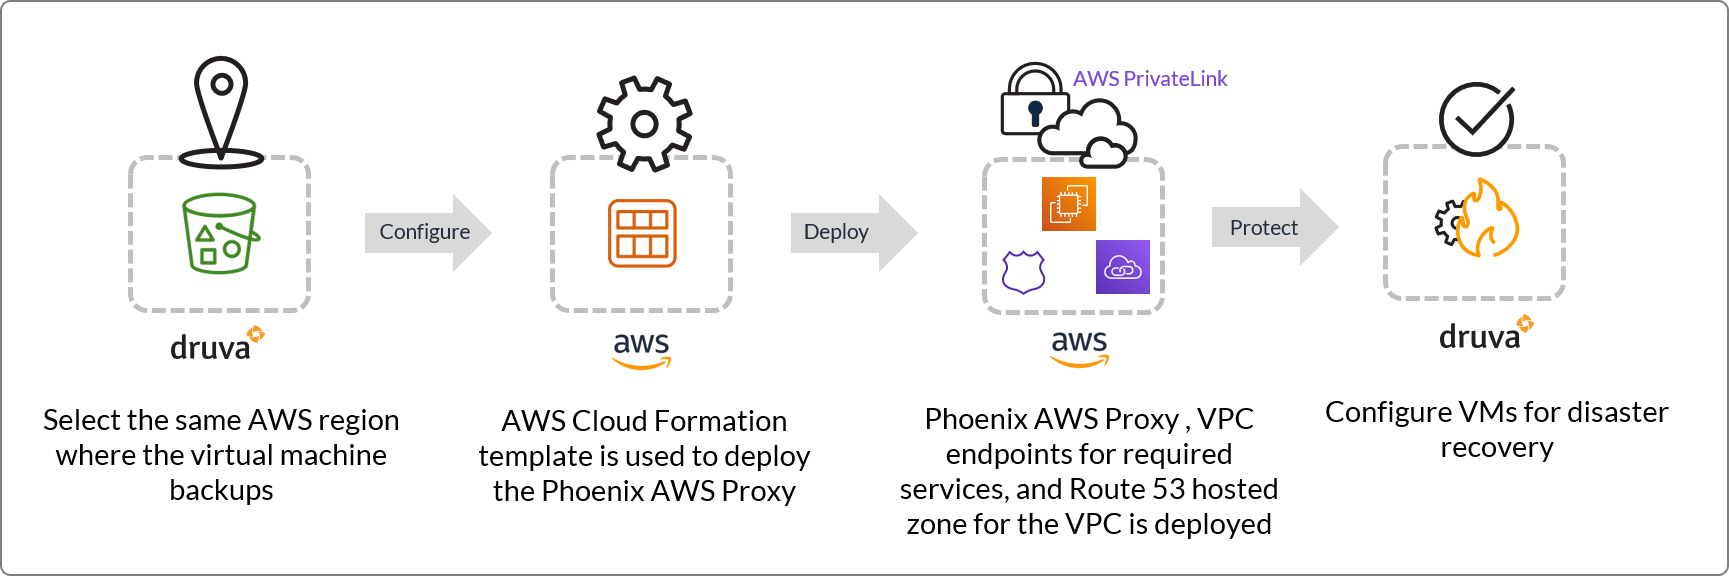
Step 1: Select an AWS region on the Management Console
Step 2: Create a CloudFormation Stack on the AWS Management Console
Step 3: View deployed proxy
Considerations
- You must register the Druva AWS proxy in the same region as the server storage region.
- IMDSv1 is the default version for any EC2 instance. IMDS service is an AWS service used to get metadata information such as the region, instance-id, and so on from any EC2 machine. During and after Druva AWS proxy deployment, Druva AWS proxy fetches region, instance-id, etc. from the IMDS service. Currently, we use only the IMDSv1 service. IMDSv2 is not supported by Druva AWS proxy.
-
The Druva AWS proxy can be deployed in a customer VPC that has DNS resolution enabled and provided by an Amazon-owned DNS server. In situations where DNS resolution is disabled or provided by a third-party-owned DNS server, we recommend deploying a new VPC dedicated to the Druva AWS proxy. This newly deployed VPC must have:
- DNS resolution enabled.
- DNS server configured in the DHCP option should be set to an Amazon-provided DNS server, not a custom DNS server.
- The Druva services should be available in the availability zone for the subnet that you intend to select during the Druva AWS proxy deployment. See Prerequisite check for Druva AWS proxy VPC and subnet and AWS Proxy deployment fails due to AWS Availability Zone limitation for details.
- When you delete a stack, AWS does not delete resources attached to the stack. Ensure that you manually delete the resources attached to the AWS account. For more information, see AWS KB article.
-
All the endpoints require a security group attached to them. Druva creates the following security groups:
- For the DR proxy, Druva creates a security group called DruvaSGGroup. This security group has a rule allowing outbound connections on port 443.
- Druva creates a security group called DruvaSGGroupEndpoint for all the endpoints created as part of the Druva AWS proxy deployment. This security group has a rule allowing inbound and outbound connections on port 443
-
To login to the AWS proxy use "centos" as the username and use the key pair you provided while deploying the AWS proxy.
-
Check your SCP (Service Control Policies) to ensure that the permissions required to deploy a CF template are available to Druva for creating VPC endpoints, IAM resources, etc.
Step 1: Select an AWS region on the Management Console
Deploy the Druva AWS proxy in the same region where the virtual machines that you intend to configure for disaster recovery are backed up in Druva. For example, if the virtual machines are backed up to a storage in Druva that is located in the US-East region, deploy the Druva AWS proxy in the US-East region.
The backup data from the Druva Cloud S3 bucket can be stored only to the S3 bucket of the customer account that belongs to same the region. Also, the optimum transfer rate can be ensured only within the same region.
Procedure
- Log in to the Management Console.
- On the menu bar, click All Organizations, and select the required organization from the drop-down list.
- On the menu bar, click Disaster Recovery.
- In the left pane, click the Druva AWS proxies tab.
- On the Druva AWS proxies page, click Register Druva AWS proxy.
- On the Register Druva AWS proxy page, from the AWS Region drop-down list, select the AWS region where you want to deploy the proxy. For example, us-west-1.

The Activation Token section displays an activation token that is used while creating the CloudFormation Stack.
Note: Druva lists the activation token under Manage > Activation Tokens.
- In the AWS CloudFormation Stack section, click Create CloudFormation Stack to register the Druva AWS proxy.
If you are logged in to the AWS Management Console, you are directed to the Quick Create Stack page. Else, you are directed to the login page of the AWS Management Console. Use your credentials to login and view the Quick Create Stack page.
Step 2: Create a CloudFormation Stack on the AWS Management Console
The Quick create stack page on the AWS Management Console uses a proxy deployment template depending on your first-time proxy deployment or the subsequent deployments. In the Quick create stack page configure parameters for your AWS resources defined in the template.
Procedure
-
Verify the stack details and click Next.
Field Description Template URL Displays the URL of the Druva deployment template used for your proxy deployment. Stack description The description of the Druva deployment template used. Stack name Displays the name generated by Druva for your stack. -
Enter the parameters and click Next.
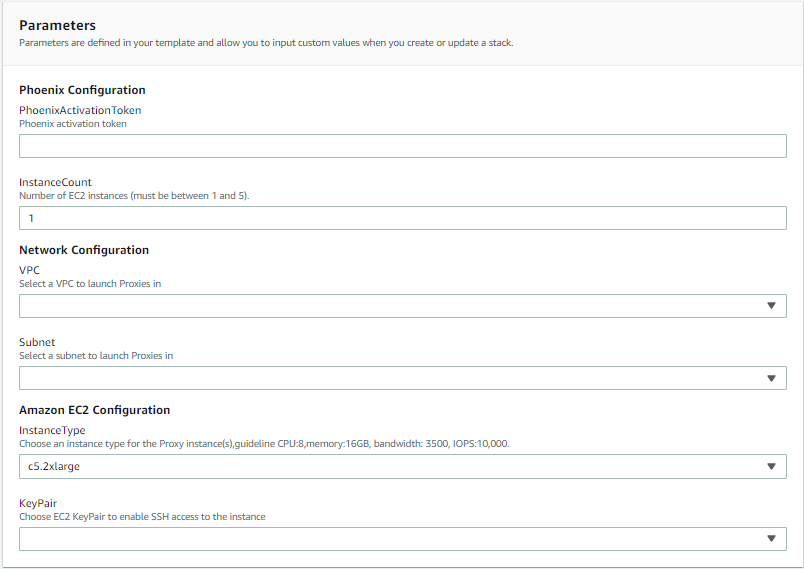
Field Description Druva Configuration parameters PhoenixActivationToken Displays the Druva activation token generated based on the selected AWS storage region on the Management Console. InstanceCount Specify the number of proxy instances that you want to launch. You can specify up to 5 instances. The default value is 1. Network Configuration parameters VPC Select a Virtual Private Cloud (VPC) network specific to the AWS account to launch the Druva AWS proxies. For more information, see Supported AWS regions.
Note: Ensure that the DNS hostnames option is enabled for the VPC. For more information, see AWS documentation.
Subnet Select a subnet to launch the Druva AWS proxies in the specific network in your VPC. Amazon EC2 Configuration parameters InstanceType Select the instance type for the Druva AWS proxy. For more information, see Supported AWS instance types.
Note: It is recommended to select the instances based on the following configuration: 8 CPUs, 16 GB memory, 3500 Mbps bandwidth, 10,000 IOPS.
KeyPair Select an EC2 key-pair to enable SSH access to the proxy instance. -
Optionally, update the stack options and click Next.
-
Review the configurations and in the Capabilities section, select the check boxes acknowledging that AWS CloudFormation might create IAM resources with custom names and that AWS CloudFormation might require the following capability: CAPABILITY_AUTO_EXPAND.
-
Click Create stack.
-
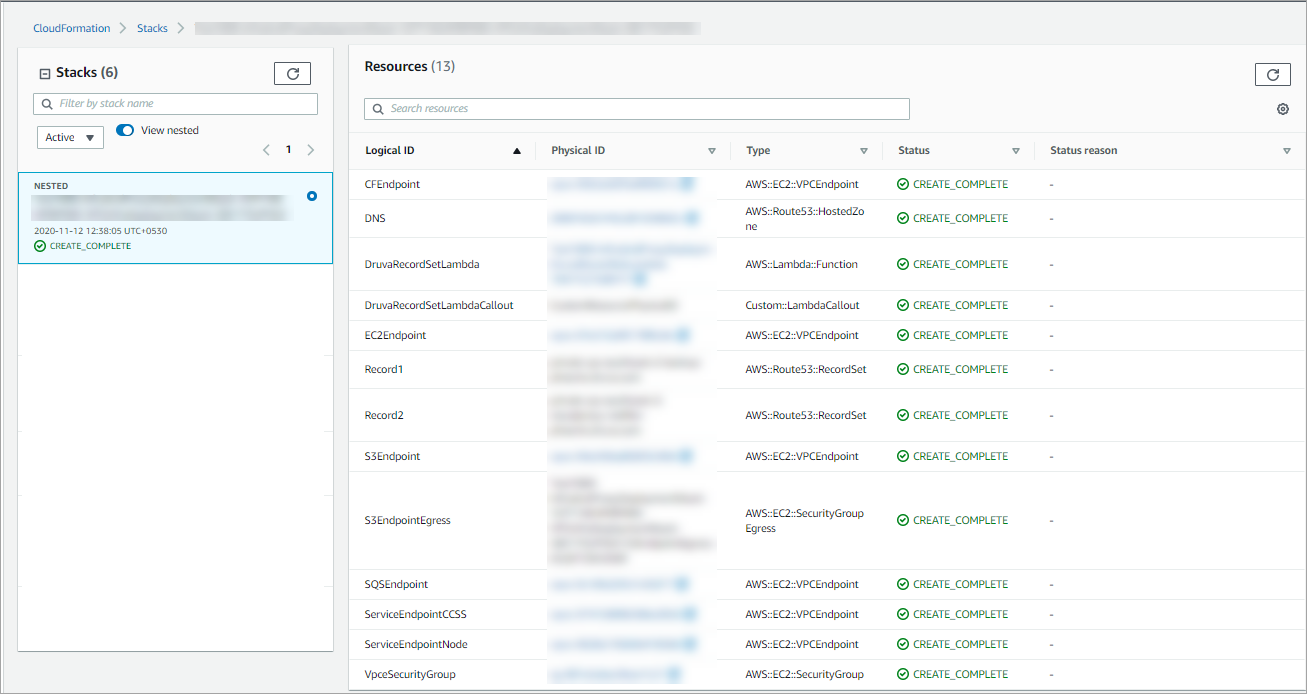
Verify the status of stack creation on the Stacks page on the AWS Management Console. If the status is:
-
CREATE_COMPLETE: Druva lists the registered Druva AWS proxy on the Druva AWS proxies tab on the Management Console.
-
CREATE_FAILED: Check the Events section on the Stacks page on the AWS Management Console for more details. You can also contact Druva Support. See Troubleshoot common scenarios.
-
- You can view the deployed AWS resources, such as EC2 instance IDs and security groups, on the Resources tab on the Stacks page.
-
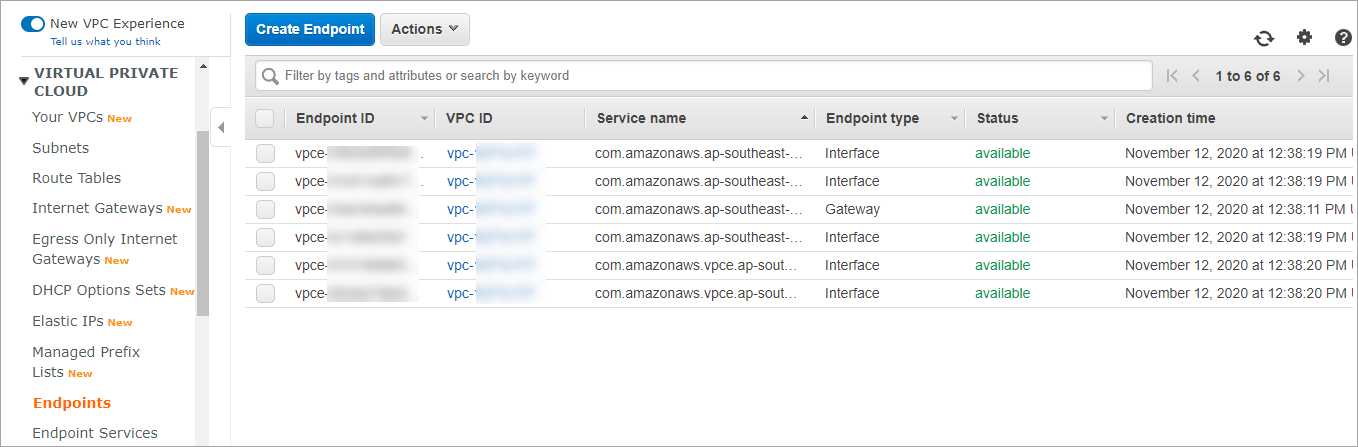
The following VPC endpoints are deployed. These VPC endpoint services (AWS PrivateLink) are used for secure communication.
-
S3 Endpoint: Used for log upload, job resume functionality, etc.
-
SQS Endpoint: Used for failover instances to communicate with the Druva AWS proxy.
-
EC2 Endpoint: Used for operations on EBS volumes and snapshots.
-
Cloud Formation Endpoint: Used for activation of Druva AWS proxy.
- EBS Endpoint: Used for operations on EBS snapshots.
- Lambda Endpoint: Used for creating lambda and invoking lambdas.
- Logs Endpoint: Used for logs download.
- Custom Druva Endpoints:
-
Druva Backup Service Endpoint: Used for metadata transfer.
-
Druva Node Service Endpoint: Used for data transfer.
Note : All the endpoints require a security group attached to it with inbound port 443 enabled.
-
-
-
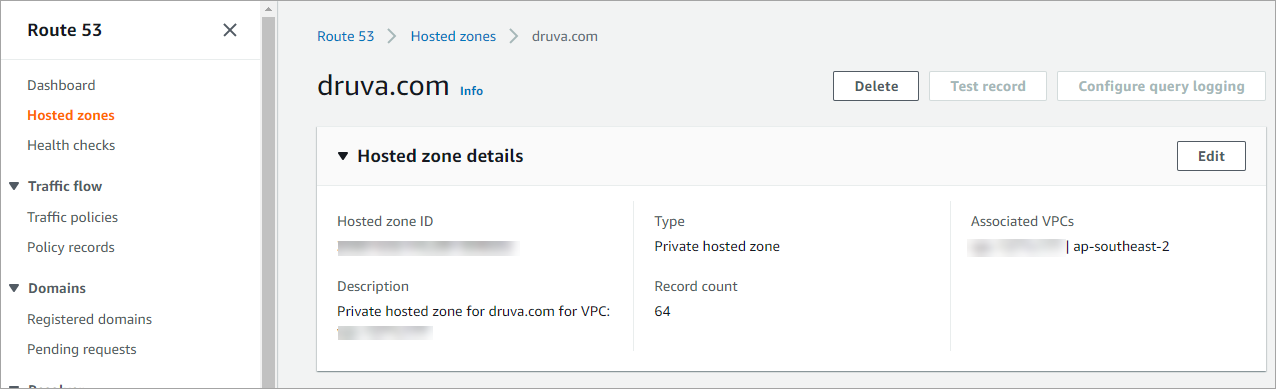
A new Route 53 hosted zone is added for the VPC.
Note: The AWS resources deployed as part of the Druva AWS proxy deployment are only accessible within your AWS account. None of these resources are accessible publicly.
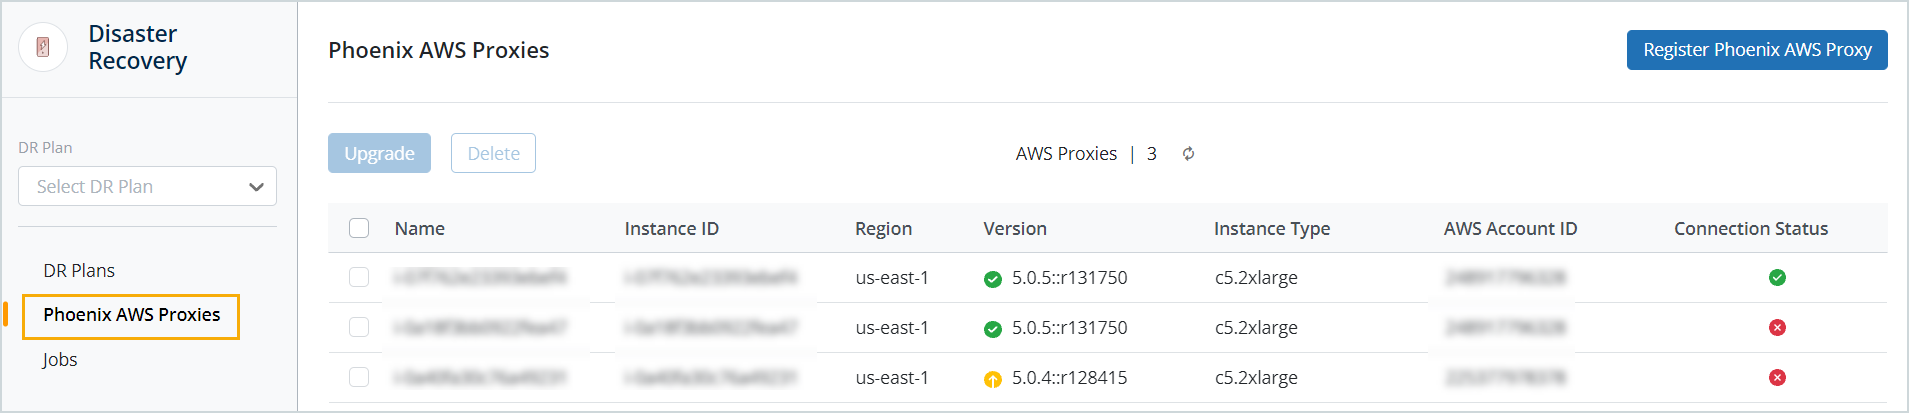
Step 3: View deployed proxy
After the registration completes successfully, the Druva AWS proxy appears on the Druva AWS proxies page. From this page, you can also deploy additional Druva AWS proxies.
Note: To login to the AWS proxy use "centos" as the username and use the key pair you provided while deploying the AWS proxy.
Deploying a Druva AWS proxy in another availability zone
To deploy another Druva AWS proxy in a different availability zone, perform the steps outlined under Deploying the Druva AWS proxy. Ensure that the subnet and VPC you select belong to the availability zone you deploy the proxy in.
Re-deploying a Druva AWS proxy
The Druva AWS proxy (DR Proxy) is stateless. Stateless means that if you lose the DR proxy instance for any reason, you can always redeploy another DR proxy instance and it can continue functioning like the previous instance. Any available DR proxy can handle DR jobs for VMs. The DR jobs aren't tied to specific DR proxies.
To re-deploy a Druva AWS proxy, perform the steps outlined under Deploying the Druva AWS proxy. The Druva AWS CloudFormation template takes less than 10 minutes to deploy.