Manage administrative groups
 Business Enterprise Elite
 Overview of administrative groups
An administrative group is a logical categorization of the servers that share something in common. For example, servers located in one region can belong to one administrative group. Similarly, servers having the same operating system can belong to another administrative group.
An administrative group allows you to organize your servers for better management. To manage the servers under a group, you assign a group admin. It is mandatory that you create an administrative group and attach servers to it.
View administrative groups
- Log in to Druva Cloud Platform Console.
- Click
 > Enterprise Workloads > Select the required organization from the All Organizations menu, and then click Manage > Administrative Groups.
 - The Manage Administrative Groups page displays a list of available administrative groups.
- You can click the administrative group for which you want to view details.
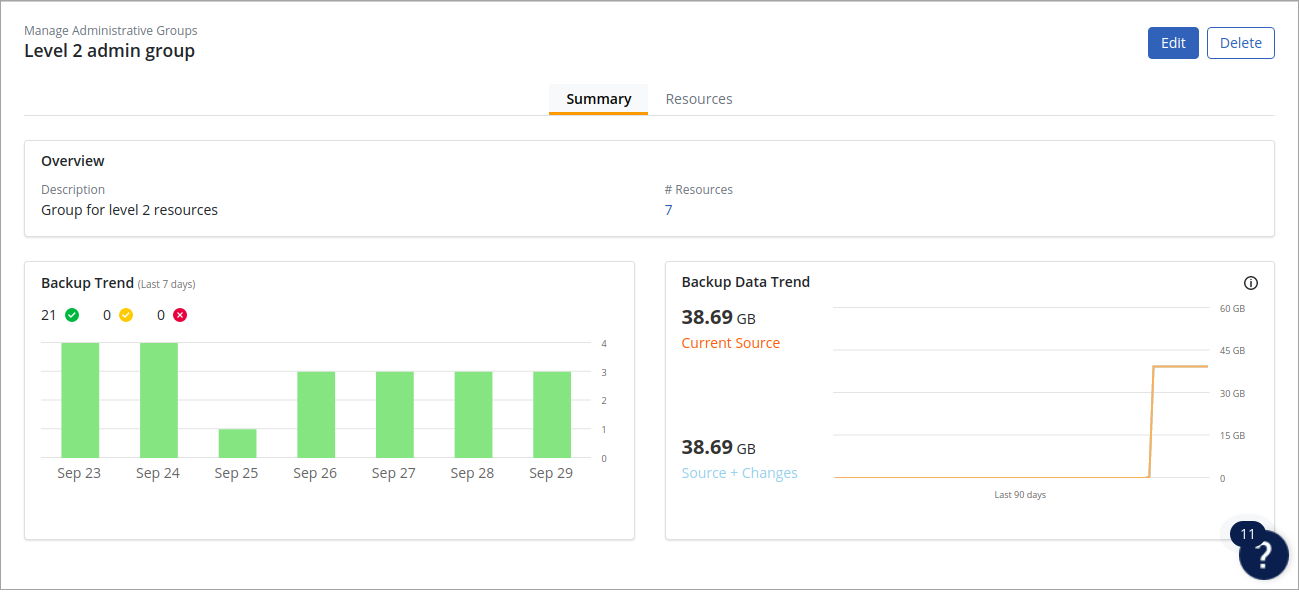
- The Summary tab of the administrative group details page displays the following fields:

| Field | Description |
|---|---|
|
Description |
The description for the administrative group. |
|
# Resources |
The number of servers associated with the administrative group. |
|
Backup Trend |
The Backup Trend section displays backup jobs for the last seven days with the following three statuses:
For the detailed explanation of each parameter, see Dashboards. |
| Backup Data Trend |
The Backup Data section illustrates the following data for the last 90 days: Source + Changes: The amount of backup data generated at the source. This includes the initial full backup and incremental data from all subsequent backups. Current Source: The size of the data on the source server(s) at the time of the last backup. |
The Resources tab of the administrative group details page displays the following fields:
| Field | Description |
|---|---|
|
Name |
The name of the resource. |
|
Resource Type |
The type of resources such as Physical Server, VMware VM, Hyper-V VM, NAS Share, SQL Availability Group, Phoenix Store, and SQL Standalone Instance. |
Create a new Administrative Group
- Log in to Druva Cloud Platform Console.
- Click > Enterprise Workloads > Select the required organization from the All Organizations menu, and then click Manage > Administrative Groups.
- Click New Group.

- Enter the name and description of the group and click Save.
- The administrative group created now appears on the Manage Administrative Groups page.
Update administrative group details
- Log in to Druva Cloud Platform Console.
- Click > Enterprise Workloads > Select the required organization from the All Organizations menu, and then click Manage > Administrative Groups.
- The Manage Administrative Groups page displays a list of available administrative groups.
- To update an administrative group you can:
- Select an administrative group and click Edit.
OR - Click on the administrative group and on the Administrative group details page, click Edit.
- Select an administrative group and click Edit.
- The Edit Administrative Group dialog box opens. Edit the name and/or description.
- Click Save.
Delete an administrative group
You can delete an administrative group at any time. However, If a resource is mapped to the group you cannot delete the group.
- Log in to Druva Cloud Platform Console.
- Click > Enterprise Workloads > Select the required organization from the All Organizations menu, and then click Manage > Administrative Groups.
- The Manage Administrative Groups page displays a list of available administrative groups.
- To delete an administrative group you can:
- Select an administrative group and click Delete.
OR - Click on the administrative group and on the Administrative group details page, click Delete.
- Select an administrative group and click Delete.
- The Delete Administrative Group dialog opens. Edit the name and/or description.
- Click Save.