Deploying CloudFormation stack template for migrating AWS Proxy from CentOS to Ubuntu
Enterprise Workloads Editions
❌ Business| ✅ Enterprise (Purchase Separately) | ✅ Elite
Overview
In the event of RedHat's announcement of discontinuation of CentOS, we need to take necessary steps to ensure a smooth disaster recovery process for our VMs. To achieve this, we are required to transition our AWS proxies from CentOS (AWS proxy version 6.3.3 or earlier) to Ubuntu. You can easily migrate your proxies from CentOS to Ubuntu by deploying the new CF template. As a part of the deployment process, the new CF template does the following:
-
Deploys Ubuntu proxy.
-
Updates the IAM roles
-
Deletes the CentOS proxies (AWS proxy version 6.3.3 or earlier) from AWS and moves them to a disconnected state on the Management Console.
Before you begin
Check if your AWS proxies are on version 6.3.3 or earlier. If yes, perform the following steps to migrate your proxy from CentOS to Ubuntu, else you can upgrade your Ubuntu proxies automatically from the Management Console.
Log in to the AWS proxy using ubuntu as the username and use the key-pair you provided while deploying the AWS proxy.
Procedure
-
Log in to the AWS Management Console.
-
From the top navigation bar, in the search box, search for CloudFormation.
-
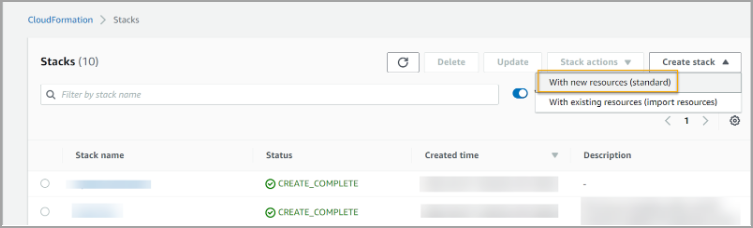
On the Stacks page, from the top right corner, click Create Stack > With new resources (standard).
-
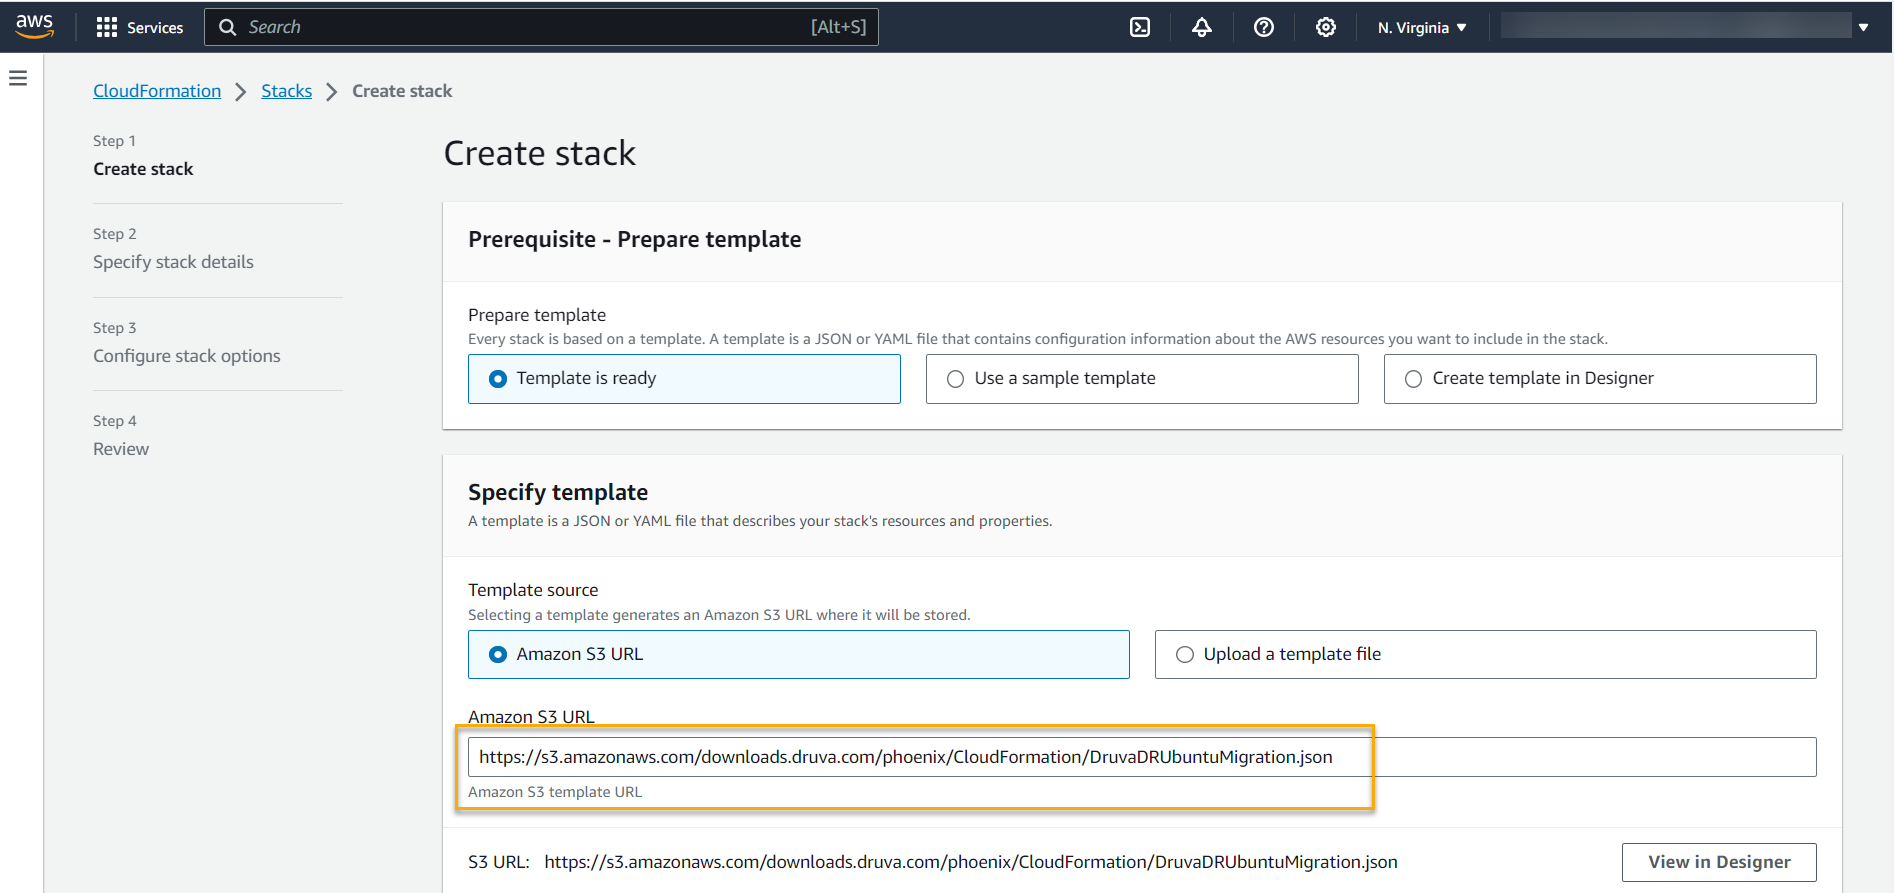
On the Create Stack page, provide the following information:
a. In the Prerequisite - Prepare template section, under Prepare Template, select the Template is ready option.-
In the Specify template section, under Template source, select the Amazon S3 URL option.
-
In the Amazon S3 URL text box, enter the following URL: https://s3.amazonaws.com/downloads.druva.com/phoenix/CloudFormation/DruvaDRUbuntuMigration.json
-
-
Click Next.
-
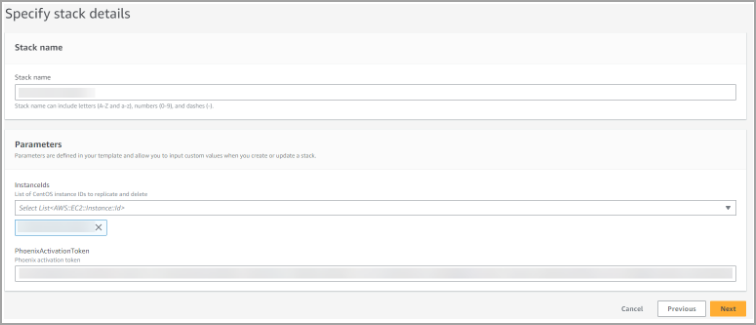
In the Specify stack details screen, provide the following details then click Next.
-
In the Stack name section, enter a stack name.
-
In the Parameters section, provide the following values:
-
InstanceIds: Select the instance IDs for migration.
Note: The activation token is valid for up to 5 instances. So make sure you select a maximum of 5 instances for migration. -
PhoenixActivationToken: Provide the activation token. You can get it from the Enterprise Workloads Management console.
-
-
-
On the Configure stack options page, retain the default values and click Next.
-
On the Review page, under the Capabilities section, select the checkboxes for acknowledgement, and then click Submit.
The stack gets created and is displayed on the Stacks listing page.
If the deployment fails, you can check the detailed logs for the same on CloudWatch.
Next Steps
After migrating the CentOS proxy to Ubuntu successfully, the CF template deletes the CentOS proxy from AWS. However, you need to manually delete the CentOS proxy from the Management Console. For more information, see Delete Druva AWS proxy.