Manage disaster recovery failback
Enterprise Workloads Editions
❌ Business| ✅ Enterprise (Purchase Separately) | ✅ Elite
For a deeper understanding of the failback process, see About disaster recovery failback.
This topic provides instructions on how to failback EC2 instances (you can failback multiple instances at one time) recovered during failover in your AWS account.
A failback is triggered on EC2 instances on the Management Console. When you trigger a failback, you must provide the details of the EC2 instances that you want to failback and the settings of the destination VMware. Unlike failover, you cannot pre-configure the settings for failback.
Prerequisites
Before you trigger failback, ensure the following:
- The EC2 instance to be failed back must be in the running state. If the EC2 instance is in the stopped state, you must start the EC2 instance before triggering failback. The status of the failed over EC2 instance is fetched by the Druva AWS proxy from the AWS Cloud. Ensure that the Druva AWS proxy is running.
- Ensure that the failed over instance has an additional space of 1.5 GB available for data copy.
- The customer’s AWS account must be accessible from the vCenter data center where the backup proxy is installed.
- You must stop all application services running on the EC2 instance that you want to failback so that no updates to the application are lost during the failback process.
- Ensure that the target virtual machine where you are failing back to has connectivity to the EC2 instance. Ensure that the following ports are open.
- Linux: Port 22 for SSH
- Windows: Ports 445 (Used for preflight checks and control messaging) and 50000 (Used for actual data transfer in failback operation).
Note: You must manually enable the SMB port for communication. See, DR8263.
- When a failback job is running, ensure that an EC2 instances are not stopped or terminated.
- Ensure that the backup proxy is configured with IP ens160.
-
Ensure to Whitelist "downloads.druva.com" over port 443 on the VM backup proxy network in the on-premises environment .
-
For VMC on Dell EMC DR failback on Windows, ensure that the virtual machines on the VMware Cloud can access the AWS instance data using the SMB protocol.
-
If we use the root login for failback, ensure that below flags should be enabled from
sshd_config:

    Location: /etc/ssh/sshd_config
PermitRootLogin yes
PasswordAuthentication yes
Launch failback
Before initiating a production DR failback job, we recommend running the DR Failback Checks to ensure that your AWS environment and the destination VMware environment do not have any issues that can cause the production DR failback jobs to fail. For more information, see DR Failback Checks.
- Log in to the Management Console.
- Select your organization if organizations are enabled.
- On the menu bar at the top click Disaster Recovery.
-
On the DR Plans page select the DR plan that has the VMs to be failed back. Alternatively, select a DR plan from the DR Plan drop-down in the left navigation pane.
-
In the left navigation bar, click Failover instances.
-
Select one or more EC2 instances that you want to failback. You can also filter the EC2 instances you want to failback by
- Failover Type: Select from a Production or Test Failover instance
- Instance Status: Select from running, stopped, and terminated instances. You can select more one than instance status.
- Failback Check Status: Select instances whose failback check status is Successful, Successful with errors, Failed, In Progress, or Not Initiated. You can select more than one failback check status.
- Failback Job Status: Select instances whose failback job status is Queued, In Progress, Successful, Successful with errors, Failed or Canceled.
- Click Failback.
- On the Failback Settings page, provide the following details:
Field Description EC2 settings tab EC2 Credentials - For each instance, you can select the VM credentials you have saved in the credential store.
Or
- Provide custom credentials wherein, you need to provide:
- Username: The username required by the target worker virtual machine to connect to the EC2 instance.
- Password: The password required by the target worker virtual machine to connect to the EC2 instance.
Source EC2 IP The IP address of the source virtual machine. This network is used to transfer the data to the destination VMware environment. Specify the IP address of the required source virtual machine in the box or select the IP address from the drop-down list. Exclude Partitions/Mounts The path of the partitions or the drives that are excluded from the backup. The restricted mount points for Linux are /, /usr, /var , and /boot, respectively. Stop EC2 instances after failback Select this check box to stop the EC2 instances in the AWS account after the failback operation completes so that the application in your data center can run.
AWS continues to charge for the EBS storage associated with the running EC2 instance and any unused Elastic IP addresses.
Destination VMware settings tab Use Source VM Attributes vCPU, RAM and disk type of the source VM will be used. vCenter Select the vCenter setup where the instance must failback.
This list only displays the vCenter servers registered with Disaster Recovery.
Backup Proxy Pool Select the name of the backup proxy pool that the backup proxy is part of.
It is recommended that you select a backup proxy pool with backup proxies that support failback and are locally connected to the destination hypervisor.
Hypervisor Select the IP address of the ESXi Hypervisor in the vCenter where you want to failback this EC2 instances. Datastore Select the data store where you want to failback the EC2 instances. Compute Resource Select host, cluster, or a resource pool where you want to failback the EC2 instances.
You cannot select a datacenter or a folder.
VM Folder Select a folder under the data center hierarchy where you want to failback the EC2 instances. Network Select the network setting available at the destination hypervisor. VM Tags The list of tags that you want to provide to your destination virtual machine.
Tags enable you to identify the failed over virtual machine.
VM Name (Prefix
Suffix)
Specify a prefix or a suffix for VM's name you want to failback.
This helps you to identify the VMs that were failed back.
Note: The prefix and suffix including the VM name must not exceed 80 characters.
Additional Settings tab Keep VM(s) powered-off after failback Select this check box to shut down the VMs in your data center after the failback operation completes to ensure that no updates to the application are lost during the failback process. Use static IP for the destination VM Select this check box if you want to use pre-configured static IP for the virtual machine. When you select this check box, the following fields are displayed for each instance:
- IP Address/Subnet: Provide the following:
- The IP address of the destination virtual machine where you want to failback data in your data center.
- The subnet to be used during failback based on the source network present on the destination virtual machine.
- Default Gateway: The IP address of the router used in your network.
- DNS: The IP address of the Domain Name System (DNS) server.
- Click Failback.
Failback is successfully triggered for the selected EC2 instances.
What happens after failback is launched
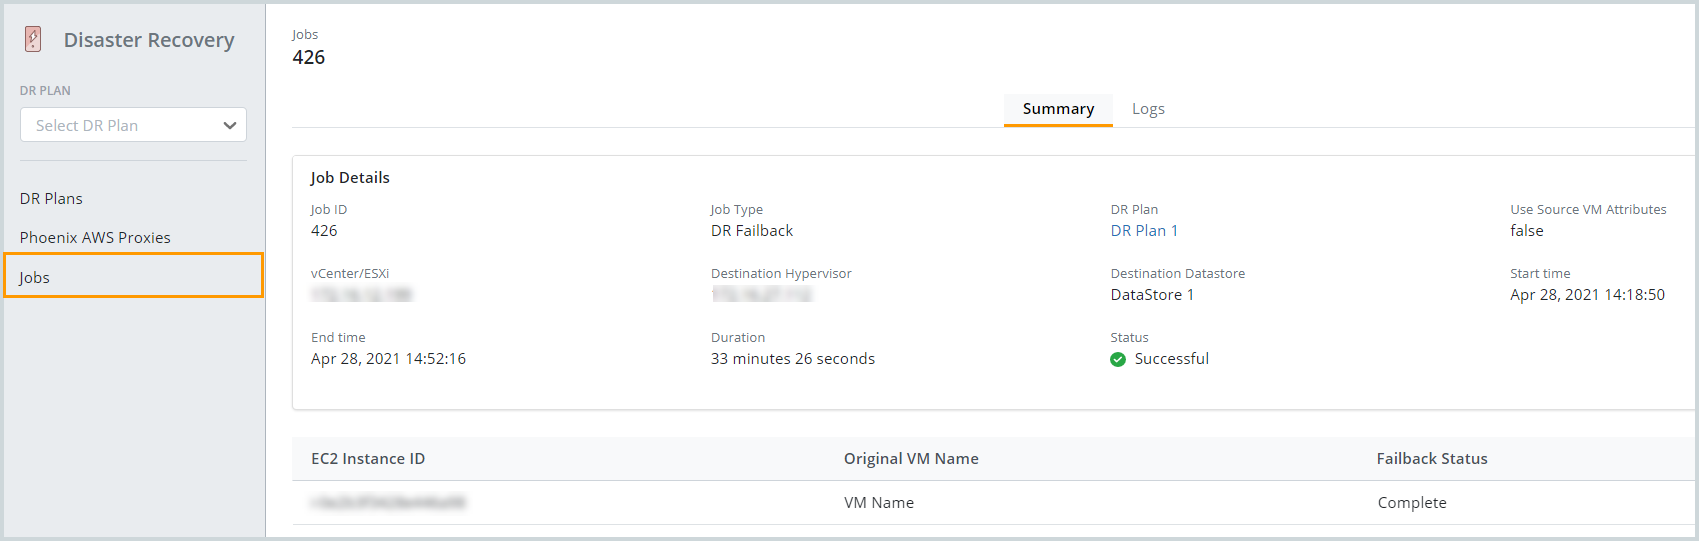
- Druva generates a failback job for this operation. A single failback job is created for all the VMs you failover in a single failback operation. You can view the details of the failback job on the Job Details page. For more information, see View disaster recovery jobs.
- The backup proxy in your vCenter data center downloads the target VMDK from the S3 bucket and launches virtual machines in the data center using the target VMDK.
- The virtual machines connect to the failed over EC2 instances and Disaster Recovery transfers the data to the respective virtual machines.
Note: If you have applied auto configuration rules to the target virtual machines, Druva automatically configures the virtual machines for backup. After a failback operation completes, the next backup of the configured virtual machines will be a full backup.