About recovery workflow
Enterprise Workloads Editions
❌ Business| ✅ Enterprise (Purchase Separately) | ✅ Elite
Overview
The recovery workflow works as a runbook and can be executed based on your application’s requirements. It enables you to define steps to logically group the virtual machines in a DR plan to perform operations in a defined order. When you create a DR plan, Disaster Recovery makes your job a little easier by automatically creating a default recovery workflow for the DR plan and adds all the virtual machines in the DR plan to a single VM boot step. You can go ahead and review the default recovery workflow in the Recovery Workflow section on the Recovery tab on the DR plan details page of the Management Console. You can edit the default recovery workflow based on your failover requirements by adding multiple recovery steps, such as virtual machine (VM) boots and time delays. Read on to know more about VM boots and time delays.
Actions possible in a Recovery Workflow
| Operation | Description |
|---|---|
| Add Recovery Step | Edit the default recovery workflow and add multiple recovery steps like VM Boot and Time Delay. |
| Abort recovery if any VM in this boot step fails to boot | Abort the failover operation if any VM in the boot step does not boot. |
| Reorder VMs and boot steps |
|
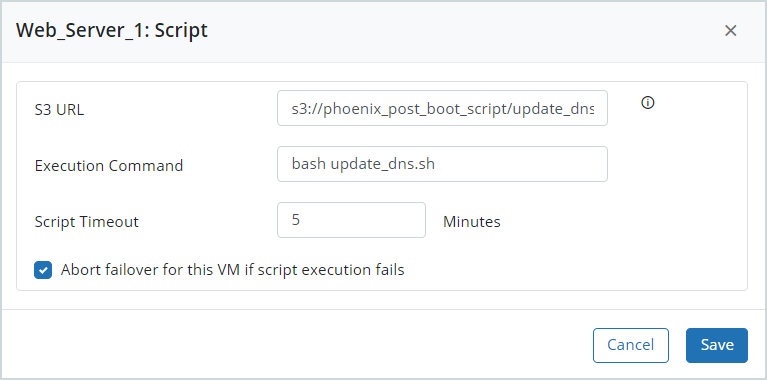
| Add Script | Clicking more options next to a VM lets you add a script to the VM. This script executes when the VM boots up. You can also specify a script timeout value and choose to abort failover for the VM if the script execution fails. |
Steps in a recovery flow
| Operation | Description |
|---|---|
| Add Recovery Step Edit the default recovery workflow and add multiple recovery steps like VM Boot and Time Delay. |
|
| VM Boot | Enables you to define a boot order for a group of virtual machines in the DR plan and add scripts in the recovery path to perform critical operations, such as change hostnames of the EC2 instances, modify service configurations, add or remove network routes and gateways, and so on. |
| Time Delay | Enables you to add a time delay between the execution of the two steps during the recovery operation. You can set the time delay or delete the time delay step. |
Customizing the recovery workflow
The recovery workflow enables you to perform the following tasks:
- Add VM boot steps to the recovery workflow and specify their sequence of execution.
- Add on-boot scripts for execution after virtual machines boot up.
- Specify a timeout for the execution of the script.
- Enable abort settings for a step if you want to cancel a failover job when failover of any virtual machines fails during that step.
- Add time delays between the execution of two steps.
- Move virtual machines from one boot step to another boot step, as required.
- Change the order of the execution of the steps. You can simply drag and drop a step to change the order of the execution.
- Remove a time delay step from the recovery workflow.
Reference configuration
Let us consider an example to know more about recovery workflow. Consider your Web application comprises virtual machines, such as database servers, application servers, and Web servers (front-end servers). The Web application requires database servers to be online and running before its application servers and Web servers start up. You want to add a post-boot script to one of the Web servers to update the DNS records to point to the failover EC2 instance and continue the failover operation only upon the successful execution of the script.
Use the following steps to implement the recovery workflow for your Web application:
- Create a DR plan and add the following virtual machines to the DR plan:
- Database servers: Database_Server_1
- Application servers: Application_Server_1 and Application_Server_2
- Web servers: Web_Server_1
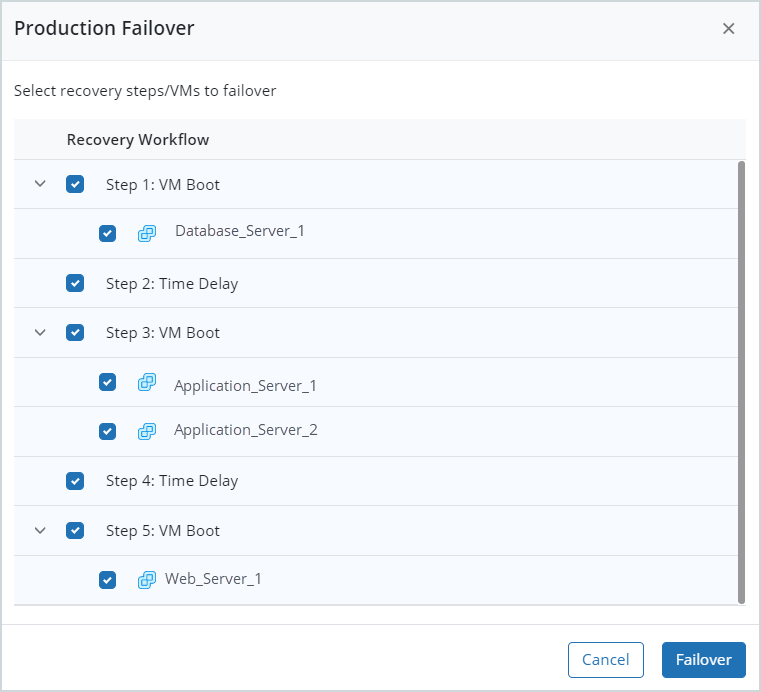
- Edit the disaster recovery workflow based on your Web application requirements.
- Define Step 1: VM Boot to boot your database server.
- Define Step 2: Time Delay
- Define Step 3: VM Boot to boot the two application servers.
- Define Step 4: Time Delay
- Define Step 5: VM Boot to boot the Web server. Add a post-boot script to the Web_Server_1 virtual machine to update the DNS record and abort failover for this virtual machine on the failure of the script execution.
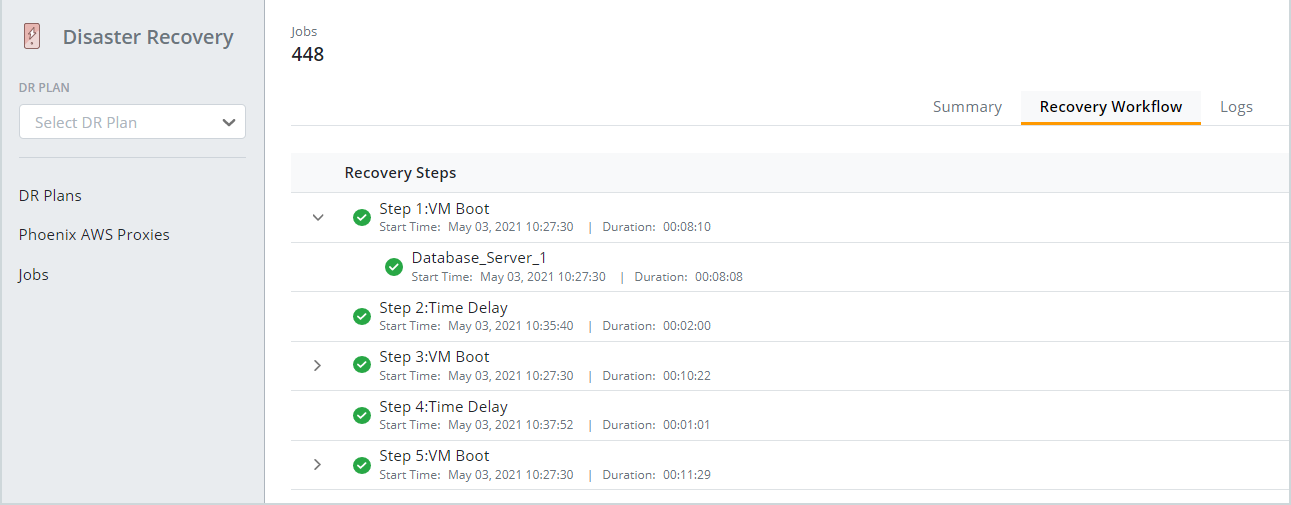
- Launch failover for the DR plan. For more information about how to launch a failover in the production or test setup, see Launch disaster recovery failover. After you launch failover, you can track the status of failover in the Recovery Workflow tab of the Job Details page. The following screenshot depicts the orchestration of the virtual machines in your application.
Recovery workflow behavior
During failover, Disaster Recovery converts all virtual machines configured in a DR plan in parallel. When you trigger a failover for your DR plan, the virtual machines in all the VM boot steps defined in the recovery workflow undergo parallel conversion ensuring reduced RTOs. As a result, you may find a few EC2 instances in the stopped state until its corresponding step starts executing.
The following screenshot depicts the parallel conversion of virtual machines in a DR recovery workflow.
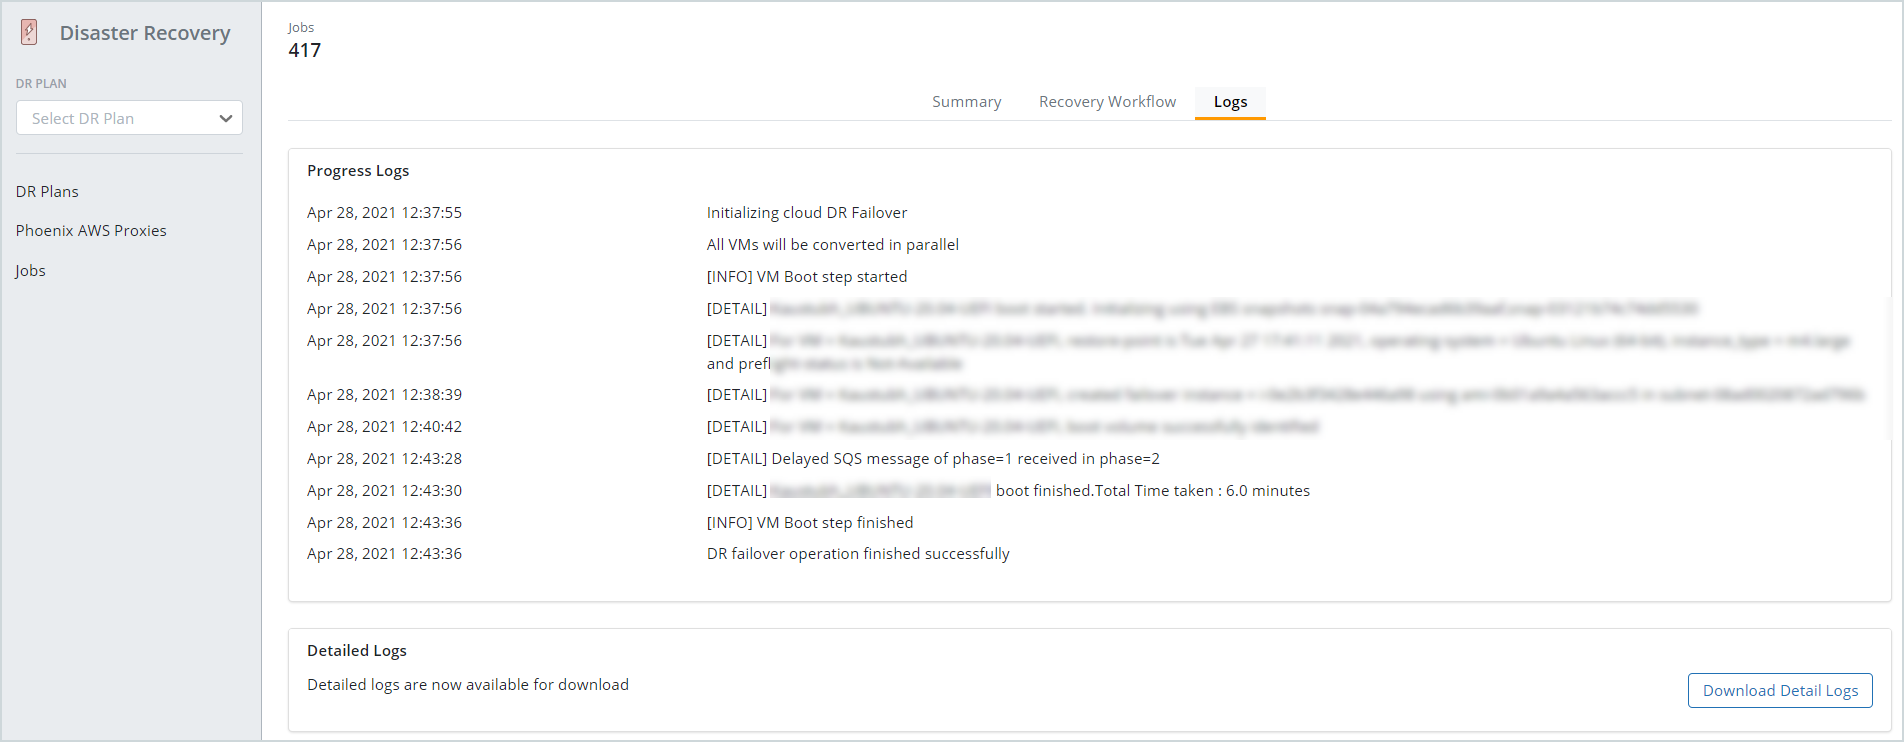
The [EARLY] tags before the virtual machine name depict the parallel conversion of all the virtual machines configured in the DR plan.