Deploy CloudFormation stack templates to update Route 53 records and IAM role
Enterprise Workloads Editions
❌ Business| ✅ Enterprise (Purchase Separately) | ✅ Elite
Overview
You can now have an enriched software deployment experience wih Druva's new global discovery service. All the workload agents will now connect to this discovery service and help us intelligently change to a region and geography-specific software deployment.
Any upgrade to existing AWS PrivateLink enabled Druva AWS proxies will cause your AWS proxy to lose connection with the Druva disaster recovery (DR) services. Consequently, you will not be able to submit any DR jobs. To avert this situation, update the Route 53 records and IAM role associated with the Druva AWS proxy by deploying CloudFormation stack templates. For any further assistance, contact Support.
Creating a new CloudFormation stack for Route53 update
-
Log in to the AWS Management Console.
-
From the top navigation bar, in the search box, search for CloudFormation.
-
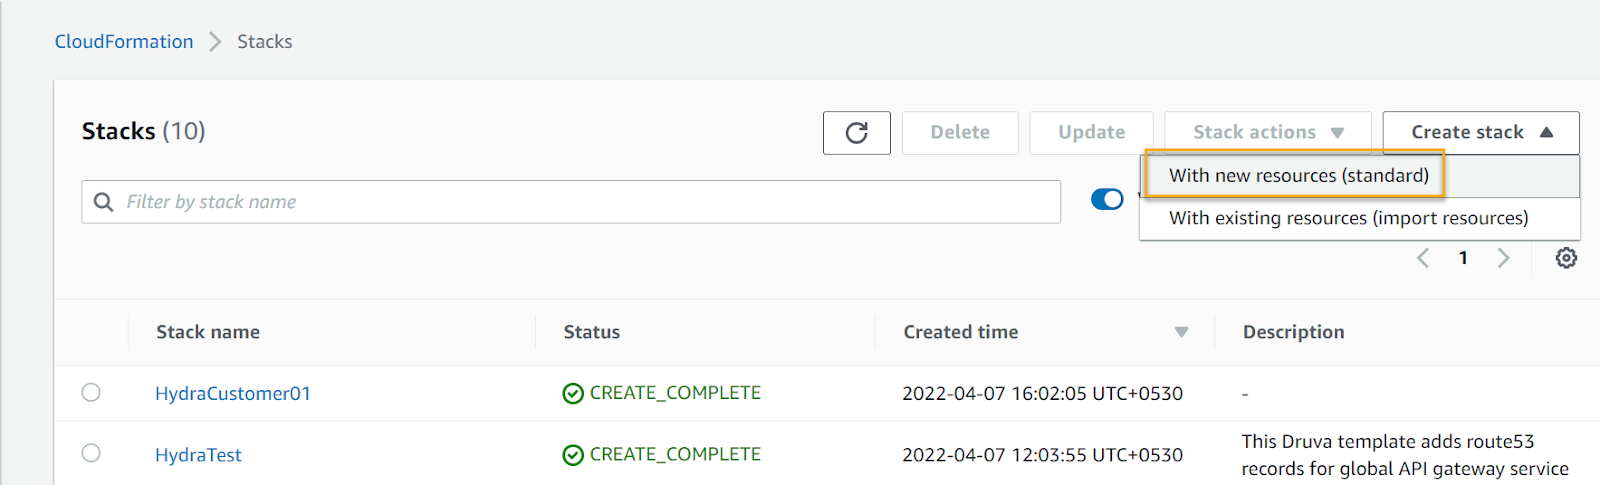
On the Stacks page, from the top right corner, click Create Stack > With new resources (standard).
-
On the Create Stack page, provide the following information:
-
In the Prerequisite - Prepare template section, under Prepare Template, select the Template is ready option.
-
In the Specify template section, under Template source, select the Amazon S3 URL option.
-
In the Amazon S3 URL text box, enter the following URL:
https://s3.amazonaws.com/downloads.druva.com/phoenix/CloudFormation/DruvaGlobalMigration.json
-
-
Click Next.
-
In the Specify stack details screen, in the Stack name section, enter a stack name and then click Next.
-
In the Configure stack options screen, retain the default settings, and click Next.
-
On the Review screen, under the Capabilities section, select I acknowledge that AWS CloudFormation might create IAM resources with custom names checkbox, and then click Create stack.


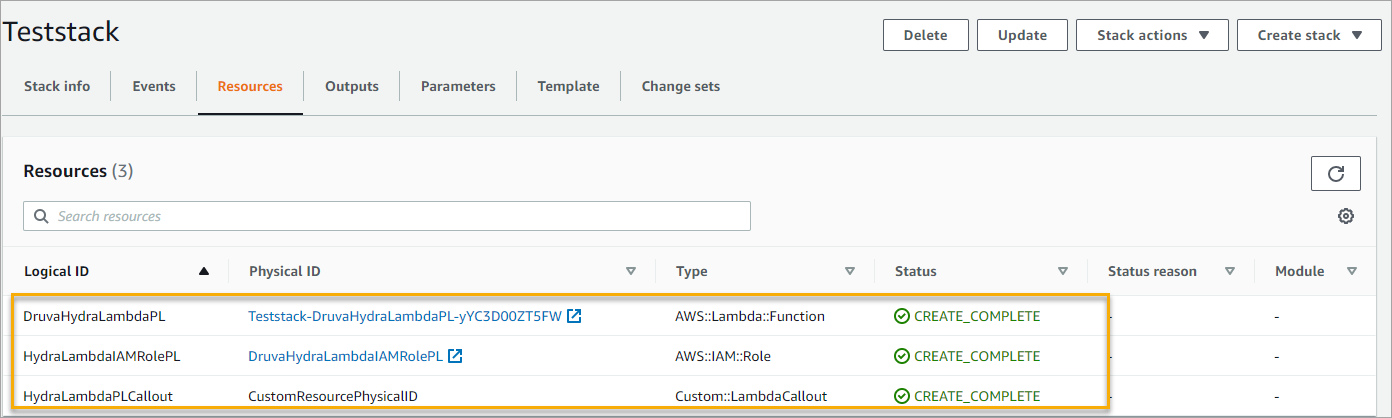
After the stack is created successfully, you should see that an AWS Lambda function is created and called out.
Next Steps
Verify a successful deployment by performing the following steps:
-
Click the Resources tab and verify that the Lambda function is created and called out successfully as shown in the following screenshot:
-
Search and open the Route 53 service, and then click Hosted Zones.
-
On the Hosted Zones page, click the druva.com domain name.
-
On the domain details page, filter the records by the typing global in the search box and verify you get the following search results:
globalapis.druva.com
private-<region>-globalapis.druva.com


Delete the Cloud Formation stack that you created. For more information, see Deleting the Cloud Formation stack.
Creating a CloudFormation stack for DruvaIAM role update
-
Log in to the AWS Management Console.
-
From the top navigation bar, in the search box, search for CloudFormation.
-
On the Stacks page, from the top right corner, click Create Stack > With new resources (standard).
-
On the Create Stack page, provide the following information a:
-
In the Prerequisite - Prepare template section, under Prepare Template, select the Template is ready option.
-
In the Specify template section, under Template source, select the Amazon S3 URL option.
-
In the Amazon S3 URL text box, enter the following URL:
https://s3.amazonaws.com/downloads.druva.com/phoenix/CloudFormation/IAMUpdate.json
-
-
Click Next.
-
In the Specify stack details screen, provide the following information:
-
In the Stack name section, enter a stack name.
-
In the Parameters section, in the IAMRoleName textbox, enter the custom role name used by Druva Proxy if any, else retain the default value DruvaIAMRolePL.
-
-
On the Configure stack options page, retain the default settings, and click Next.
-
On the Review screen, under the Capabilities section, select I acknowledge that AWS CloudFormation might create IAM resources checkbox, and then click Create stack.


After the stack is created successfully, you should see that an AWS Lambda function is created and called out.
Next Steps
Verify a successful deployment by performing the following steps:
-
Click the Resources tab and verify that the Lambda function is created and called out successfully as shown in the following screenshot:
-
Search for IAM and open it.
-
In the left navigation panel, click Access management > Roles.
-
Verify that the DruvaIAMRolePL or the custom role (defined in Step 6b, section Creating a CloudFormation stack for DruvaIAM role update) has a new policy called DruvaIAMPolicy_v2.
-
Delete the Cloud Formation stack that you created. For more information, see Deleting the Cloud Formation stack.


Deleting the Cloud Formation stack
-
Log in to the AWS Management Console
-
From the top navigation bar, Click Services > CloudFormation.
-
On the Stacks page, select the stack that you want to delete and click Delete.

On the delete confirmation box, click Delete Stack.