Manually configure virtual machines for backup
 Business Enterprise Elite
Before you begin
-
Decide to use the default or create a new administrative group.
Administrative groups are formed to simplify server management. It is a logical categorization of servers and virtual machines that share similar attributes. Servers can be grouped based on similar attributes like server type, server location, and operating system.
See, Manage administrative groups. -
Decide to use the default or create a new backup policy.
A backup policy is a set of rules that defines the schedule for automatic backups that occur on virtual machines configured for backup.
See, Manage backup policy. -
Review the prerequisites for configuring virtual machines for backup.
-
The discovered virtual machine list is refreshed every 24 hours. You can also manually refresh the list by clicking the Refresh button.
-
Ensure that you provide the VM credentials to Druva when you configure application-aware backups on virtual machines. See Manage credentials for VMware servers for details.
- If you want to store your backups in local storage, configure the CloudCache. For more information, see Configure CloudCache.
- If you want to restore the virtual machines instantly, map the virtual machines to CloudCache (Linux version) and enable Instant Restore for the selected virtual machines.
- Migrate to production job for a VM cannot reuse the staging datastore used for the instant restore job of that VM. If you want to migrate a virtual machine to production, ensure you have another datastore on the same or different ESXi host, depending on whether you are migrating to the same or alternate host.
Procedure
- Log in to the Management Console.
- From the top menu bar, select your organization if organizations are enabled.
- Click Protect > VMware.
The All vCenters/ESXi Hosts page appears that lists all the registered vCenters/Hypervisors. - You can either select the registered vCenter/ESXi host from the card view or list view or select it from the vCenter/ESXi host list in the left navigation pane.
- Select the virtual machines you want to configure.
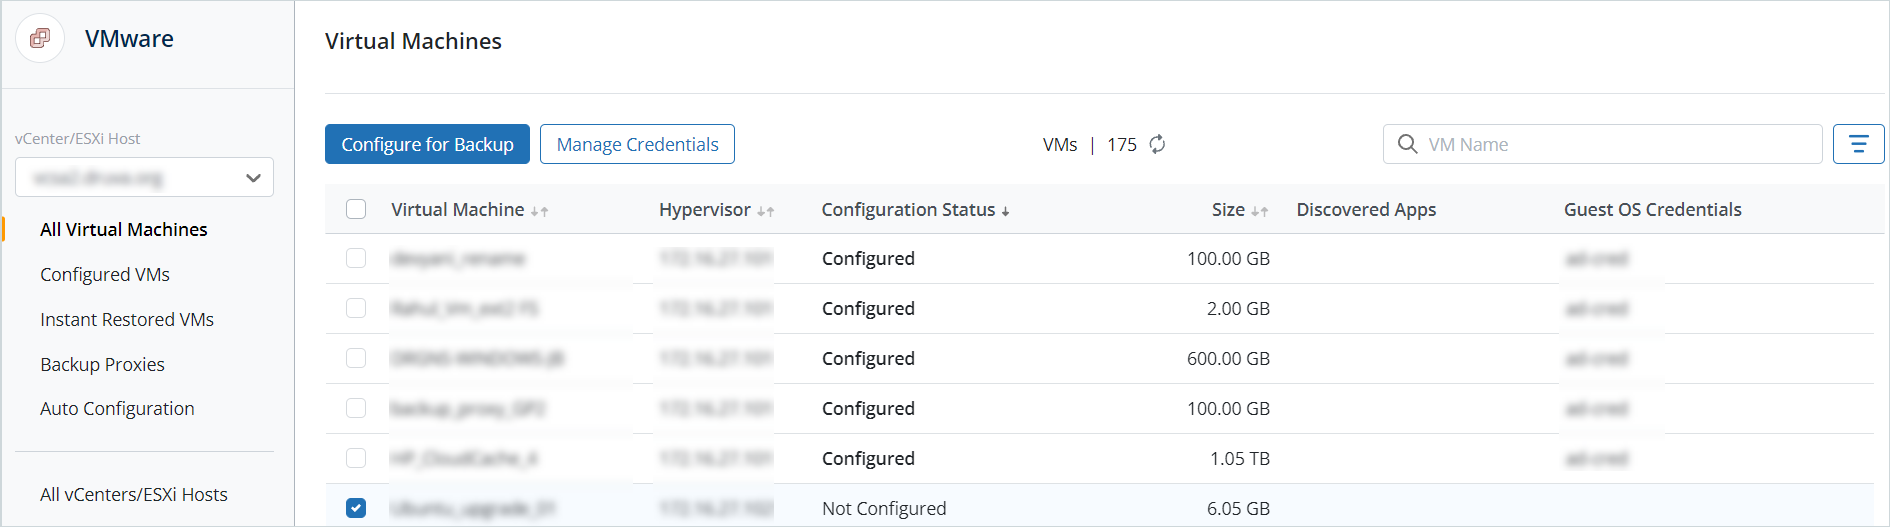
For ease of operation, you can filter the virtual machines according to their configuration status and select the ones with Not Configured status. - Click Configure for Backup.
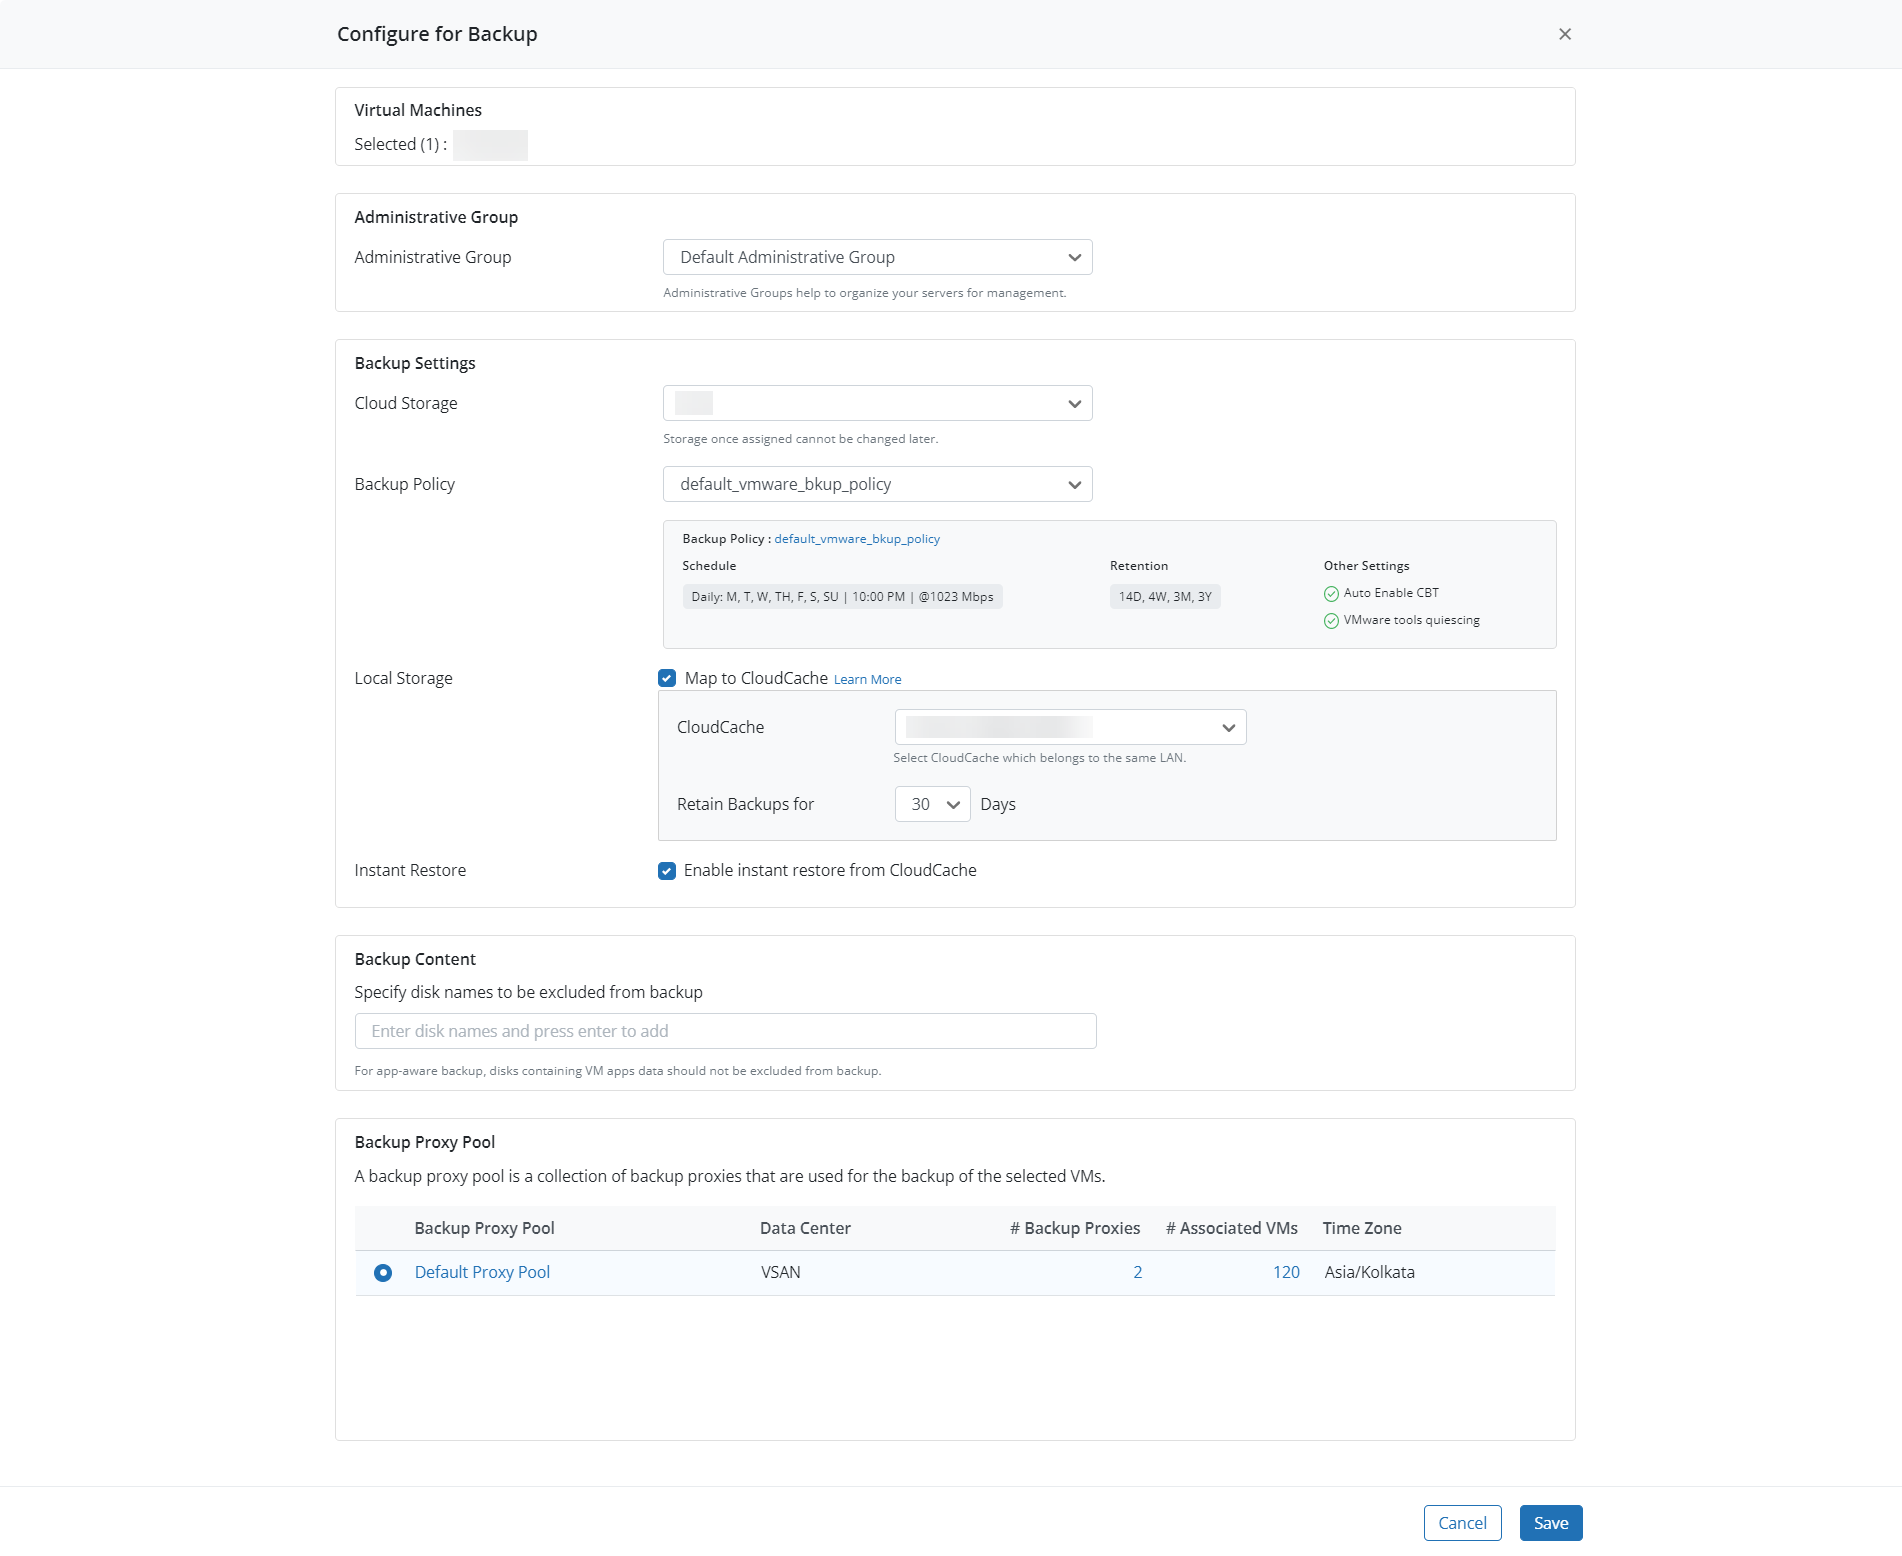
- In the Configure for Backup page, enter the following details:
| Field | Description |
|---|---|
| Administrative Group |
Administrative groups are formed to simplify server management. It is a logical categorization of servers and virtual machines that share similar attributes. Servers can be grouped based on similar attributes like server type, server location, and operating system. You can either: Choose an existing or the default administrative group. Create a new administrative group. See Manage administrative groups. |
|
Backup settings |
Cloud Storage: Region where you want to store the backups of backup recovery points. You cannot change storage later. Backup Policy: Choose an existing or the default backup policy.
From here, you can review the following information specified in the backup policy : Backup Details
|
| Backup Content |
You can leave the Backup Content field empty to include all virtual disks for backup. Or, enter the virtual disks that you don't want Druva to backup. Druva does not list the virtual disks automatically. Manually enter the virtual disks you want to exclude. To exclude virtual disks, provide: The entire path to the virtual disk location if you want to exclude a specific virtual disk. For example:
A wildcard with a string. For example, enter *test* to exclude virtual disks that contain the string test in the path of the virtual disk. For more information on how to use the wildcard character, see VMware backup and restore FAQs. |
| Backup Proxy Pool |
You can select the default backup proxy pool, or you can select a user-created pool. The backup of virtual machines mapped to this pool is triggered in this time zone. For more details on backup proxy pools, see Backup Proxy Load Balancing. |
- Click Save. The status of the virtual machines is updated to Configured and they are also listed on the Configured VMs page.

Note:
- MS-SQL servers that are available for app-aware backups can be identified with
icon next to them after the first backup is run.
- Makes sure to avoid Backup Window overlap by changing the scheduled start time, if the same VM machine is configured for SQL backups, that is, the SQL backups and VMware backups of the same VM should have a different start time.
- To avoid backup errors, SQL backups and VMware backups should not coincide for the same server.
Indicates VMs that are configured for instant restore.
Indicates VMs that are configured for CloudCache but not for instant restore.
- You can click on the configured machine to view its details.
Note: When creating a virtual machine, you can add a Virtual Trusted Platform Module (vTPM) to provide enhanced security to the guest operating system. You must create a key provider before you can add a vTPM.
You can back up these vTPM-enabled VMs. However, v-TPM settings will not be copied in the recovery points during backup. Therefore, whenever you are doing a restore of these VMs, you will have to manually add the vTPM settings later.