Configure CloudCache
 Business
  Enterprise Elite
Overview
After you add, install, and activate CloudCache, configure the schedule that the CloudCache follows to synchronize backup data to the cloud storage.
To ensure optimum bandwidth, we recommend setting these schedules during the off-peak hours. To benefit from the wider off-peak windows on weekends, you can set the weekly schedule for a longer duration.
When you configure the CloudCache, set the resources such as the data volume and maximum bandwidth. You must map the backup sets with CloudCache, and define a retention period for each backup set. CloudCache backs up data from the servers and maintains the data for the configured retention period. After the retention period for a backup set is over, the CloudCache tries to free the space on the CloudCache by removing the non-referenced files. The amount of space that the CloudCache frees depends on how frequently the files are changed.
CloudCache synchronizes the backup data to the Druva Cloud according to the CloudCache synchronization schedule.
Note: CloudCache only stores backup data. The metadata is saved to the Druva Cloud storage. Therefore, you only need to create the Data folder at the time of configuration.
You need to perform the following steps to configure your CloudCache:
Step 1: Provide general settings
-
- Log in to the Management Console.
- Click Manage > CloudCache. Note that if the All Organizations menu is enabled, you have to first select an organization and then click Manage > CloudCache.
-
The CloudCache devices are listed in two tabs – Unconfigured and Configured. Each CloudCache device has an icon next to it that shows the CloudCache release.
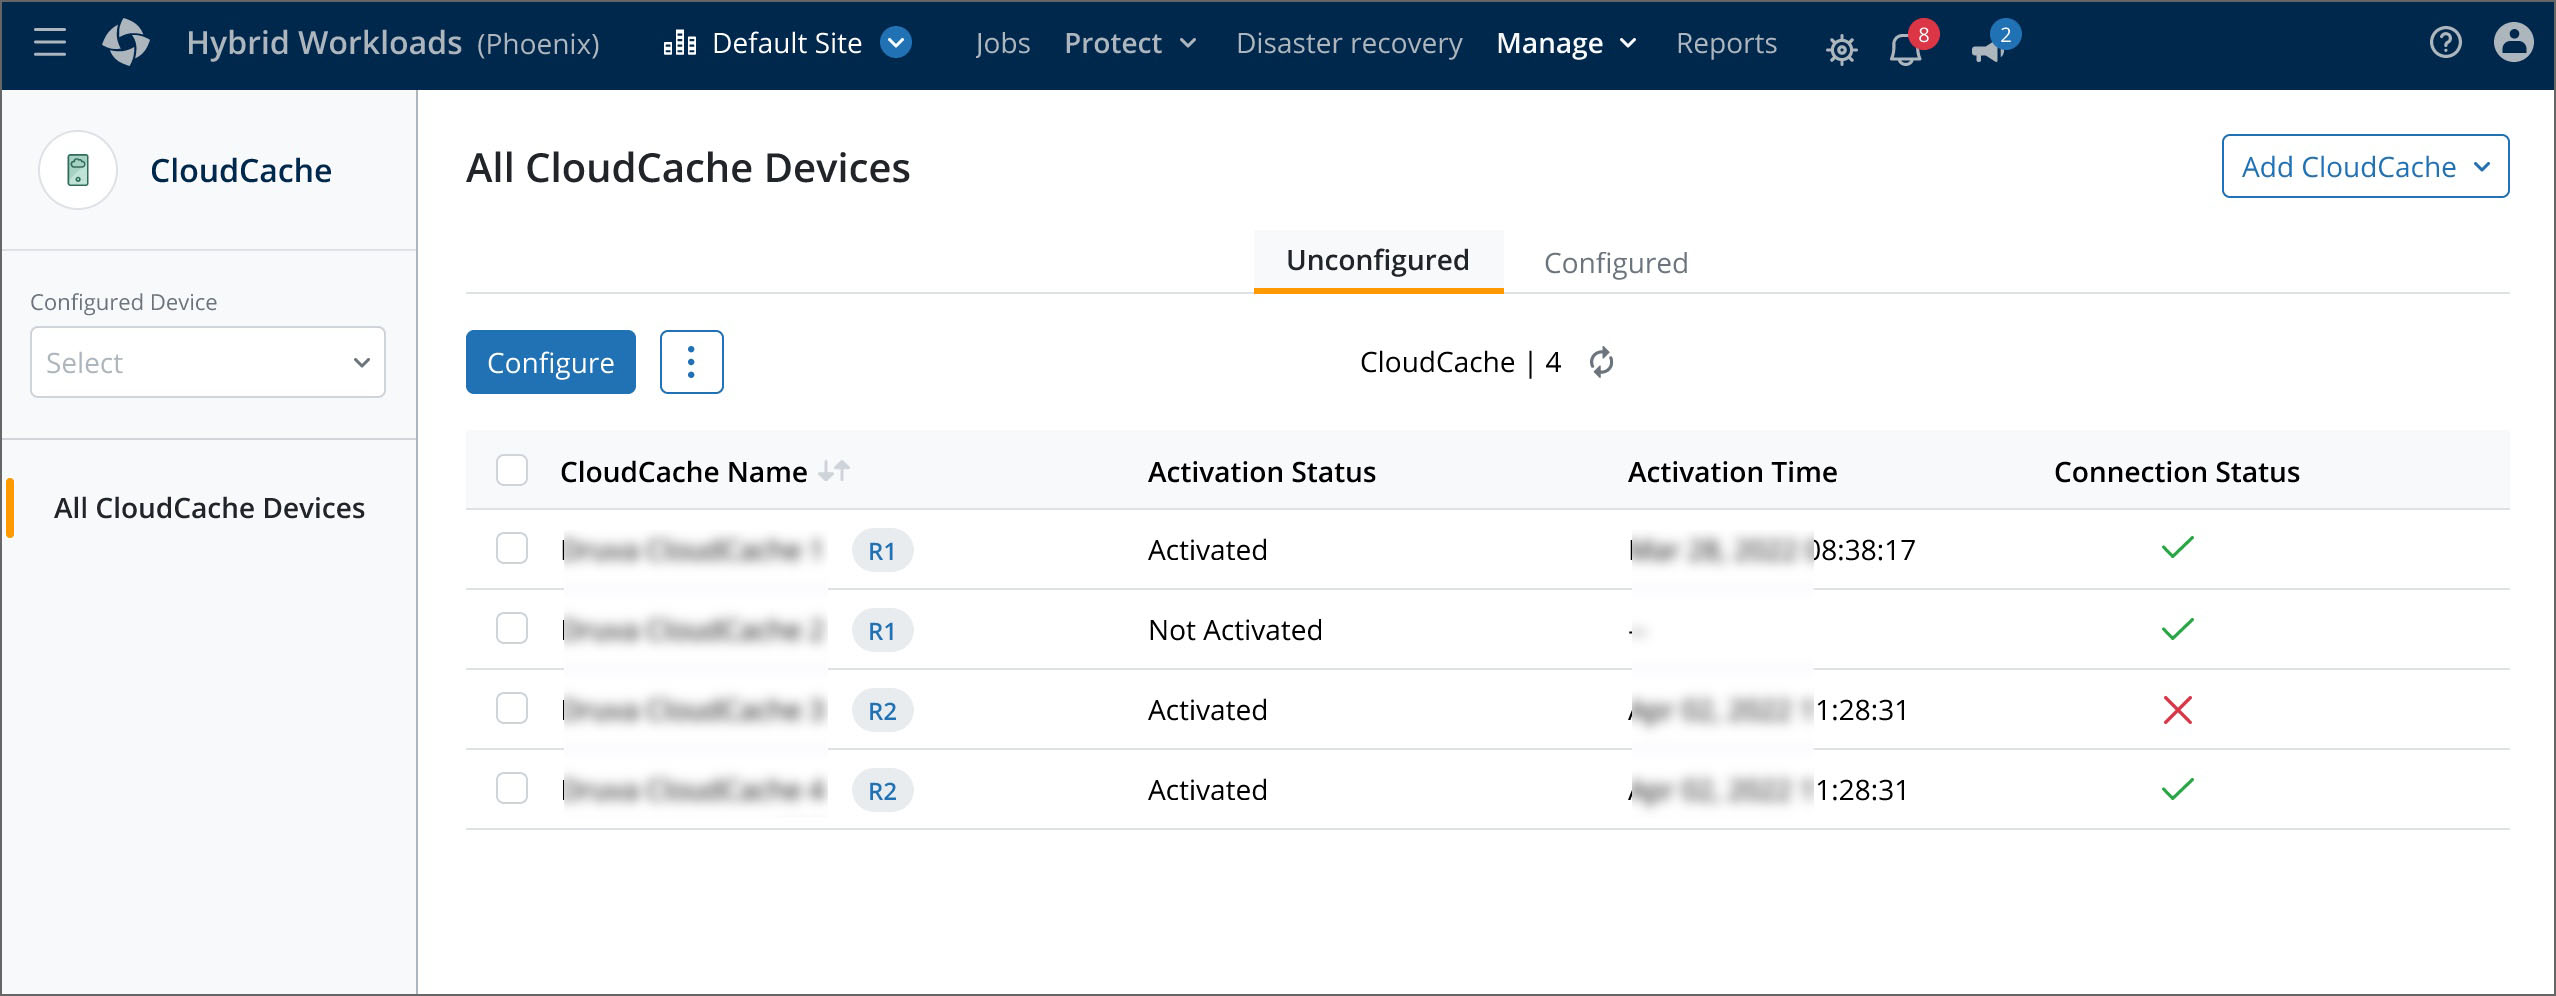
- Under the Unconfigured tab, select a CloudCache that is in the Activated status.
- Click Configure.
The Configure CloudCache page opens.
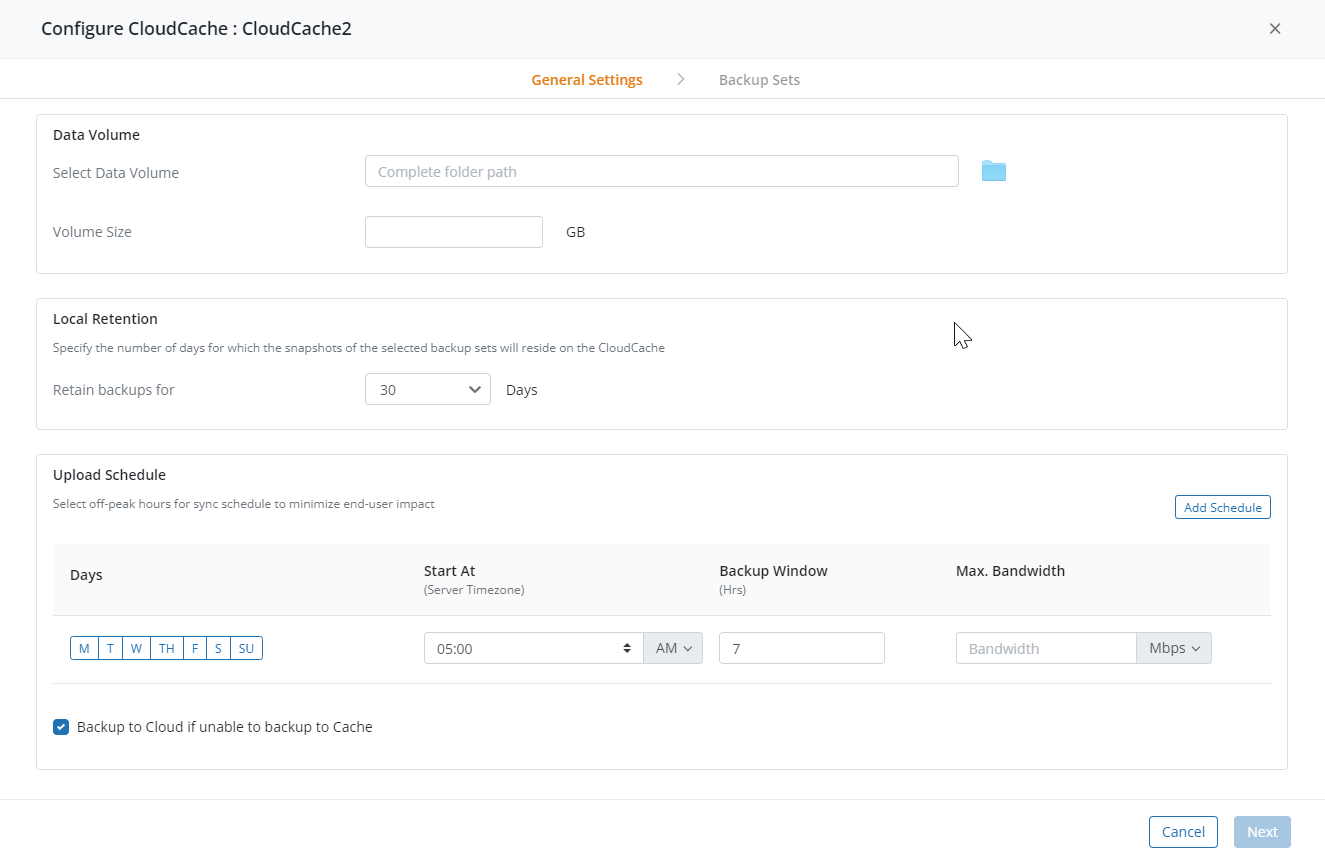
Provide the following details:Field
Description
Data Volume Select Data Volume The path to the data folder. In a Windows CloudCache, you can browse data volumes on the CloudCache server and select a data volume. In a Linux CloudCache the data volume /mnt/data/ is hardcoded. You cannot browse and select another volume.
Note:
- Your server data is saved to the data folder, and the metadata is saved to the cloud storage.
- Symbolic links and mounted folders do not appear in the folder structure.
- CloudCache does not support UNC shares. Ensure that you select a local data folder.
Volume size The size that this volume can accommodate in GB. Local Retention Retain backups for The number of days for which the recovery points of the selected backup sets will reside on the CloudCache. Upload Schedule: The retention period in each backup set determines the duration for which data from the servers reside on the CloudCache. At the end of the retention period, the CloudCache is compacted, thus freeing up disk space. The retention period does not determine the schedule for synchronizing data from the CloudCache to the Druva Cloud. Synchronization operation occurs as per the CloudCache synchronization schedule. The synchronization schedule follows the CloudCache time zone. For example, if you set the synchronization start time to 6 AM, the synchronization operation from the CloudCache located in New York and London starts at 6 AM EST and 6 AM UTC, respectively. Days The days on which you want the CloudCache to synchronize backup data to the cloud storage.
Note: We recommend that you create a separate schedule for weekdays and weekends. This is because you can benefit from the wider off-peak windows on weekends, and thus set a longer duration for synchronization operations.
Start at (Server Timezone)
The time when you want the CloudCache to start synchronization.
Backup Window (Hrs)
The duration in hours within which you want synchronization to occur.
Note: If the synchronization completes within this duration, CloudCache checks for data additions every 10 minutes. If new data is backed up during this period, CloudCache synchronizes this new data to the Druva Cloud. For example, if you set Start time to 9 AM and duration to 4 hours, and the synchronization completes before 1 PM, CloudCache checks for new data every 10 minutes. CloudCache synchronizes this data to the cloud. CloudCache considers this synchronization operation as complete at 1 PM.
Max. Bandwidth (Mbps) The bandwidth in Megabits per second (Mbps) that you want the CloudCache to consume at the time of synchronizing backup data to the cloud storage. Backup to Cloud if unable to backup to Cache
The option to enable Druva to back up the data directly to the Druva Cloud if the Hybrid Workloads agent is unable to back up to the CloudCache because either the CloudCache server is not reachable or it has run out of disk space.
If you do not select this check box and the CloudCache server is not reachable or runs out of disk space, the backup operation fails. For more information, see True hot restore.
Note: This functionality is available only for the Hybrid Workloads agents with version 3.2 r2743 or later on GovCloud only. For older versions, backups by default fall back to Cloud if the CloudCache server is not reachable or runs out of the disk space.
You can add more schedules by clicking Add Schedule in the Upload Schedule section.
- Click Next.
Step 2: Attach backup sets
-
- In the Backup Sets tab, select one, multiple, or all the backup sets, and map to the CloudCache. You can use the backup set filter option to filter the backup set based on type or search using the backup set name.
A backup set represents the data that Druva backs up. A backup set can be a bunch of files on your resource configured for backup. When you attach backup sets to the CloudCache, Druva backs up the data it represents and stores it on the CloudCache.
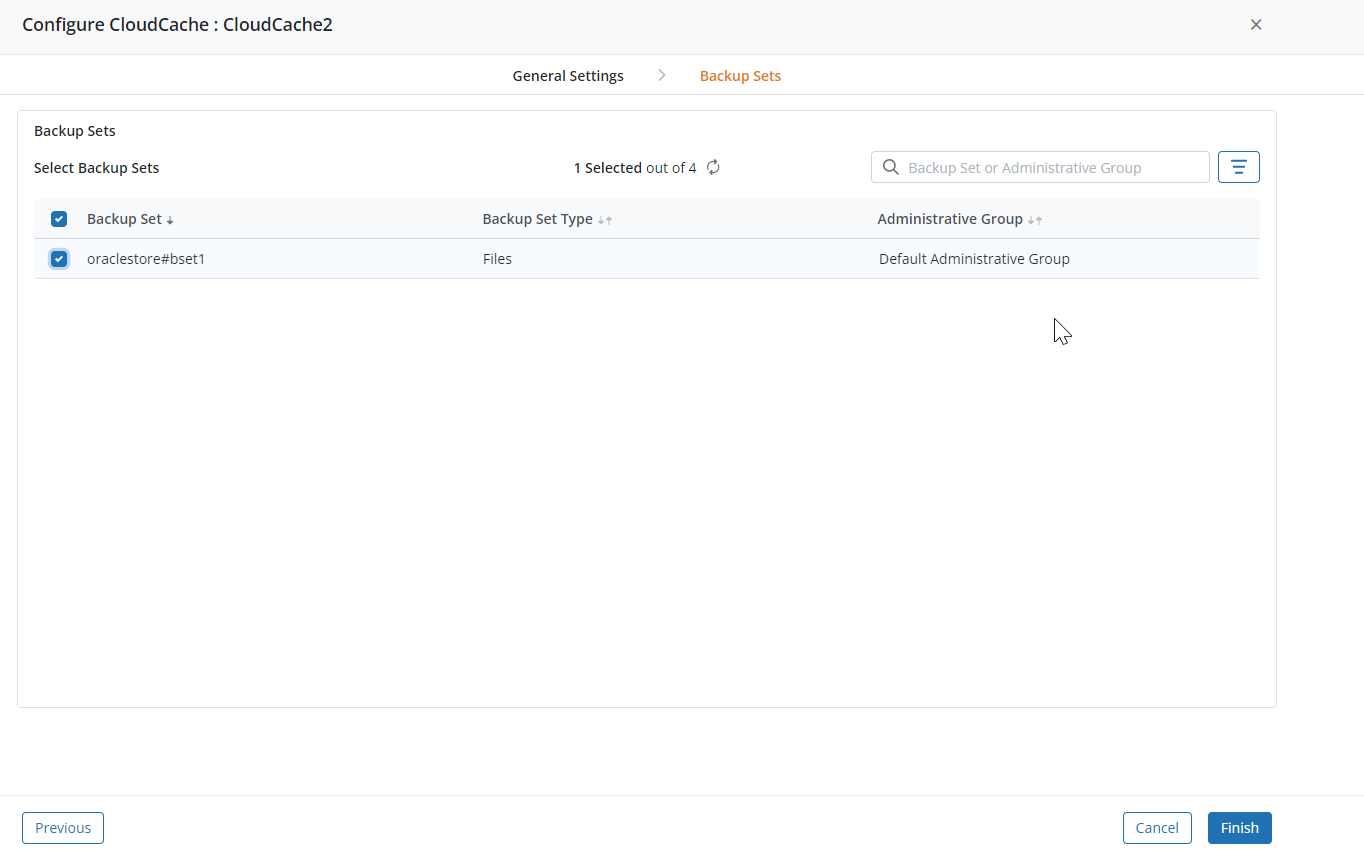
- Click Finish.
- In the Backup Sets tab, select one, multiple, or all the backup sets, and map to the CloudCache. You can use the backup set filter option to filter the backup set based on type or search using the backup set name.
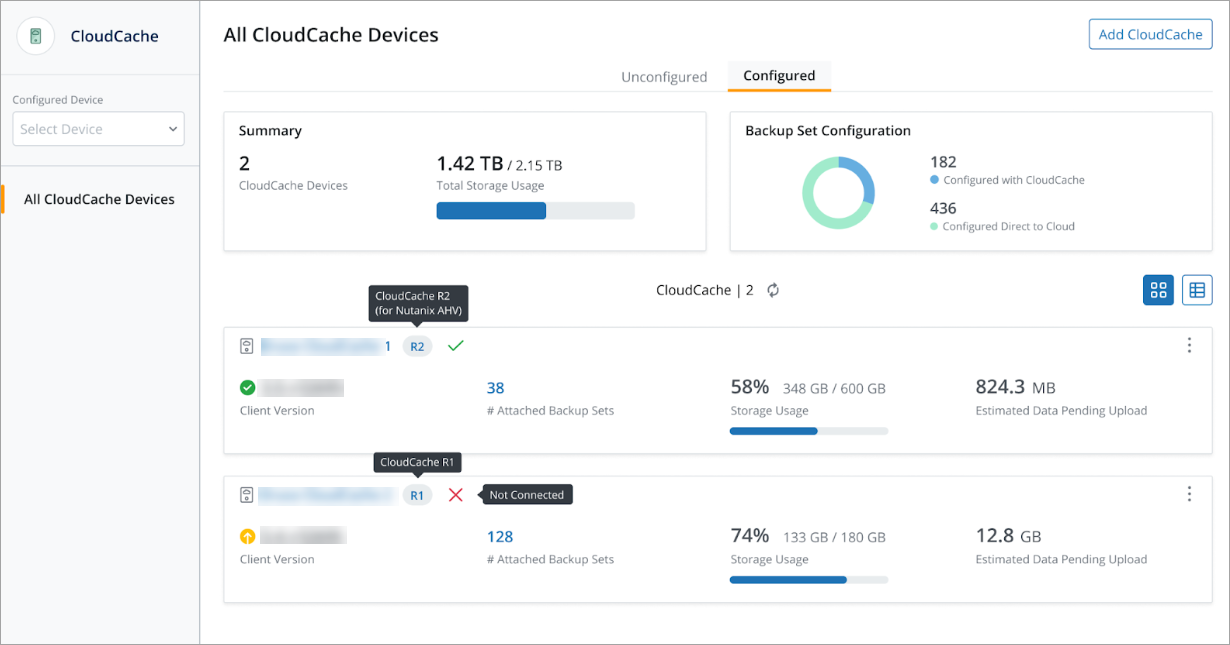
CloudCache appears under the Configured tab on the All CloudCache Devices page.
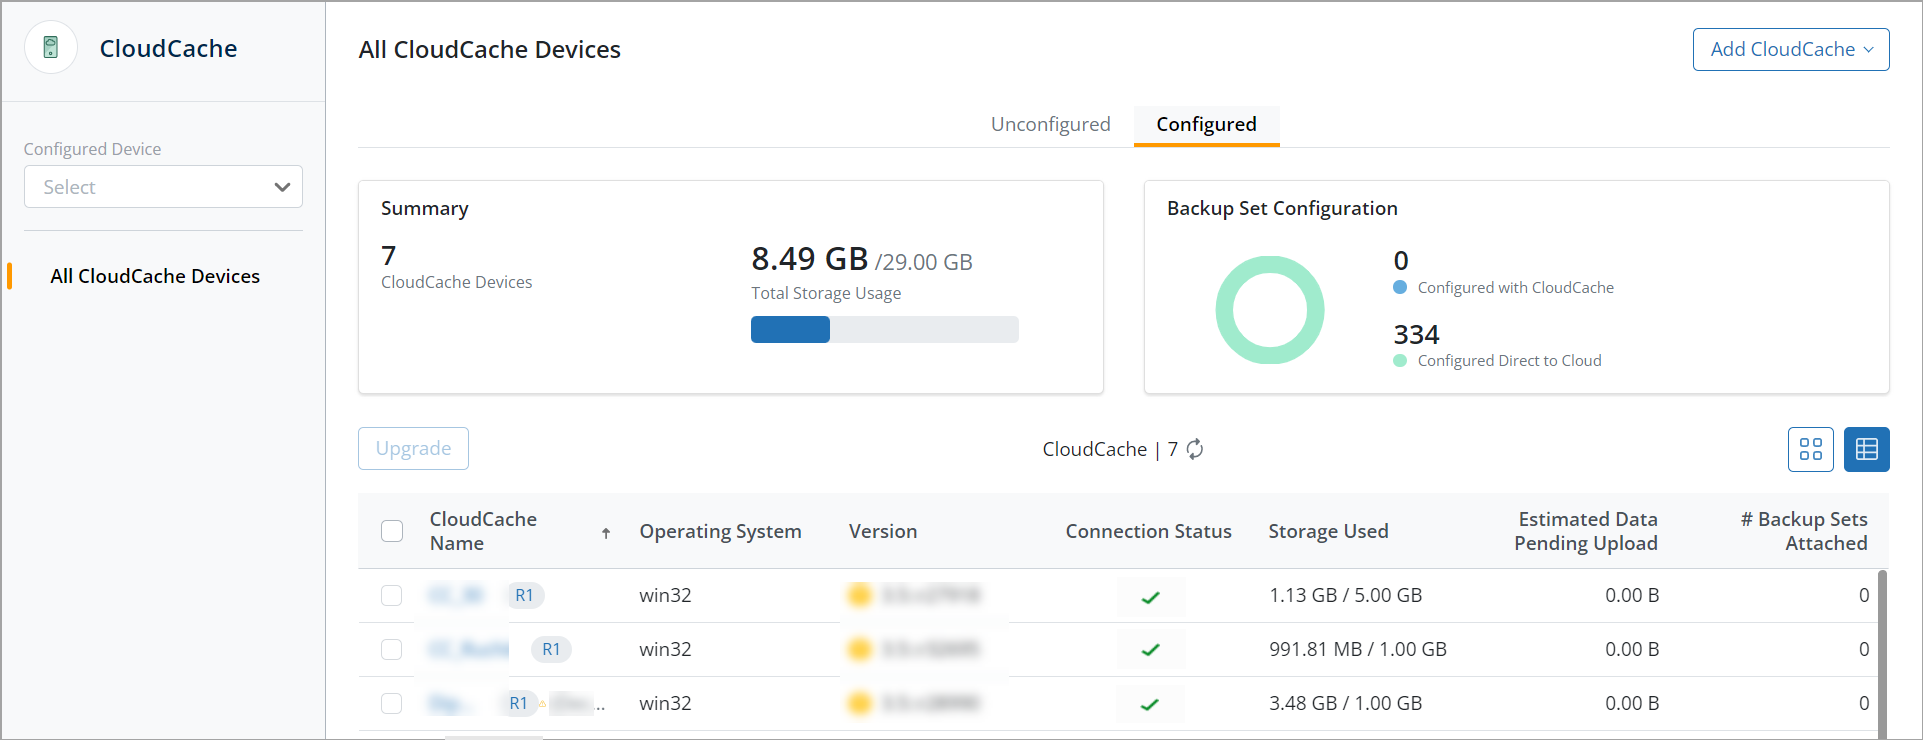
The same information can be viewed in a card view. To switch to the card view, click the card view button  at the top right of the table. You will see the same information in a card format.
Note: Whenever a backup set with existing recovery points is attached to a CloudCache, only the recovery points from the same day will be attached to the CloudCache. It wont synchronize the old backups from the cloud to the CloudCache.