Restore full virtual machine
 Business Enterprise Elite
If you have taken a standard backup (non-application aware), you can restore:
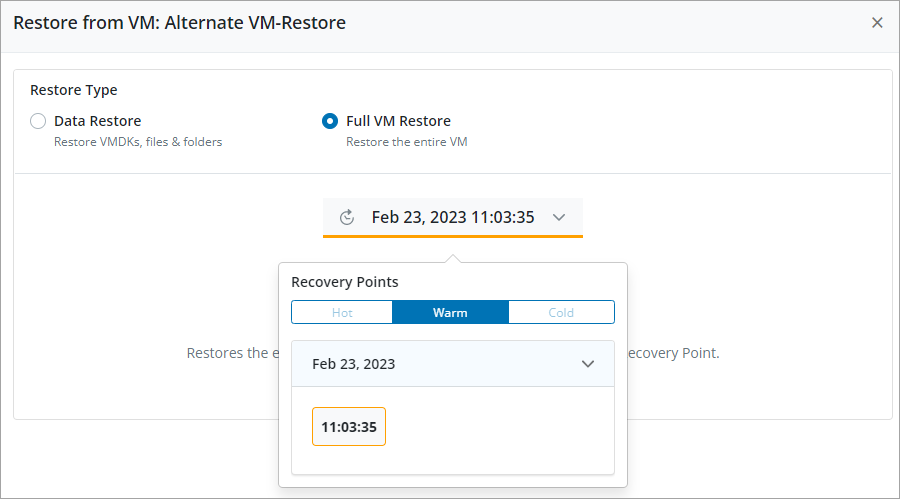
- Full virtual machine: Restores the entire virtual machine.
- Data Restore: Restores VMDKs, files and folders. For more information, see Restore virtual machine data.
Full VM restore, restores the entire VM with all its VMDKs from a selected recovery point.
During original restore, the virtual machine will be restored at the same data store and ESXi as it was present before the restore. The original virtual machine will be overwritten. If the target virtual machine has new VM disks attached which were not present at the time of backup then they will be detached.
Note: Virtual machine restore to original location is a Guest Repair operation. This requires the original virtual machine to be present during the restore operation.
You can restore virtual machines to an alternate location in the following scenarios:
- Restore virtual machines present on one VMware Cloud on AWS (VMC) to another (existing or new) VMware Cloud on AWS (VMC) provided they are configured in the same Organization.
- Restore virtual machines present on one On-premise vCenter to another (existing or new) On-premise vCenter provided they are configured in the same Organization.
- Restore virtual machines present on VMware Cloud on AWS (VMC) to On-premise vCenter (existing or new) and vice-versa provided they are configured in the same Organization.
To know more about the restore workflow, see About VMware restores.
For backup and restore of VMs with NVMe controllers or disks, the following scenarios and limitations are applicable:
- If you have upgraded to version 6.0.0 -147290 of the VMware backup proxy, you can backup and restore VMs with NVMe controllers or disks. Restores from the new recovery points created after the agent upgrade are subject to some Limitations.
- For restores of virtual machines with NVMe controllers or disks from older recovery points, you need to add ENABLE_NVME_CONVERSION = True parameter in the Phoenix.cfg file on the VMware backup proxy. The restores are subject to some Limitations.
- MS SQL database restores from VMs with NVMe controllers or disk are not supported. Full VM restores having app-aware policy configured will restore such databases as part of VM restores.
- The backups will fail if you have set HotAdd as a transport mode in the Phoenix.cfg file for the VMs having NVMe disks. However, if no changes are made to transport mode in the Phoenix.cfg file, though HotAdd is prioritized, the transport mode will fall back to NBDSSL. All sorts of restores will work from these recovery points.
Prerequisites
- Before you proceed with the restore, ensure you have reviewed the prerequisites and considerations.
- For the list of supported disks, partitions, and files, see Support matrix.
- You must have write permission for the target location, where you want to restore the files.
Procedure
- Log in to the Management Console.
- From the top menu bar, select your organization if organizations are enabled.
- Click Protect > VMware.
The vCenter/ESXi host page appears that lists all the registered vCenter/hypervisors. - You can either select the registered vCenter/ESXi host from the card view or list view or select it from the vCenter/ESXi host list in the left navigation pane.
- In the left navigation pane, click Configured VMs.
- Select the virtual machine you want to restore.
- Click Restore > VM Restore.
- Click Full VM Restore and then select a recovery point.
To know more about restoring cold recovery points, see Restoration of cold-tier data.
- Click Proceed to Restore.
- Select the location to restore.
- Original Location: Restores the entire VM to the original hypervisor with original settings.
- Alternate Location: Creates a new VM on any selected hypervisor with the customized settings.
Enter the following details for an alternate location.Note: Druva does not power on a full virtual machine restored to an alternate location.
Field Description Destination VMware Setup From the dropdown list, select the VMware setup where you want to restore the virtual machine. Backup Proxy Pool Lists the backup proxy pools available in the vCenter server.
It is recommended that you select a backup proxy pool with backup proxies that are locally connected to the destination hypervisor for restore.
Destination Hypervisor From the dropdown list, select the ESXi hypervisor where you want to restore this virtual machine. Destination Datastore From the dropdown list, select the data store where you want to restore this virtual machine. Available Space In the case of a full restore, the destination must at least have 1 GB space excess than the files being restored.
In the case of disk restore, the destination must have at least have space equal to the files being restored.
Compute Resource Select host, cluster, or a resource pool where you want to restore the virtual machine. You cannot select a datacenter or a folder.
This option is not available if you are restoring a virtual machine to a standalone ESXi host.
Folder Select a folder under the data center hierarchy where you want to restore the virtual machine.
This option is not available if you are restoring a virtual machine to a standalone ESXi host.
Network Select a network setting available at the destination hypervisor.
For on-premises, If a network adapter was not attached to the virtual machine at the time of backup, Druva will attach the VMXNET3 or VMXNET2 type adapter and restore the virtual machine with the selected network setting.
If a network adapter was attached to the virtual machine at the time of backup, Druva will restore the virtual machine with the backed up network adapter and selected network setting.
If multiple network adapters were attached to the virtual machine at the time of backup, Druva will restore the virtual machine with all the adapters and selected network settings.
For troubleshooting network issues, see Troubleshooting.Recovered VM Name (Optional) -
Enter the name to be given to the recovered VM. If this field is left blank, or a folder with the recovered VM name already exists in the datastore, the recovered VM will be named <Name of the original virtual machine>_<counter>.
- - |?*:/\"<>' are not allowed in the recovered VM name.
- The VM name must not exceed 80 characters
-
-
Review the restore details, and click Finish. After clicking Finish, Druva initiates restore pre-checks. These checks look for issues that can cause your restore job to fail before the restore has even started. Druva does not initiate a restore job if the restore pre-checks identify any issues. You must fix any identified issues before restoring your data. For more information, see VMware restore pre-checks.
Druva creates a new virtual machine with the same configuration as the original virtual machine using the following naming syntax:
<Name of the original virtual machine>_<counter>
The <counter> increments by 1 for subsequent restores of the virtual machine.
Example:
Suppose you want to perform a full VM restore of a virtual machine called Test Virtual Machine to an alternate location and the Recovered VM name is left blank or a folder called Test Virtual Machine already exists in the datastore, Druva will name the recovered virtual machine Test Virtual Machine_1.
If you perform a second full VM restore of the same virtual machine to an alternate location and leave the Recovered VM name field blank or a folder with the name Test Virtual Machine already exists in the datastore, Druva will name the recovered virtual machine Test Virtual Machine_2.
Restore processing
The triggered restored request is processed in one of the following manners:
- If the target virtual machine has no backup or restores request running: The triggered restore request will be processed.
- If the target virtual machine is processing a backup request: The following message is displayed on the screen.
A backup process is currently running on target VM. Do you wish to cancel backup and trigger restore?
- If you select Yes, the backup in progress will be canceled and the restore request will be triggered. On the Jobs page this backup job will be marked as canceled and an error PHOENIX247 will be displayed. For more information on the error, see Druva errors.
- If you select No, the triggered restore request will be canceled and you will be directed to the restore screen.
- If the target virtual machine is already processing a restore request: As two restore requests cannot run in parallel on the same virtual machine, the following message will be displayed on the screen.
Failed to schedule restore. Error : Cannot proceed as another restore operation is in progress for the same VM.
Impact of post backup configuration changes
If you change the virtual machine configuration such as name, memory, and vCPUs after backing up the virtual machine:
- Druva overwrites the updated configuration at the time of restore
- The changed configuration is rolled back to what it was when the virtual machine was backed up.
- In addition, the VMware hypervisor changes the thin disk to a thick disk in the following scenarios:
If Changed Block Tracking (CBT) was disabled at the time of backup.
- The virtual disk was attached to a virtual machine that was created on top of an NFS datastore at the time of backup. For more information, see the VMware KB article.
- All data blocks of the thin disk were allocated at the time of backup.