Restore virtual machines using sandbox
Overview
Would you like to check if the chosen recovery point on a VM is ransomware-free? Use the Sandbox Recovery feature in the VMware Restore workflow to recover a specific recovery point, followed by an antivirus scan in a sandbox environment. You can certify whether the selected recovery point is clean based on the scan results.
Note: The virtual machine is recovered in a sandbox environment with an isolated VM (Sandbox VM) running without network resources. An antivirus scan is then performed on this VM.
To use this feature:
- You must have the appropriate license. For more information, contact support.
- Upgrade the VMware Backup proxy to the latest version. For more information, see Restore prerequisites and considerations.
Note: Malicious file scan based on file hashes is also supported. For more information, see Add file hash values of malicious files for scanning.
Prerequisites
Before you proceed with the restore, ensure you have reviewed the Restore prerequisites and considerations.
Procedure
- Log in to the Management Console.
- Under Services >Enterprise Workloads, click VMware.
- Select your organization if organizations are enabled.
- The vCenter/ESXi host page appears that lists all the registered vCenter/hypervisors.
- You can either select the registered vCenter/ESXi host from the card view or list view or select it from the vCenter/ESXi host list in the left navigation pane.
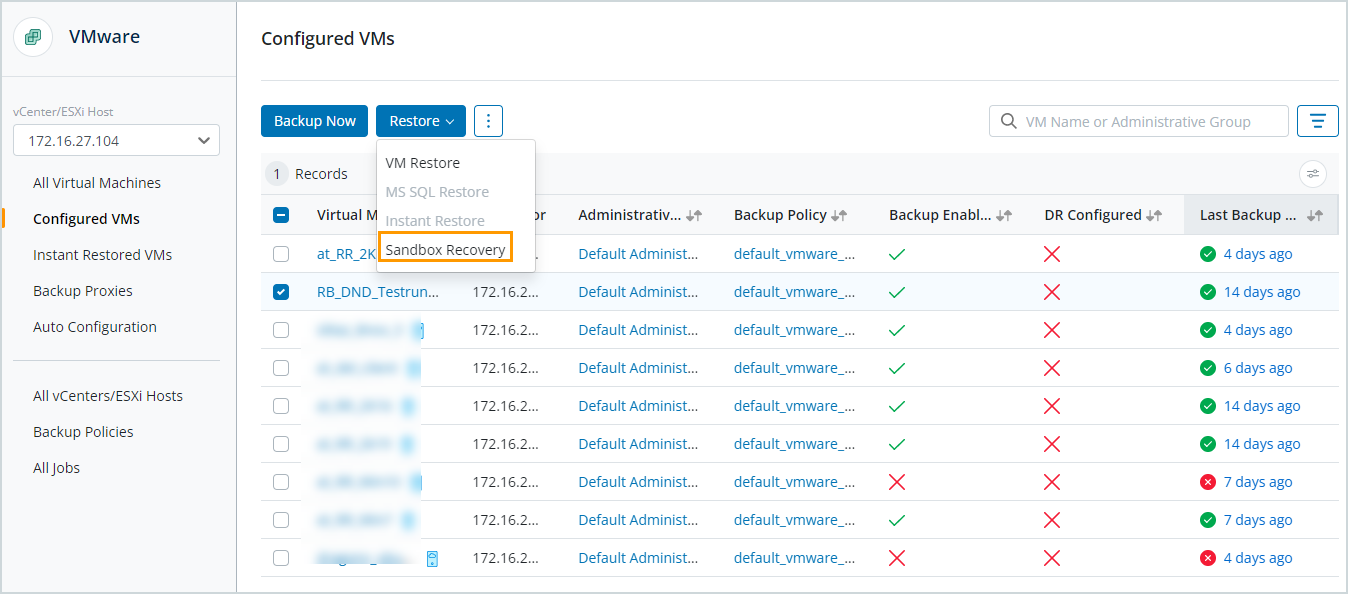
- In the left navigation pane, click Configured VMs.
- Select the virtual machine you want to restore.
- Click Restore > Sandbox Recovery.
- On the Recovery point selection screen, select the recovery point and click Proceed to Restore.
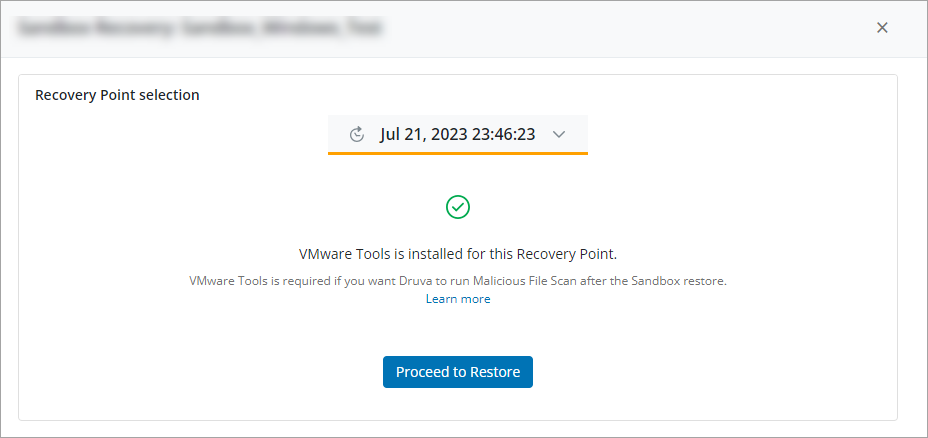
The alert warning email is sent:Note: Regardless of whether VMware Tools is installed, you can continue with the restore. If VMware Tools is not present, an alert warning email is sent to the administrator, and a job is created. Post-restore, a scan can start only if you install VMware Tools within 24 hours.
- If VMware Tools is not installed
- If VMware Tools is installed but not ready for interaction. In this case, you need to log in to the VM to ensure that the VMware Tools service is running.
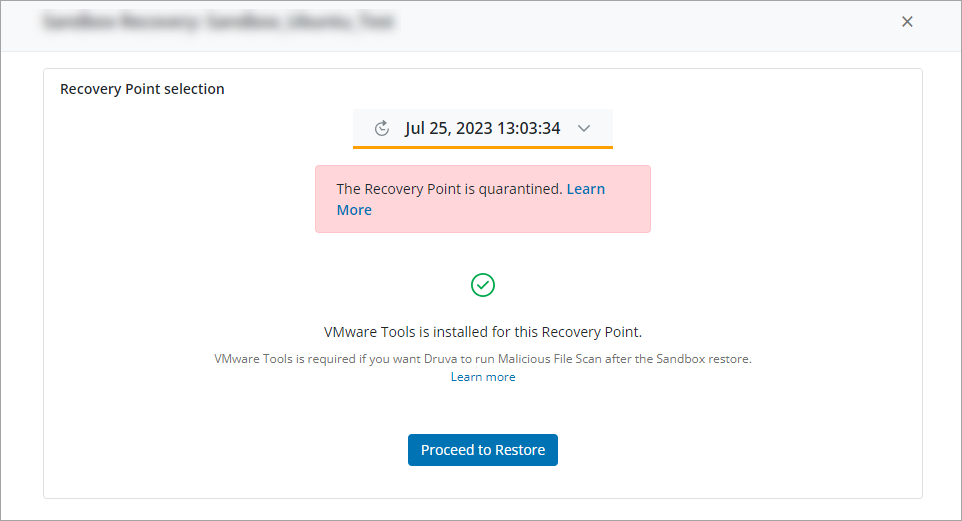
For a quarantined recovery point, the following message is displayed on the Recovery Point selection screen.
Note: For more information on how to install VMware Tools, see Troubleshoot VMware issues.
- Select and enter the restore details on the Sandbox Recovery window.
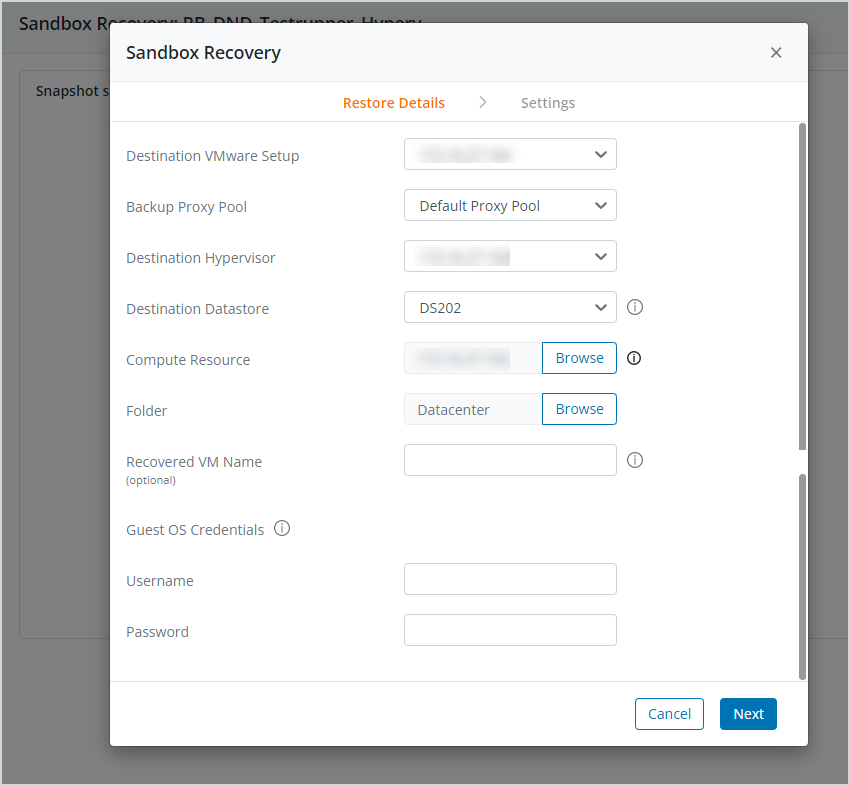
Field Description Destination VMware Setup
From the drop-down list, select a vCenter/ESXi that has at least one Backup proxy in the connected state.
This is the vCenter/ESXi where the restore will happen.
Backup Proxy Pool
From the drop-down list, select a Backup proxy pool. It is recommended that you select a Backup proxy pool with backup proxies that are locally connected to the destination hypervisor for restore.
Note: A proxy can communicate with the Sandbox VM via VMware Tools.
Note: If you are using an old backup RPM proxy and performing sandbox restore, then even if the VMware Tools is already installed, it will not be detected because the old RPM proxy does not have that provision. In such a case, you must first install a new RPM proxy, take one latest backup, and then trigger Sandbox Recovery to detect the VMware Tools installed.
Destination Hypervisor Select the required hypervisor. Destination Datastore
From the dropdown list, select the data store where you want to restore this virtual disk.
Note: Datastore with sufficient disk space are available for selection.
Compute Resource Select host, cluster, or a resource pool where you want to restore the virtual disk. You cannot select a datacenter or a folder.
This option is not available if you are restoring a virtual disk to a standalone ESXi host.Folder Select a folder under the data center hierarchy where you want to restore the virtual disk.
This option is not available if you are restoring a virtual disk to a standalone ESXi host.Recovered VM Name (optional)
Enter the name to be given to the recovered VM (Sandbox VM). If this field is left blank, or a folder with the recovered VM name already exists in the datastore, the recovered VM will be named <VM_Name_1>.
A Sandbox VM is created with the above name (<VM_Name_1>), where restore will happen. It's an isolated VM that does not have the capability to interact with the public network.
Note: Post restore, the actual antivirus scan runs on the Sandbox VM.
Guest OS Credentials Username Valid username. Password Valid password. - Click Next.
- On the Sandbox Recovery:Settings tab, provide the following details:
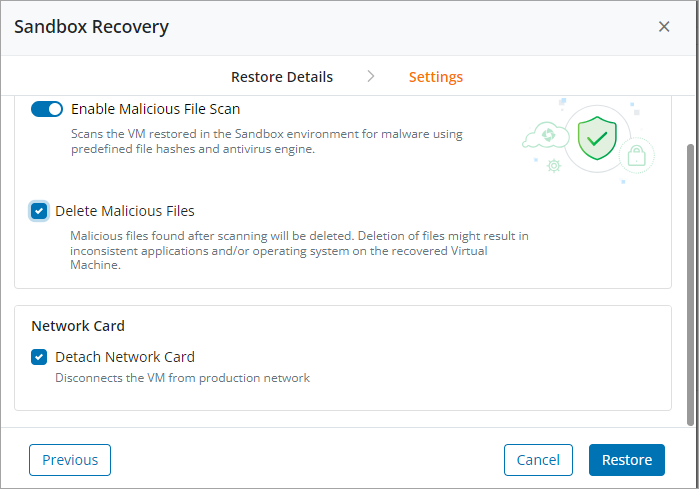
Field Description Enable Malicious File Scan
Enable this option to scan the VMs restored in the sandbox environment. These VMs are scanned for malware using predefined file hashes and antivirus engine.
If this option is enabled, the job will also be created on the Ransomware Recovery, mapping it to the job that has been triggered.Note: If this field is disabled and a restore is performed, the Sandbox Recovery proceeds without an antivirus scan operation. A job is created, but no notification will be sent to the Ransomware Recovery.
Delete Malicious Files
Select this option to delete any malicious files found after the scan.
By default, this option is not selected.Note: If the Enable Malicious File Scan toggle is turned off, then the Delete Malicious Files option is disabled.
Detach Network Card
Select this option to isolate the VM from the production network.
Note: In this case, restore will be performed in the sandbox environment.
- Click Restore. Pre-checks are performed, and a restore job is created. For more information, see VMware restore pre-checks.
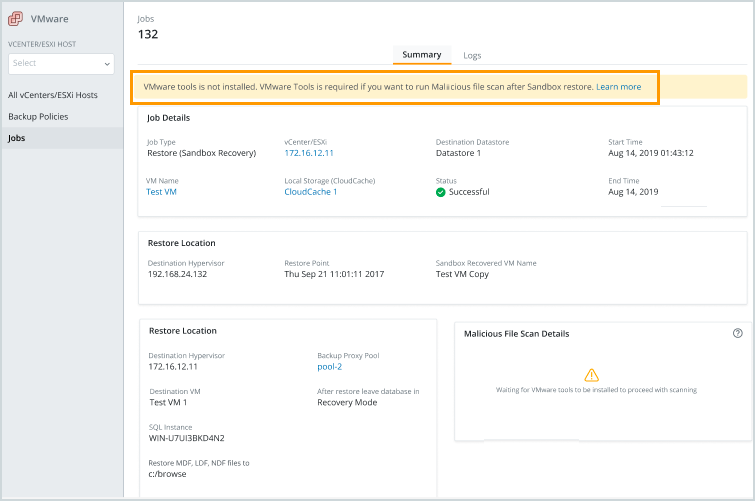
Note: On the restore job Summary page, the above message is displayed if VMware Tools is not installed. For more information about Malicious File Scan details, see Monitoring VMware jobs.
- Druva initiates the following pre-scan checks after the restore of the VM is completed.
- If the VM is powered on, VMware Tools is installed, or VMware Tools is installed but not ready for interaction
- If the VM has the proper credentials.
If any pre-scan checks fail, the scan will not happen, and the restore will be marked as successful with error.
For more information, see Sandbox recovery scenarios.
Limitations
- Sandbox recovery is not supported if the recovery point (RP) is generated by excluding the disks that have boot partitioning.
- Sandbox restore scan is not a resumable job. You have to retrigger it in case of failure.
- The following operating system is supported for restore but not for a scan during a sandbox recovery workflow.
- Windows 7
Sandbox recovery scenarios
The following table describes the success and failure scenarios for a Sandbox Recovery job.
See Monitoring VMware jobs for more information on scan status icons and Malicious File Scan details.
| Scenario | Job state | Next job state | Action | Status/Remarks |
|---|---|---|---|---|
|
VMware Tools not installed within 24 hours of the job start time |
Queued Restore initiated |
Running Restore is in process |
VMware Tools not installed after 24 hours |
Successful with errors VM restored. No scan. |
|
Queued Restore initiated |
Running Restore is in process |
Successful VM restored and scanned |
|
|
Queued |
Running Restore is in process |
Successful with errors VM restored. Scan failed. |
|
|
Restore failed |
Queued Restore initiated |
Running Restore is in process |
Failed No restore |