Migrate VMware backup proxy from CentOS to new Ubuntu proxy
Prerequisites
Ensure you meet the required prerequisites. For more information, see Prerequisites to install the backup proxy.
If you have not deployed any proxy, use Druva Proxy Deployer to deploy the Ubuntu-based proxy. For more information, see article.
To migrate an existing CentOS-based proxy to the new Ubuntu proxy, make sure the existing proxy is connected. In this case, the Connection status to vCenter column status is connected (Green).
Ensure you have the following information:
- vCenter credentials
- Web proxy credentials (If you use a Web proxy in your environment)
- IP settings
- Existing VMware proxy credentials (if any). The default username is root, and the default password is druvaphoenix.
Procedure
Step 1: Deploy an Ubuntu-based backup proxy
Perform the following:
- Log in to the Management Console.
- From the top menu bar, select your organization if organizations are enabled.
- Click Protect > VMware.
- The All vCenters/ESXi Hosts page appears that lists all the registered vCenter/hypervisors.
- You can either select the registered vCenter/ESXi host from the card view or list view or select it from the vCenter/ESXi host list in the left navigation pane.
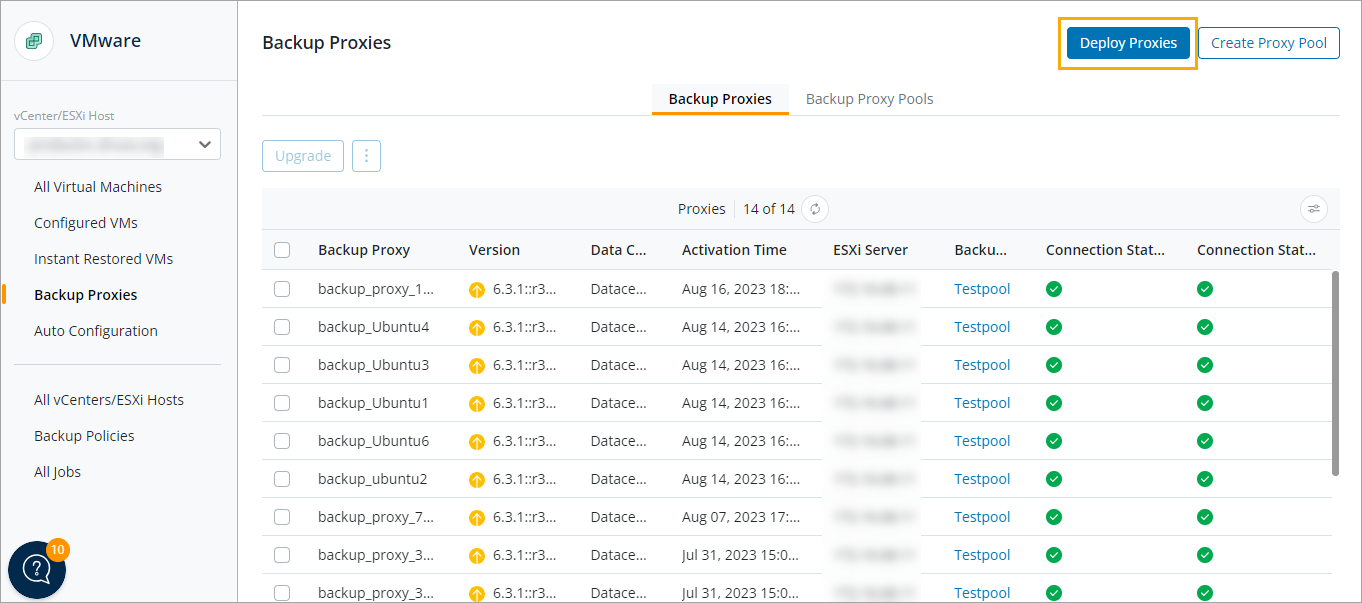
- In the left pane, click Backup Proxies.
- Click Deploy Proxies.
- Select the datacenter where you want to deploy the backup proxy.
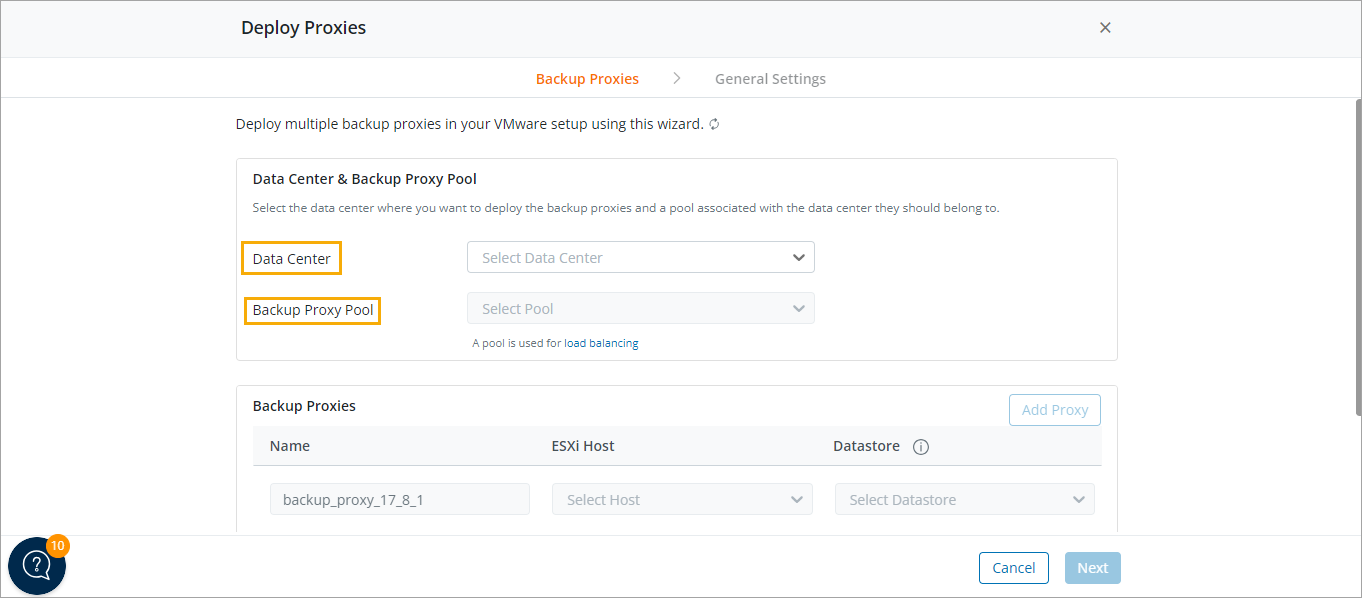
- Select the existing backup proxy pool.
- Click Add Proxy and provide the following details.
- Name: Enter the name of the backup proxy. Ensure that the name is not used by another backup proxy. Also, ensure that the name does not use special characters:
- ESXi Host: Select the ESXi host.
- Datastore: Select the datastore. Ensure that the datastore has at least 110 GB of free space.
Note: Click Add Proxy to add more proxies.
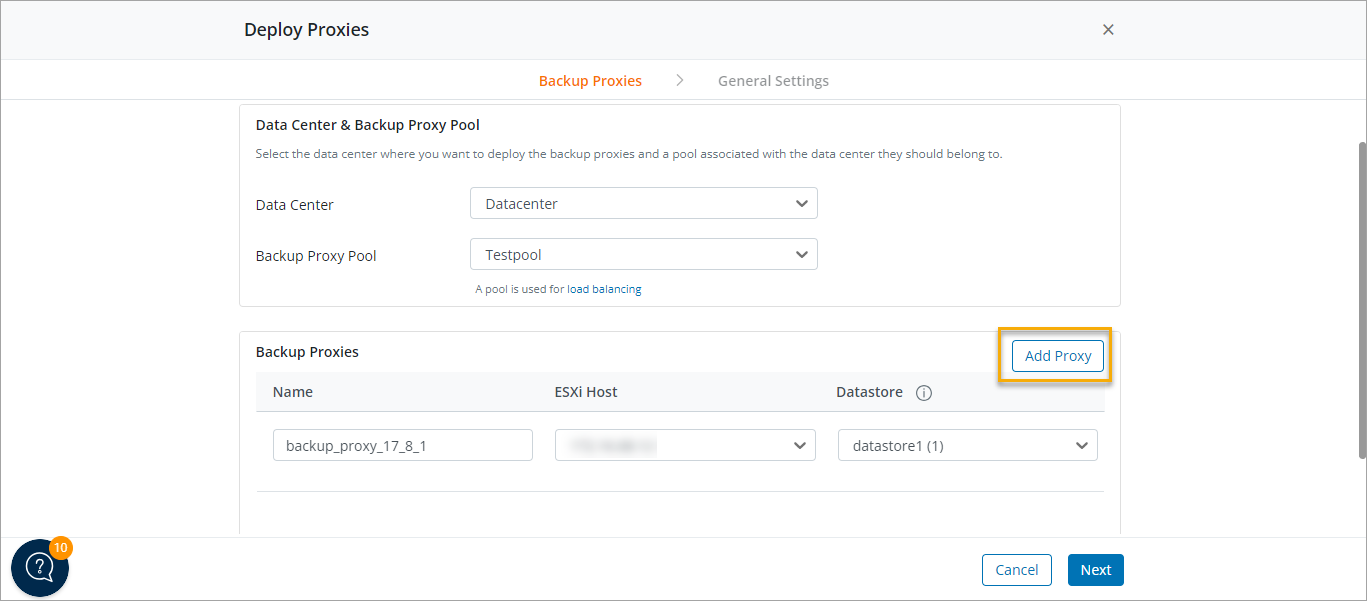
- Click Next.
- Provide the Network settings information:
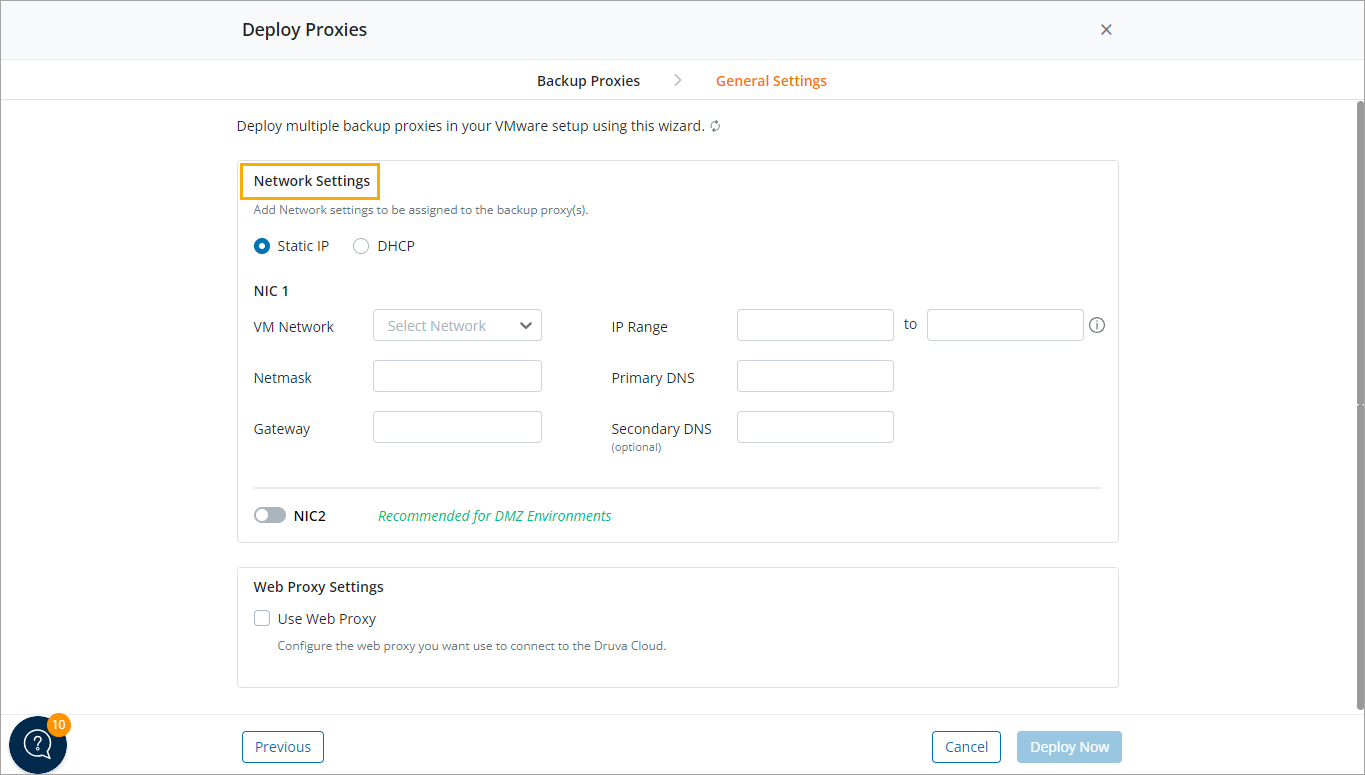
Network details Static IP
Update the following details:
- IP address - Mandatory
- Netmask - Mandatory
- Gateway - Mandatory
- VM Network - Mandatory (Select network from existing list)
- Primary DNS - Mandatory
- Secondary DNS - Optional
If you are adding NIC 2 (Recommended for DMZ Environments), update the following details:
- IP address - Mandatory
- Netmask - Mandatory
- Default gateway - Optional
- VM Network - Mandatory (Select network from existing list)
- Primary DNS - Optional
- Secondary DNS - Optional

DHCP
Select VM Network from an existing list of networks.
The IP address for a VM is dynamically assigned.
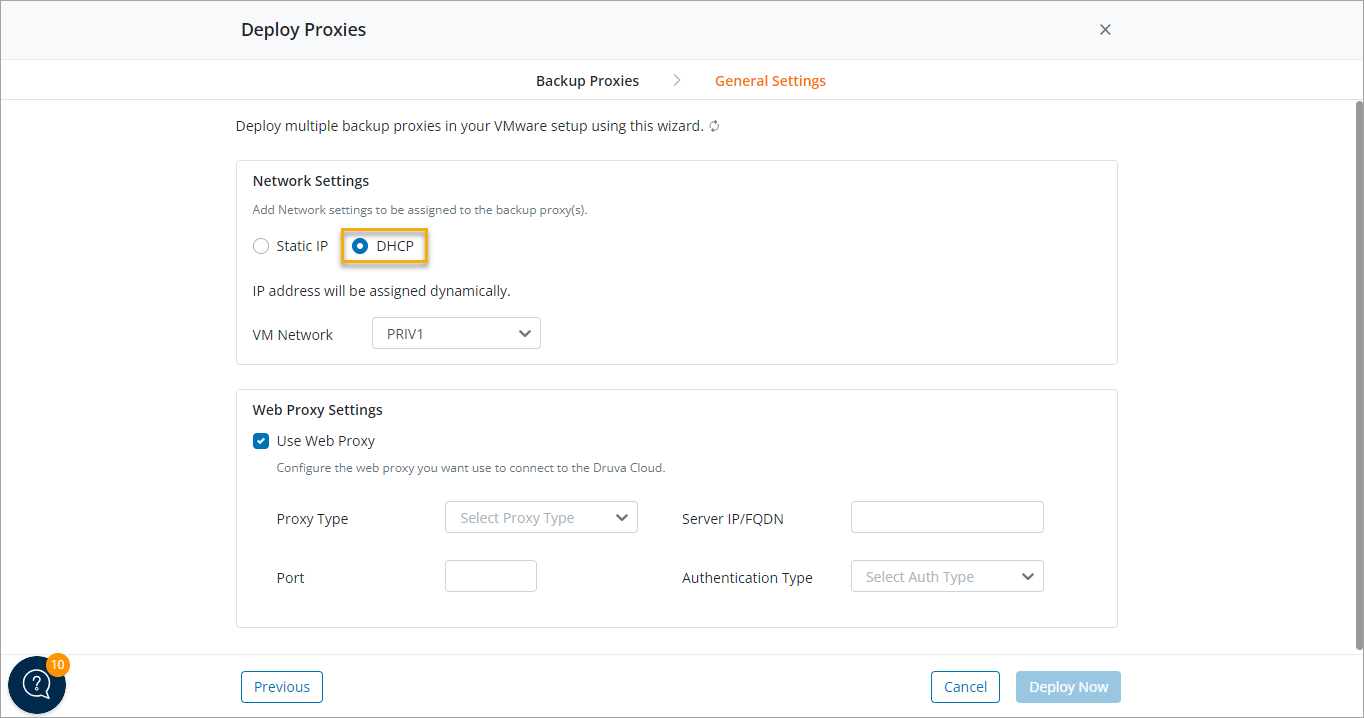
Web Proxy Select this option if you are using a web proxy in your environment.
- Choose authentication type:
- None: Select for unauthenticated proxy.
- Basic
- Kerberos
- If you select Kerberos authentication method, provide the following details:
- Enter KDC server name: Provide the FQDN of the Key Distribution Center (KDC) server.
- Enter KDC user name: Provide a user name that the KDC can authenticate.
- Enter KDC Password: Provide the password of the user entered in the KDC user name field.
- Enter KDC port: Provide the KDC port.
- Enter FQDN of DNS Server Name: Provide the FQDN of the DNS server.
- Enter DNS Server User Name: Provide a DNS server user name to let the backup proxy virtual machine use the domain you provided in the DNS Server Name field.
- Enter DNS Server User Password: Provide the password of the user entered in the DNS Server User Name field.
Note: Ensure that the FQDNs of the KDC, DNS server, and the web proxy host resolve to the appropriate servers. If the FQDNs do not resolve, add the FQDNs and the respective IP addresses in the /etc/hosts file of the backup proxy virtual machine.
- Proxy Type: Druva supports the following proxy types:
- http
- socks4
- socks5
- Proxy Server IP: Valid IP of proxy server.
- Proxy Port: Respective proxy port number.
- Username: Valid proxy username.
- Password: Valid proxy password.
- Click Deploy Now.
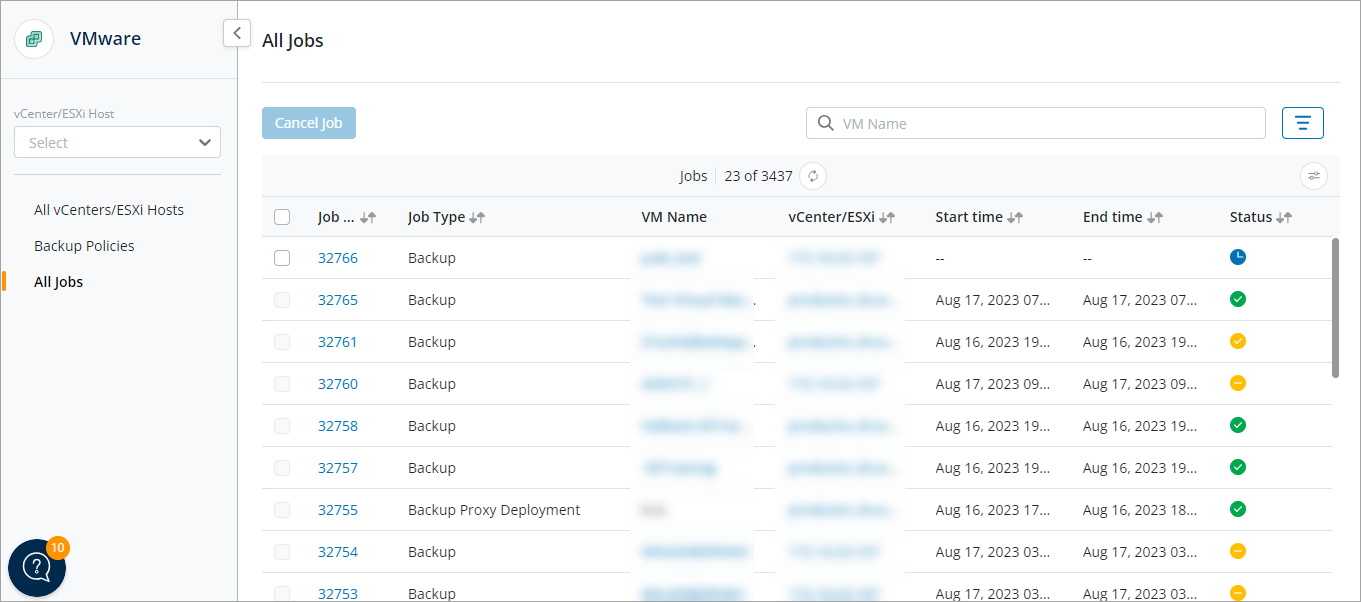
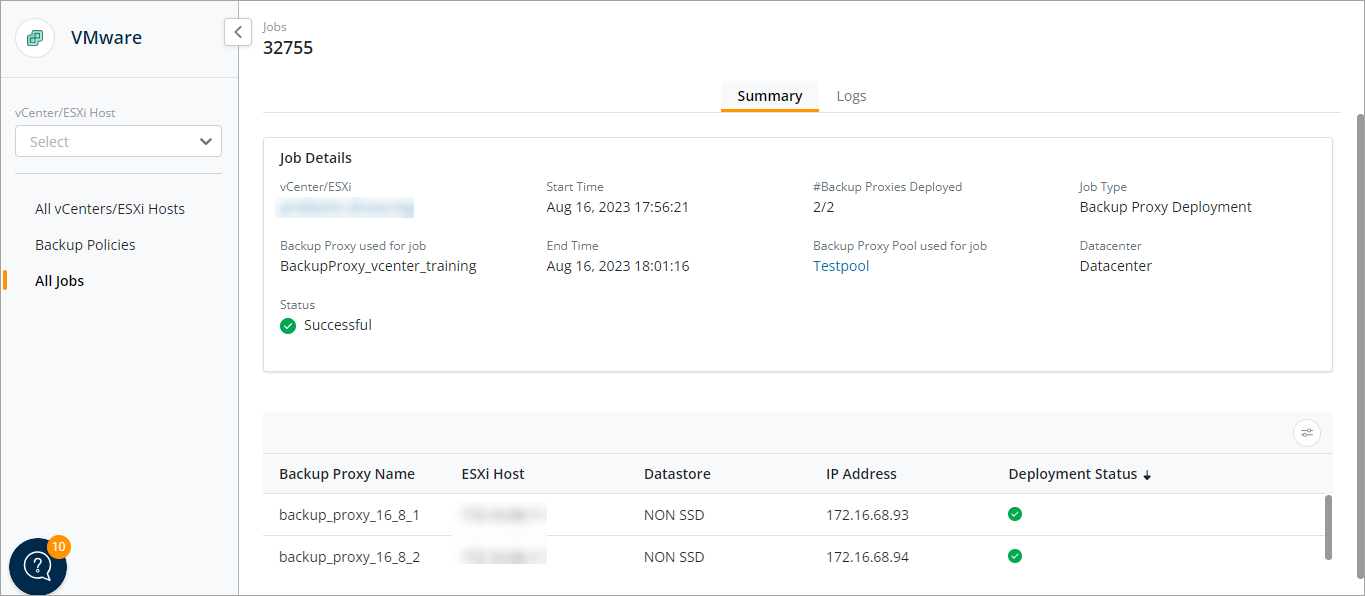
- You can see the status of the deployment of backup proxy on the All Jobs page. Click the Backup Proxy Deployment job to see the deployment status of each backup proxy.
Note: If the configuration during deployment fails, the virtual machine is powered-off.
Step 2: Verify the configuration
The proxy/proxies deployed in Step 1 have Druva default configuration.
If you have changed any default proxy settings in the existing backup proxy (version 6.3.2-359254 or earlier), you can verify these settings and apply the same to the newly deployed VM backup proxy.
Verify the following VM and Druva-specific configurations:
VM configuration
To check the VM settings in an existing proxy (version 6.3.2-359254 or earlier), see article.
Follow the quick steps:
- Go to the VMware console.
- Click on your proxy VM.
- Select Actions and click Edit Settings to check the VM configuration.
- To change the settings, power off the VM and click Edit Settings.
- Apply the settings to the newly deployed proxy.
Druva-specific configuration
For VMware backup proxy with version prior to 7.0.0, Druva-specific configurations are present in the phoenix.cfg file at /etc/Phoenix/VMWARE/. However, for VMware proxy version 7.0.0 and later, Druva-specific configurations are present in the Config.yaml file at /etc/Druva/EnterpriseWorkloads/vmware/VMwareConfig.yaml.
Compare the configuration file in the existing proxy with the configuration file in the newly deployed proxy, and then replace only the following parameters if they are different (ignore all other parameters).
The first parameter in the Parameter column below is for the VMware proxy version prior to 7.0.0. This is followed by the parameter for the VMware proxy version 7.0.0 and later.
| Parameter | Description |
|---|---|
|
VM_MAX_CONCURRENT_BACKUPS vm_max_concurrent_backups |
Use this parameter to control the number of concurrent backup jobs running on the proxy. |
|
VMWARE_EXCLUDE_FILTER vmware_exclude_filter |
Set the value to 'True' if you want to exclude the default files, i.e., pagefile.sys and swap partition. |
|
_VM_BACKUP_TRANSPORT_MODE _vm_backup_tranport_mode |
Set a value to override the transport mode at the time of backup. For example, if you want to use ‘nbd,’ then set the value of the transport mode in phoenix.cfg to ‘nbd.’ |
|
_VM_RESTORE_TRANSPORT_MODE _vm_restore_transport_mode |
Set a value to override the transport mode at the time of restore. For example, if you want to use ‘nbd,’ then set the value of the transport mode in phoenix.cfg to ‘nbd.’ |
|
_VM_BACKUP_BLOCK_SIZE vm_backup_block_size |
Specify the maximum chunk size that will be uploaded in a single call. It should be a multiple of 256 KB and a maximum of 4 MB. |
|
VM_PROXY_PRESERVE_CONNECTION_CONFIG vm_proxy_preserve_connection_config |
Static routes will be deleted from the VMware backup proxy after the proxy is rebooted. Set the value of this parameter to 'True' to preserve such connection configurations. |
|
__FLR_GUEST_VM_PORT_RANGE flr_guest_vm_port_range |
Use this parameter to allow DruvaVMwareRestoreAgent.exe (Windows) or guestossvc (Unix) service to communicate on specific ports for restore. |
|
PRESERVE_FOLDER_TIMESTAMP vm_preserve_folder_timestamp |
Use this parameter in VMware File-level restore (FLR) to retain the modified date of the restored folders. |
How to upgrade packages in Ubuntu proxy?
For more information, see Commands to upgrade packages in Ubuntu proxy.