Troubleshooting Instant Restore issues
 Business Enterprise Elite
This topic describes common workarounds for the issues that you might encounter while performing the following tasks:
- Restoring virtual machines instantly
-
Migrating instantly restored VMs to production
-
Deleting instantly restored VMs
-
Other issues
Common issues
The following are some of the common issues that you might face while performing instant restore of VMs:
Manual migration of instantly restored VM fails
Cause
This issue can occur if you manually migrate the instantly restored VM to another datastore.
Resolution
On the Instant Restored VMs page, select the VM for which migration failed and perform the manual cleanup steps. For more information, see Steps for cleaning the datastore manually.
Migration of instantly restored VM fails
Cause
This issue can occur if another datastore is attached to the instantly restored VM apart from the instantly restored datastore.
Resolution
Perform one of the following actions:
- Detach the disk and then trigger migration.
- Delete the instantly-restored VM.
Instant restore or migration to production fails
Cause
Instant restore or migration to production fails when the operating system buffers consume a big portion of RAM due to which the NFS servers do not start. The following traceback is shown on the terminal:
root@cloudcache:~# service nfs-server start
Job for nfs-server.service canceled.
root@cloudcache:~# service nfs-server status
● nfs-server.service - NFS server and services
Loaded: loaded (/lib/systemd/system/nfs-server.service; enabled; vendor preset: enabled)
Drop-In: /run/systemd/generator/nfs-server.service.d
└─order-with-mounts.conf
Active: failed (Result: exit-code) since Wed 2021-06-09 12:08:22 UTC; 1min 27s ago
Process: 3311885 ExecStartPre=/usr/sbin/exportfs -r (code=exited, status=0/SUCCESS)
Process: 3311887 ExecStart=/usr/sbin/rpc.nfsd $RPCNFSDARGS (code=exited, status=1/FAILURE)
Process: 3311889 ExecStopPost=/usr/sbin/exportfs -au (code=exited, status=0/SUCCESS)
Process: 3311890 ExecStopPost=/usr/sbin/exportfs -f (code=exited, status=0/SUCCESS)
Main PID: 3311887 (code=exited, status=1/FAILURE)
Jun 09 12:08:22 cloudcache systemd[1]: Starting NFS server and services...
Jun 09 12:08:22 cloudcache rpc.nfsd[3311887]: error starting threads: errno 12 (Cannot allocate memory)
Jun 09 12:08:22 cloudcache systemd[1]: nfs-server.service: Main process exited, code=exited, status=1/FAILURE
Jun 09 12:08:22 cloudcache systemd[1]: nfs-server.service: Failed with result 'exit-code'.
Jun 09 12:08:22 cloudcache systemd[1]: Stopped NFS server and services.
root@cloudcache:~# service nfs-server start
Resolution
Run the following command to verify and fix the issue:
root@cloudcache:~# free -m
total used free shared buff/cache available
Mem: 12003 3072 433 0 8497 8634
Swap: 4095 23 4072
Drop buffer
sync && echo 3 > /proc/sys/vm/drop_caches
Verify
root@cloudcache:~# free -m
total used free shared buff/cache available
Mem: 12003 3085 8662 0 255 8714
Swap: 4095 23 4072
Instant restore and migration job fails
Cause
This issue can occur if the PhoenixIRFS (Fuse) process is not able to start. The log file shows entries similar to this:
level=debug ts=2021-05-21T11:44:57.677353062Z filename=fsm.go:228 message="Fuse Process Creation Failed" ExportPath=/mnt/data/instantrestore/75/mnt Outputofsearch="root 6392 0.0 0.0 5648 3064 pts/0 S 11:44 0:00 /bin/bash -c ps -aux | grep -i '/mnt/data/instantrestore/75/mnt'\nroot 6394 0.0 0.0 5216 2528 pts/0 S 11:44 0:00 grep -i /mnt/data/instantrestore/75/mnt\n"
Resolution
- If there are multiple unused IRed datastores present on ESX then delete the datastore.
- First delete the instantly restored VM from the datastore.
- If the VM is inaccessible, then you can’t delete the VM. In that case, remove it from the inventory by using the VM setting (Action button or right click option).
- Right-click the datastore, and select the unmount option to unmount the datastore.
- Additionally, you can update the NFS max limit on the ESXi host. For more information, see the KB article Increasing the default value that defines the maximum number of NFS mounts on an ESXi/ESX host (2239).
Instant restore fails during export
Cause
Instant restore fails during exporting NFS share.
Resolution
- Remove the stale entries present at /etc/export and restart NFS service “service nfs-server restart” on .
- Re-trigger the instant restore job.
Delete custom command fails
Cause
This error can occur if the instantly restored datastore is not attached to the instantly restored VM. This indicates that the VM is already migrated manually or by the migration job.
Resolution
In case of manual migration, the instantly restored datastore gets detached but not deleted. You must manually clean up the datastore. For more information, see Steps for cleaning the datastore manually.
Ongoing job fails during instant restore or migration
Cause
The ongoing job might fail if the service is restarted during instant restore or migration. For existing running instantly restored VMs, which are not migrated or deleted, stopping or restarting the service kills all the IRFS processes running on , due to which the instantly restored VM and datastore go into an inaccessible state.
Resolution
- Either migrate the instantly restored VMs or delete them before restarting service. IRService is restarted as part of service restart.
- If the VMs go in an inaccessible state, delete those VMs by using the delete custom command from Management Console.
Error during a client upgrade or phoenix service restart
Cause
After installing the latest rpm manually, you get an error while migrating credentials during a client upgrade or phoenix service restart.
Resolution
Set credentials again using vCenterDetail set command.
Communication request failure
Cause
For validating communication between the Backup proxy, IRAgent, and CC IRService, a token is generated in cacheconfig and passed in each request triggered by IRAgent. IRService decrypts this token and validates the request based on the cache ID and time within the token. The request might fail during token decryption or token expiry.
Resolution
Retrigger the instant restore or migration job.
Configuration error
Cause
Unable to mount the datastore due max NFS datastore limit.
Failed to mount to server 10.x.x.x mount point /mnt/nfs-share/subdir/subdir. NFS has reached the maximum number of supported volumes.
Resolution
This is due to a VMware/ESXi configuration. Please refer to VMware documentation for more details.
Production issues
The following issues may occur after migrating an instantly restored VM to production. The migration is successful, but with some errors.
Cause
Deletion of datastore fails.
Resolution
- Delete the respective datastore from the datastore listing page. Make sure you note the datastore summary, such as the full path of NFS and the NFS version before deletion.
- Migrate the VM if present on the instantly restored datastore.
- Perform CloudCache cleanup.
Cause
Clean up of the fails.
Resolution
Perform the cleanup manually.
Deletion issues
The following are some of the deletion issues:
Deletion of instantly restored VM fails
Cause
The deletion of an instantly restored VM can fail in the following scenarios:
- The instantly restored VM is already migrated to a different datastore.
- The customer has attached a disk of a different datastore.
Resolution
- Delete the instantly recovered VM from the vCenter if it is not migrated to the production environment.
- Delete the respective datastore from the datastore listing page.
- Migrate the VM if present on the instantly restored datastore.
Job issues
Instant restore job issue
Cause
Instant restore job stuck or not completed.
Resolution
Use the following commands to debug any issues related to instant restore job:
- Check if the IRAgent process is spawned on the Backup proxy.
ps -ef | grep PhoenixIRAgent

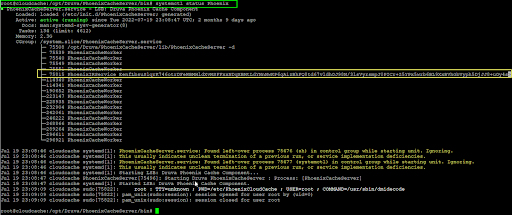
- Check the status of the and the output.
/etc/init.d/PhoenixCacheServer status
OR
systemctl status Phoenix
- Check if the IRService is running on .
ps -ef | grep PhoenixIRService

- Check if the IRFS process is spawned on .
ps -ef | grep PhoenixIRFS

- Use logs to verify the service is running.
tail +f /var/log/PhoenixCloudCache/PhoenixIRservice.log

Enabling custom export paths for IR
Perform the following steps to set the custom export path on .
- Open the /etc/PhoenixCloudCache/PhoenixCloudCache.cfg file.
- Set your desired path against the variable IR_CUSTOM_EXPORT_PATH.
- Save the PhoenixCloudCache.cfg file and trigger the instant restore job.