Heads up!
We've transitioned to a new documentation portal to serve you better. Access the latest content by clicking here.
About inSync Client
inSync Client is a lightweight application that manages data backup and allows collaboration with other users. Users can easily view a summary of the last scheduled backups, add/remove backup folders, pause backups and quickly access shared content with other colleagues on any project. End users can self-restore from any time-stamped snapshot, and select the device and location on the device to which they want to restore their data.
Installation and configuration
Install and activate inSync Client on the first laptop
|
Ensure that you have received the inSync account activation email and have it handy.
- Download and run the installer.
- To install:
- Select the language.
- Accept the EULA.
- Select the destination folder.
- To activate:
- Double-click the inSync icon.
- Select your inSync edition from the list.
- Enter your credentials.
- Click Activate.
- If required, configure proxy server settings.
- Change password.
For detailed documentation about installing and activating inSync Client on Windows, Mac, Linux, etc, see Install and activate the inSync Client.
|

|View larger image|
|
Note:
- If your organization uses SSO, leave the password blank.
- The Server URL and your credentials are available in the account activation email.
Configure Backup Folders
Add backup folders
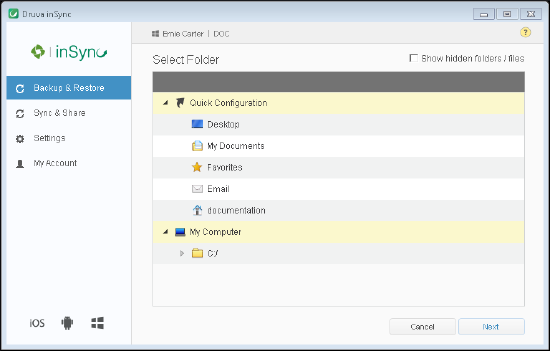
- Start the inSync Client.
- On the navigation pane, click Backup & Restore. In the right window, click Add folder.
- Select the folder you want to backup, and then click Next.
- Select the files and folders that you want to backup.
- Click Add.
|
|View larger image|
|
Add backup settings
- Start the inSync Client.
- On the navigation pane, click Backup & Restore. In the right window, click Add folder.
- Select the folder you want to backup, and then click Next.
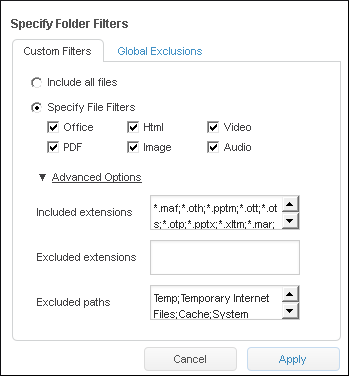
- On the Select Items to Backup window, click
 for the backup folder that you want to configure. for the backup folder that you want to configure.
- If you want to include all files for backup, select Include all files.
- If you want to include common file types, select Specify File Filters, and then select appropriate file types.
- If you want to add or exclude more file types, click Advanced Options.
- Click Apply.
|
|View larger image|
|
Backup content from device
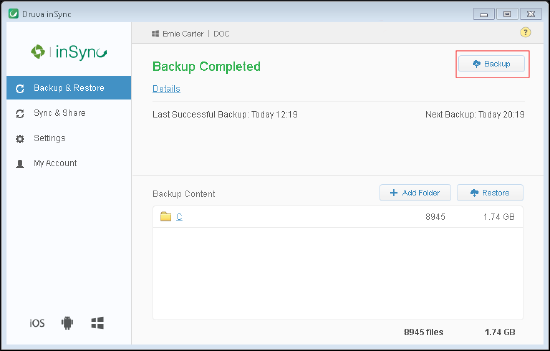
- Start the inSync Client.
- On the navigation pane, click Backup & Restore.
- In the right pane, click Backup.
|
|View larger image|
|
Restore data to your device
- Start the inSync Client.
- On the navigation pane, click Backup & Restore.
- In the right pane, click Restore.
- On the Restore window, click the device and then select the snapshot from which you want to restore data.
- Select the files or folders that you want to restore, and click Restore to Device.
|

|View larger image|
|
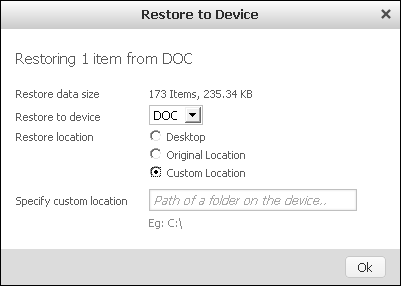
- Select the device to which you want to restore data.
- Select the restore location.
- Click Ok.
|
|View larger image|
|
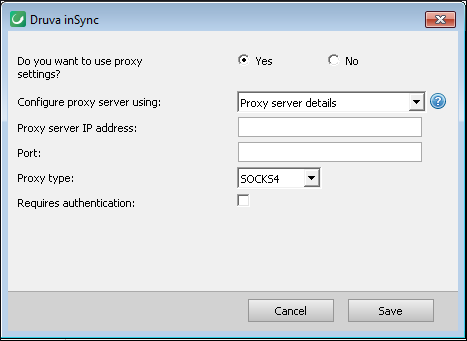
Configure proxy settings
- Start the inSync Client.
- On the navigation pane, click Settings.
- Click the Network tab, and then click Proxy Settings.
- If you want to use proxy settings, click Yes.
- In the Configure proxy server using list, click the configuration option for proxy server.
- In the Proxy server IP address box, type the IP address of the proxy server.
- In the Port box, type the port number of the proxy server.
- In the Proxy type list, click the proxy server type.
- If access to proxy server requires authentication, select Require authentication check box.
- Click Save.
|
|View larger image|
|
|
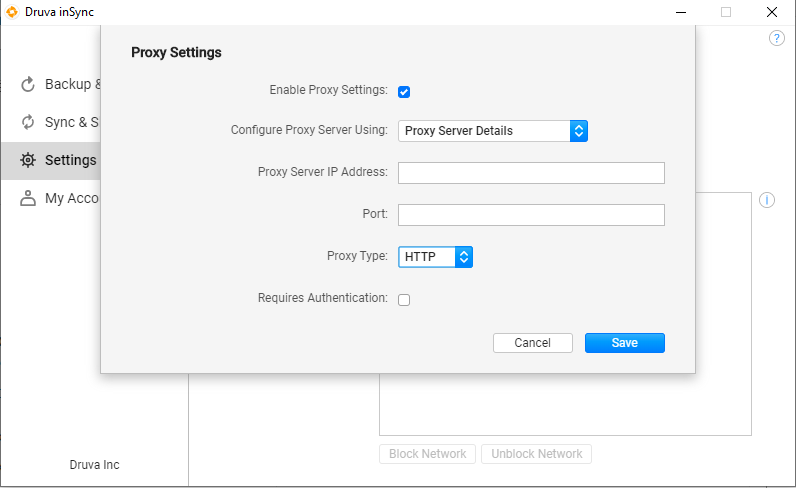
Configure Proxy setting for Linux
- Start the inSync Client.
- On the navigation pane, click Settings.
- Click the Network tab, and then click Open Proxy Settings.
- If you want to use proxy settings, click Enable Proxy Settings.
- In the Configure proxy server using list, click the configuration option for proxy server.
- In the Proxy server IP address box, type the IP address of the proxy server.
- In the Port box, type the port number of the proxy server.
- In the Proxy type list, click the proxy server type.
- If access to proxy server requires authentication, select Require authentication check box.
- Click Save.
|
|View Larger Image| |
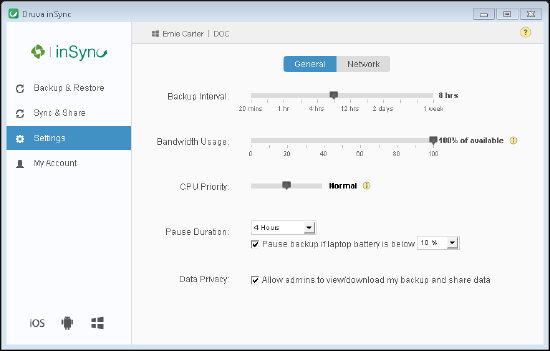
Configure resources
- Start the inSync Client.
- On the navigation pane, click Settings.
- Under the General tab, move the Backup interval slider to set the frequency of the scheduled backups.
- Under the General tab, move the Bandwidth Usage slider to set the network bandwidth that your laptop can consume while the inSync client is backing up data.
- Under the General tab, move the CPU priority slider to set the priority that you want to assign to the inSync Client on your laptop.
|
|View larger image|
|
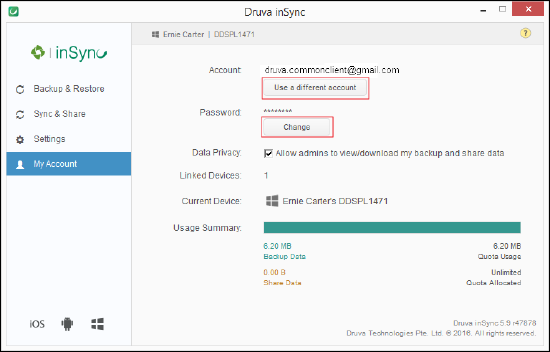
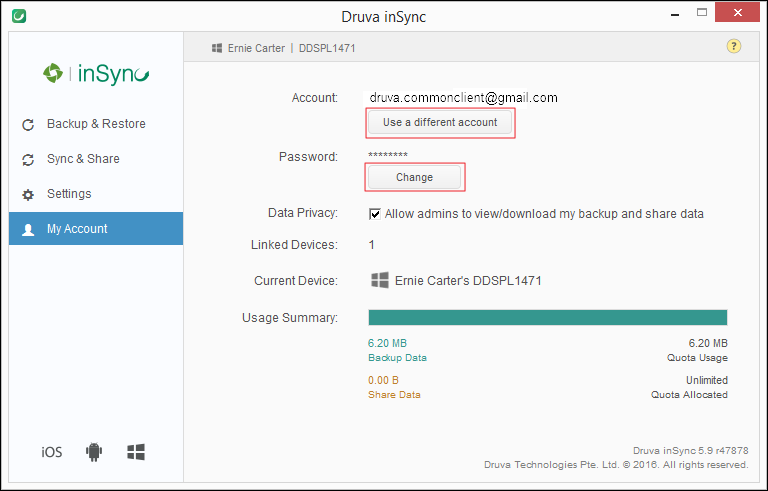
Modify account details
- Start the inSync Client.
- On the navigation pane, click My Account.
- If you want to change your inSync account password, click Change.
- If you want to activate the inSync Client using different credentials, click Use a different account.
|
|View larger image|
|
inSync Web
Access inSync Web
- Open a browser.
- If you are an inSync Cloud user, then type, https://cloud.druva.com/home and then press Enter.
- If you are an inSync On Premise user, then type, https://<inSync Master URL>/home and then press Enter.
- On the inSync Web Login page, type your user name and password, and then click Login.
|
Restore data to your device
- Open the inSync Web.
- On the inSync Web menu bar, click My Devices.
- From the list of devices, click the device for which you want to view the snapshots.
- In the Snapshots list, click the snapshot from which you want to restore data.
- Select the files or folders that you want to restore, and click Restore.
- In the Restore to device window, provide the appropriate information for each field.
- Click OK. The data restore starts.
|

|
Download data to your device
- Open inSync Web.
- On the menu bar, click My Devices.
- In the Devices list, click the device from which you want to download data.
- In the Snapshots list, click the snapshot from which you want to download data.
- Select the files or folders that you want to download, and then click Download.
- Save the file or folder to a desired location.
|

|
FAQS
Browse through the inSync Client FAQs for more information related to Client installation, activation, backup and restore, and upgrade.