Restore data by using the inSync Web
Overview
If your inSync administrator enables web restore for you, you can restore data from inSync Web. If your inSync administrator disables web restore for you, you can log on to inSync Web, but you must use inSync client to start a restore operation.
For restore, you can use Search to easily find and restore selected files.
Procedure
To restore data
- Open the inSync Web.
- On the inSync Web menu bar, click My Devices. Your devices are displayed on the left pane.
- From the list of devices, click the device for which you want to view the snapshots.
- In the Snapshots list, click the snapshot from which you want to restore data.
- Select the files or folders that you want to restore, and click Restore. Alternatively, you can use Search to search for files that you want to restore.
After you click Restore, a Restore to device window appears. The size of the data that you are going to restore is displayed in the Restore Data Size field.Note: You cannot restore files with the same names simultaneously.

- In the Restore to device window, provide the appropriate information for each field.
Field Action Restore to device If you want to restore the data to the device's desktop, click Desktop.
The inSync client restores the data on the desktop in the following format:
Wed Mar 11 12-15-39 2015\{{Desktop1}}\07_Oct_2014Where Wed Mar 11 is the date of the restore, 12-15-39 is the time of the restore, 2015 is the year of the restore, Desktop1 in the folder configured for backup, 07_Oct_2014 is the snapshot that you restored from the storage.
Restore location If you want to restore the data to the folder from which it was backed up, select Original Location. This option is available only when you are restoring data to the device from which it was backed up.
If you want to restore the data to a custom location, select Custom Location and then specify the location in the Specify custom location box. - Click OK. The data restore starts. A restore window appears. You can view the progress of data restore.
Note: If you change the language in the inSync Web, the display of content within the My Devices page updates accordingly. However, the file name or folder name is not translated. For more information, see About language support for inSync Web.
Restore data from Shared data sources
If your administrator provides access to other Device data sources, you can restore the data to your configured devices from inSync Web.
Procedure
-
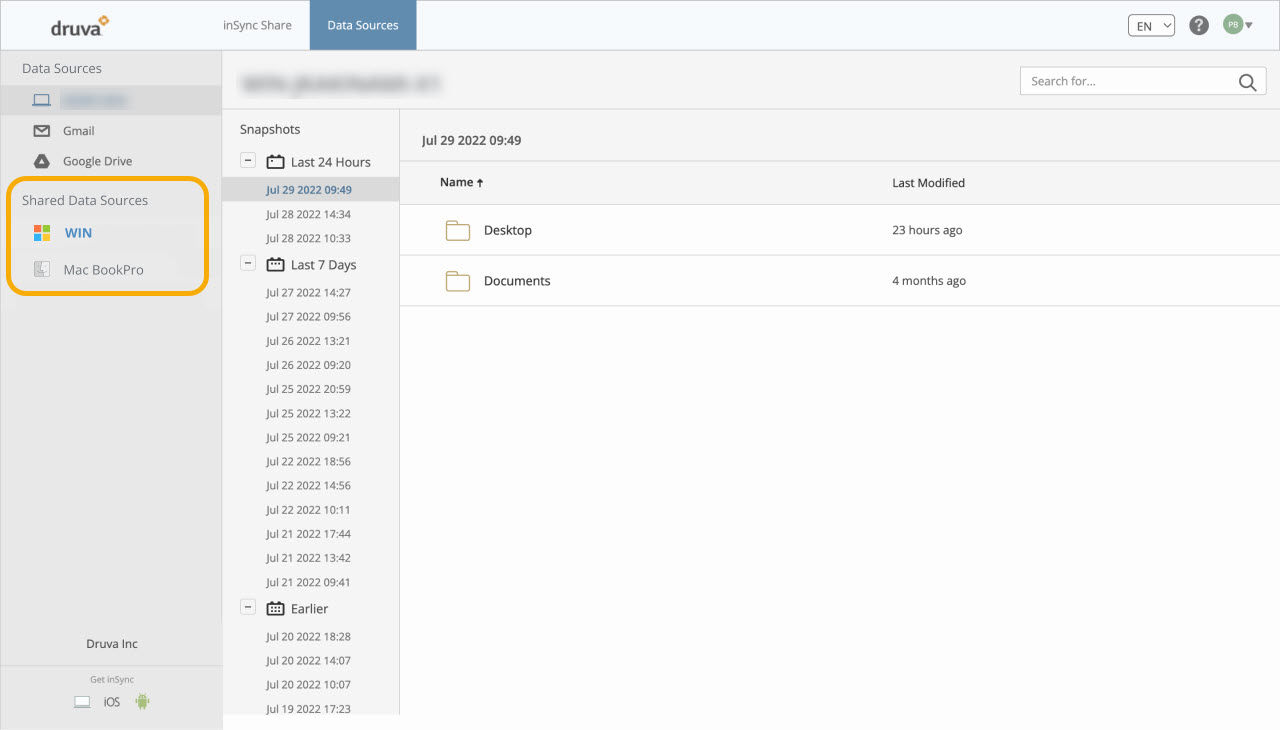
On the left navigation menu bar, you can see the Shared Data Sources section displayed in the left pane.
-
Under the Shared data sources, click the data source for which you want to restore the snapshots.
-
In the Snapshots list, click the snapshot from which you want to restore data.
-
Select the files or folders that you want to restore, and click Restore Selected.
Once you click Restore Selected, a Restore to Device window appears. The size of the data that you are going to restore is displayed in the Restore Data Size field. -
Do one of the following:
If you are restoring to a device, in the Restore to device window, select the following information for each field.
| Field | Action |
|---|---|
| Restore to device |
If you want to restore the data to the device's desktop, click Desktop. The inSync Client restores the data on the desktop in the following format:
Wed Mar 11 12-15-39 2015\{{Desktop1}}\07_Oct_2014
Where Wed Mar 11 is the date of the restore, 12-15-39 is the time of the restore, 2015 is the year of the restore, Desktop1 in the folder configured for backup, 07_Oct_2014 is the snapshot that you restored from the storage. |
| Restore location |
|