Manage NAS proxies for NAS devices
 Business Enterprise Elite
Determine NAS proxy version
You can determine the version of the NAS proxy that is currently running on your servers. Each Druva release comes with new features and enhancements, and to use these features, you must have the latest version of the NAS proxy. You can obtain the version details of the NAS proxy from the Management Console.
Ensure that you have the latest version of NAS proxy installed on your servers.
To determine the NAS proxy version:
-
Log in to the Management Console.
-
Select the workload from the Protect menu. Note that if the All Organizations menu is enabled, you have to first select an organization that has your NAS device and then select the workload.
-
In the device-specific navigation pane on the left, select the NAS device from the DEVICE drop-down.
-
In the device-specific navigation pane on the left, click Mapped Proxies. The right pane lists all the proxies mapped to the selected device. The Client Version column gives you the NAS proxy version.

- Latest: The current version is the latest version that is available.
- Upgradable: The current version is upgradable.
- Upgrade scheduled: An upgrade is in progress.
- Not upgradable: The current version cannot be upgraded to the latest version through the Druva portal.
Unmap a NAS proxy from a NAS device
Unmapping a NAS proxy from a NAS device detaches the proxy from the device. If a proxy is unmapped from a NAS device, Druva does not use that proxy to perform backups and restores of the NAS share.
Before a NAS proxy can be unmapped, all the associated backup sets must either be mapped to another NAS proxy or deleted. A NAS proxy with associated backup sets cannot be unmapped. For more information on editing a backup set to map the backup sets to alternative proxies, see Edit a backup set.
The last proxy mapped to a NAS device cannot be unmapped. One or more proxies must always remain mapped to a NAS device.
- Log in to the Management Console.
-
Select the workload from the Protect menu. Note that if the All Organizations menu is enabled, you have to first select an organization that has your NAS device and then select the workload.
-
In the device-specific navigation pane on the left, select the NAS device.
-
In the device-specific navigation pane on the left, select Mapped Proxies. The right pane, lists all the proxies mapped to the selected NAS device.
- Select the NAS proxy and then click Unmap.

Delete a NAS proxy
To delete a NAS proxy, ensure that:
- The NAS proxy is unmapped from all the mapped devices.
- This NAS proxy is not the last proxy to be mapped to the NAS device.
- The deletion of a NAS device automatically deletes the last proxy mapped to it. For more information on how to delete a NAS device, see Manage your NAS device
You can delete a NAS proxy only after 7 days of the deletion of the last NAS device mapped to it. When you delete a proxy, it is removed from Druva and you cannot map it again to a NAS device. To delete the last proxy mapped to a NAS device, you must first delete the device and then delete the proxy.
To delete a NAS proxy:
-
Login to the Management Console.
-
Select the workload from the Protect menu. Note that if the All Organizations menu is enabled, you have to first select an organization that has your NAS device and then select the workload.
-
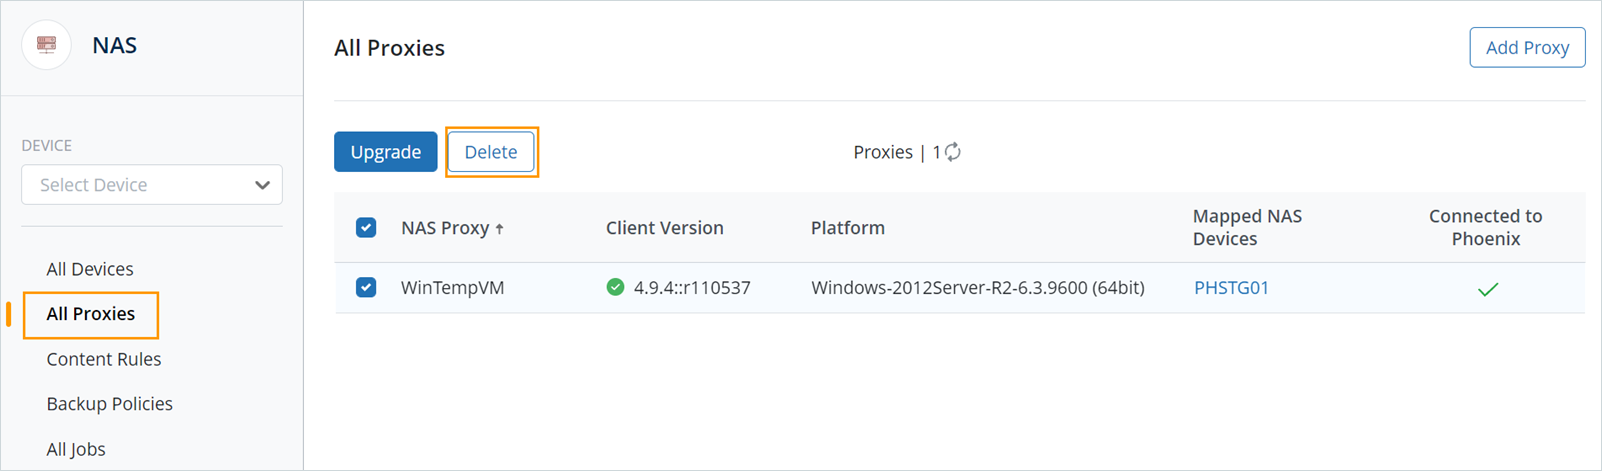
In the navigation pane on the left, click All Proxies.
- The right pane lists all the registered NAS proxies. Select the NAS proxy that has to be deleted, and then click Delete.
Map more proxies
When you are trying to map multiple new NAS proxies to a NAS device simultaneously, and a few of these proxies are either unreachable or are unable to validate the NAS device credentials, Druva will not map them. Druva will only map those NAS proxies which are reachable and those that can successfully validate the NAS device credentials.
To map proxies to your NAS device:
-
Log in to the Management Console.
-
Select the workload from the Protect menu. Note that if the All Organizations menu is enabled, you have to first select an organization that has your NAS device and then select the workload.
-
In the device-specific navigation pane on the left, select the NAS device.
-
In the device-specific navigation pane on the left, select Mapped Proxies.
- In the right pane, click Map More Proxies.

- In the Map More Proxies dialog box, select the proxies that you want to map to the selected NAS device and then click Map.
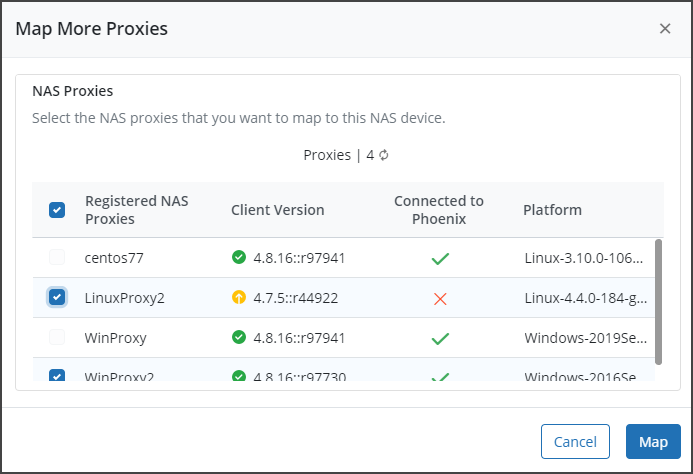
Note: The checkbox next to a registered proxy is disabled when that proxy is already mapped to the selected device.
-
If an older NAS device is mapped to the latest proxy, the Credentials Required dialog box is displayed to gather the device credentials. If the NAS device already has device credentials assigned and stored in the credential store, this dialog box is not displayed. In the Credentials Required dialog box, perform the following tasks:
-
Select an existing pair of credentials, or
- Click New Credential to create new credentials. After creating new credentials, click Save.
-