Manage your NAS share
 Business Enterprise Elite
A NAS share may have multiple backup sets configured, with each backup set backing up a set of files and folders. With multiple backup sets, you can schedule backups when there is minimal network traffic and also perform backups of specific files and folders.
Credentials in NAS share
NAS shares integrate with the credential store. The credentials for manually added shares and automatically discovered shares are stored in the credential store. NAS credentials, once added, can be used for multiple NAS shares. Older shares continue to store the share credentials on the NAS proxy. If you have enabled the Use device credentials for auto-discovered shares setting while adding a NAS device, the automatically discovered shares will use the device credentials. The Credentials column in the NAS Shares page displays the status of credentials assigned to each share. Credentials only need to be assigned to SMB/CIFS shares. NFS shares do not require credentials.
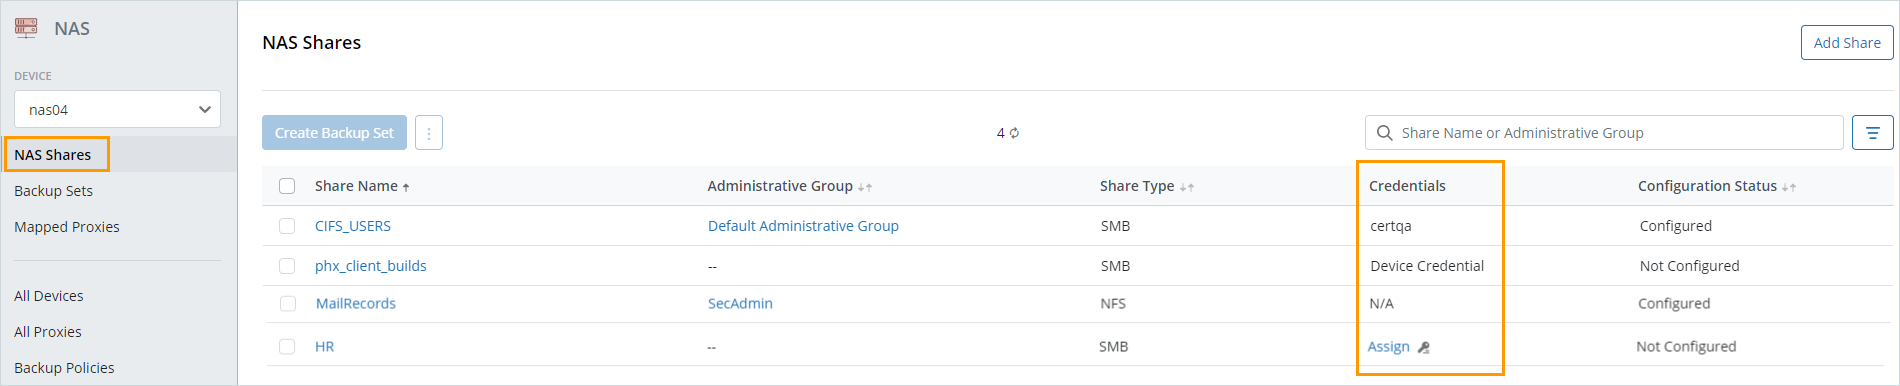
The following table discusses the Credentials column value for NAS shares.
| Credential status | Description |
|---|---|
| N/A | This is an NFS share that does not need credentials. |
| Device Credential | This share uses the NAS device credentials |
| <credential> | This is the credential that has been assigned to the share and is stored in the credential store. |
| Local | This credential is stored on the NAS proxy |
| Assign | When the device is not set to use device credentials for share auto-discovery, and the auto-discovered share does not have an assigned credential. |
Assign credentials
-
Log in to the Management Console.
-
Select the workload from the Protect menu. Note that if the All Organizations menu is enabled, you have to first select an organization that has your NAS device and then select the workload.
-
In the device-specific navigation pane on the left, select the NAS device from the Device dropdown.
-
In the device-specific navigation pane on the left, click NAS Shares. The right pane displays all the NAS shares on the selected device.
-
Automatically discovered NAS shares that don’t have any assigned credentials have a clickable Assign in the Credentials column. Click Assign.
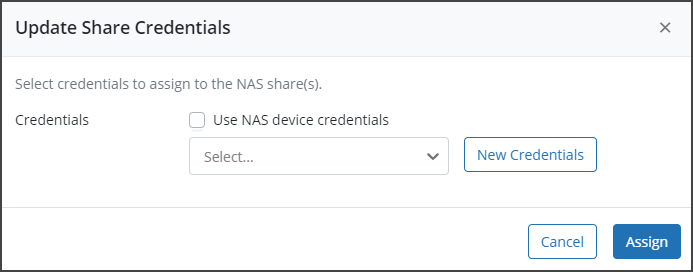
- In the Update Share Credentials dialog box, enter the following details:
| Field | Description |
|---|---|
| Use NAS device credentials | Select this checkbox if the NAS share must use the same credentials as the device that it is on. If this checkbox is selected, the other fields are disabled. |
| <Select> | Select a credential for the NAS share from a list of existing credentials. |
| New Credentials | |
| Label | Enter a unique label for the NAS credential |
| Username | Enter a username in the Domain\username format |
| Password | Enter the password for the credential |
| Confirm Password | Re-enter the password for the credential |
Update credentials
-
Log in to the Management Console.
-
Select the workload from the Protect menu. Note that if the All Organizations menu is enabled, you have to first select an organization that has your NAS device and then select the workload.
-
In the device-specific navigation pane on the left, select the NAS device from the Device dropdown.
-
On the NAS Shares page select the NAS share whose credentials have to be updated, click more options, and then click Update Credentials.
- In the Update Share Credentials dialog box, choose to either use NAS device credentials, select from an existing set of credentials, or create new credentials.
- Click Assign.
Note: The share name cannot be edited.
Change admin group
- Log in to the Management Console.
- Select the workload from the Protect menu. Note that if the All Organizations menu is enabled, you have to first select an organization that has your NAS device and then select the workload.
- In the device-specific navigation pane on the left, select the NAS device from the dropdown.
- Change the administrative group from two locations:
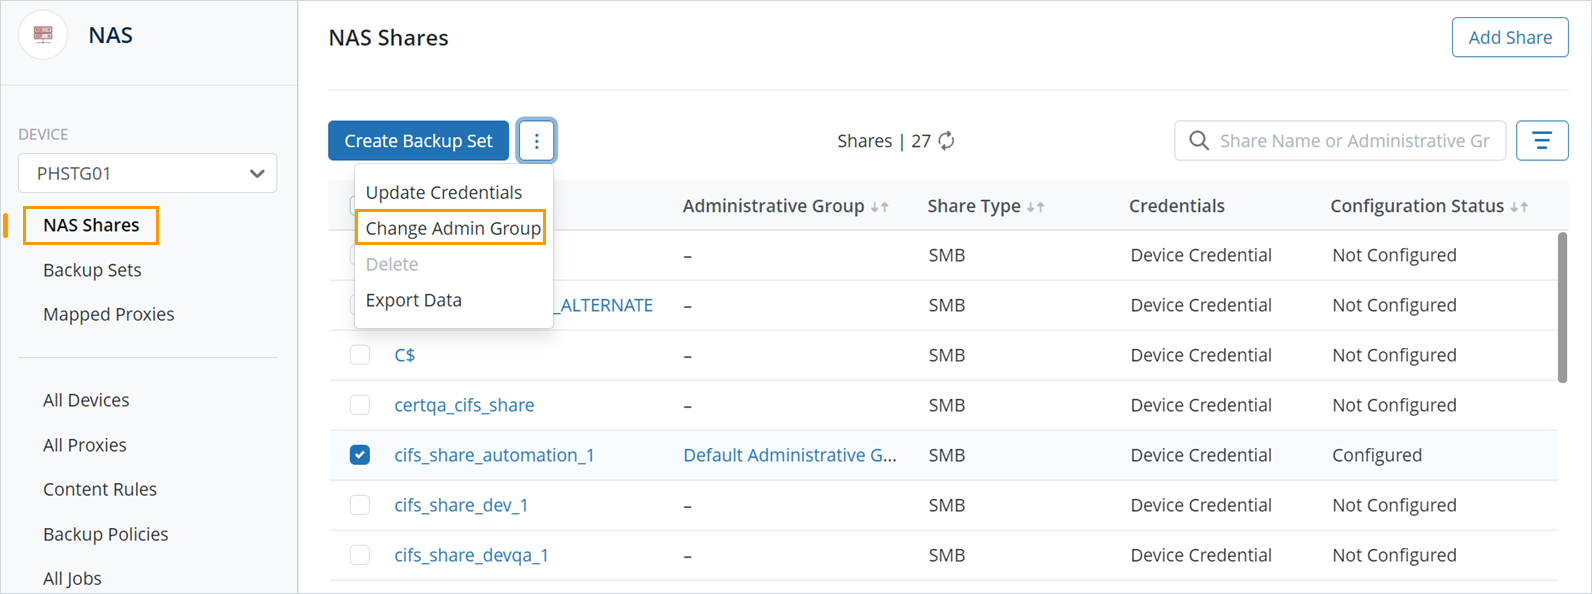
- NAS share page
In the NAS share details page, select the NAS share whose administrative group needs to be changed, click more options, and then click Change Admin Group.
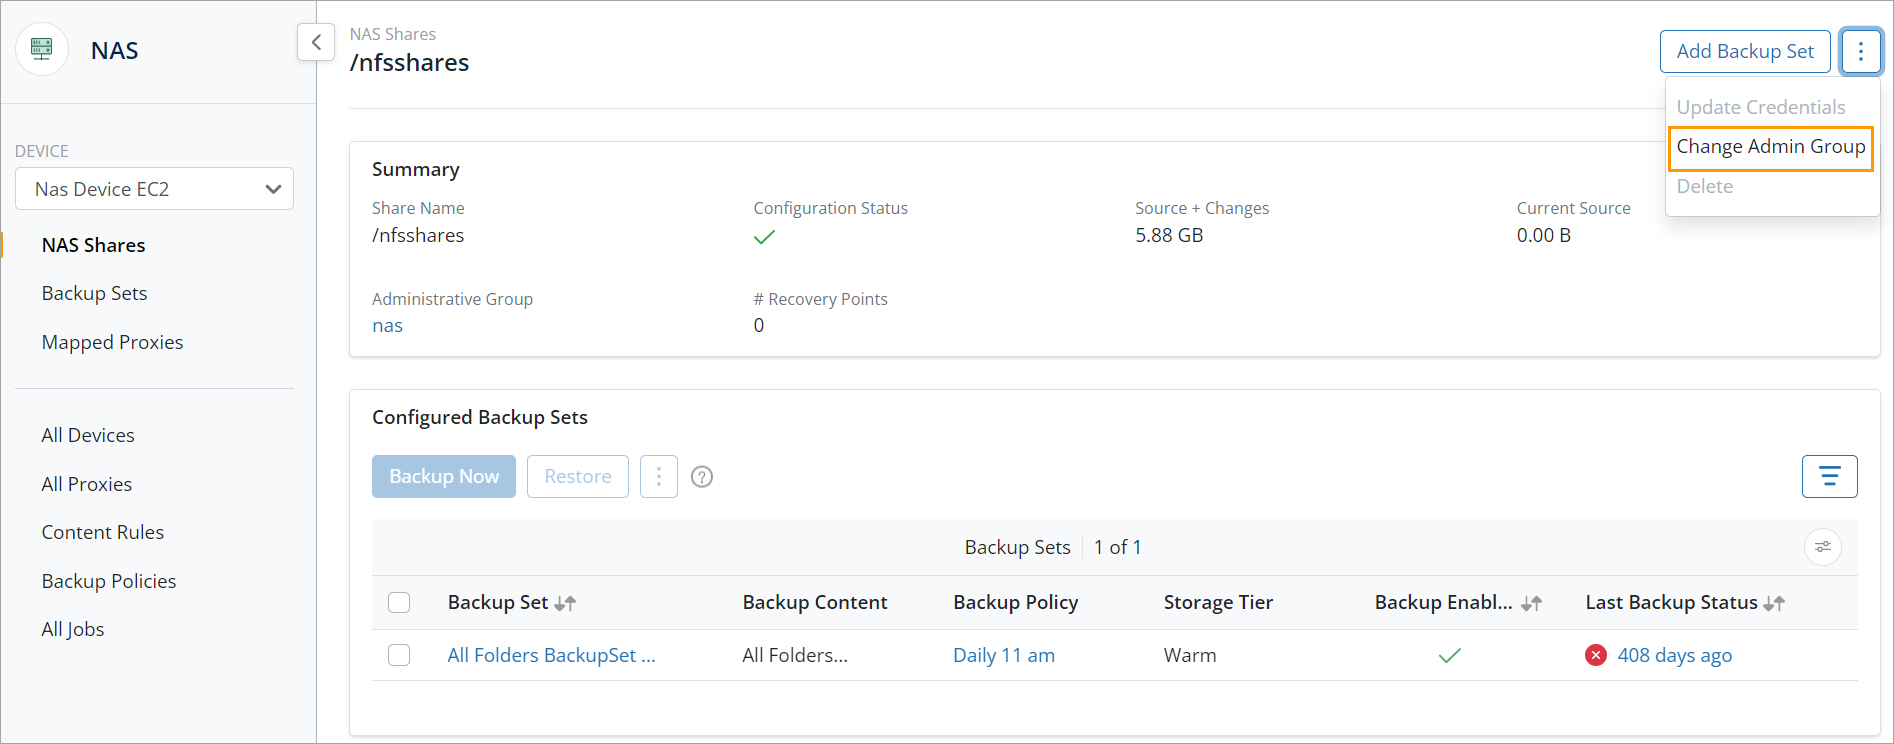
- NAS shares details page
Click the NAS share whose administrative group needs to be changed. In the NAS shares details page, in the top right corner click more options, and then select Change Admin Group.
- NAS share page
- In the Change Administrative Group dialog box, select the administrative group that you want to change to from the dropdown, and then click Save. The NAS share will get added to the new administrative group.
View NAS share details page
-
Log in to the Management Console.
-
Select the workload from the Protect menu. Note that if the All Organizations menu is enabled, you have to first select an organization that has your NAS device and then select the workload.
-
In the device-specific navigation pane on the left, select the NAS device from the Device dropdown.
-
On the NAS Shares page, in the right pane, click the NAS shares whose details you want to view. This brings up the NAS share details page.
- The NAS share details page is divided into 2 panes: The Summary pane and the Configured Backup Sets pane.
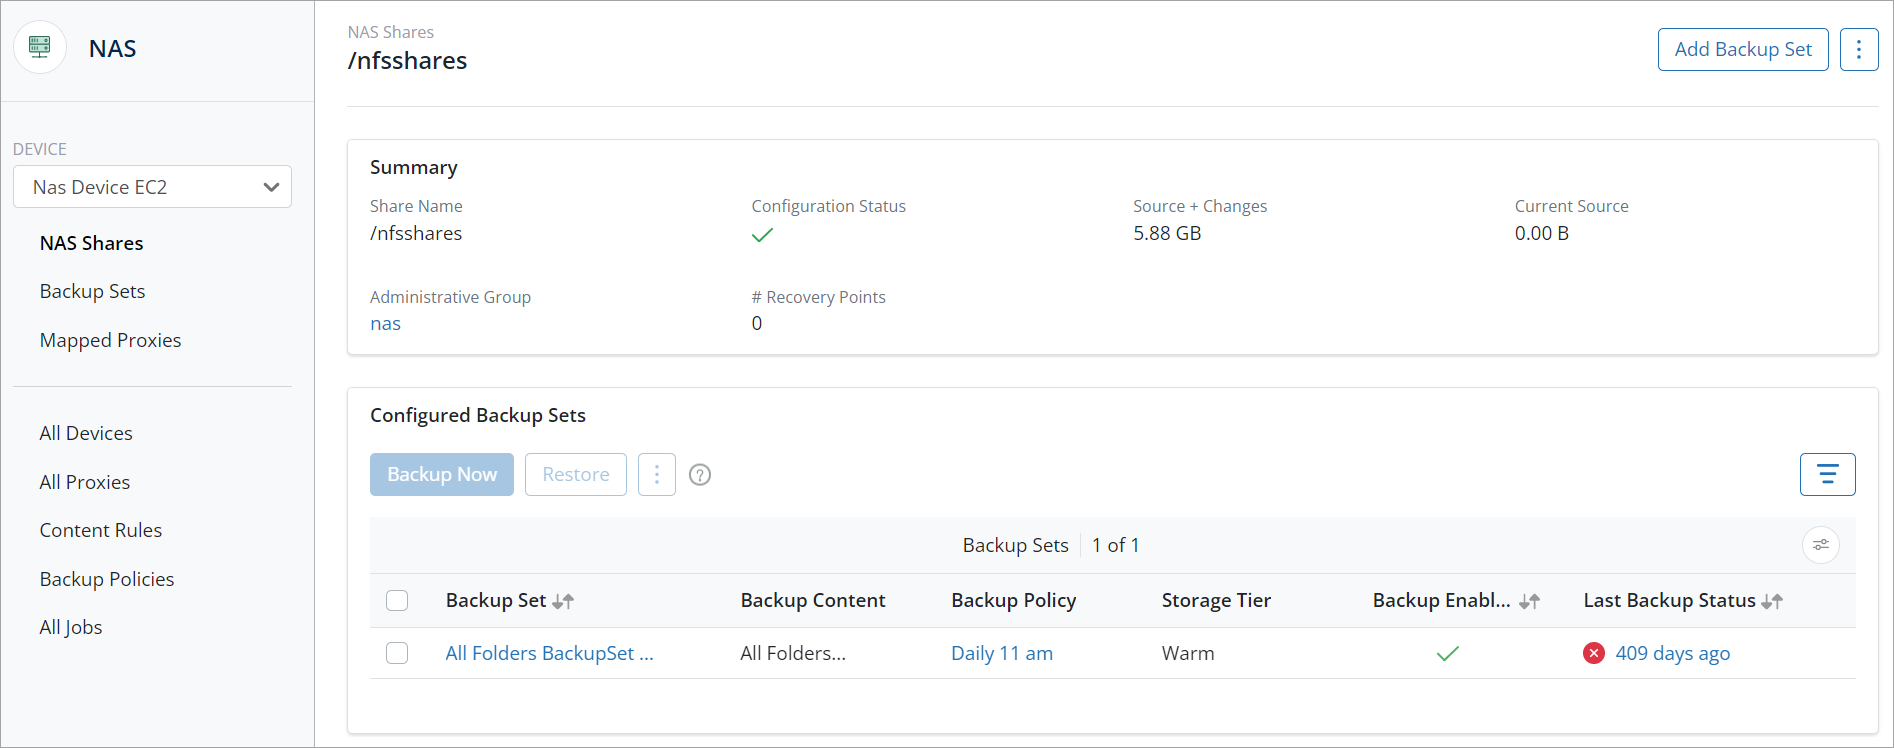
The Summary pane has information like the share name, the administrative group that the share belongs to, the number of recovery points for that share, the amount of data at the source, the amount of source and changed data, and the configuration status of that share. The Configured Backup Sets pane lists the backup sets configured for the share, the content they backup, the last backup status, and whether the backups are enabled or disabled for the backup set.
Backup a single backup set on a NAS share manually
-
Log in to the Management Console.
-
Select the workload from the Protect menu. Note that if the All Organizations menu is enabled, you have to first select an organization that has your NAS device and then select the workload.
-
In the device-specific navigation pane on the left, select the NAS device from the Device dropdown.
-
On the NAS Shares page, click the NAS share whose backup you want to run manually.
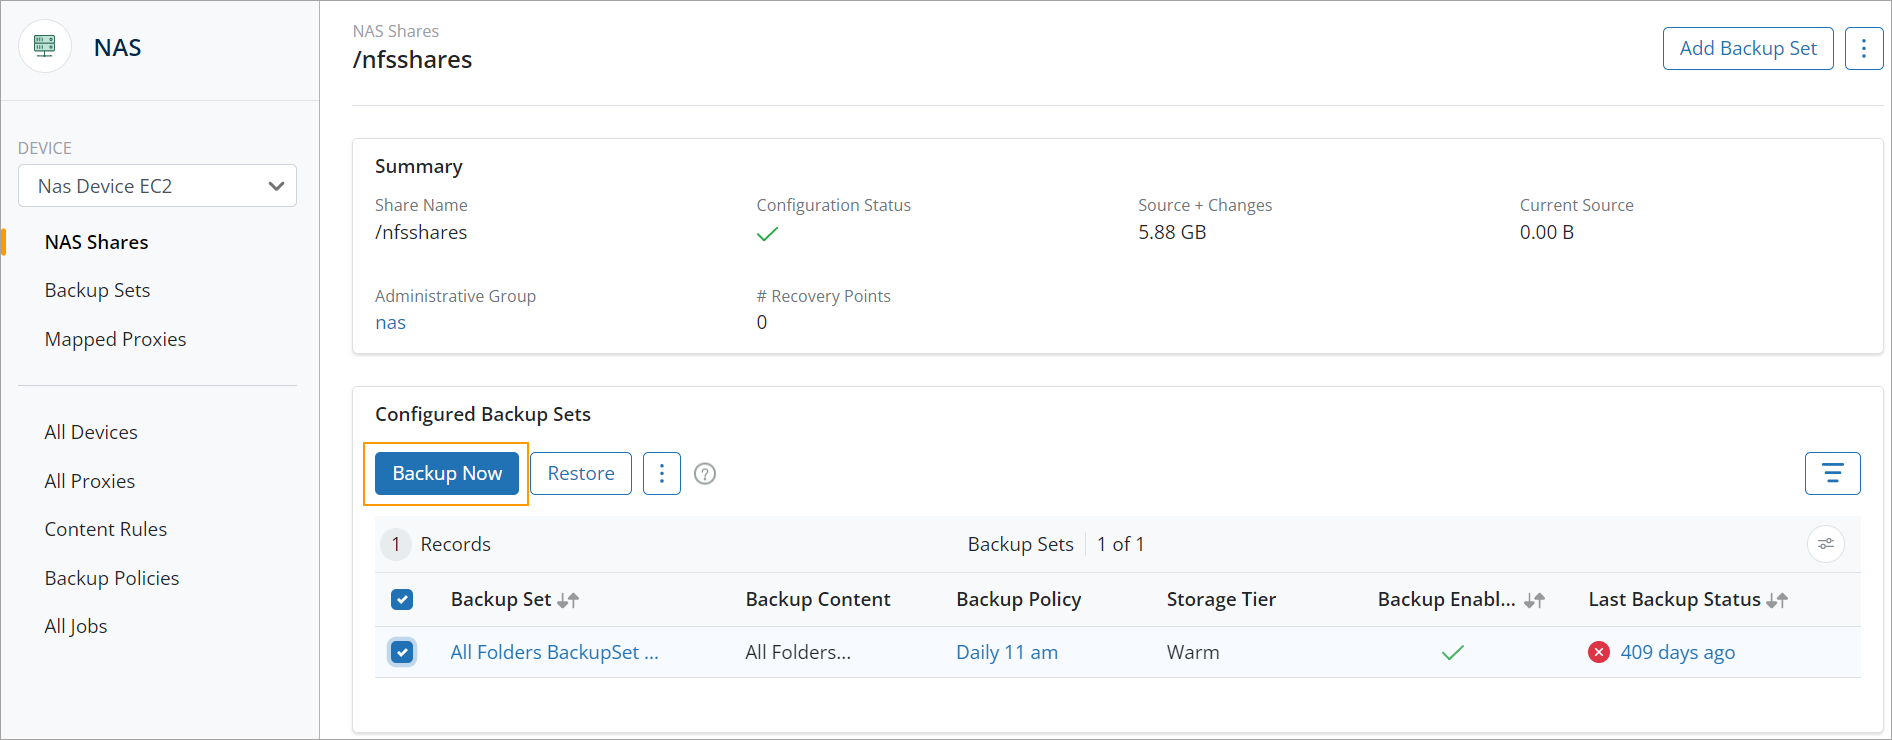
- In the NAS share details page, in the Configured Backup Sets section, select the backup set, and then click Backup Now. This triggers a manual backup for the selected backup set.
Backup all backup sets on the NAS share
-
Log in to the Management Console.
-
Select the workload from the Protect menu. Note that if the All Organizations menu is enabled, you have to first select an organization that has your NAS device and then select the workload.
-
In the device-specific navigation pane on the left, select the NAS device from the Device dropdown.
-
On the NAS Shares page, click the NAS share.
- In the NAS share details page, in the Configured Backup Sets section, select one or more backup sets, and then click Backup Now.
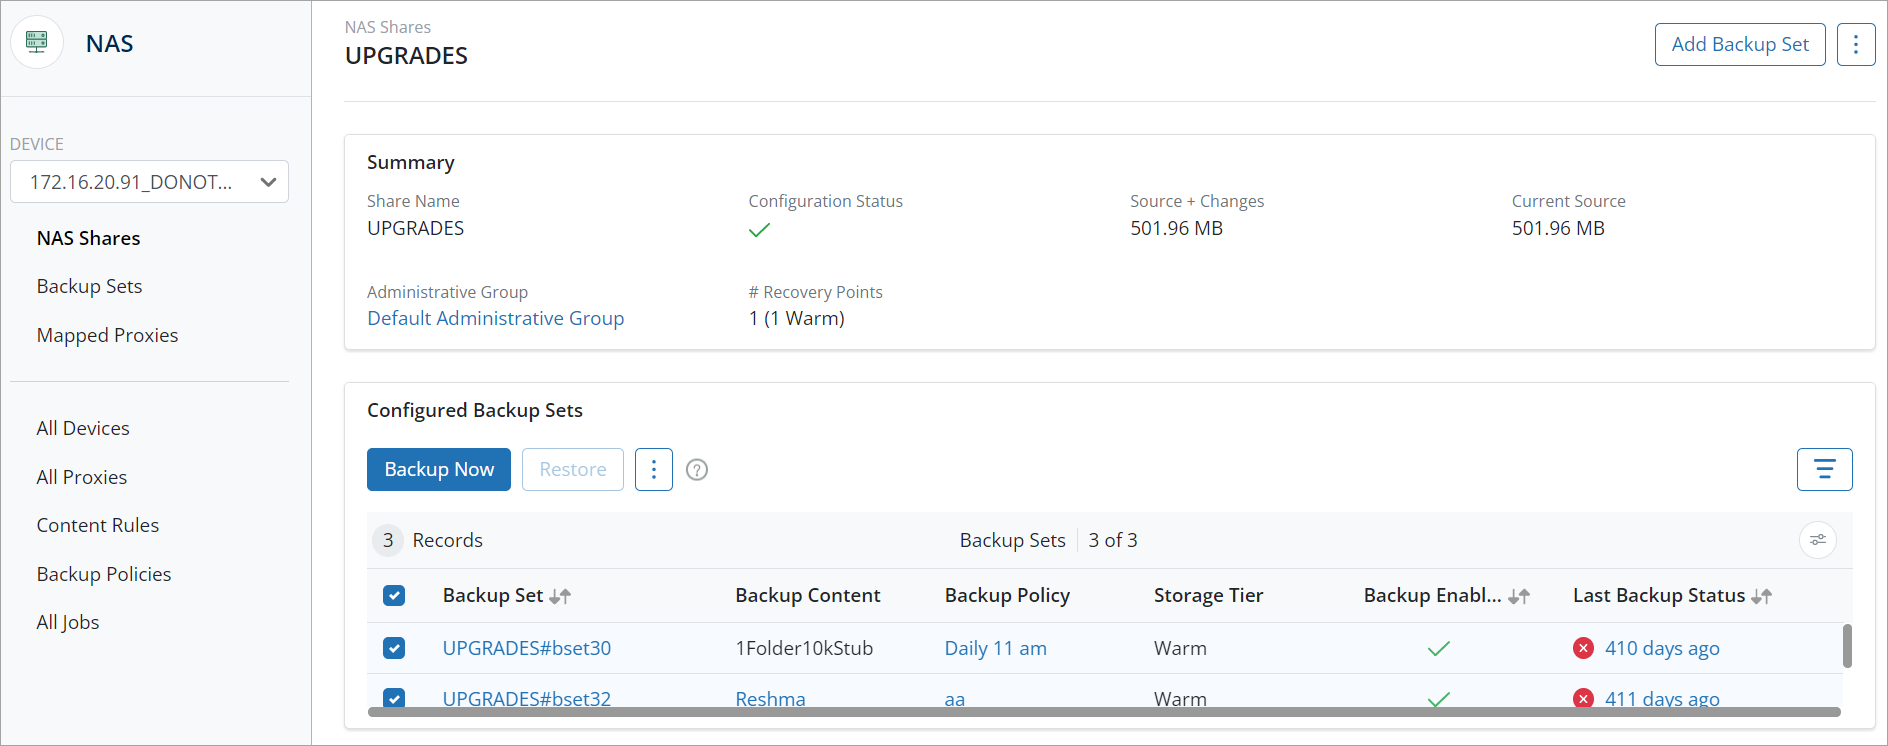
This triggers a manual backup of all the configured backup sets for the selected NAS shares. The backup status for each of these jobs is displayed in the Last Backup Status column in the NAS share details page of the NAS share.
Delete a NAS share from Druva
All the backup sets configured for a NAS share need to be deleted before the NAS share can be deleted. You can delete a NAS Share only after 7 days of the deletion of the last backup set mapped to the share. See Manage backup sets for NAS shares on how to delete backup sets.
- Log in to the Management Console.
-
Select the workload from the Protect menu. Note that if the All Organizations menu is enabled, you have to first select an organization that has your NAS device and then select the workload.
-
In the device-specific navigation pane on the left, select the NAS device from the Device dropdown.
- On the NAS Shares page select the NAS share, click more options, and then click Delete.

- Alternatively, click the NAS share, and from the NAS share details pane, in the top right corner, click more options, and then click Delete.

Note: Ensure that you have deleted all backup sets associated with the share before deleting the NAS share. NAS shares can be deleted even if a share auto-discovery is in progress.
Error messages
Druva displays the following error message if you attempt to delete a NAS share without deleting the backup sets configured in the share.
Could not delete the NAS share as there are backup sets configured in it. To delete a NAS share, you must delete all the backup sets in it.
For any other error messages or internal errors, contact Druva Support.
Delete NAS share recovery points
If you are a cloud administrator, you can delete warm recovery points of NAS shares that you no longer require. If you are a group administrator, you can delete warm recovery points of NAS shares that belong to the administrative groups that you manage.
After you delete a recovery point, Druva purges the recovery point data from the warm storage, thus freeing up the storage space.
Note: You cannot delete the most-recent recovery points of a NAS share. However, all recovery points get compacted according to the retention period defined in the backup policy.
Procedure
-
Log in to the Management Console.
-
Select the workload from the Protect menu. Note that if the All Organizations menu is enabled, you have to first select an organization that has your NAS device and then select the workload.
-
In the device-specific navigation pane on the left, select the NAS device from the Device dropdown.
-
In the device-specific navigation pane on the left, click Backup Sets.
-
The right pane lists all the available backup sets configured for all NAS shares on the selected NAS device.
-
Click a backup set whose recovery points you want to delete. This brings up the backup sets details page.
- On the Backup Sets details page, click the Backups tab. The Backups tab lists all the recovery points for this backup set. You can filter the recovery points by Recovery point Type (Hot, Warm, or Cold), and Created In (Last 24 hours, Last 7 days, and Last 1 month). Click the Filters icon to filter the displayed recovery points.
- Select a recovery point that you want to delete, and then click Delete. This deletes the recovery point from the storage and frees up space.
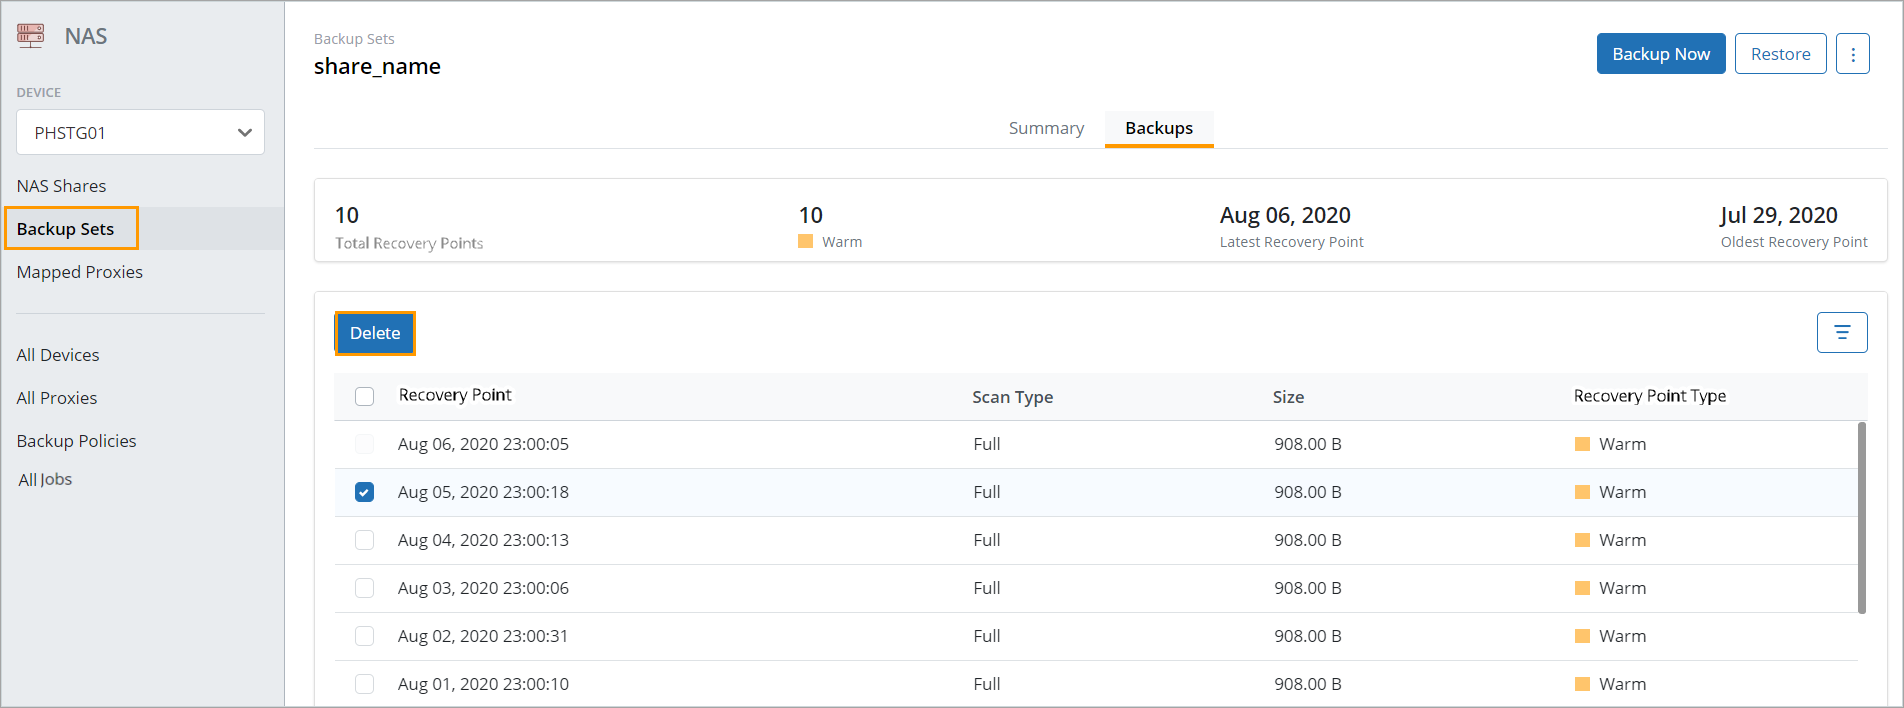
Note: The most recent recovery point of a backup set cannot be deleted. However, all recovery points get compacted according to the retention period defined in the backup policy.
33935