NAS share backup workflow
Enterprise Workloads Editions:  Business Enterprise Elite
Business Enterprise Elite
This article provides the workflow diagrams and steps for data backup of NAS shares on Windows and Linux.
Backup workflow
The following workflow illustrates the data flow during backup of NAS shares on Windows or Linux:
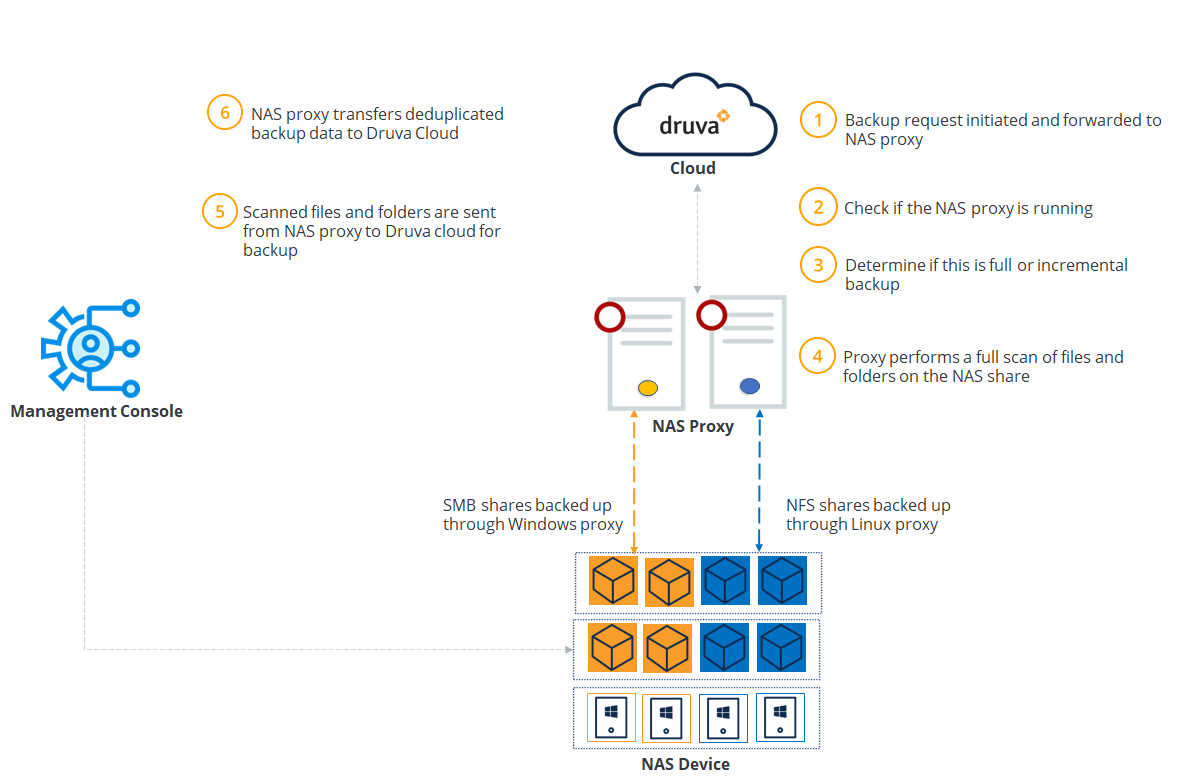
The following table summarizes the workflow steps.
| Step | Operation |
|---|---|
|
Step 1 |
A backup request is initiated and forwarded to the NAS proxy. |
|
Step 2
|
Druva checks if the NAS proxy is running.
|
|
Step 3
|
Druva determines the type of backup. If it is the first backup from any source, Druva performs a full backup. The subsequent backups are incremental backups. |
|
Step 4 |
Enterprise Workloads agent performs a full scan of the files and folders on the NAS share. |
|
Step 5 |
NAS proxy sends the scanned files and folders for backup to Druva Cloud.
|
| Step 6 | NAS proxy transfers the deduplicated backup data to the Druva Cloud. |