Update a profile
Overview
A Druva Cloud administrator and a Cloud administrator can update an existing profile at any time. If you are a profile administrator, you can update the profiles for which you have access control.
Any changes made to a profile take effect in the next backup cycle.
To update a profile
-
Click the profile that you want to update.
-
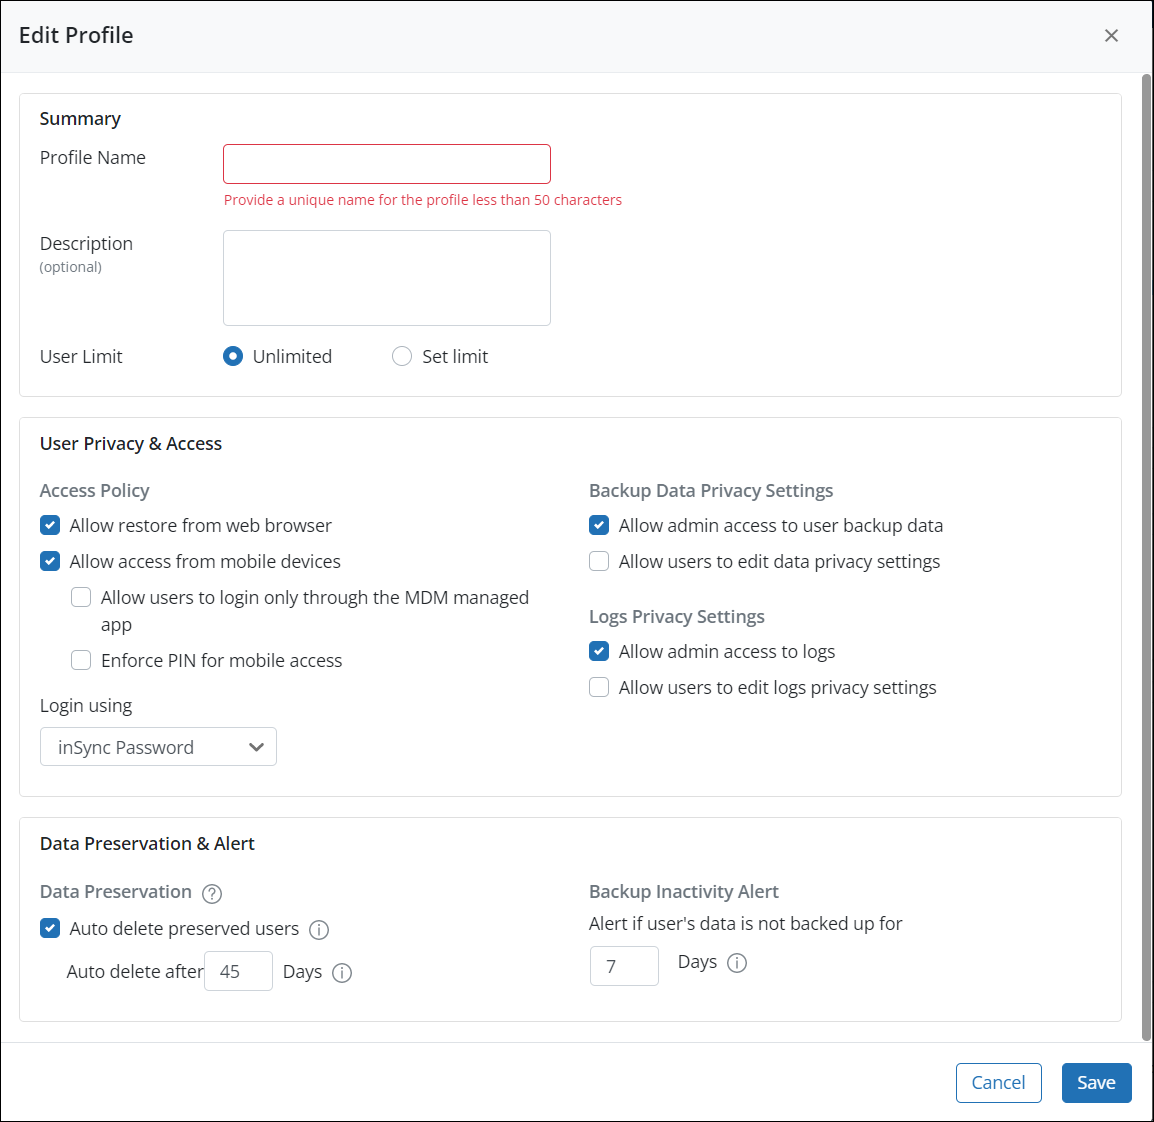
Click the Edit button at the top right, select either General or SaaS Apps to update the required profile, and select Save.
Steps for updating a profile:
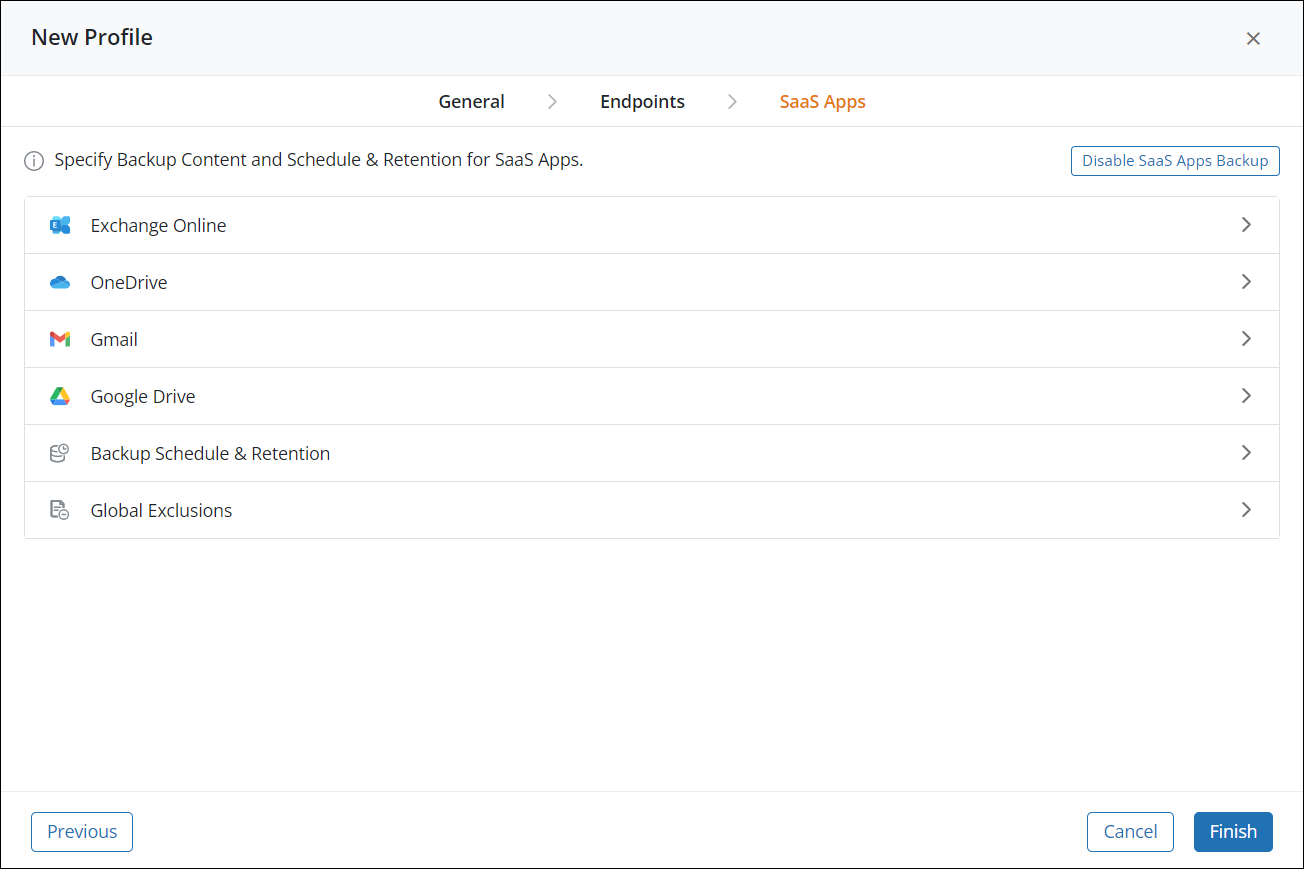
Step 3: SaaS Apps
To start configuring backup and retention settings for SaaS Apps, Enable SaaS Apps Backup.
You can view and configure settings only for those SaaS Apps for which you have purchased a license and configured it in inSync. To purchase a license, contact your Account Manager or Druva Support.
Configure Backup settings for Microsoft 365 Apps
You can configure the settings for the following user apps -
- Exchange Online
- OneDrive
Other supported Microsoft 365 apps like SharePoint Online, Teams, Groups, and so on, do not require a Profile to be configured. You can configure the backup settings at the App level while configuring it to protect in inSync. For more information, see Protect Microsoft 365 Apps.
Exchange Online
- ►Configure settings for Exchange Online
-
- Click the slider to Enable Exchange Online backup.
In-Place Archive for Exchange Online is also backed up if Exchange Online is selected.
- (Optional) If you want to Exclude Paths and Folders while backing up data, type the folder name or relative path to the folders that you want to exclude from backups.
Ensure that you separate consecutive entries using a semicolon (;) and there is no white space between two entries.
Example: Let's assume you have the following folder in your Exchange Online:- Inbox/Mails
- /Templates
You specify Inbox/Mails ;Templates in the Exclude Paths field. Now, during the backup operation, inSync excludes Inbox/Mails and Templates from getting backed up.
Avoid using ':&' when specifying the path. for exclusion.
- (Optional) If you want to backup the Exchange Online 'Recoverable Items' folder, which keeps the deleted emails, contacts, and calendar items in the Deletions and Purges items, select the Backup Recoverable Items checkbox. This enables administrators and users to restore or download data caused by accidental or malicious deletion.
OneDrive
- ►Configure settings for OneDrive
-
- Click the slider to Enable OneDrive backup.
- (Optional) You can exclude specific files and specific file and folder paths from backup.
- Exclude File Types - If you do not want inSync certain file types, select and enter those in Exclude File Types. If you are looking for a specific file type and if it does not appear in the standard list, type the file extension in the adjacent box.
- Exclude Paths - Type the file or folder name or relative path to the files and folders that you want to exclude from backups in Exclude Paths. Ensure that you separate consecutive entries using a semicolon (;) and there is no white space between two entries.
Let's assume you have the following folders in your OneDrive:
- /Druva/Templates/Paths.txt
- Druva/Paths.txt
- You specify Paths.txt in the Exclude Paths field. Now, during the backup operation, inSync excludes Paths.txt from the folders ‘/Druva/Templates/Paths.txt’ and ‘/Druva/Paths.txt’ from getting backed up
- By default, backup of Teams Meeting Recordings (TMR) is excluded. Microsoft stores the Teams Meeting Recordings (TMR) in OneDrive and SharePoint. To ensure better backup speed, all files from the default folder path of Teams Meeting Recordings are excluded from the backups by default. To backup Teams Meeting Recordings (TMR), clear the check box.
Configure Backup Settings for Google Workspace Apps
If you have a Google Workspace license, you can configure the settings for the following user apps -
- Gmail
- Google Drive
Shared Drive does not require a Profile to be configured. You can configure the backup settings while configuring Google Workspace for data protection in inSync. For more information, see Protect Google Workspace Apps.
Gmail
- ►Configure settings for Gmail
-
- Click the slider to Enable Gmail backup.
- (Optional) You can exclude specific files and specific file and folder paths from backup. Type the folder name or relative path to the folders that you want to exclude from backups in Exclude Paths. Ensure that you separate consecutive entries using a semicolon (;) and there is no white space between two entries.
Example: If you have the following folder in your Gmail:
- Inbox/Mails
- /Templates
You specify Inbox/Mails ;Templates in the Exclude Paths field. Now, during the backup operation, inSync excludes Inbox/Mails and Templates from getting backed up.
Note: Avoid using ':&' when specifying the path. for exclusion.
Google Drive
- ►Configure settings for Google Drive
-
- Click the slider to Enable Google Drive backup.
- (Optional) You can exclude specific files and specific file and folder paths from backup.
- Exclude File Types - If you do not want inSync certain file types, select and enter those in Exclude File Types. If you are looking for a specific file type and if it does not appear in the standard list, type the file extension in the adjacent box.
- Exclude Paths - Type the file or folder name or relative path to the files and folders that you want to exclude from backups in Exclude Paths. Ensure that you separate consecutive entries using a semicolon (;) and there is no white space between two entries.
Let's assume you have the following folders in your Google Drive:
- /Druva/Templates/Paths.txt
- /Druva/Paths.txt
You specify Paths.txt in the Exclude Paths field. Now, during the backup operation, inSync excludes Paths.txt from the folders ‘/Druva/Templates/Paths.txt’ and ‘/Druva/Paths.txt’ from getting backed up.
- Backup shared data owned by other users: Select this checkbox if you want to backup all the Google Drive users' data (owner's data and data shared by other users).
Selecting the Backup shared data owned by other users checkbox might slower your incremental backups. For faster backup and restore, it is recommended to deselect this checkbox. For existing administrators, this checkbox is selected by default. You have to manually deselect this option.
Backup Schedule & Retention
- ►Configure Backup Schedule & Retention settings
-
Field Action Backup Schedule Backup every
Select how frequently you want inSync to back up SaaS Apps data. By default, inSync performs the backup operation once a day. For more information, see Define the backup interval for SaaS Apps. Data Retention for files Retain all Snapshots For
Set the duration in days to retain all the daily backups.
Example: If you set the duration to retain snapshots for five days and the backup is completed on January 5, it will delete the backup data from the storage on January 10.
For more information about the retention policy, see Configure the backup retention policy.Retain Weekly Snapshots For Set the duration in weeks to retain all the weekly backups.
Note: The weekly backup is the last backup in a calendar week. The calendar week starts on Sunday.
Retain Monthly Snapshots For
Set this duration in months to retain all the monthly backups.
Note: The monthly backup is the last backup in a calendar month.
For more information about the retention policy, see Configure the backup retention policy.
Note: The monthly backup is the last backup in a calendar month.
Data Retention for Emails Apply files data retention settings for emails Select this option if you want to apply the files' data retention settings for Microsoft 365 Exchange Online and Gmail snapshots.
inSync retains the email backed-up snapshots within the storage as per the configured daily, weekly, and monthly retention period settings for files.
For example, if you specify that you want to retain all backups for 5 days and inSync completed the backup operation on January 6, 2019. inSync retains the email backed-up snapshots till January 11, 2019.
For more information about retention policy, see Configure the backup retention policy.
Delete emails older than
- If you have selected this option, then the Retention Period assigned to the files is not applicable for Microsoft 365 Exchange Online and Gmail snapshots.
- Delete Emails older than option is applicable for Microsoft 365 Exchange Online and Gmail only.
Select and type the number of months up to which you want inSync to retain all backed up emails within Exchange Online and Gmail snapshots.
For example, if you type 6, inSync will retain all emails across all snapshots whose sent or received timestamp is less than 6 months old.
By default, inSync retains emails for 84 months.
Emails are retained based on the email’s event date and timestamp. The maximum retention period that you can specify is 250 months and the minimum is 1 month. Type zero (0) for unlimited retention of emails.
For more information about retention policy, see Configure the backup retention policy.
Note: Data retention settings for files and emails do not apply in the following scenarios:
- If the users associated with the SaaS Apps profile are put on Legal Hold.
- If the retention settings for Files for the SaaS Apps profile has unlimited retention settings for daily, weekly, and monthly frequencies. i.e. The Retention Settings for Files for the SaaS Apps profile is set to Zero.
Data Lock Enable Data Lock
Note: Only Druva Cloud Administrators can enable the Data Lock feature.
Enable Data Lock: Select the Enable Data Lock option to enable the data lock to prevent the snapshots from any accidental or malicious deletion.
After the profile is enabled with the Data Lock feature, you will see the
 icon next to the profile on Manage Profile page. When you hover over the icon, a message stating Data Lock is enabled appears.
For more information, see Data Lock.
Note: Once you enable a profile with the Data Lock feature, you cannot:
- Disable the Data Lock setting.
- Delete the snapshots, users, and devices associated with the profile.
- Edit the retention period.
- Change profile of users.
- Remove license of users.
Global Exclusions
- ►Configure Global Exclusions
-
You can create a global exclusion list for file types, file names, and folders that you want to exclude from inSync backups. inSync excludes the files types that you specify in the global exclude list irrespective of the filters set at the folder level by the administrator or the user. For example, if you do not want inSync to back up .mpg files from user account, you must add .mpg to the global exclude list.
For more information on how you can configure the global exclude list, see Configure a global exclusion list for files and folders.
- In the Exclude File Types box, type the file types that you want to exclude from the backup. The file extensions are automatically added to the adjacent field. If you want to remove a file type, click the file type.
Note: Exclusions of file types are supported for OneDrive and Google Drive only.
- In the Exclude Paths and Folders box, type the file or folder name or relative path to the files and folders that you want to exclude from backups. Ensure that you separate consecutive entries using a semicolon (;) and there is no white space between two entries.
- For Gmail and Exchange Online, only folder name or relative paths are supported for Exclude Paths. For example, Birthdays;United State s holidays;Calendar
- For Google Drive and OneDrive, folder or file name or relative paths are supported for Exclude Paths. For example, /Druva/Templates/Paths.txt;Templates
Related links