Heads up!
We've transitioned to a new documentation portal to serve you better. Access the latest content by clicking here.
If you’ve successfully backed up your Nutanix virtual machines using Enterprise Workloads, you can restore virtual machines disks (vDisks) and full virtual machines.
Types of recovery points
Warm recovery point
Warm recovery points are point-in-time images of data stored in the warm storage. The data is stored in the warm storage till its retention period lapses.
Workflow
| Step |
Operation |
| Step 1 |
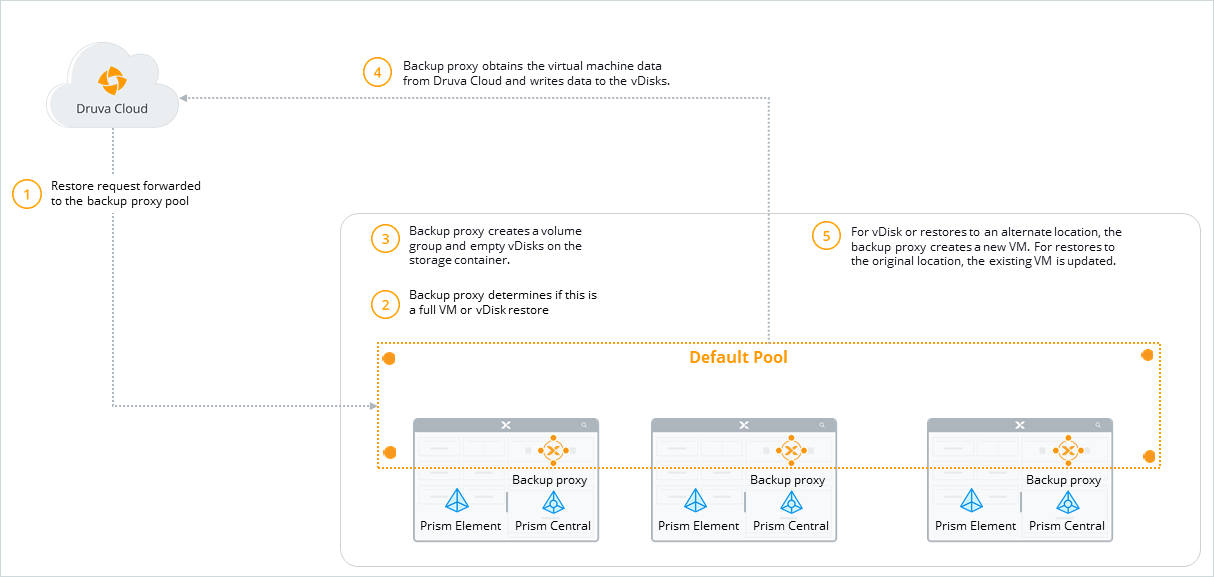
Druva forwards the restore to the default Backup proxy pool.
- Druva automatically identifies the Backup proxy within the default pool that will run the restore request based on a load balancing algorithm.
- The restore request is queued if the identified Backup proxy is busy processing other restore jobs. The request is reinitiated when the Backup proxy is available.
|
| Step 2 |
Depending on where the virtual machines are deployed, the Backup proxy contacts either the Prism Element or Prism Central to locate the virtual machines and their configuration. If you’ve registered Prism Central, then the Backup proxy gets the VM configuration information from Prism Central and the recovery point information from the Prism Element. |
|
Step 3
|
For full virtual machine restores to the original location, Druva:
- Uses the same storage container that the original VM uses to store its vDisks. Druva then creates a volume group using the vDisks that need to be restored.
- Downloads the data from Druva Cloud and writes to the newly created virtual disks (vDisks) using an iSCSI connection.
- Detaches all the existing disks (except CDROM) in the VM and attaches the restored ones from the above volume group for original restore.
The network settings remain unchanged.
For full virtual machine restores to an alternate location, Druva:
- Uses the storage container specified in the restore settings to create a volume group for the vDisks to be restored.
- Downloads the data from Druva Cloud and writes to the newly created virtual disks (vDisks) using an iSCSI connection.
- Creates a new VM and attaches the restored vDisks to it.
You can select the network before submitting the restore job.
For disk restores, Druva:
|
| Step 4 |
The Backup proxy obtains the virtual machine data from Druva Cloud. |
| Step 5 |
- Druva creates a new VM when full VM restores to an alternate location, and disk restores are successful.
- Druva alters the vDisks and updates the original VM if a full VM restore to the original location is successful
- No VMs are created or updated if the restores fail.
|
 Business