Restore vDisks
Enterprise Workloads Editions:  Business Enterprise Elite
Business Enterprise Elite
After your Nutanix environment has backed up successfully, you can perform:
- Data Restore: Restore vDisks, files and folders.
- Full VM restore: Restore the entire virtual machine.
You can restore vDisks associated with the selected machine as part of a Data Restore. Druva creates a new virtual machine on the selected Prism, Cluster, and Storage container and attaches the selected vDisks to the newly created virtual machine.
Procedure
- Log in to the Management Console.
- Select your Organization if Organizations are enabled.
- On the menu bar, click Protect > Nutanix AHV.
- On the Prism page click the Prism Element or Prism Central whose VMs need to be restored. Alternatively, select the Prism Element or Prism Central from the Prism dropdown menu on the left.
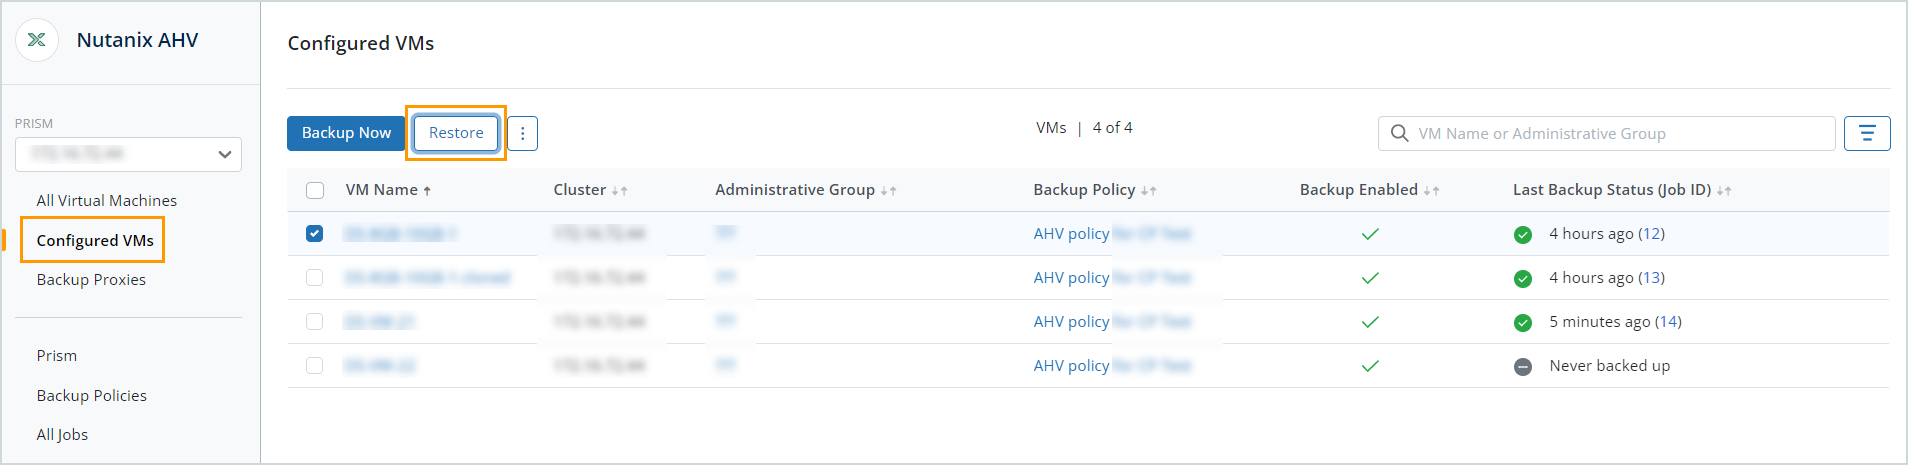
- In the left pane, under the selected Prism Element or Prism Central, click Configured VMs.
- Select the VM that needs to be restored, and then click Restore.
- In the Restore Type section, ensure that Data Restore is selected.
- Click the dropdown next to the date and time stamp, and select the recovery point that you want to restore from.
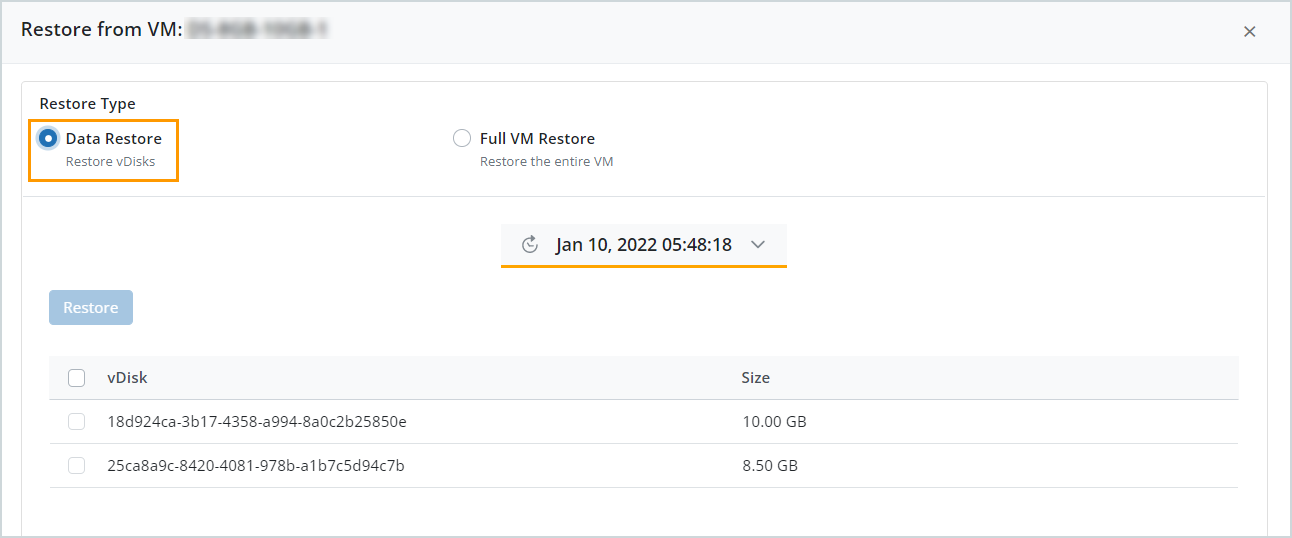
- Select one or more vDisks, and then click Restore.
- In the vDisk Restore dialog box, perform the following tasks:
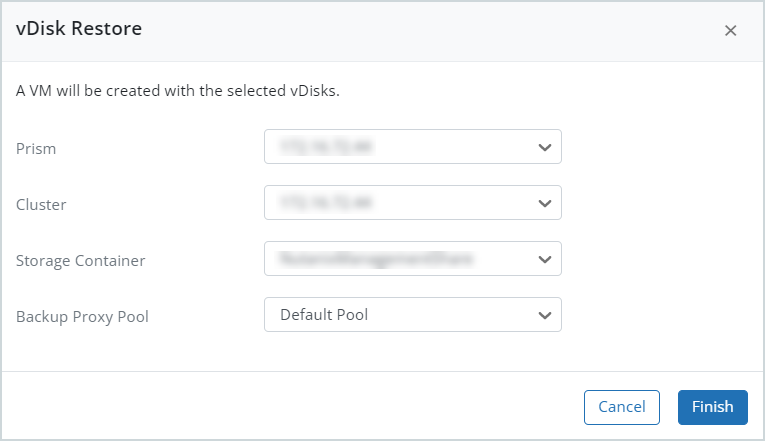
Field Description Prism Select a Prism on which the VM should be created. Cluster Select the Cluster in the Prism where the VM should be created. Storage Container Select the Storage Container where the virtual machine will be stored. Backup Proxy Pool Ensure that the Default Pool is selected. -
Click Finish.