Configure the Phoenix Backup Store and RMAN hosts to backup databases
 Business Enterprise Elite
Overview
After the Phoenix Backup Store is created, a mount must be created on the Phoenix Backup Store which serves as the location where Oracle Recovery Manager (RMAN) stores the database backups. Druva then creates a recovery point of the Oracle RMAN backup on the Phoenix Backup Store and uploads it to the Druva Cloud.
To backup databases, Druva provides scripts that are shipped with the Phoenix Backup Store. Use these scripts to configure the Phoenix Backup Store for backup and restore of Oracle databases. See, Template shell scripts for Linux RMAN hosts and Template batch file and RMAN script for Windows RMAN hosts.
The process includes the following stages:
- Create a backup mount on the registered Phoenix Backup Store. See, Create a mount on the Phoenix Backup Store.
- Map the backup mount on the RMAN host. See,
- Let RMAN store backups on the mount. See,
Prerequisite
The Phoenix Backup Store is deployed and activated. For more information, see Deploy and register a Phoenix Backup Store.
Create a mount on the Phoenix Backup Store
- Log in to the Management Console.
- Click Oracle > Phoenix Backup Store from the Protect menu. Note that if the All Organizations menu is enabled, you have to first select an organization where the Phoenix Backup Store needs to be configured and then click Oracle > Phoenix Backup Store.
- The Phoenix Backup Stores page appears.
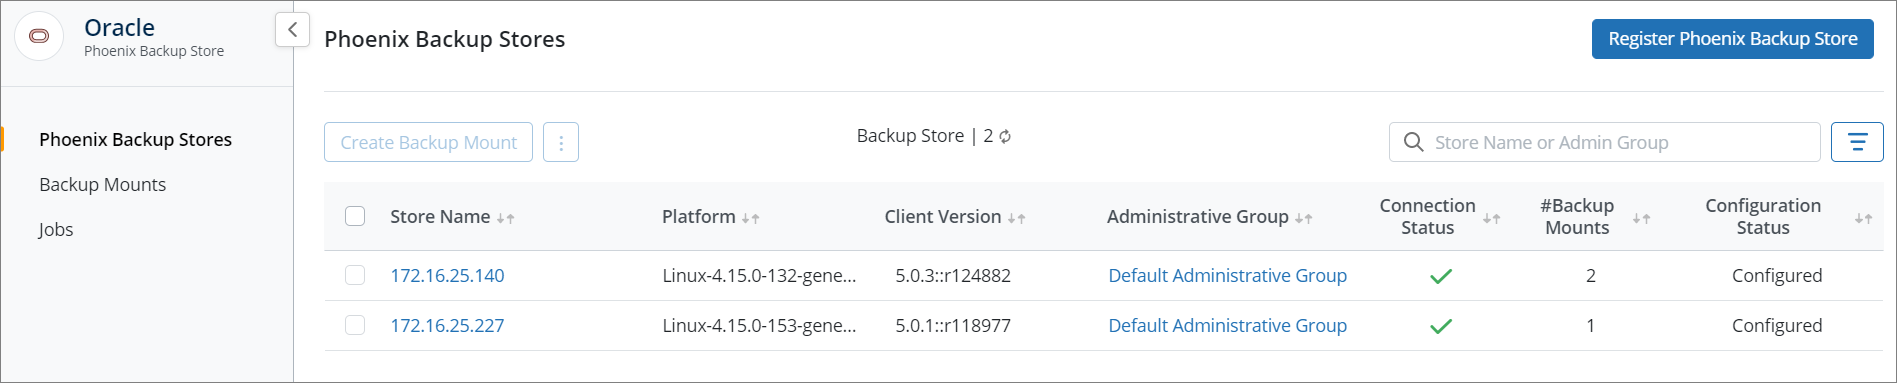
- On the Phoenix Backup Stores page, in the Store Name column, select a Phoenix Backup Store and then click Create Backup Mount.
The Create Backup Mount page appears.
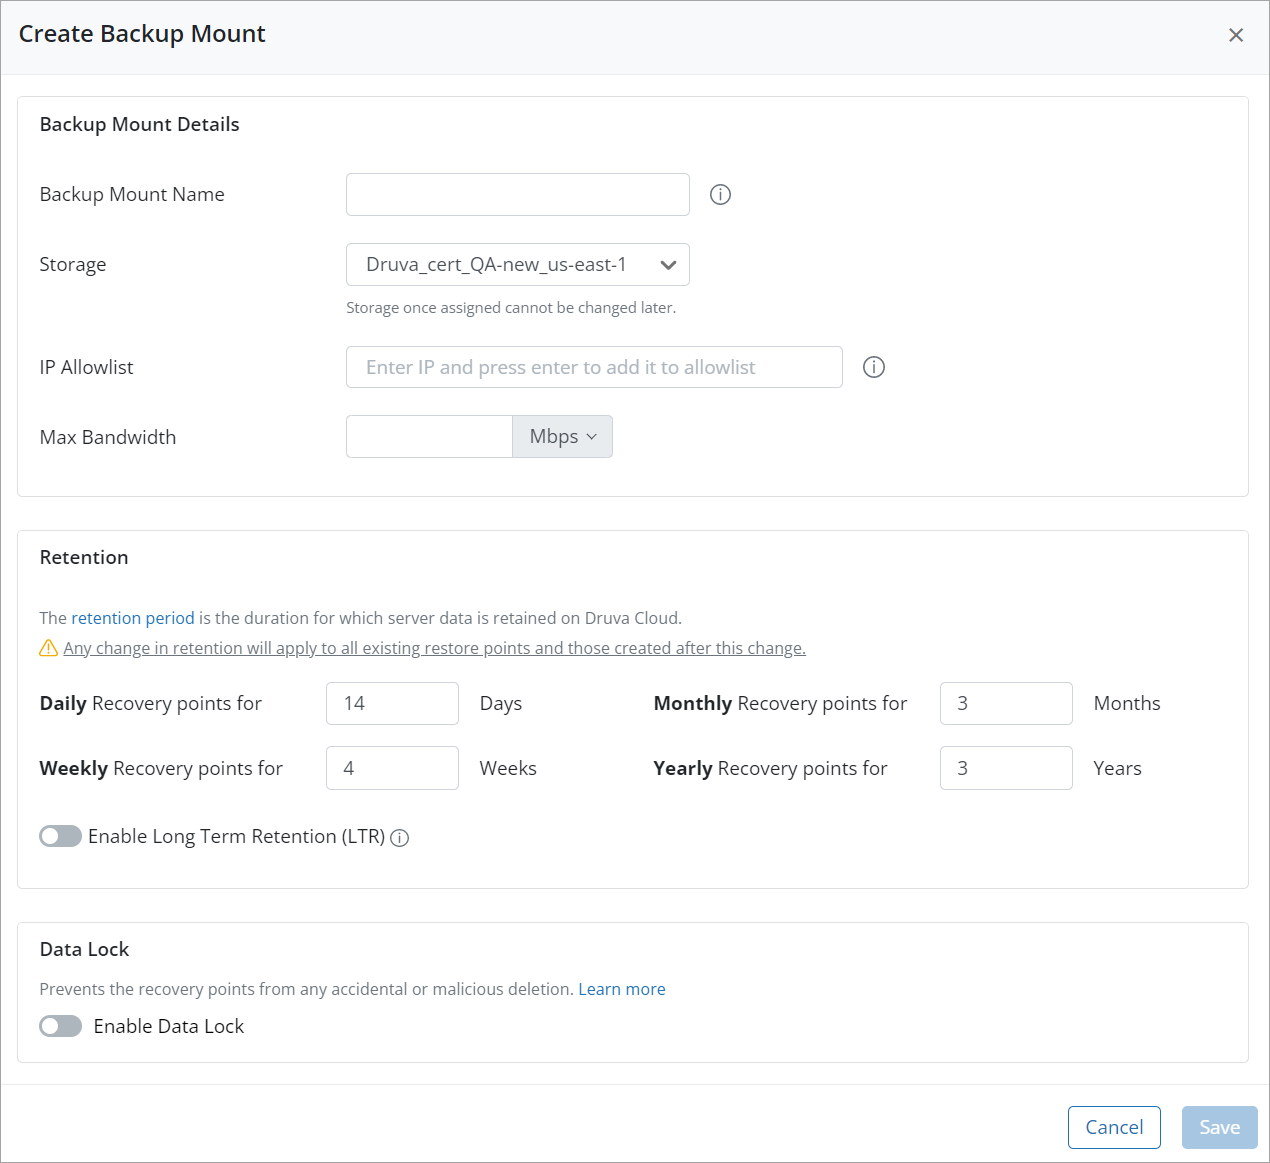
- In the Backup Mount Details section, provide the following details:
Field Description Backup Mount Name The backup mount name is the RMAN target location. The Backup Mount Name field identifies the Phoenix Backup Store mount where the Oracle RMAN backups are stored. For example, testmount. Ensure that you enter alphanumeric characters only. Storage The storage is the location on the Druva Cloud where the recovery point is stored after the Phoenix Backup Store uploads the recovery point to the Druva Cloud. The list of IP addresses of RMAN hosts that can read from or write to a backup mount on the Phoenix Backup Store. The connection to the Phoenix Backup Store will be restricted to the IP addresses specified in this box. For example, if you want an RMAN host to store Oracle RMAN backups on a backup mount, add its IP address to the whitelist. Similarly, if you restore a database from the Druva Cloud to the Phoenix Backup Store, add the IP address of the RMAN host that can use the downloaded Oracle RMAN backup to restore the database.
To allow multiple IP addresses, either use a comma or a wildcard. For example, if you enter 192.0.*.*, all the servers with the IP addresses starting 192.0.0.0 through 192.0.255.255 can access the mount. If you want to allow servers with specific IP addresses to access the mount, enter the IP addresses using a comma. For example, you want two servers with IP addresses 192.0.2.0 and 198.51.100.1 to access the mount. To allow access to the mount, enter 192.0.2.0, 198.51.100.1.
If no IP address is provided, any system can connect to the Phoenix Backup Store.Max Bandwidth
The maximum bandwidth available to the Phoenix Backup Store to upload the recovery points to the Druva Cloud.
Note: The maximum bandwidth that a backup job can consume is 2 Gbps (2000 Mbps).
-
The retention settings on Druva specify the period for which a recovery point is retained on the Druva Cloud. The retention setting is tied to a recovery point that the Phoenix Backup Store creates for the Oracle RMAN backups that Oracle Recovery Manager (RMAN) stores on the backup mount. In the Retention section, provide the following details:
Field Description Daily Recovery points for
Druva retains all the recovery points that are created for the number of days specified in Daily recovery points.
Druva considers midnight as the end of a day.
If you have configured Druva to back up your server multiple times within a day, Druva retains all the recovery points for the days specified.Weekly Recovery points for
The number of weekly recovery points that Druva should retain. Druva treats the latest recovery point in the week as the weekly recovery point.
Druva considers midnight on Sunday as the end of the week.
Monthly Recovery points for
The number of monthly recovery points that Druva should retain. Druva treats the latest recovery point in the month as the monthly recovery point.
Druva considers midnight of the last day of a month as the end of the month.
Yearly Recovery points for
The number of yearly recovery points that Druva should retain. Druva treats the latest recovery point in the year as the yearly recovery point.
Druva considers the midnight of the last day of the year as the end of the year.
Enable Long Term Retention
Toggle to enable or disable LTR for the backup policy. You can enable LTR only if the retention period is greater than or equal to one year. To know more about LTR, refer to About Long Term Retention.
In the Keep recovery points in warm tier drop-down list, specify the duration in days to retain the recovery points in the warm tier. For example, 15, 30, 45, and 60 days. See Impact of changing the threshold on the existing recovery points.
Enable Data Lock Toggle to enable the Data Lock for the backup policy. For more information about Data Lock, refer to Data Lock for preventing malicious or accidental deletion of recovery points.
Note: Once you apply Data Lock to the backup mount, you cannot:
- Disable Data Lock.
- Delete the recovery points and backup mount.
- Edit the retention period in the backup mount.
-
After you provide the retention settings, click Save.
Druva creates a mount on the Phoenix Backup Store, and you can see it listed in the Backup Mounts tab of the Oracle page.
Backup Oracle databases using RMAN hosted on a Linux server
After you create a mount on the Phoenix Backup Store, you have:
- To map it to the Linux server that hosts the RMAN. To map the mount to the RMAN host, you need the details of the backup mount which is a shared directory on the Phoenix Backup Store.
- Update and run the RMAN scripts provided by Druva that use the Phoenix Backup Store API to backup databases.
- For more information on how this script uses the Phoenix Backup Store API to backup and store Oracle RMAN backups on the backup mount, see Phoenix Backup Store API reference.
- To review the contents of the scripts, see Template shell scripts for Linux RMAN hosts.
Map the mount to the RMAN hosted on a Linux server
In this example, the backup mount on the Phoenix Backup Store is mapped to the /local/testmount folder on the RMAN host.
- Log on to the virtual machine that is set up as the Phoenix Backup Store.
- Transfer the following scripts from the Phoenix Backup Store to the server that hosts Oracle Recovery Manager (RMAN). The scripts are stored under the /opt/Druva/Phoenix/PhoenixBackupStore/bin folder on the Phoenix Backup Store.
- phoenix_get_mount_details.sh:This script provides the details of the backup mount and the Phoenix Backup Store. Use this script to get the location of the backup mount so that you can map it to the RMAN host.
- oracle_rman_data_backup.sh: This script runs RMAN commands that perform incremental merge backup of databases, archive log backups, and store the backup on the backup mount. You can modify the script to modify RMAN parameters.
- Run the phoenix_get_mount_details.sh script on the RMAN host with the IP address of the Phoenix Backup Store server and backup mount name as the parameters.
Run the script as:
phoenix_get_mount_details.sh <Phoenix-Backup-Store-ip-address> <backup-mount-name>
For example:phoenix_get_mount_details.sh 192.0.2.1 testmount
The output of the phoenix_get_mount_details.sh script is the path to the backup mount. You have to map the backup mount to the RMAN host so that when you run a backup job using the RMAN script, the RMAN can store the Oracle RMAN backup on the backup mount.
Sample output of the phoenix_get_mount_details.sh script:Remote mountpath is 192.0.2.1:/Phoenix/testmount/oracle_data Mount options : retrans:5,timeo:1200, rw, user
If you are using a Real Application Cluster (RAC) setup, the nfs mount should have NOAC option.
- Map the backup mount to the RMAN host after you generate its path. For example, if the RMAN host is also Linux based,
Run the following command for a standalone host:sudo mount -t nfs <Phoenix-Backup-Store-IP-Address>:<path-to-backup-mount-on-Phoenix-Backup-Store> <path-to-local-folder-on-rman-host-for-mapping>
For example:
sudo mount -t nfs 192.0.2.1:/Phoenix/testmount/oracle_data /local/testmount
Example command for a Real Application Cluster setup
sudo mount -t -o noac,rw,user nfs 192.0.2.1:/Phoenix/testmount/oracle_data /local/testmount
For more information on the mount command, see Ubuntu Manpage: mount [External link to Ubuntu Manpages].
- Add the folder as an entry to /etc/fstab to ensure that the backup mount stays mapped to the RMAN host if it is restarted. For example:
192.0.2.1:/Phoenix/testmount/oracle_data /local/testmount nfs rw,user,timeo=1200,noac
- 192.0.2.1 is an example IP address of the Phoenix Backup Store.
- /Phoenix/testmount/oracle_data is an example path to the backup mount on the Phoenix Backup Store.
- /local/testmount is an example path to a folder on the RMAN host to which the backup mount is mapped. When RMAN writes data to this folder, data is actually written to the backup mount through NFS.
- rw,user,timeo=1200,noac are applicable mount options. For more information, see Fstab [External link to Ubuntu documentation].
- Change the ownership of the mapped folder on the RMAN host. The ownership of the mount on the RMAN host should belong to the oracle/oinstall user. Run the following command as the root user to change the ownership of the folder:
sudo chown -R oracle:oinstall <path-to-local-folder-on-rman-host-to-which-backup-mount-is-mapped>
For example:
sudo chown -R oracle:oinstall /local/testmount
or
sudo chmod -R 777 /local/testmount
-
After you map the backup mount to the RMAN host, you can backup Oracle databases.
Run the script on a Linux server
When you upgrade the Phoenix Backup Store to version 4.9.1 or later, Druva requires you to:
- Replace your existing RMAN scripts with the new template scripts provided with the Phoenix Backup Store 4.9.1 released on October 19, 2020.
- Run the new RMAN scripts without the logdir parameter.
Your backups will stop running if you upgrade the Phoenix Backup Store to version 4.9.1 or later but miss to replace the old RMAN scripts with the new scripts. To use the new scripts, see Template shell scripts for Linux and Solaris RMAN hosts. The new scripts are also located at the /opt/Druva/Phoenix/PhoenixBackupStore/bin location on the Phoenix Backup Store 4.9.1 and later.
Before you run the script, ensure you have:
- The IP address of the Phoenix Backup Store that hosts the backup mount
- The backup mount name
The run-time parameters of the oracle_rman_data_backup.sh and oracle_rman_archivelog_backup.sh scripts are:
- IP address of the Phoenix Backup Store that hosts the backup mount.
- The name of the backup mount.
Procedure
- Log on to the oracle server that is mapped to the Phoenix Backup Store mount.
- On the terminal, change the directory to the folder in which the script is stored.
- Run the following two scripts as the Oracle user to back up data files and the archived log files simultaneously:
- To back up data files, run the following script as the Oracle user:
./oracle_rman_data_backup.sh <ip-address-of-the-phoenix-backup-store> <name-of-the-backup-mount>
For example:./oracle_rman_data_backup.sh 192.0.2.1 testmount
- To back up the archived log files in the database based on the required backup frequency, run the following script as the Oracle user:
./oracle_rman_archivelog_backup.sh <ip-address-of-the-phoenix-backup-store> <name-of-the-backup-mount>
For example:./oracle_rman_archivelog_backup.sh 192.0.2.1 testmount
Note: For Oracle RAC configuration, you cannot back up data files and archived log files separately using Phoenix Backup Store versions prior to 4.8.15-97113.
- To back up data files, run the following script as the Oracle user:
When the script is run, the RMAN creates an Oracle RMAN backup and stores it on the backup mount of the Phoenix Backup Store. All the logs of the Oracle RMAN backup job are stored in the folder you provide at the time of running the script.
Note: Druva can also back up and restore Oracle instances running on Solaris. Use the following scripts to back up data files and archived logs, separately.
Backup Oracle databases using RMAN hosted on a Windows server
After you create a backup mount on the Phoenix Backup Store, you have to:
- To map it to the Windows server that hosts the RMAN. To map the mount to the RMAN host, you need the details of the backup mount which is a shared directory on the Phoenix Backup Store.
- Update and run the RMAN script and a template batch file provided by Druva that uses the Phoenix Backup Store API to backup databases.
- For more information on how this batch file uses the Phoenix Backup Store API to backup and store Oracle RMAN backups on the backup mount, see Phoenix Backup Store API reference.
- To review the contents of the scripts, see Template batch file and RMAN script for Windows RMAN hosts.
Map the mount to the RMAN hosted on a Windows server
- On the Windows Server, install the Network File System client.
- For Windows 2014 and later, run the following command:
PS C:\>
Install-WindowsFeature
-Name NFS-Client - For Windows 2012 and earlier, follow the steps as provided in the Microsoft documentation.
- For Windows 2014 and later, run the following command:
- Enable Direct NFS Client for Oracle. The Direct NFS Client for Oracle optimizes the operations that RMAN performs to store backups on the Phoenix Backup Store mount. For more information, see Enabling Direct NFS Client [External link to Oracle documentation].
- Enable write permissions for the anonymous user on the Windows Server. With the write permissions, the anonymous user can write data on the backup mount of the Phoenix Backup Store.
To enable write permissions for the anonymous user:- Run regedit to start the Registry Editor.
- In the Registry Editor, navigate to the HKEY_LOCAL_MACHINE\SOFTWARE\Microsoft\ClientForNFS\CurrentVersion\Default folder in the left pane.
- Create two DWORD 32-bit values in the folder. The two values create a user and group ID for the anonymous user that can write to the backup mount on the Phoenix Backup Store. To create the values:
- In the right-pane, right-click and then select New > DWORD 32-bit value. Specify the name as AnonymousGID. Ensure that:
- The value is either 0 or it matches the GID of the root user on the Phoenix Backup Store
- Base is decimal
- In the right-pane, right-click and then select New > DWORD 32-bit value again. Specify the name as AnonymousUID. Ensure that:
- The value is either 0 or it matches the UID of the root user on the Phoenix Backup Store
- Base is decimal
- In the right-pane, right-click and then select New > DWORD 32-bit value. Specify the name as AnonymousGID. Ensure that:
- Close the Registry Editor and restart the Windows Server.
- Set up the curl utility on the Windows Server. For more information, see How do I set up and use cURL on Windows.
Note: If you have TLS version 1.2 or higher, install and use the CURL Chocolatey package manager. External link for Chocolatey package manager.
For older version of TLS, you can by pass the execution policy to install the CURL Chocolatey package manager. Copy and run the complete command:
Set-ExecutionPolicy Bypass -Scope Process -Force; [System.Net.ServicePointManager]::SecurityProtocol [System.Net.ServicePointManager]::SecurityProtocol -bor 3072; iex ((New-Object System.Net.WebClient). DownloadString('https://community.chocolatey.org/install.ps1'))
Run the batch file on a Windows server
For Windows RMAN hosts, Druva provides a template batch file and an RMAN script to backup databases. The files are:
- oracle_rman_backup.bat: This batch file runs the RMAN script that backs up a database. You can modify this script to provide RMAN parameters that specify the type of backup and information related to backup like filesperset and channels for a backup.
- rman_backup_windows.rman: This script runs the backup job on RMAN.
Note: The contents of the files for Windows RMAN hosts are available in this reference article. You can copy the contents of the files and create your own scripts to backup databases.
When you upgrade the Phoenix Backup Store to version 4.9.1 or later, Druva requires you to:
- Replace your existing RMAN scripts with the new template scripts provided with the Phoenix Backup Store 4.9.1 released on October 19, 2020.
- Run the new RMAN scripts without the logdir parameter.
Your backups will stop running if you upgrade the Phoenix Backup Store to version 4.9.1 or later but miss to replace the old RMAN scripts with the new scripts. To use the new scripts, see Template batch file and RMAN script for Windows RMAN hosts. The new scripts are also located at the /opt/Druva/Phoenix/PhoenixBackupStore/bin location on the Phoenix Backup Store 4.9.1 and later.
Before you run the batch file
Ensure you have:
- The IP address of the Phoenix Backup Store that hosts the backup mount
- The backup mount name.
- Enabled hard mount. Run the following command:
nfsadmin client localhost config mtype=hard
For more information, see nfsadmin [External link to Microsoft documentation]
The run-time parameters of the oracle_rman_backup.bat script are:
- A folder path that will store the logs that the RMAN generates
- IP address of the Phoenix Backup Store that hosts the backup mount
- The name of the backup mount
Procedure
- Open the command prompt as admin on the Windows Server.
- Create a directory.
For example, create PhoenixScripts folder and change it into PhoenixScripts directory.
Sample command:
mkdir C:\PhoenixScripts
cd C:\PhoenixScripts - Create the oracle_rman_backup.bat and rman_backup_windows.rman scripts based on the templates provided. See, Template batch file and RMAN script for Windows RMAN hosts.
- Copy both the scripts to the folder you created.
- Run the batch file. For example:
oracle_rman_backup.bat 192.0.2.1 testmount