Quick reference guide
 Business Enterprise Elite
 Here is a step-by-step guide to get started with configuring your Azure VMs for backup and restore.
Before you begin
Ensure that you have the appropriate Microsoft authorization, that is a User Access Administrator or Owner role assigned before you proceed with onboarding subscriptions to your management console.
Quick steps to deploy, onboard, and configure Azure resources for backup and restore.
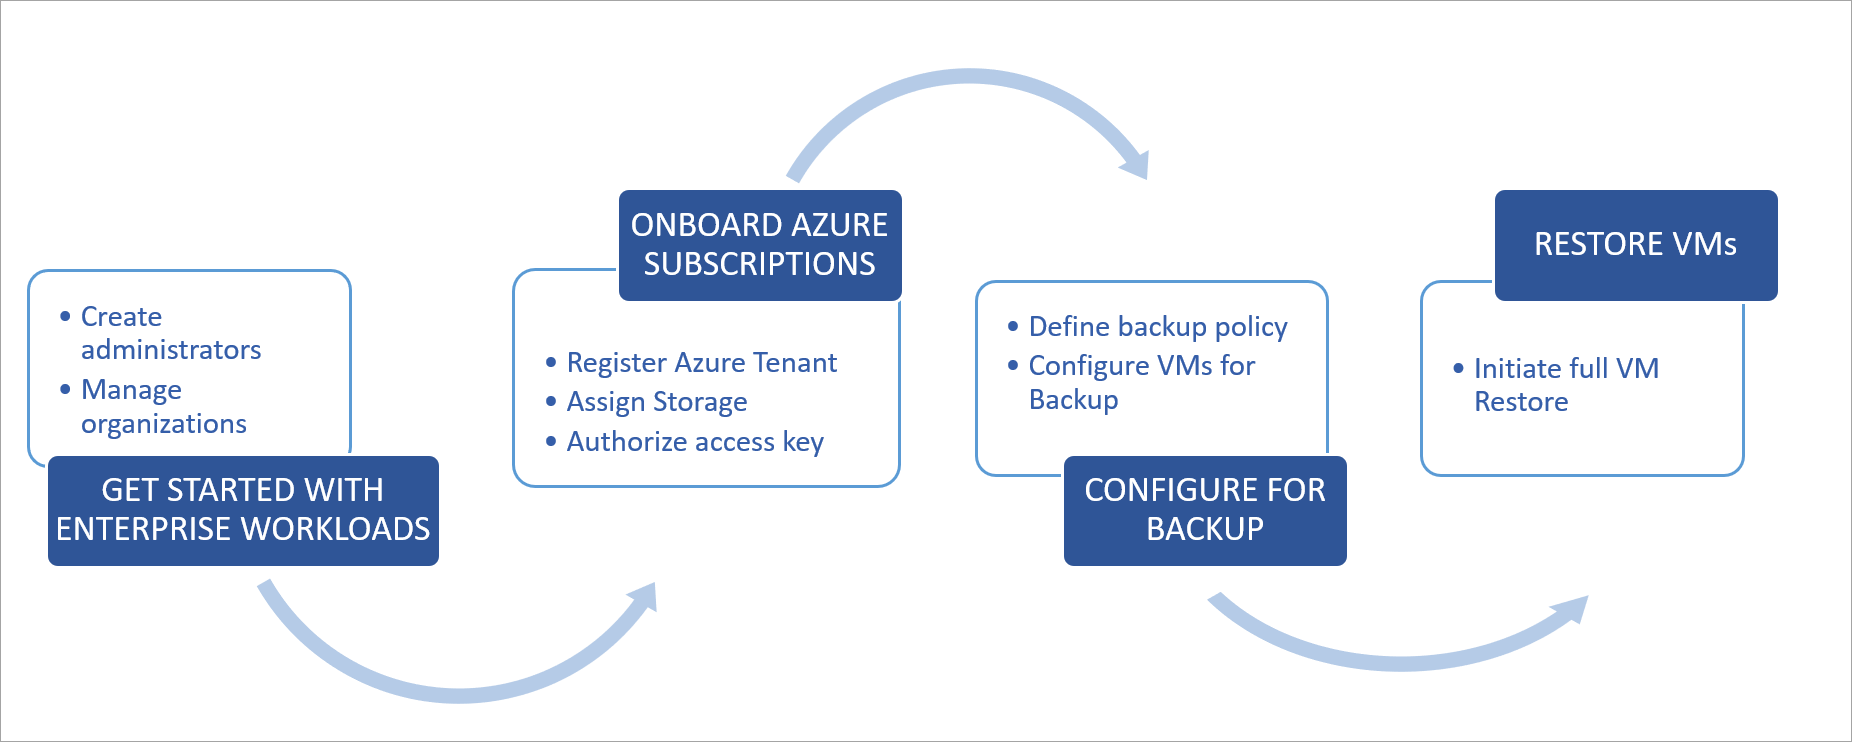
Step 1: Get started with Enterprise Workloads
Log into the management console and ensure that you have the following in place:
- Create and manage Administrators and Admin Groups.
- Enable organizations. Alternatively, you may use the Default Organization.
For more information, see Get Started with Enterprise Workloads.
Step 2: Onboard Azure Subscriptions
- Register your Azure Tenant and authorize Druva to onboard new Azure subscriptions.
Note: The subscription should have Microsoft.KeyVault registered in the resource provider section.
- Select a preferred Druva storage to back up your data from a specific Azure Region.
You can now view and manage the subscriptions discovered right from your management console.
Step 3: Configure Azure VMs for backup
- Create and manage backup policies to configure the backup settings.
This defines the backup schedule and snapshot retention. - Configure VMs for backup.
For more information, see Backup virtual machines.
Step 4: Perform a Full Restore of Azure virtual machines
On successful backup, you can restore a virtual machine along with any associated managed disks to the same storage region or across regions.
For more information, see Restore virtual machines.