Endpoints and SaaS Apps Settings
The Cloud Administrator can update the SaaS Apps/Endpoints settings once the users are provisioned.
Procedure
-
On the Endpoint/ SaaS Apps workload page, go to
.
-
Select Endpoints & SaaS Apps settings and update the settings for the below components.
Update User Password Settings
The Password Policy is enabled by default with mandatory settings that allow you to govern the password creation and control the password lifecycle.
- ►Expand to see a glimpse
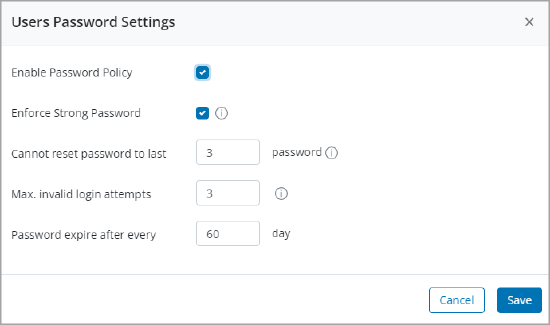
Click the edit button and update the below fields:
| Field | Description |
|---|---|
| Enable Password policy | Select this checkbox to enable the Password Policy for the users. Additional fields appear. |
| Enforce Strong Password |
Select this checkbox to enforce a strong Password Policy.
|
| Cannot reset password to last |
Enter the value to restrict users from setting passwords similar to previous ones. Set 0 for no limitations.
|
| Minimum lifetime for password (Applicable for GovCloud only) |
Type the number of days you want a password to be used before the user can change it. The possible value range is between 1-60 days. Set the Minimum lifetime for password age to a value of 1 day. Setting |
| Max. invalid login attempts | Enter the maximum number of login attempts. The user's account is locked after invalid login attempts are exceeded. |
| Password expire after every |
Type the number of days after which the user must reset the password. The recommended value range is 1 to 60 days.
|
Configure Network Settings
You can allow or restrict inSync Client to back up the user data over specific networks. Similarly, you can define a unique string name for Druva Cloud to identify the network you want to allow/block.
- ►Expand to see a glimpse
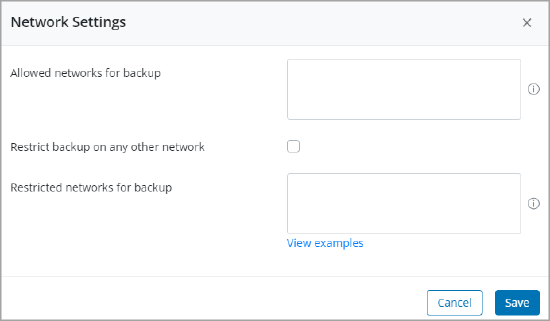
Click the edit button and update below fields:
| Field | Description |
|---|---|
| Allowed network for backup |
Add the network you want to allow backup data.
|
| Restrict backup on any other network | Select this checkbox if you do not want to backup user data on any network other than the allowed networks |
| Restricted networks for backup |
Add the network you want to restrict backup data.
|
- ►The following table lists the guidelines to set unique string names on Windows and macOS devices.
-
Windows macOS - For data cards, the service provider's name describes the interface. For example, Photon describes the data card provided by Tata Photon. You might want to use the string Photon to indicate a data connection.
- You can use either the name or the device name of the network to define a unique string. Go to Network Connections in Control Panel to view the details of your networks configured for your device.
- The characters you use in the string must be a sequential subset of the characters in the interface name. For example, the string TAP might best describe "TAP-Windows Adapter V9 network".
- Ensure that no two strings are identical.
- Ensure that you separate entries using a semicolon (;) and there is no white space between two entries.
- If you have multiple network interfaces of the same type, you cannot block a specific network. For example, you can block all VPN interfaces but not a specific VPN connection.
- inSync uses the string ppp to recognize 4G and 3G interfaces and the string tun to recognize VPN interfaces.
- Use the string ppp to disable backup on all 4G and 3G interfaces and the string tun to disable backup on all VPN interfaces.
- Ensure that no two strings are identical.
- Ensure that you separate entries using a semicolon (;) and there is no white space between two entries.
- For VPN connections, there are two adapters - Home network adapter and VPN adapter.
-
If both these networks are unrestricted, then, inSync performs the backup through the first available connection.
-
If both the home as well as the VPN network are restricted, then, inSync fails to perform any backups.
-
If the VPN adapter name is restricted but the home network is unrestricted, then, inSync performs backup through the home network and not through the VPN.
Access Token for Endpoints & Saas Apps APIs
You can copy the generated token or create a new token for SaaS Apps and Endpoints API.
To create a new token, go to  and select Create New token.
Note: Creating a new token will expire the existing token, and all APIs using the current token will stop working.
Update Event API Settings
To update the event API settings, select Enable Event Export and configure the settings mentioned on the Druva Developer portal.
Update Co-branding settings
The Co-branding settings, can promote your organization's branding details with support links and contact information on inSync Client and inSync web. This functionality reassures the users that the inSync Client is an officially approved app and the email alerts are from an authorized source.
- ►Expand to see a glimpse
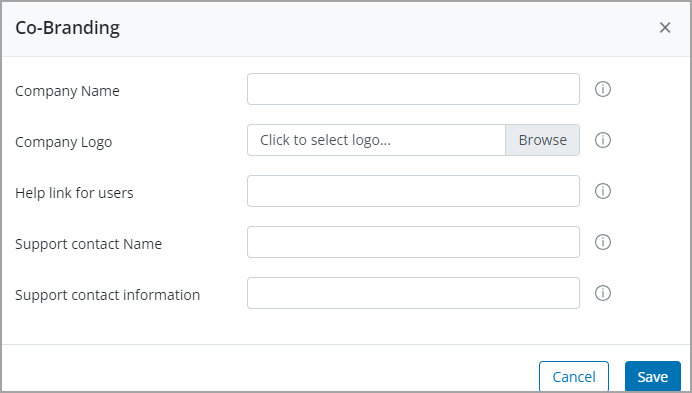
With co-banding settings, you can:
-
Display your logo and company name
-
Enter your company name
- Upload your company considering the following criteria:
- Dimension: 120 x120 pixels
- Size: Up to 32 KB
- File Format: PNG
-
Redirect help links to custom help files on inSync Web and alert email notifications.
- Add the Help link for users and test it out using Validate link option.
Note: By default, the help link on the inSync Web points to the latest inSync Client documentation.
-
Display support contact information on the inSync Client, inSync Web interface, and alert email notifications.
You can configure the support contact name, designation, number, or email address to open an email client, a phone dialing application, or a support link; the contact information is available as a hyperlink for users to click and report their queries.
Note: Ensure you use tel: or mailto: while specifying the phone contact or email address. In the absence of tel: or mailto:, the hyperlink fails to find the default phone or email application and redirects to a browser.
- ►Here are a few examples in the table given below that give a brief for the configuration format
-
Support contact name
(Example values)Support contact information Displayed as When clicked GCS Administrator http://<website URL>
or
https://<website URL>or
file:///
On inSync Client and inSync Web:
-
Displays the entire web link or folder path.
In alert notification emails:
-
Displays GCS Administrator as a hyperlinked text.
Opens the web page (specified in <website URL>) or the file location GCS Administrator http://<website URL>
or
https://<website URL>
or
file:///
On inSync Client and inSync Web:
-
Displays the entire web link or folder path.
In alert notification emails:
-
Displays GCS Administrator as a hyperlinked text.
Opens the web page (specified in <website URL>) or the file location GCS Administrator tel:<+X-XXX-XXX-XXXX>
For example:
tel:+XX-XXX-XXX-XXXX
On inSync Client and inSync Web:
-
Displays the entire phone number prefixed by mailto:
In alert notification emails:
-
Displays GCS Administrator as a hyperlinked text.
Opens the default phone dialing application of the user's device. -
Customize Email Template
You can customize the email template sent to users.
- ►Expand to see a glimpse
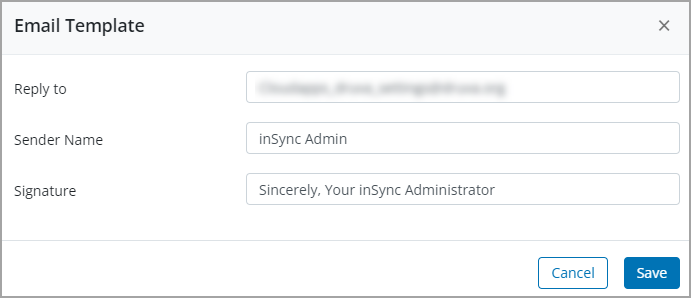
Click the Edit button to update the below fields:
| Field | Description |
|---|---|
| Reply to |
The reply-to email address of the Druva Cloud.
|
| Sender name | The sender name for emails sent by the server. |
| Signature | The signature that appears on emails sent by the server. |
Update Enterprise Key Management
With this option, you can update the Enterprise Key Management key ARN. Go to the three-dot menu to edit the Key ARN. For more information, see Enterprise Key Management.
Enable Cloud Key Management
The Cloud Key Management feature is a secured mechanism to back up the SaaS Apps data and is an alternative method to the AD/LDAP Connector-based deployment.
Once you receive the confirmation email from Support about the activation of the Cloud Key Management feature for your account, you can enable it by selecting the Enable option. For more information, see Configure Cloud Key Management.
Load APN Certificate for iOS device management
You can create and upload an Apple push notification certificate that allows you to use the inSync Data Loss Prevention features on all enterprise mobile devices.
The following fields list the iOS Device Management area.
-
APN certificate: Indicates that an APN certificate is loaded
-
APN details: The details of the APN certificate
For more information, see Configuring certificates for iOS devices.
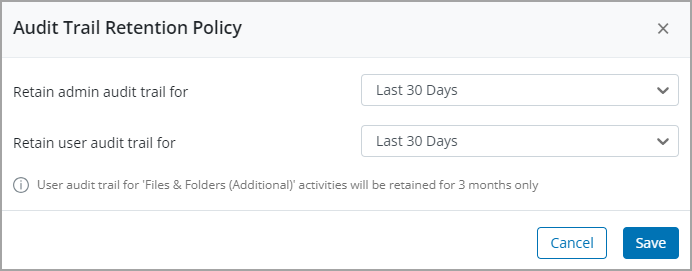
Manage Audit Trails Retention Policy
You can define the duration for which you want to retain the Audit Trails for administrator and user activities. After the duration expires, the audit trails are automatically deleted. The changes are immediately reflected in the Time-period filter on the Audit Trails page. For example, if you have changed the default retention period to the last 6 months, the changes are immediately reflected in the Time-Period filter of the administrator.
- ►Expand to see a glimpse
Add and manage Connectors
The AD/LDAP Connector is an agent used to install on a Windows device or server within your organization's network.
You need the Connector:
-
When using Active Directory (AD) or Lightweight Directory Access Protocol (LDAP) to import and manage new users in Druva.
-
When you want to protect Cloud Apps Office 365 and G-Suite data for your users, and you do NOT have:
-
A user endpoint device (desktop or laptop) configured for backup in Druva.
-
The Cloud Key Management feature is enabled.
The following table lists the actions you can perform in the Connectors tab.
| Action | Description |
|---|---|
| Add Connector | Add a new inSync Connector in your environment. For more information, see Install or upgrade AD Connector. |
| Delete Connector | Delete an existing inSync Connector in your environment. For more information, see Delete AD Connector. |
| Get Registration Key |
Generate a new registration key to register inSync Connector in your environment. Do not regenerate the registration key after the inSync Connector is registered. If you regenerate the key, the existing registration key is deactivated. |