Enable Data Lock
The Data Lock feature is available to Enterprise and Elite editions. Only Druva Cloud Administrators can enable this feature.
What happens when you enable Data Lock?
Once you apply Data Lock to the profile, you cannot:
- Disable the Data Lock setting.
- Delete the snapshots, users, and applications associated with the profile.
- Edit the retention period.
- Change profile of users.
- Remove the license of the user.
- Downgrade from the Enterprise and Elite editions to the Business edition for customers.
Considerations
- If users and applications who are assigned the Data Lock enabled profile are in the Rollback Actions, you cannot mark them as immutable until they are rolled back.
- The Data Lock feature overrides the settings for Auto delete Preserved users and Auto delete Disabled apps.
- Once you enable the Data Lock feature:
- All existing and new users who are assigned the data lock enabled profile will be enabled with a data lock.
- Data lock feature will be applicable to historical and future snapshots.
- This feature will be applicable even after the license has expired.
- You cannot change the retention period, but you can change other settings such as backup frequency.
- You cannot manually delete the user, SaaS apps, and snapshots associated with the profile.
- Data Lock does not apply to curated or golden snapshots as they are created using an existing snapshot.
- Data Lock-enabled snapshots can be marked as quarantine snapshots.
You can enable the Data Lock feature when creating a new profile or when editing an existing profile.
Enable Data Lock for a new profile
-
On the SaaS Apps Management Console, click Profiles > Create New Profile. See create a profile for more information.
-
To enable Data Lock for SaaS Apps
-
In the SaaS Apps > Backup Schedule & Retention > Data Lock section, select the Enable Data Lock checkbox.
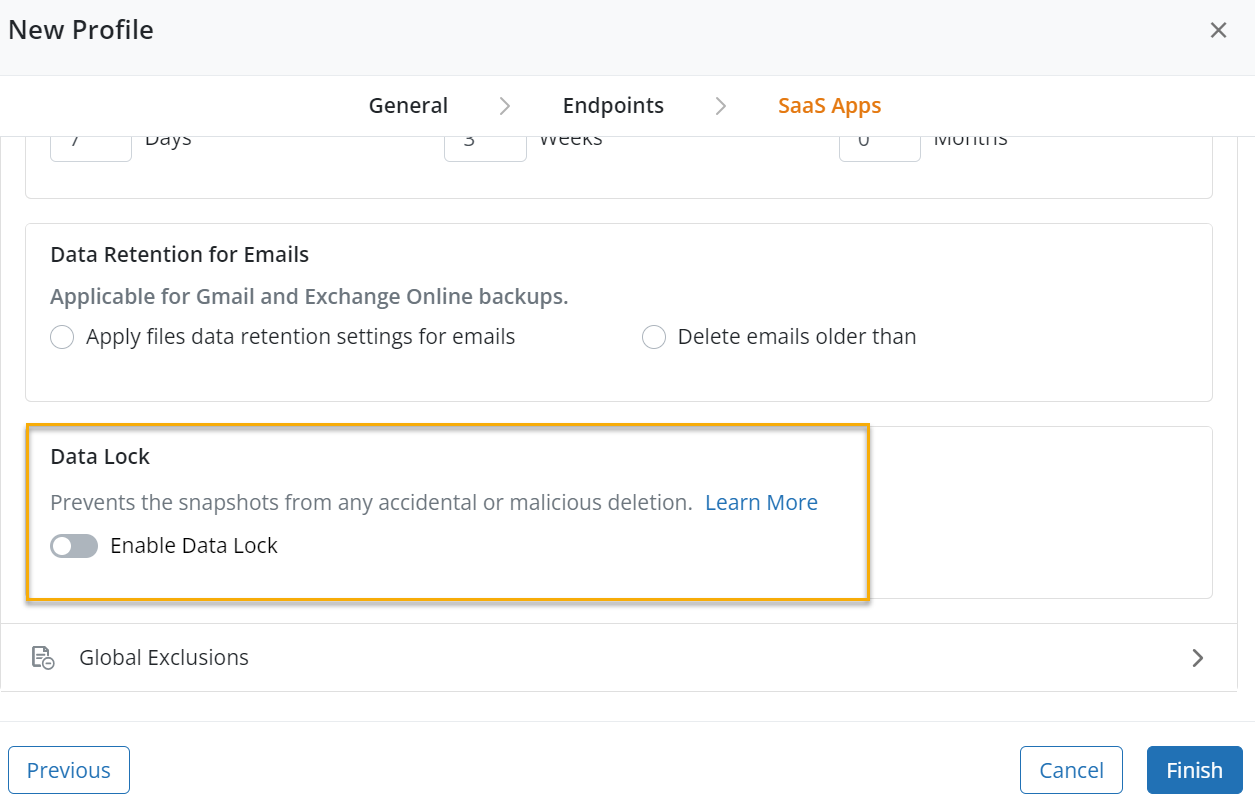
-
On the confirmation window, click Yes. The Data Lock setting will be applicable after saving the profile.
-
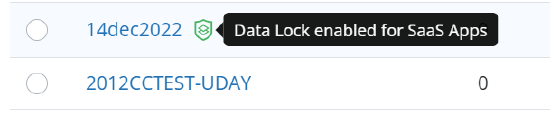
Once the profile is enabled with the Data Lock feature:
-
On the Profiles page, you will see the
 icon next to the profile. When you hover over the icon, a message will appear stating Data Lock is enabled for SaaS Apps.
-
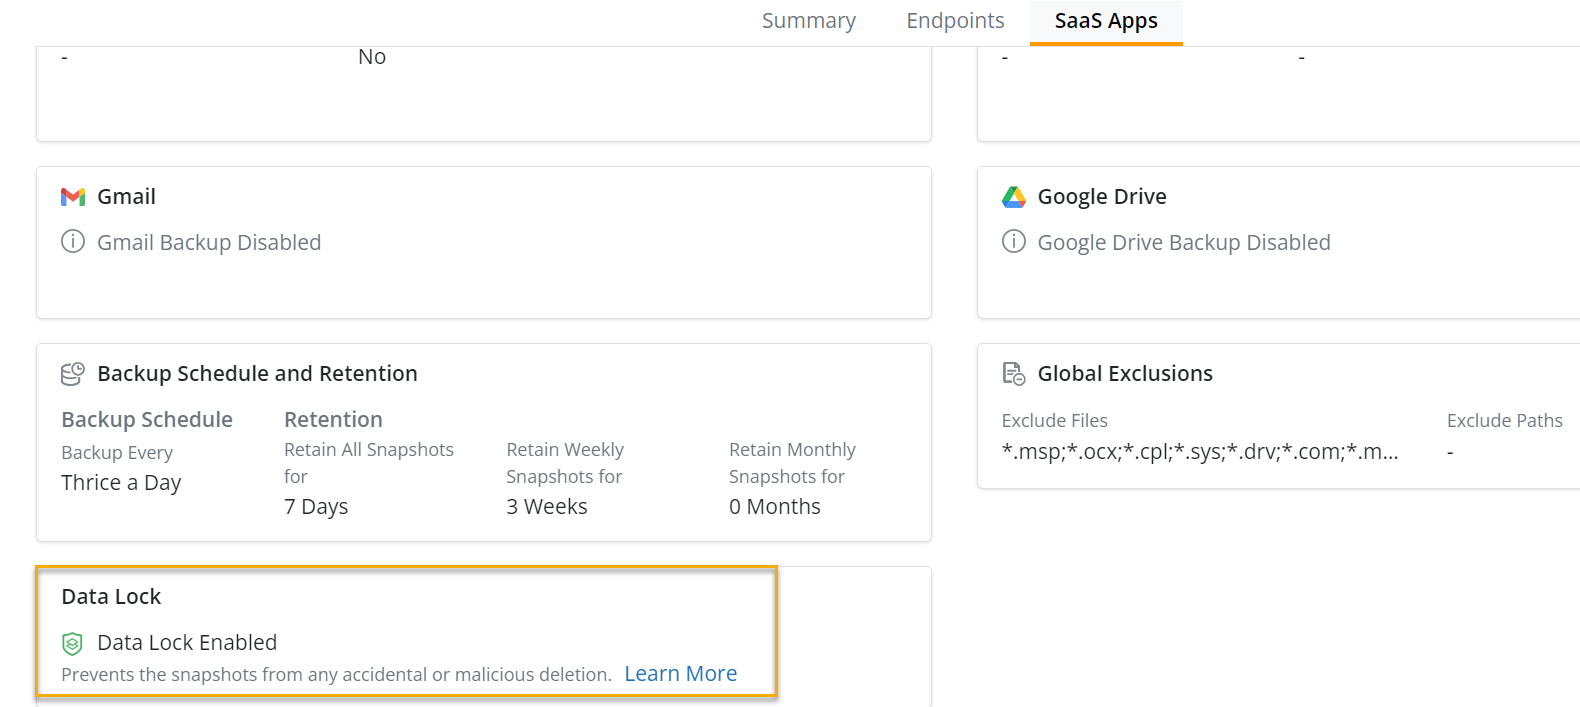
On the Profile details page, open any profile, go to SaaS Apps > Data Lock sections, Data Lock status is displayed as Enabled.
Enable Data Lock for an existing profile
You can also enable Data Lock while editing an existing profile. See Update a profile for details.