Configure the AD/LDAP Connector
Prerequisite
Ensure that you have installed the AD/LDAP Connector.
For more information, see Install or upgrade inSync AD/LDAP Connector.
Configure the inSync Connector
Step 1: Establish a connection between the AD/LDAP Connector and inSync Public Cloud or GovCloud
The following table describes the configuration process to enable the AD/LDAP Connector to communicate with inSync Public Cloud or inSync GovCloud.
AD/LDAP Connector can establish a connection to inSync Public Cloud directly or through a proxy server.
| Configure the AD/LDAP Connector with inSync Public Cloud | For the AD/LDAP Connector to communicate with the inSync Cloud using a proxy server, see Configure AD/LDAP Connector with inSync Public Cloud through a proxy server. |
|---|---|
| Configure AD/LDAP Connector with inSync GovCloud | For the AD/LDAP Connector to communicate with the inSync GovCloud, see Configure AD/LDAP Connector with GovCloud. |
Configure AD/LDAP Connector with inSync Public Cloud through a proxy server
If the AD/LDAP Connector has to access the internet through a proxy server, add the proxy configuration details to the inSyncADConnector.cfg file that is located in the C:\inSyncADConnector directory.
To add the proxy server details,
- On the computer where the AD/LDAP Connector is installed, stop the Druva inSync Connector service.
- Open the C:\inSyncADConnector directory.
- Open the inSyncADConnector.cfg using a text editor, such as Notepad.
- Provide the required proxy server details for the following parameters in the .cfg file.
| Parameter | Description |
| PROXY_SERVER | IP address and port of the proxy server. Ensure that the port number is for the proxy server that is using HTTP or SOCKS4 or SOCKS5. For example, 192.168.54.100:1080. |
| PROXY_USER | Username required for proxy server authentication. This is required only if authentication is necessary to access the Internet. |
| PROXY_PASSWD | Password required for proxy server authentication. This is required only if authentication is necessary to access the Internet. |
| PROXY_TYPE | Proxy protocol that you are using. inSync supports http, socks4, and socks5 proxy protocols. |
| WPAD_URL |
The URL of the WPAD location. This parameter is optional and can be used to fetch the PAC file based on the following requirements:
|
- Save the inSyncADConnector.cfg file.
- Start the Druva inSync Connector service.
Configure the inSync Connector with inSync GovCloud
If the AD/LDAP Connector has to communicate with the inSync GovCloud, update the Cloud Master IP parameter in the inSyncADConnector.cfg file that is located in the C:\inSyncADConnector directory.
To update the Cloud Master IP,
- On the computer where the AD/LDAP Connector is installed, stop the Druva inSync Connector service.
- Open the C:\inSyncADConnector directory.
- Open the inSyncADConnector.cfg file using a text editor, such as Notepad.
- Update the CM_IP parameter to govcloud.druva.com.
- Save the inSyncADConnector.cfg file.
- Start the Druva inSync Connector service.
Note: inSync Connector v5.8 and above for inSync GovCloud is FIPS 140-2 Compliant.
Step 2: Generate a registration key for the AD/LDAP Connector
To generate a registration key for the AD/LDAP Connector,
- On the Druva console, navigate to
 -> Endpoints and SaaS Apps Settings -> Connector.
 - In the Connectors section, click Add Connector. The Add AD/LDAP Connector window appears.
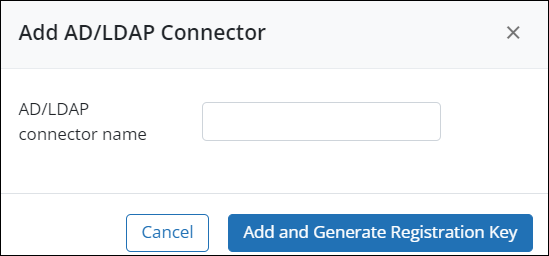
- In the AD/LDAP Connector name field, type a name for this AD/LDAP Connector, and then click Add and Generate Registration Key. The AD/LDAP Connector registration key appears.
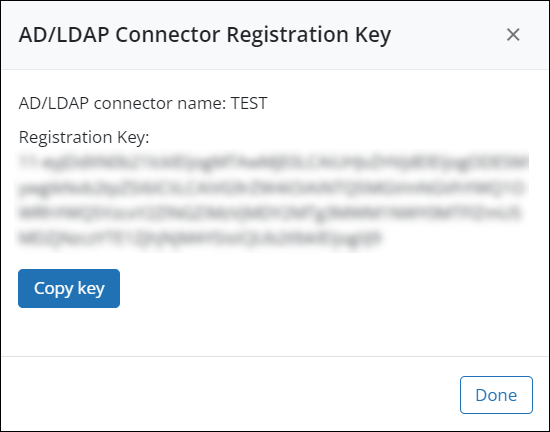
- Copy the registration key.
Step 3: Register the AD/LDAP Connector
To register the AD/LDAP Connector,
- On the computer where you have the inSync Connector installed, click Start > Druva inSync AD Connector Configuration. The Register AD Connector window appears.
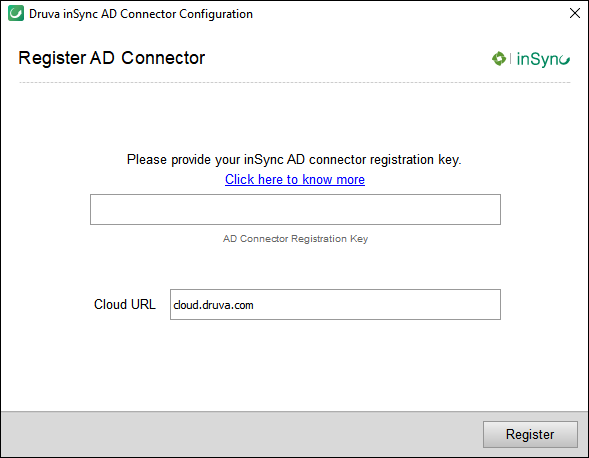
- Type or paste the registration key, and then click Register. For more information on how you can obtain the registration key, see Step 2: Generate a registration key for the AD/LDAP Connector.
You can verify the connection status of the installed and configured AD/LDAP Connector on the Settings > Connectors. Upon successful registration, the Connection Status appears as Connected.
Note: Do not regenerate the registration key after the {{iconnector}} is registered. If you regenerate the key, the existing registration key is deactivated.
About inSync Connector Status
Once configured, inSync tracks the inSync Connector status dynamically. You can navigate to the  > inSync Settings > Connectors to verify the AD/LDAP Connector status whenever required. inSync also raises alerts on the inSync Management Console and sends alert notifications whenever a AD/LDAP Connector is in Not Connected state.
On the contrary, Druva recommends to avoid checking the connector status from its host as it displays a static value and may differ from its status displayed on the inSync Management Console.
inSync Connector migration scenarios
The following scenarios describe the impact on AD/LDAP Connector services if the operating system (OS) installed on a Server is updated or when a new Server is installed. Follow the recommended steps provided to ensure the inSync Connector services continue running smoothly.
Scenarios
When OS on a Server is updated
Follow the steps given below to ensure the AD/LDAP Connector services do not get disrupted if the operating system on the Server gets updated:
- Stop the AD/LDAP Connector services before updating the OS.
- Update the OS on the Server.
- Restart the AD/LDAP Connector services once the OS is updated. The services will run properly.
When a new Server is installed
Follow the steps given below to ensure the AD/LDAP Connector services continue working fine after installing the AD/LDAP Connector on the new Server:
- Stop AD/LDAP Connector services and then back up the entire AD/LDAP Connector directory on C:\inSyncADConnector directory.
- Decommission the old AD/LDAP Connector from the instance.
- Install AD/LDAP Connector on new Server and stop the AD/LDAP Connector services.
- Copy the AD/LDAP Connector directory from the old server and replace it in the AD/LDAP Connector directory installed on the new server.
- Restart the AD/LDAP Connector services. The services will run properly.
Delete AD/LDAP Connector
To delete an AD/LDAP Connector
- On the inSync Management Console menu bar, click > inSync Settings.
- Click the Connectors tab.
- In the Connector area, select the AD/LDAP Connector that you want to delete.
- Click Delete Connector.
- On the prompt window, click Yes.
Connection to the AD/LDAP associated with this AD/LDAP Connector is released. inSync stops auto-import of users through this AD/LDAP Connector.
Best practices
Port Usage
The following table lists the ports that the AD/LDAP Connector uses.
| Port Number | Used By |
|---|---|
| 443, 6061, 80 |
AD/LDAP Connector with inSync Cloud
|
| 389 | LDAP |
| 3268 | LDAP on the global catalog |
| 636 | Secure LDAP |
| 3269 | Secure LDAP on the global catalog |