Manage Backup Proxy pool
Enterprise Workloads Editions:  Business Enterprise Elite
Business Enterprise Elite
Change backup proxy pool for a backup proxy
After changing the Backup proxy pool, all the new backup requests triggered by the virtual machines are sent to the new Backup proxy pool. However, the old Backup proxy handles any requests triggered by the virtual machines before changing the pool.
You might want to move Backup proxy to a different pool based on the following reasons:
- You want to scale up and thus move the Backup proxy to a different Backup proxy pool.
- You want to delete the Backup proxy pool.
Considerations
- You cannot move all the proxies to another pool if a Backup proxy pool has some VMs configured. For example, if you have a total of 30 proxies in one Backup proxy pool, you can move 29 proxies to another pool. If you want to move all the backup proxies to another Backup proxy pool, ensure that the current Backup proxy pool does not have any backup sets attached.
- You cannot change the Backup proxy pool of a Backup proxy until 7 days after the deletion of the last configured virtual machine.
- You cannot move a Backup proxy of a Backup proxy pool belonging to one Prism to another Backup proxy pool of a different Prism.
- When you select a Backup proxy to change the pool, you can only move it to the pool of the same data center to which the Backup proxy originally belonged.
Procedure
- Log in to the Management Console.
- Select your Organization if Organizations are enabled.
- On the menu bar, click Protect > Nutanix AHV.
- The All Backup Proxies page appears that lists all the registered backup proxies.
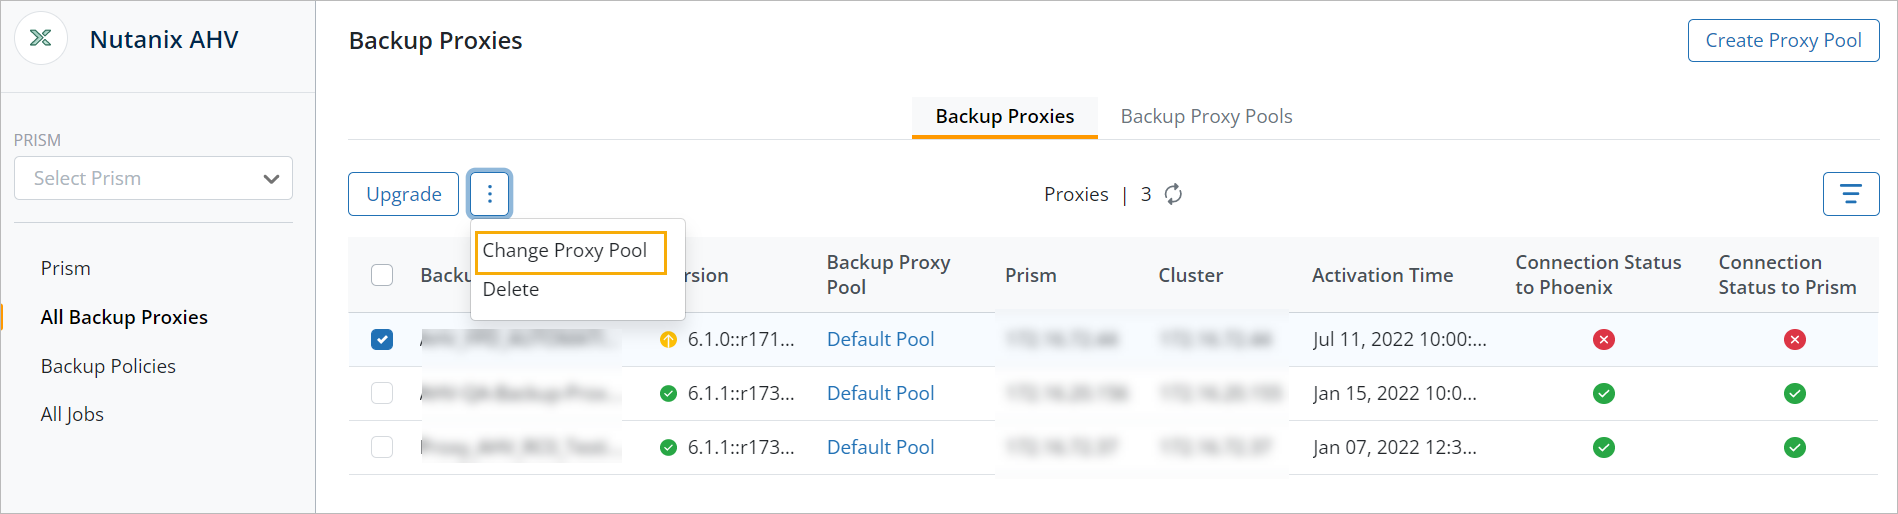
- To move backup proxies from different pools to a common pool, select the Backup proxy(s) you want to move to a different pool.
- Click the more options button and click Change Proxy Pool.
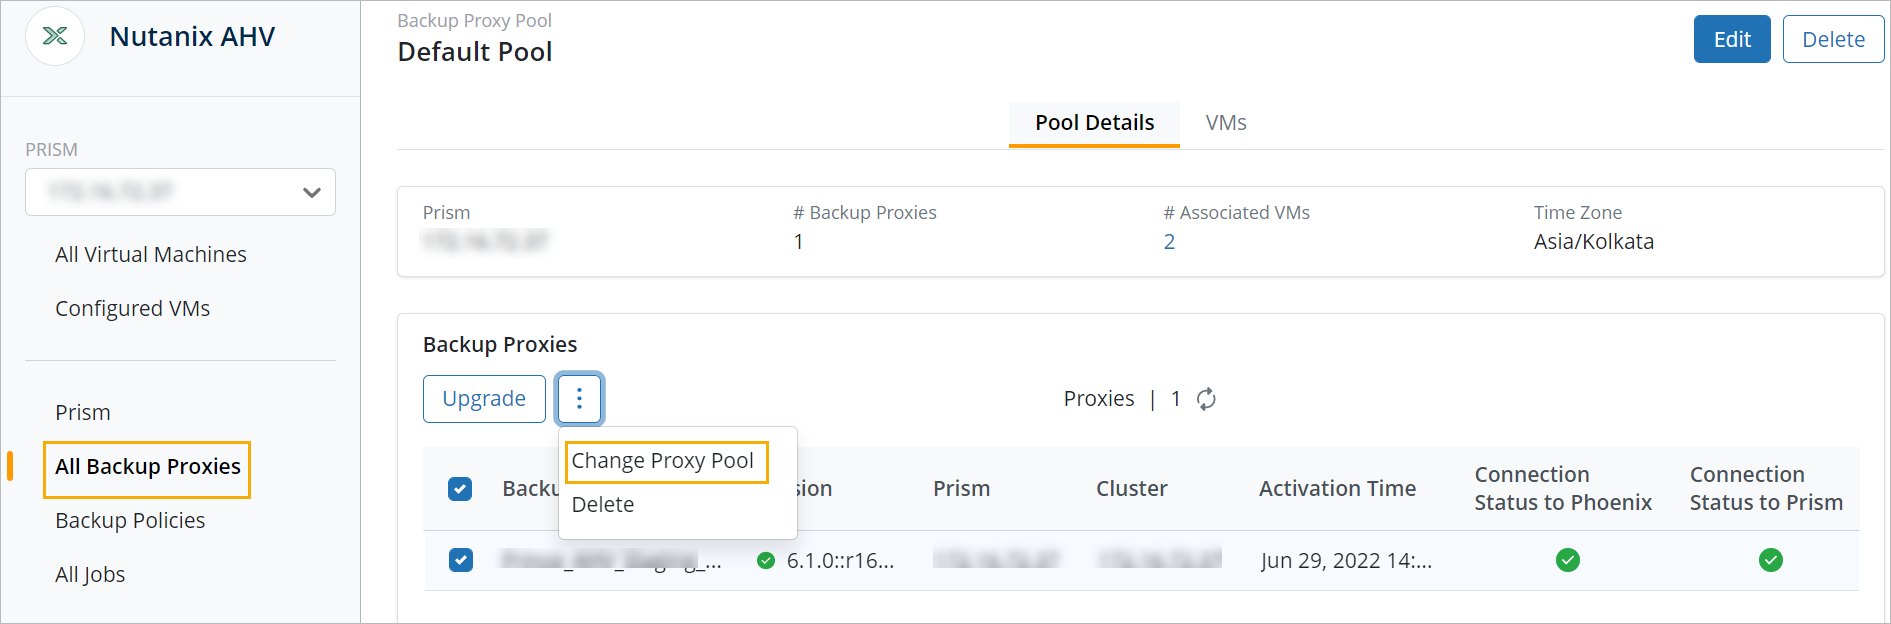
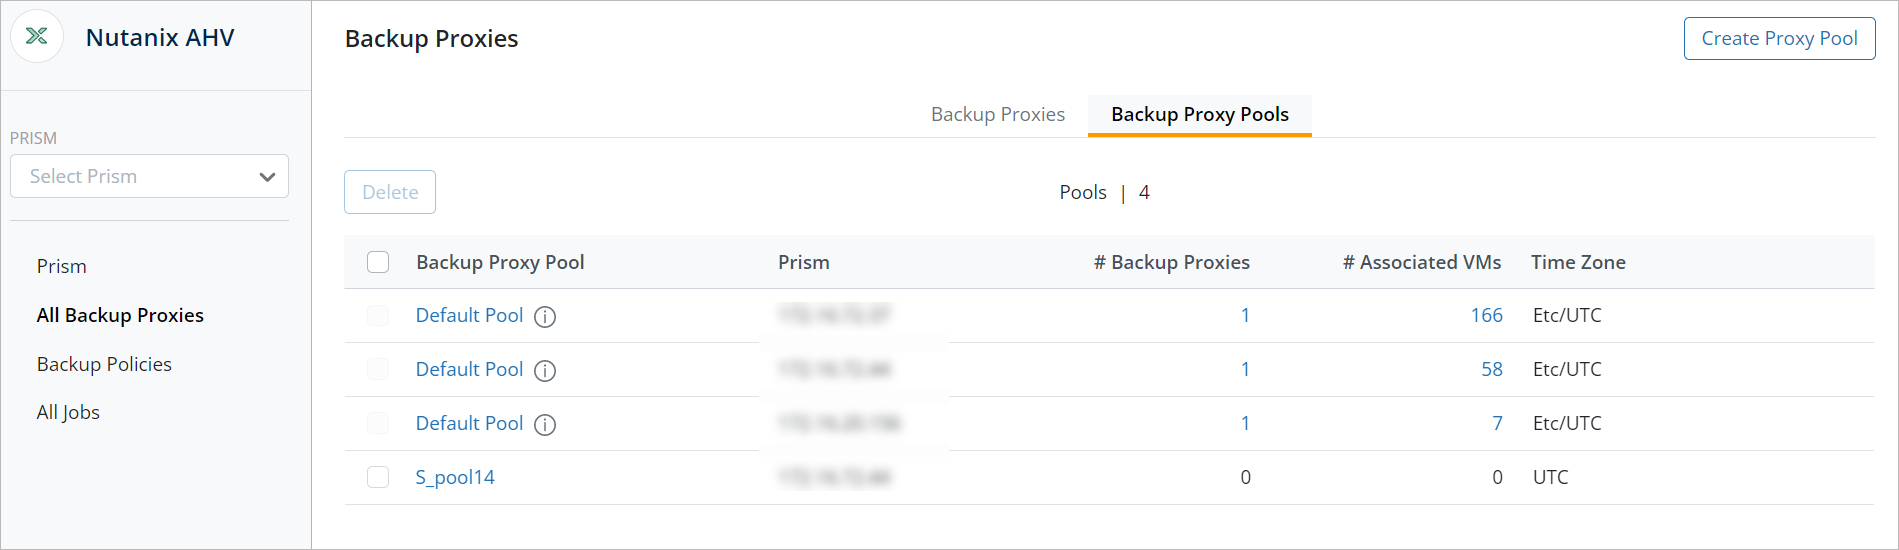
- To move backup proxies from the same pool, click on the Backup Proxy Pools tab.
- Click on the Backup proxy pool.
- Select the Backup proxy(s) and click the more options button and click Change Proxy Pool.
- Select the desired backup proxy pool from the list and click Save.
Note:
A confirmation dialog box appears.
Only the backup proxy pools configured for the same data center are listed.
You can also create a new backup proxy pool. See, Create a new backup proxy pool. - Click OK to change the backup proxy pool.
To edit a backup proxy pool
- Log in to the Management Console.
- Select your Organization if Organizations are enabled.
- On the menu bar, click Protect > Nutanix AHV.
- The All Backup Proxies page appears that lists all the registered backup proxies.
- Click on the Backup Proxy Pools tab.
- Click the pool you want to edit.
- Click Edit.
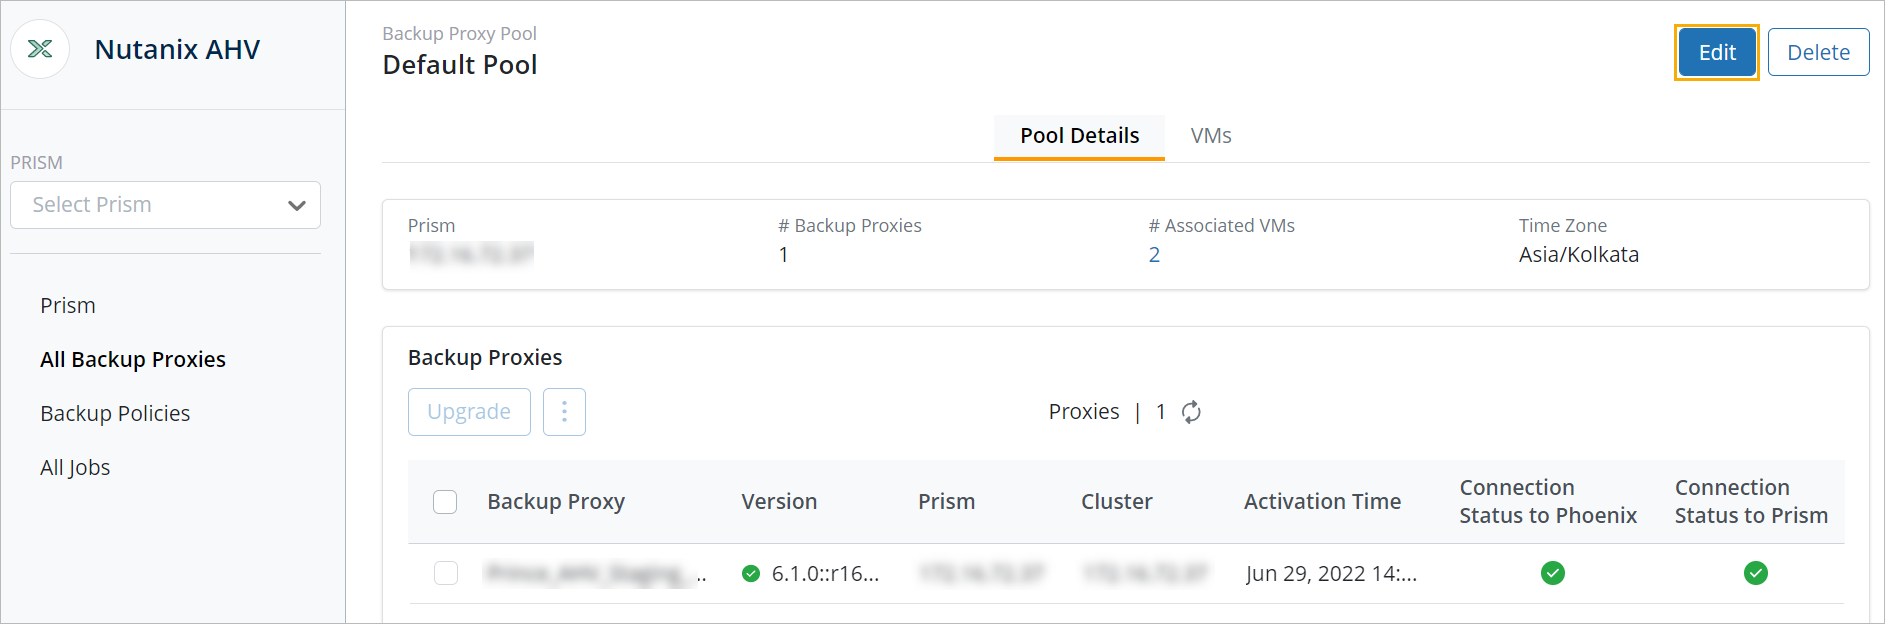
- In the Edit Backup Proxy Pool dialog, you can edit the name, country, and time zone.
Note:
- The Prism field cannot be changed.
- You cannot change the name of the default Backup proxy pool.
- Click Save.
The edits to the Backup proxy pool are saved successfully.
Deleting a backup proxy pool
If you delete the proxy pool, all the proxies residing in the pool will also get deleted. To avoid this, you must move the backup proxies under this Backup proxy pool to other pools.
Considerations
- You cannot delete the default proxy pool.
- If a Backup proxy pool consists of a backup set then the Backup proxy pool cannot be deleted.
Procedure
- Log in to the Management Console.
- Select your Organization if Organizations are enabled.
- On the menu bar, click Protect > Nutanix AHV.
- The All Backup Proxies page appears that lists all the registered backup proxies.
- Click on the Backup Proxy Pools tab.
- Select the pool you want to delete.
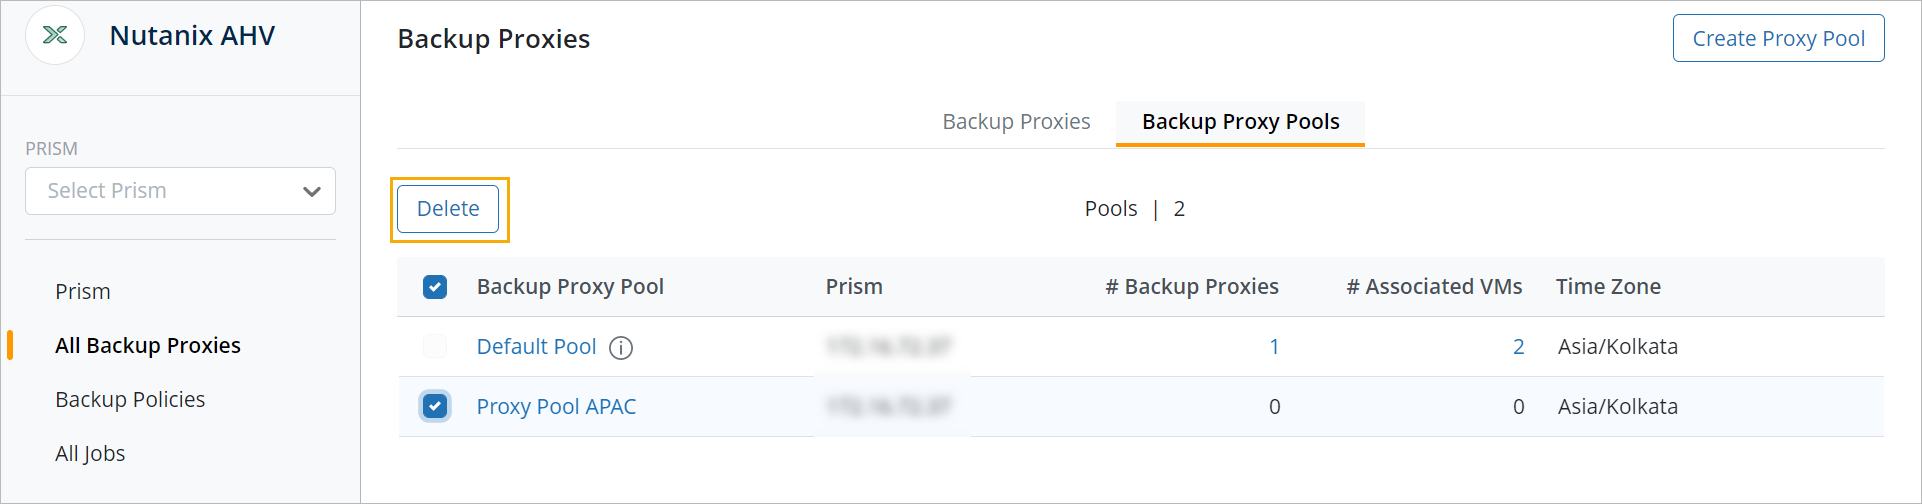
- Click Delete.
A confirmation dialog box appears. - Read the message carefully and click Yes to delete the Backup proxy pool.