Configure virtual machines for backup
 Business Enterprise Elite
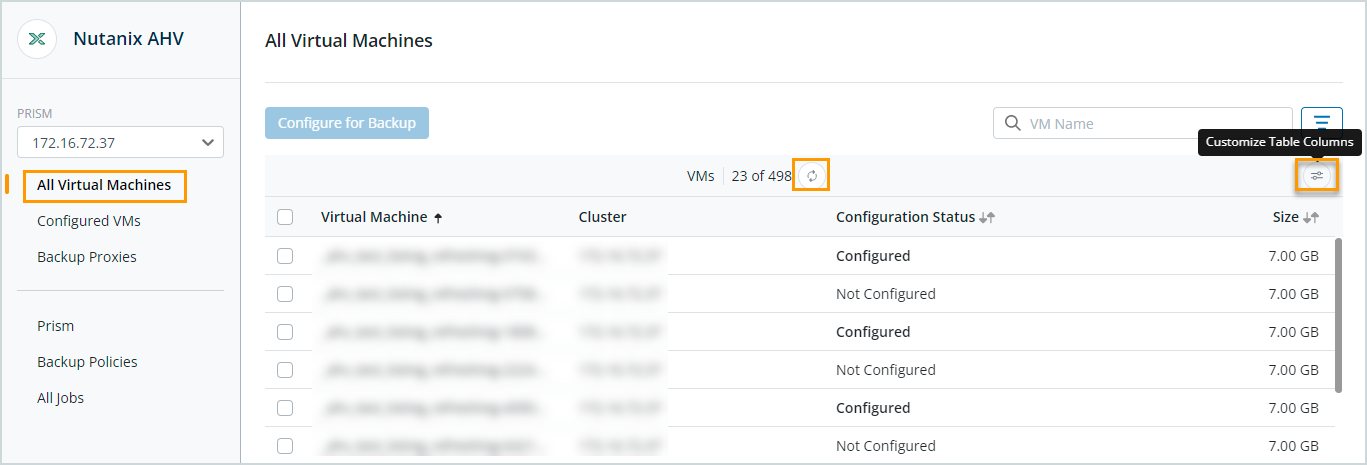
The list of discovered virtual machines that can be configured for backup is refreshed every 24 hours. You can manually refresh the list by clicking the Refresh icon on the All Virtual Machines page.
Additionally, you can click the Customize Table Columns icon to get a list of all the columns on the page:
- Select the checkbox to display the column.
- Clear the checkbox to hide a column on the All Virtual Machines table. Removing unnecessary columns will make the UI more spacious.
- Move a column to change the order. The change is reflected in the All Virtual Machines table.
The column configuration persists across sessions in the same browser.
Note: You can resize a column on the All Virtual Machines table by dragging it to the desired location.
- Log in to the Management Console.
- Select your Organization if Organizations are enabled.
- On the menu bar, click Protect > Nutanix AHV.
- On the Prism page click the Prism Element or Prism Central whose VMs need to be backed up. Alternatively, select the Prism Element or Prism Central from the Prism dropdown in the navigation pane on the left.
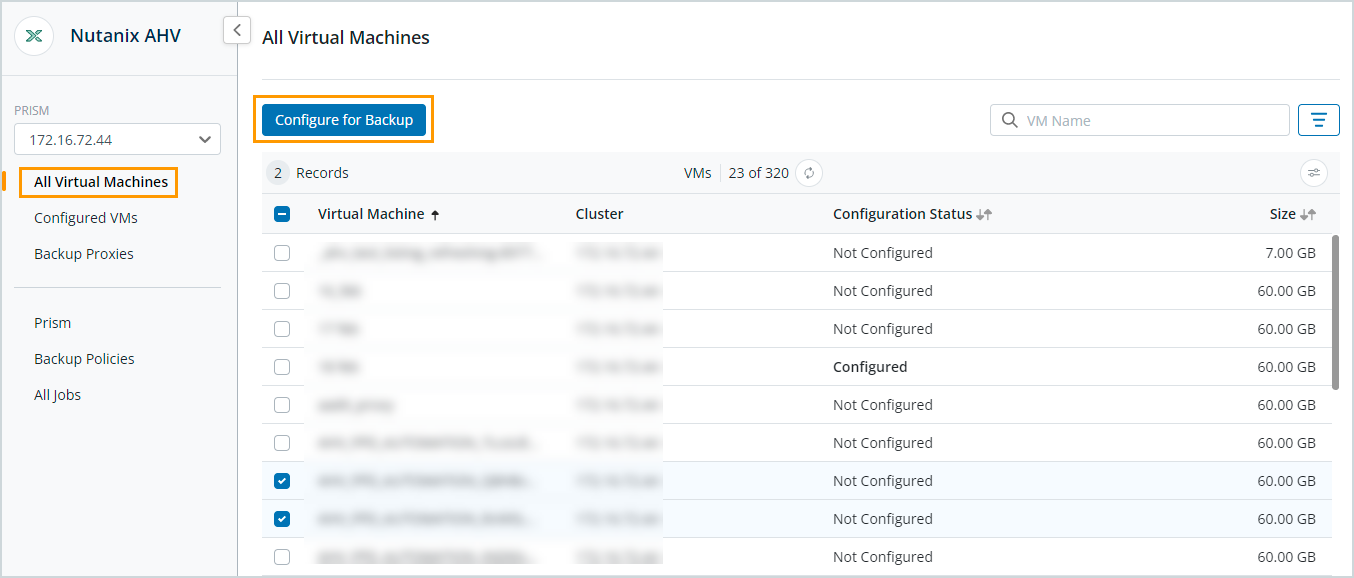
- On the All Virtual Machines page, select one or more unconfigured virtual machines and then click Configure for Backup.
- On the Configure for Backup page, perform the following tasks:
| Field | Tasks |
|---|---|
|
Virtual Machines |
This section lists all the virtual machines that were selected for backup. |
| Administrative Group |
Select a pre-existing administrative group or create a new one. To create a new administrative group:
|
| Storage | Select the Druva Cloud storage where your Nutanix backups will be stored.
Note: Storage once assigned cannot be changed. |
| Backup Policy | Select a pre-existing backup policy or create a new one. See Manage Backup Policies. |
| Backup Proxy Pool | By default, all proxies are part of the Default Pool. |
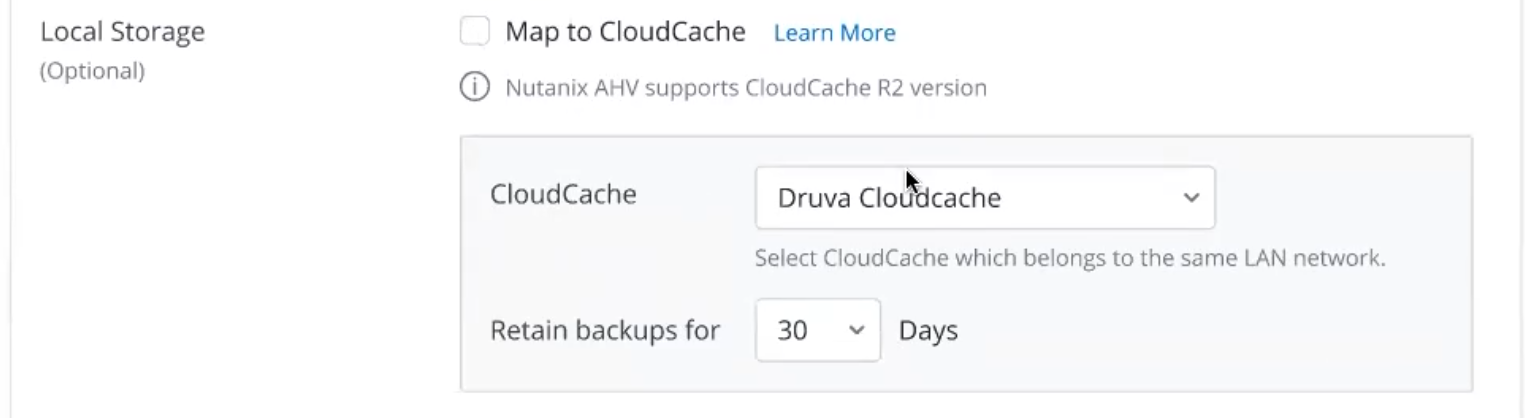
| Local Storage (Optional) |
If you wish to use CloudCache as local storage, select Map to CloudCache. NOTE: Nutanix AHV supports CloudCache R2. If you do not have any device with CloudCache R2, this option will be disabled. In that case, go to Manage CloudCache by following the link on the screen and configure a new CloudCache R2 device. If you select Map to CloudCache, you will see two new dropdowns:
|
- Click Save.
The backups execute as per the schedule defined in the backup policy.