Quick steps to set up CloudCache
- Last updated
-
-
Save as PDF
-
Heads up!
We've transitioned to a new documentation portal to serve you better. Access the latest content by clicking here.
If you are using CloudCache for the first time, perform the following tasks to set up CloudCache at your remote office locations.
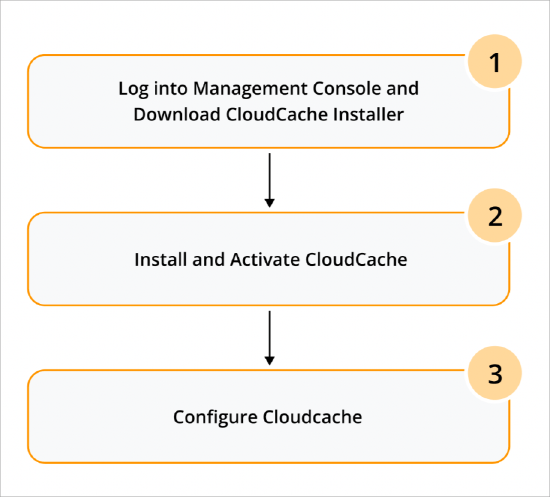
Steps to set up CloudCache
| Task Number |
Task |
Description |
|
1
|
Log in to the Management Console and download CloudCache installer
|
To download and set up CloudCache, you must log in to the Management Console.
The CloudCache installer for Windows and the OVA for Linux is available on the Downloads page that you can access from Management Console.
|
|
2
|
Add, install, and activate CloudCache for
|
To start, add an instance of CloudCache from Management Console.
At the time of adding, Druva Cloud generates an activation key. This key functions as a unique identifier and establishes a connection between the Druva Cloud and the CloudCache. Use this key to activate CloudCache.
Notes:
- Perform this step for all instances of CloudCache.
- Currently, CloudCache is offered in two variations – CloudCache R1 and CloudCache R3. CloudCache R3 supports only Linux. For more details, see About CloudCache.
|
|
3
|
Configure CloudCache
|
After you activate the CloudCache, you must configure the CloudCache so that you can successfully use it for your data backup and restore tasks.
In the configuration, perform the following tasks:
- Add volume: While adding a volume, specify the folder as a volume and folder size as the volume size to back up your server data in CloudCache. For more information, see Add Data Volumes.
- Define retention period: To back up and restore your servers, you need to configure the retention period for each attached backup set. For more information, see Update the retention period.
- Define synchronization schedule and maximum bandwidth: The schedule that you configure for CloudCache to synchronize the data with Druva Cloud storage. To ensure optimum usage of bandwidth, we recommend that you set these schedules during off-peak hours. To benefit from the wider off-peak windows on weekends, you can set the weekly schedule for a longer duration. For more information, see Update synchronization schedule for a CloudCache.
- Attach backup set: Attach one or more backup sets that you want to map to CloudCache. For more information, see Attach a new backup set.
Note: Perform these steps for all instances of CloudCache.
|
 Business
  Enterprise