Manage backup sets for NAS shares
 Business Enterprise Elite
This topic describes how to add and delete backup sets in a configured NAS share. Backup sets are important in setting the backup and retention schedule of the backups performed from the NAS shares.
Add backup set to a NAS share
You can perform this procedure provided you have already added a NAS share for a NAS device on the Management Console. If you have added the first NAS share, the procedure to configure a backup set is already described in the Configure backup set for a NAS share section. This procedure describes how to add additional backup sets to an already configured NAS share.
To configure an additional backup set for a NAS share:
-
Log in to the Management Console.
-
Select the workload from the Protect menu. Note that if the All Organizations menu is enabled, you have to first select an organization that has your NAS device and then select the workload.
-
In the device-specific navigation pane on the left, select the NAS device from the DEVICE drop-down.
- In the NAS shares page, in the right pane, click the NAS share to view NAS share details.
- In the top right corner, click Add Backup Set.
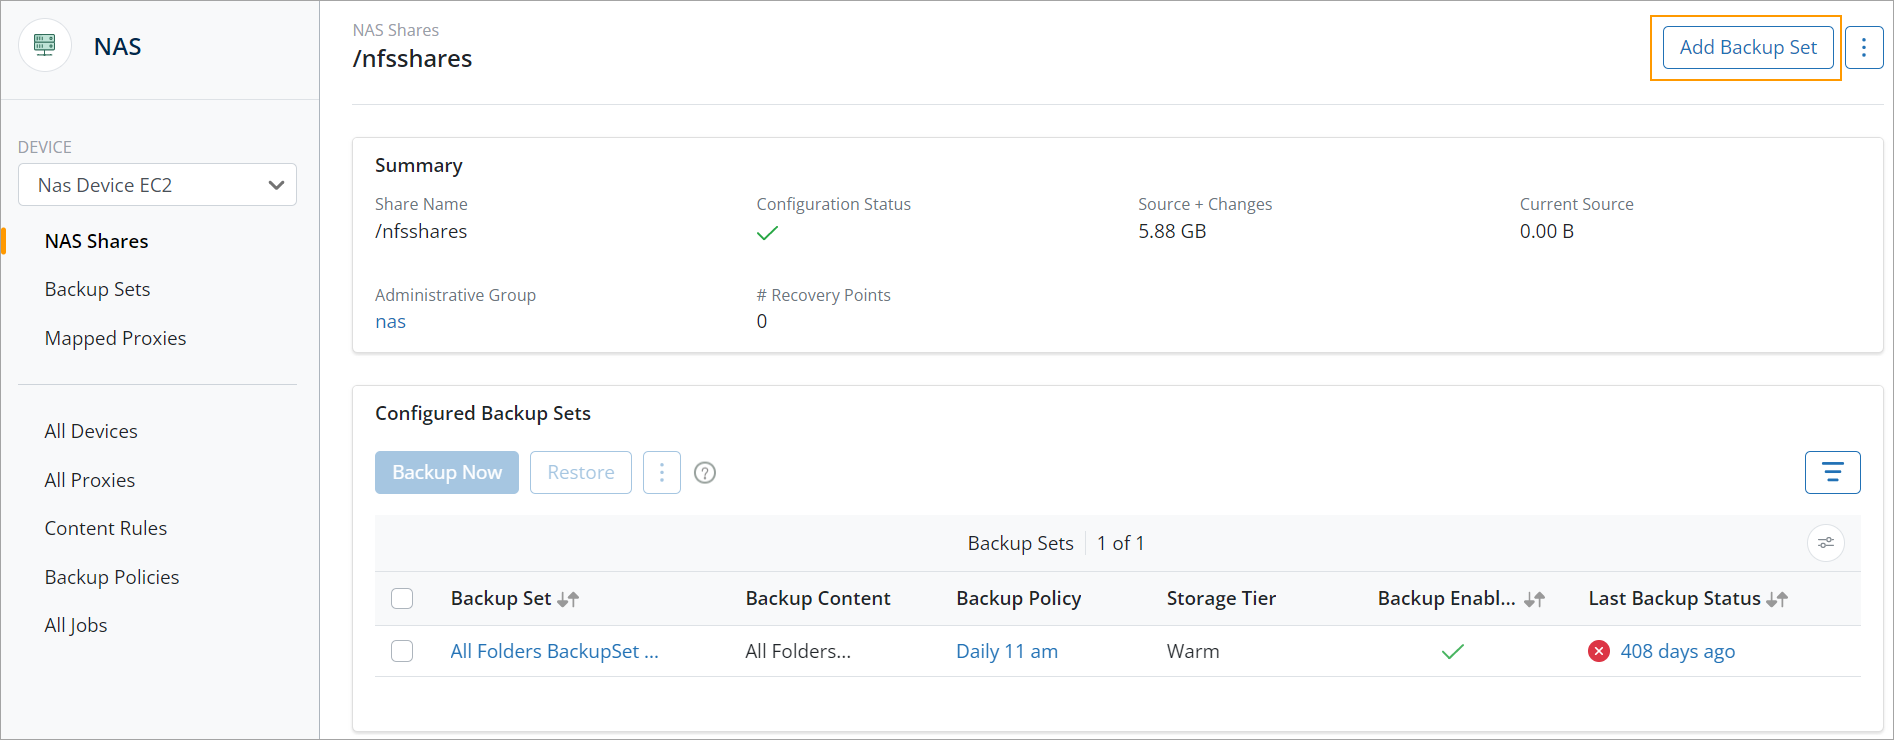
- Enter the information as described in the Configure Backup Set for NAS share page.
- Click Save.
Edit a backup set
This procedure describes how you can edit the backup set configured in a NAS share.
To edit a backup set configured for NAS share:
-
Login to the Management Console.
-
Select the workload from the Protect menu. Note that if the All Organizations menu is enabled, you have to first select an organization that has your NAS device and then select the workload.
-
In the device-specific navigation pane on the left, select the NAS device from the device drop-down.
-
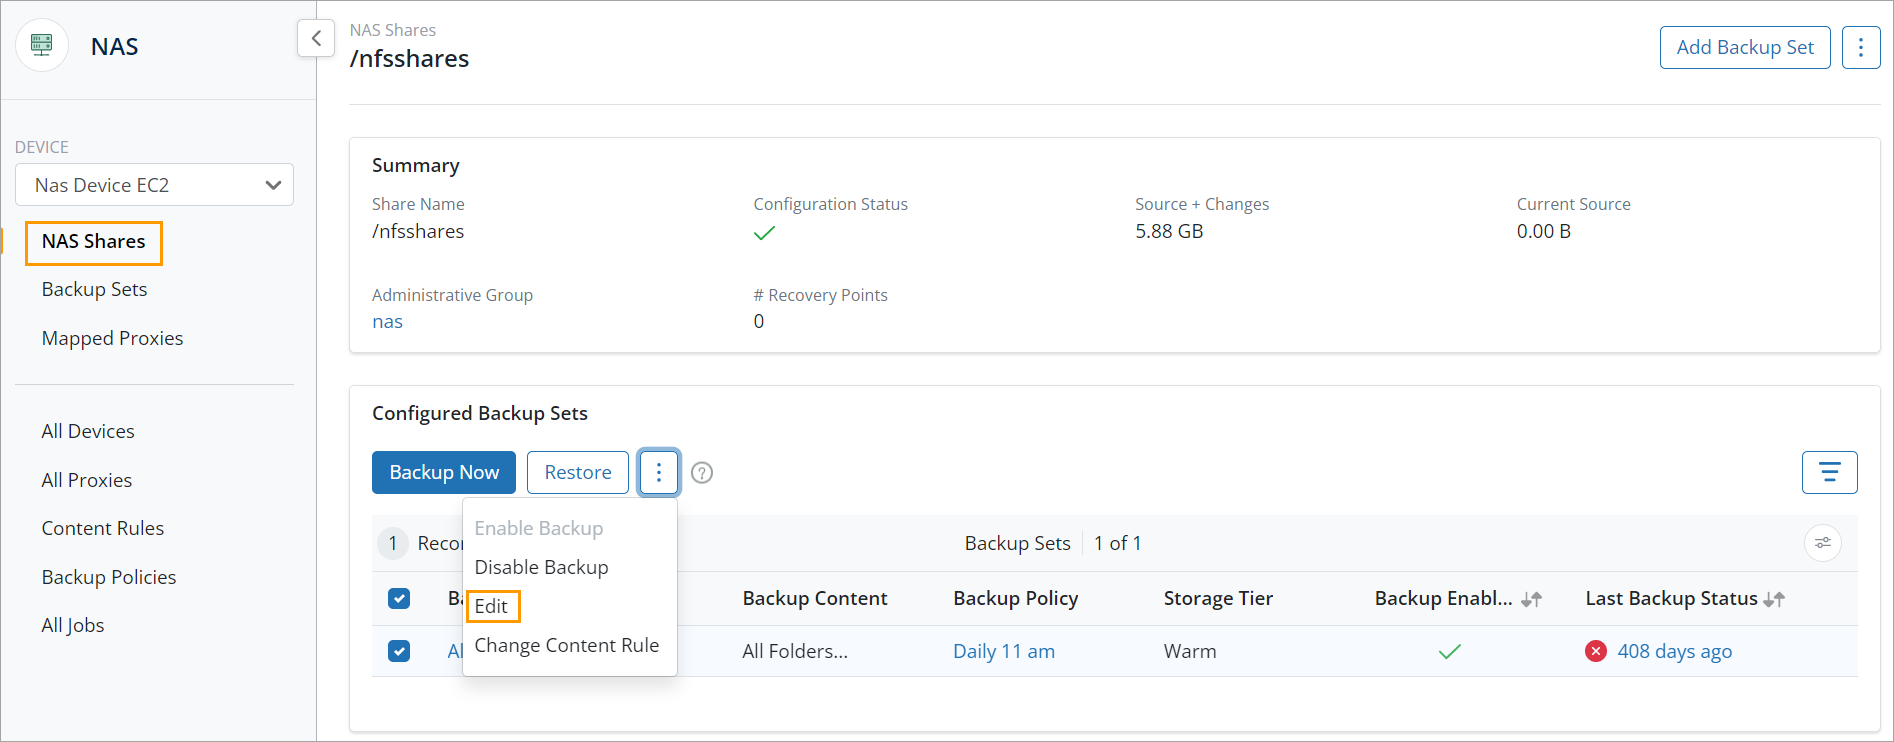
In the device-specific navigation pane on the left, click Backup Sets.
- Select the backup set that needs to be edited, click more options, and then click Edit.

You can even click a backup set to see backup set details, click more options, and then click Edit.
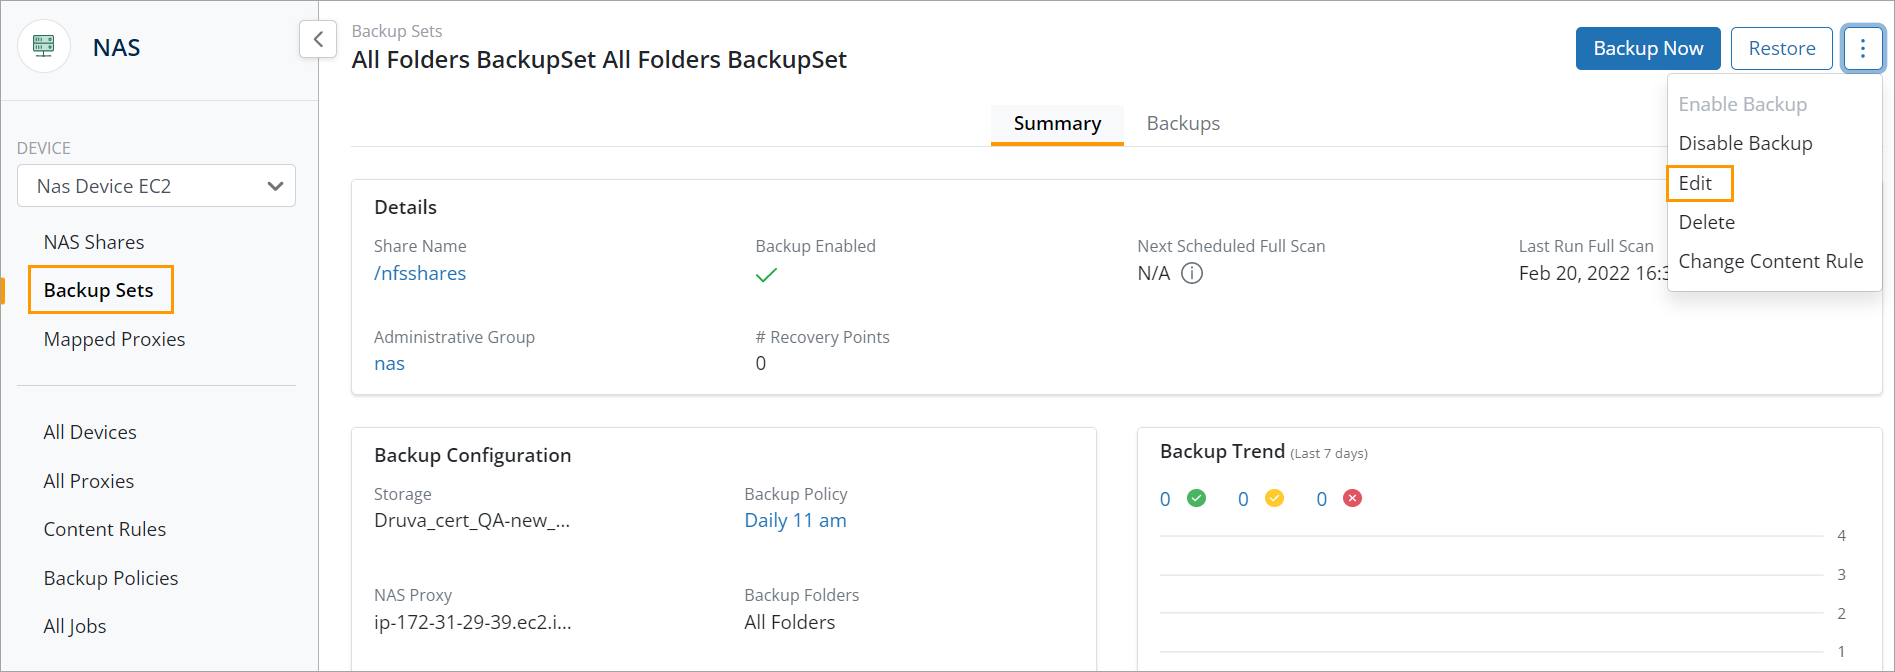
Alternatively, from the NAS share details page, in the Configured Backup Sets section, you can select a backup set, click more options, and then click Edit.Note: For newer backup sets created with a content rule, the backup set details page shows the Content Rule in the Summary tab under the Content Rule field For older backup sets that were not created using Content Rules, the Backup Folders field displays the folders included for backup.
-
Enter the backup set information as explained in the Configure backup set for NAS share article. Storage information cannot be edited. Storage once assigned cannot be changed.
- Click Save.
Disable backup from NAS shares
Disable backup when you want to pause the backups performed by a specific backup set. You can use this feature to prevent backups of corrupt or infected files from the NAS share. Druva saves the backup settings and applies them again whenever the backup is enabled for the backup set.
To disable backup from NAS shares:
-
Log in to the Management Console.
-
Select the workload from the Protect menu. Note that if the All Organizations menu is enabled, you have to first select an organization that has your NAS device and then select the workload.
-
In the device-specific navigation pane on the left, select the NAS device from the DEVICE drop-down.
- There are three ways to disable backups of backup sets:
- In the device-specific navigation pane on the left, click Backup Sets. The right pane lists all the backup sets configured for the shares on the NAS device. Select the backup set that needs to be disabled, click more options, and then click Disable Backup. You can disable multiple backup sets at once.

- You can also disable a backup set by going into the backup set details, clicking more options, and then selecting Disable Backup.
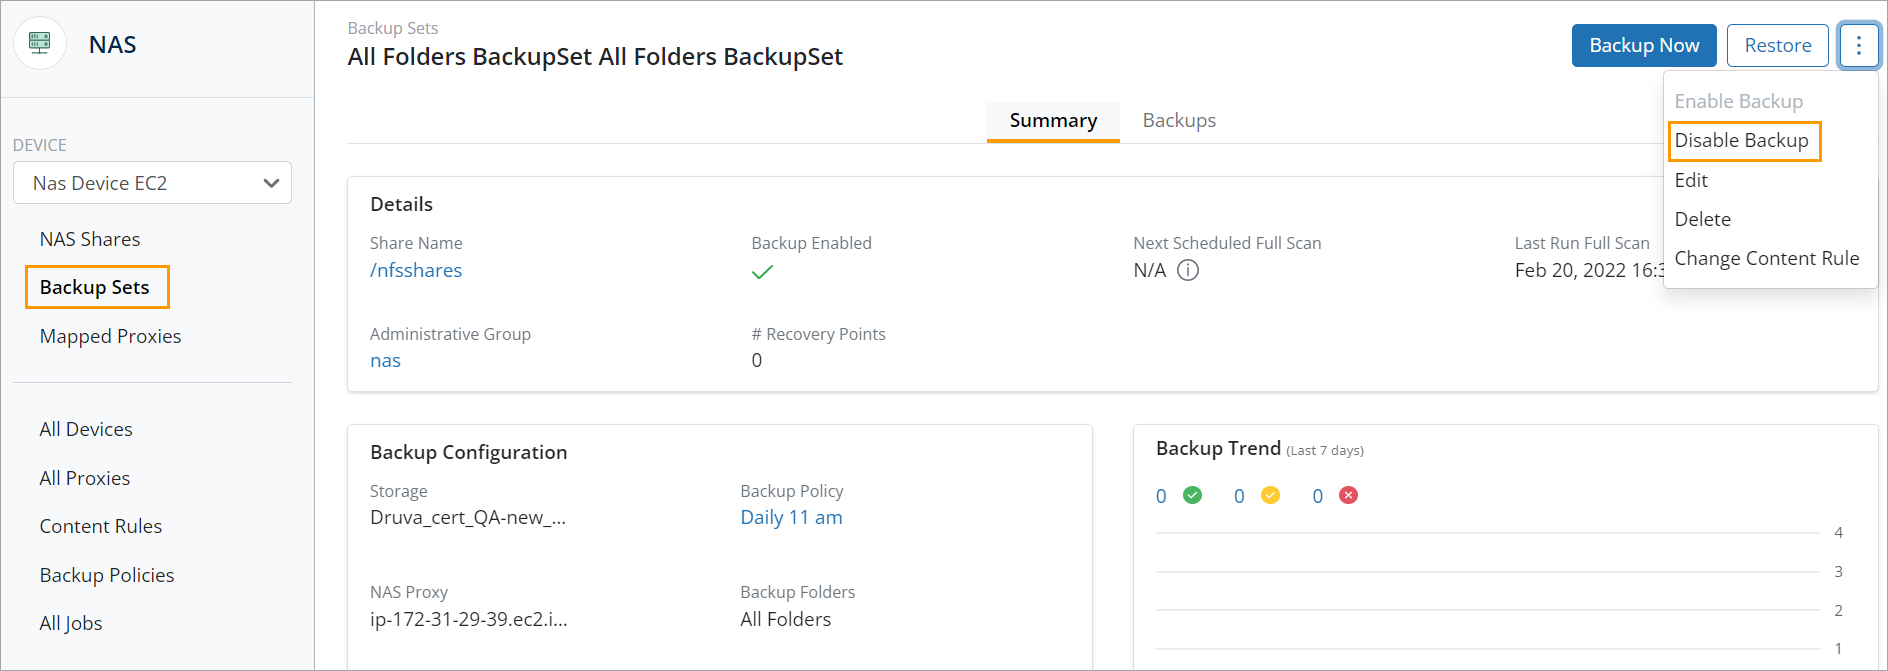
- Alternatively, you can disable backup sets by going into the NAS shares details, and then in the Configured Backup Sets section, select the backup set, click more options, and then click Disable Backup.
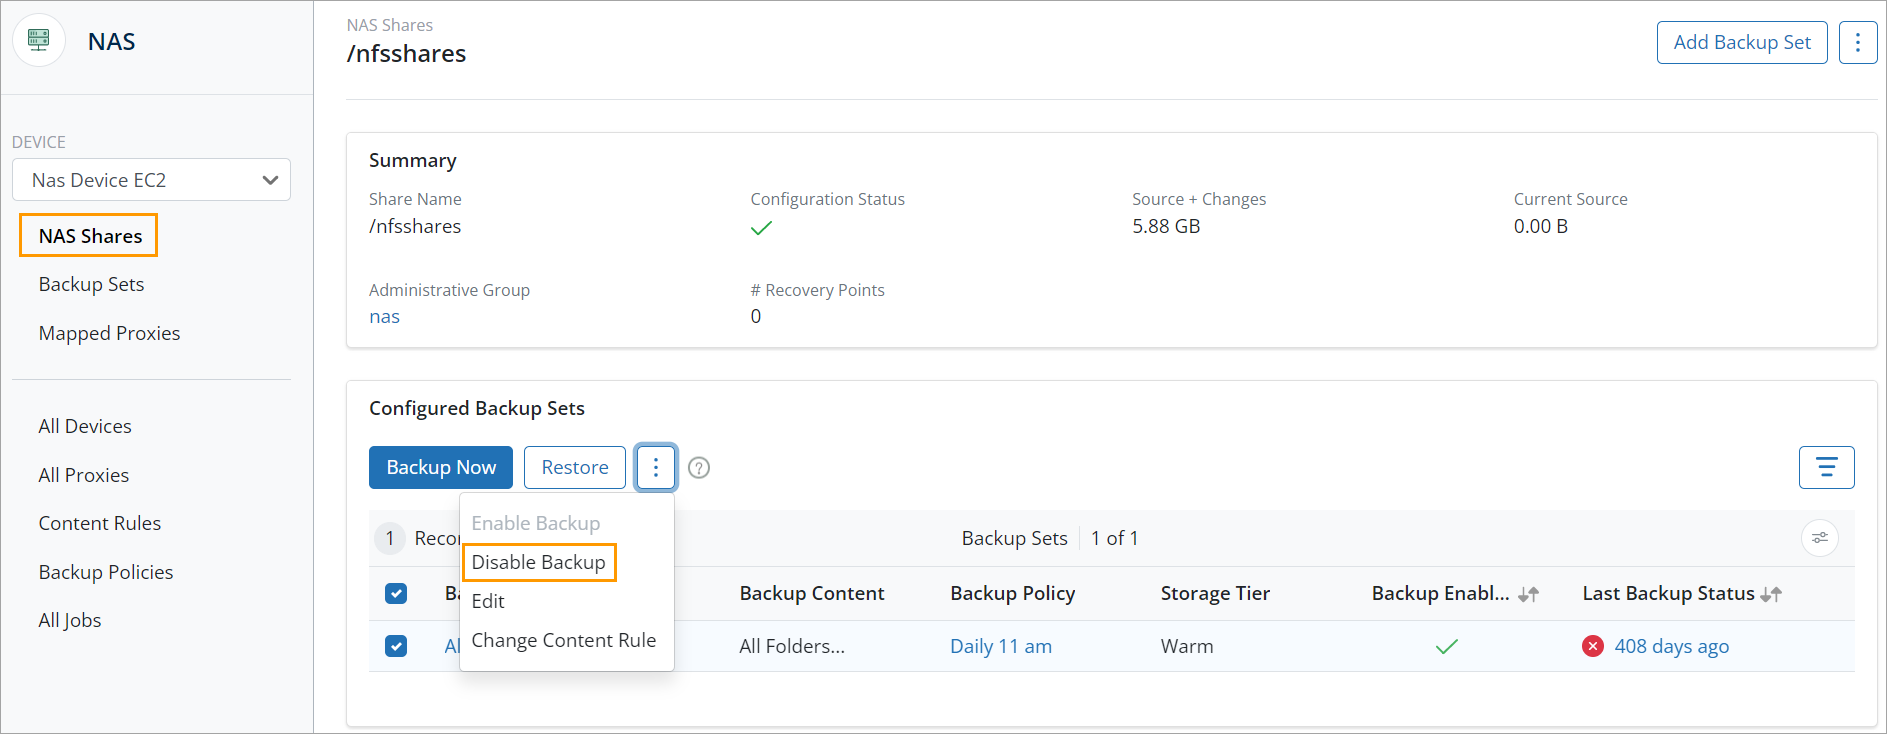
The backups for the backup set are disabled until they are enabled again.
- In the device-specific navigation pane on the left, click Backup Sets. The right pane lists all the backup sets configured for the shares on the NAS device. Select the backup set that needs to be disabled, click more options, and then click Disable Backup. You can disable multiple backup sets at once.
Delete a backup set
Deleting backup sets is essential when you plan to delete a NAS device or a NAS share from Management Console or when you want to move the NAS device or NAS share to a different administrative group. When you delete a backup set, Druva retains the backup set data for 7 days after its deletion.
When you delete a backup set:
- The backup policy and the NAS proxy linked with the backup set are detached.
- The backups occurring through the backup set are stopped.
- The snapshots backed up using the backup set are deleted.
Notes:
- To preserve the snapshots, you can restore the snapshots and then proceed to delete the backup set.
The most recent snapshot cannot be deleted as long as the device exists in the Management Console, regardless of whether the device is marked as inactive or disabled.
The retention period would not be honored for the most recent snapshot when a device is disabled. This allows you to restore the latest snapshot later if required.
To delete a backup set:
-
Login to the Management Console.
-
Select the workload from the Protect menu. Note that if the All Organizations menu is enabled, you have to first select an organization that has your NAS device and then select the workload.
-
In the device-specific navigation pane on the left, select the NAS device from the device drop-down.
- In the device-specific navigation pane on the left, click Backup sets. Click the backup set that you want to delete. From the Backup Sets details page, click more options in the top right corner, and select Delete.
- A confirmation dialog is displayed. Provide a reason in the Reason for deletion box and click Delete.
The reason is required to confirm your action and to prevent any accidental deletion. This is a mandatory field, and you can use a minimum of 10 characters and a maximum of 150 characters to provide the reason for deletion.
Note that all deletion requests with a reason will be reported to the Audit Trails.
For more information, see View Admin Audit Trails page.
33934Note: Deleting the last backup set for a NAS share deletes the admin group associated with that share as well.