Add a NAS device
 Business Enterprise Elite
The next step in configuring a NAS share for backups is adding the NAS device and mapping it to a NAS proxy. This article guides you through adding a NAS device in the Management Console and mapping it to a NAS proxy.
Procedure
- Log in to the Management Console.
- The Get Started page is displayed if no NAS devices have been added so far. In the Get Started page, under Add a NAS device, click Add NAS device.
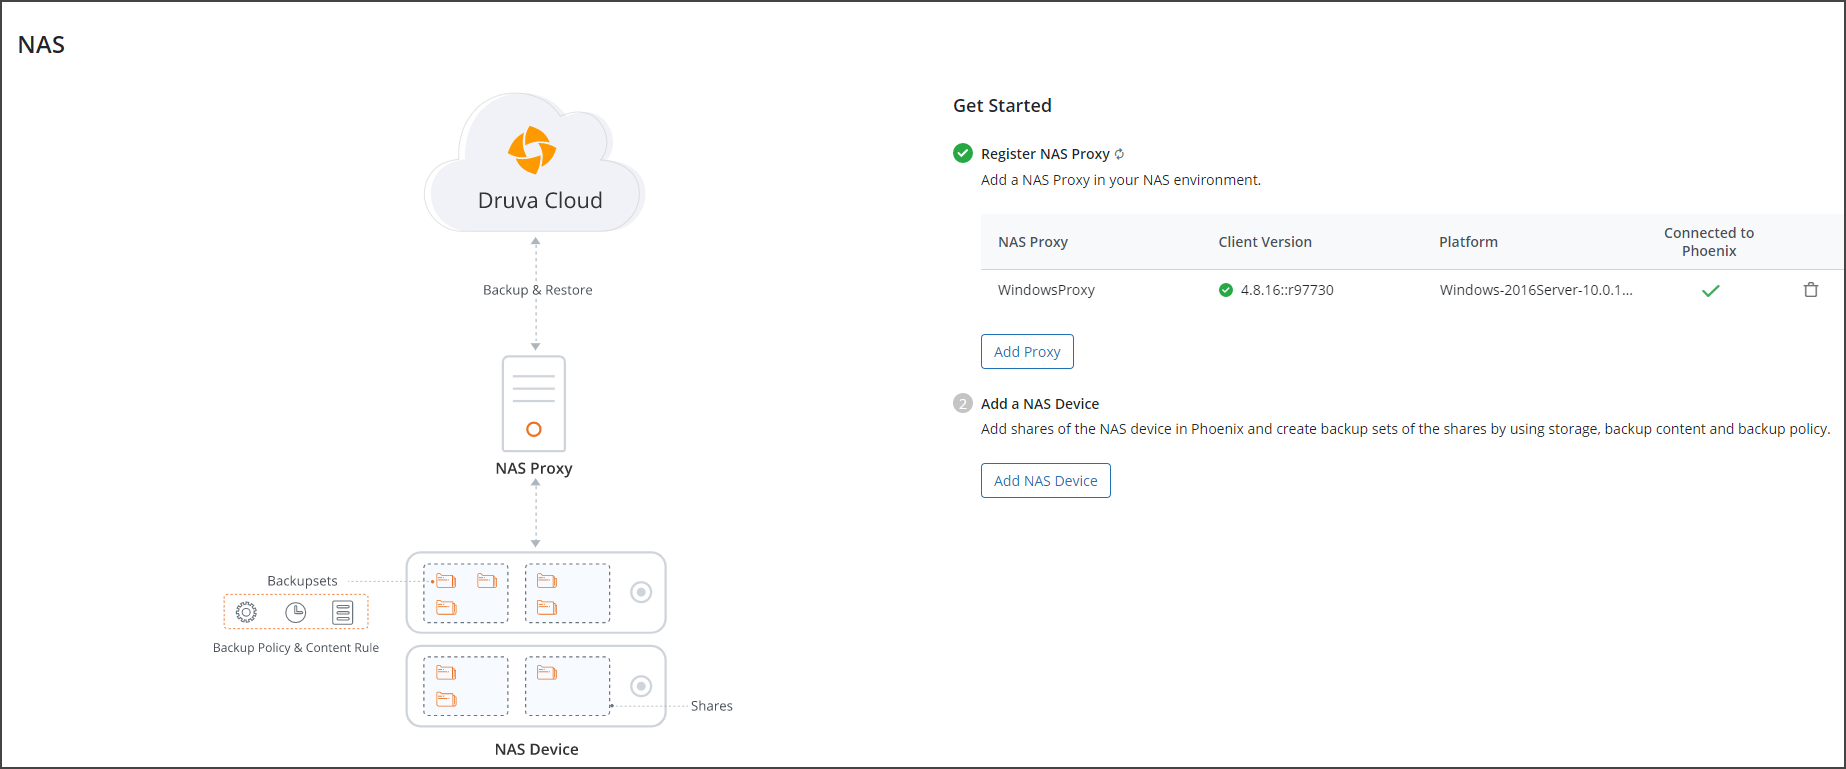
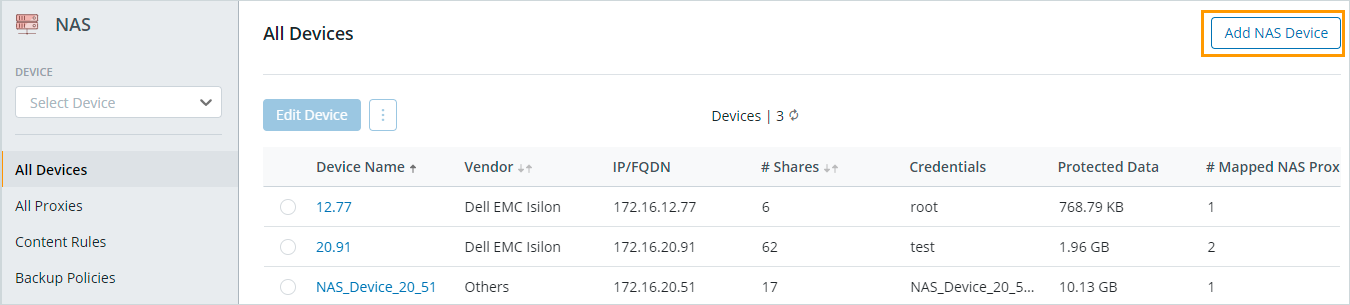
If NAS devices have already been configured, the Get Started page is not available. To add additional NAS devices, click Add NAS Device.
-
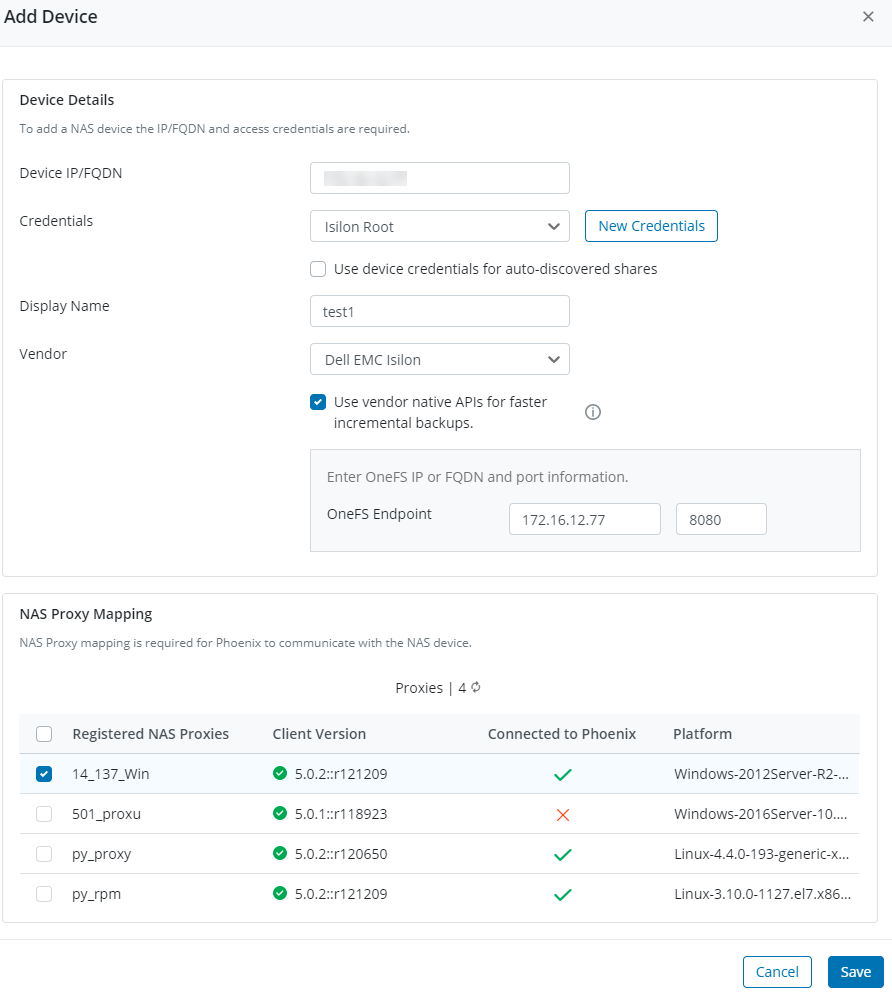
On the Add Device page, enter the following details:
| Field | Description |
|---|---|
|
Device IP/FQDN |
IP or Fully Qualified Domain Name (FQDN) of the NAS device.
|
| Credentials |
If you choose to create new credentials, enter the following details in the New Credentials dialog box:
|
| Display Name | NAS device name that will appear on the Management Console. |
|
Vendor
|
Select the NAS vendor from the drop-down. The values are:
You can select Others to enter the name of the vendor of your choice. This field is mandatory. By default, the value in this field is freeNAS.
When you select Dell EMC Isilon, and need these features, then select the Use vendor APIs for faster incremental backups option. Enter OneFS IP or FQDN and port information in the OneFS Endpoint field.
|
| NAS Proxy Mapping | Map this device to registered NAS proxies. If your NAS device has SMB and NFS shares, ensure that you map it to a Windows and Linux proxy. |
-
On the Add Device page, click Save.
Validation checks are performed and the Device Validation window is displayed with the results.
Note: When the agent proxy discovers that a vendor is configured with native APIs, it runs vendor-specific validations that verifies all the privileges on the credentials. For more information on validations, see NAS Device Validations.
- If both basic and vendor-specific (Isilon) validations are successful, then click Done. The NAS device is added. Druva performs backup using the recovery point-based approach. It also identifies and skips the stub files.
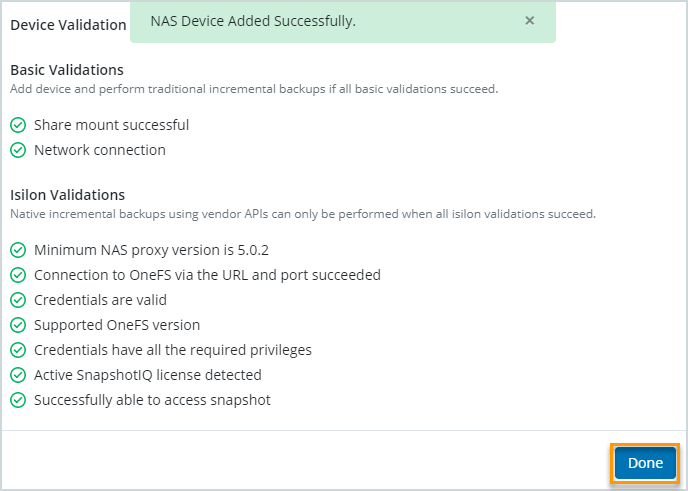
Note: If all the Isilon validations are successful, then the vendor specific APIs are supported. OneFS API performs a check for all the stub files in the directory. If a stub file is found, it is skipped during backup. Also, a changelist is created from the recovery points, which helps to achieve faster incremental backups.
- If the Isilon validation is not successful, then click Add Device on the Device Validation window. The NAS device is added and traditional backups will be performed.
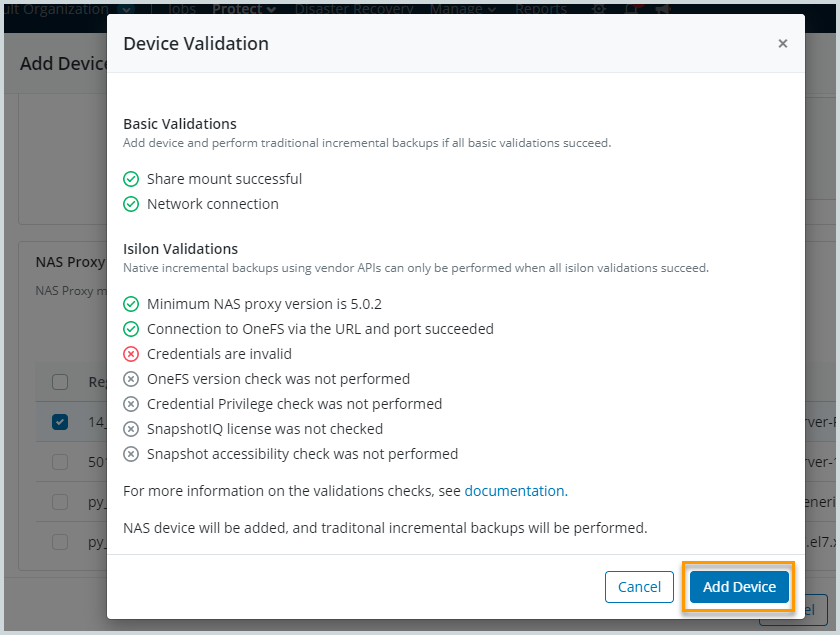
Note: Basic Validations are performed first and then Isilon Validations are performed. If any Isilon validation fails, then the vendor's APIs are not supported and the Isilon backups will be performed by the traditional approach, and the stub files are processed as regular files.
For more information, see NAS Device Validations.