Restore files and folders
 Business Enterprise Elite
The following article provides information on restoring files and folders to an original or an alternate location:
- Search for files and folders
- Restore files and folders from search
- About Restore settings
- Export File/Folder listing
- Restore a file to the original server
- Restore a file to the alternate server
Search for files and folders
Use the search feature to search for files and folders across recovery points in a backup set. The following table describes the search criteria and filters for new and existing customers.
| Users | Search by | Filter by |
|---|---|---|
| Existing File server users (Druva account created before 17 May 2021) |
file name | exact filename, file extension, file size, modified date |
| New Druva Users (Druva account created on or after 17 May 2021) |
file name or folder name |
exact filename, type, file extension, file size, modified date |
In the above table,
- If you are an existing file server user and your Druva account was created before 17 May 2021, you can only search for files and restore them.
- If you are a new Druva customer and your account was created on or after 17 May 2021, then you can search for files and folders and restore them both.
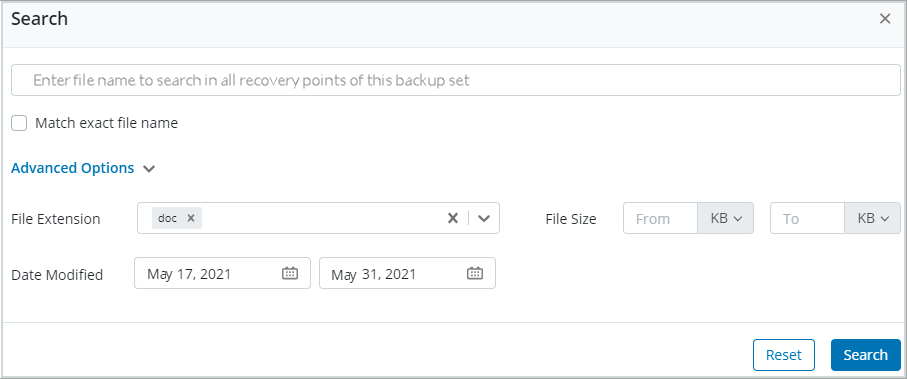
Search filters for existing file server users
You can use one or more filters to narrow down the search results. Click the search bar to view the available filters. For example, if you want to restore a .doc file modified between 17 May 2021 and 31 May 2021, expand Advanced Options and select the following:
- File Extension doc
- Date Modified 17/05/2021 to 31/05/2021
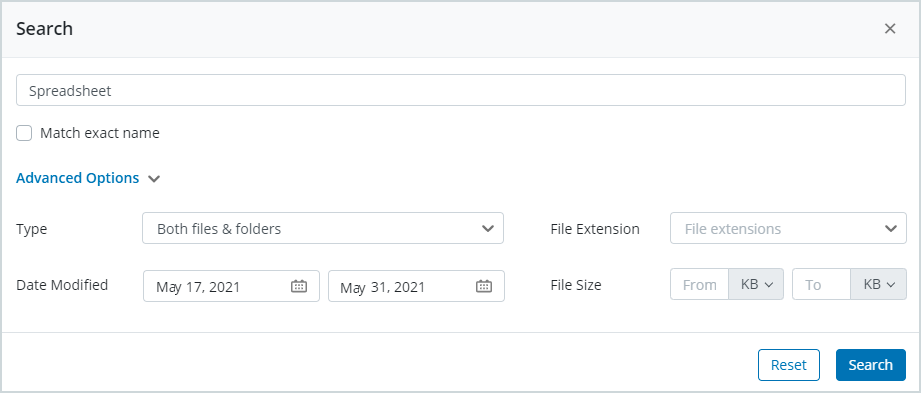
Search filters for new file server users
If you are a new Druva customer, then you can use one or more filters to search and restore both files and folders. Click the search bar to view the available filters. For example, if you want to restore files and folders that start with the word Spreadsheet modified between 17 May 2021 and 31 May 2021, expand Advanced Options and select the following:
- File or folder name: Spreadsheet
- Advanced Options:
- Type: Both files & folders
- Date Modified:17/05/2021 to 31/05/2021
Here are some of the ways you can use the search filters:
File Names
-
Exact name match: To search for the exact filename, use the Match exact name checkbox. Enter the complete filename in the search bar, including the file extension, and then click Search. Selecting the Match exact name checkbox disables the File Extension filter.
To search for the file filename.pdf, enter filename.pdf in the search bar, select Match exact name, and click Search.
Note: If you do not select the Match exact name checkbox, Druva searches for files whose name starts with a similar prefix.
For example, if you enter _filename.pdf in the search bar, keep the Match exact name checkbox deselected, and click Search, Druva returns the following results:
- _filename.pdf
- _filename.pdf.txt
- _filename.pdf.old, and any other files with similar prefixes.
- Partial name search
If you do not select the Match exact name check box, then you are performing a partial file name search.
You can search for files with search terms or prefixes. Search terms are substrings of a filename that are separated by a delimiter. For example, search terms for a file Druva_Phoenix.txt are Druva, and Phoenix. You can also use a prefix of a search term to search for files. For example, prefixes of search terms for a file Druva_Phoenix.txt are Dru, Druv, Druva, Pho, Phoe, Phoeni, Phoenix, Druva_Phoenix.txt. The prefix should start from the left of the search term and must be a minimum of 3 characters and a maximum of 64 characters.
Note: Druva does not support performing a partial filename search using search terms or prefixes starting with special characters. For example, to search for a file _druva.txt, the valid search terms are:
- dru
- druv
- druva
- You can also enter _druva.txt and select Match exact name to perform this search.
| To search for | Valid search terms and prefixes | Invalid search terms and prefixes |
|---|---|---|
Phoenix_backup_0019.pdf |
|
|
- Search multiple files
Search for multiple files at once by specifying search terms or a prefix of the search terms separated by a space. Druva performs an OR operation between the search terms and lists all the files that contain the search terms and prefixes. The maximum number of search terms or prefixes that you can specify is 10.
Note: The file name or folder name must be three characters or greater.
| List of files in backup set | Search term used | Resulting files | Invalid search terms |
|---|---|---|---|
|
|
|
|
|
|
|
|
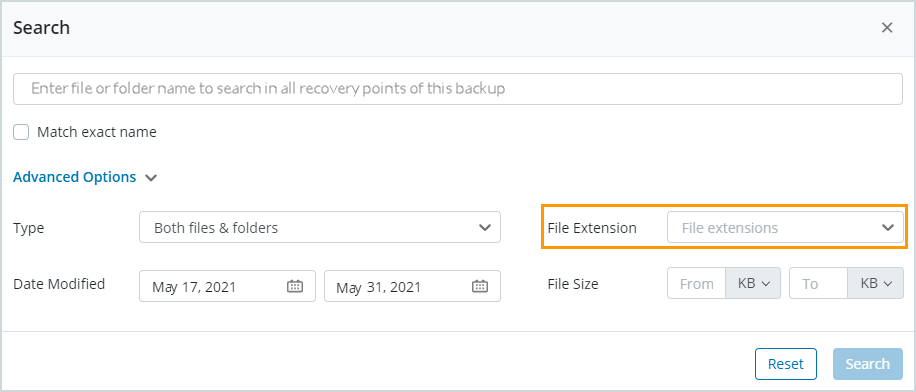
File Extensions
Search for files of predefined file types such as Office files, Image files, and so on, or enter custom extensions without periods or character prefixes to search for files with custom extensions. The custom extension can have a maximum length of 10 characters.
| To search for | Valid search terms | Invalid search terms |
|---|---|---|
Phoenix_backup_0019.doc |
|
|
Note: To see a list of file types and their associated extensions, see File types supported for backup.
Type
This field is available if you are a new Druva user and your account was created on or after 17 May 2021. Choose to search for Both files & folders, Only files, or Only folders from the Type dropdown. The search results are filtered to show Both files and folders, Only files, or Only folders that match the other search filters.
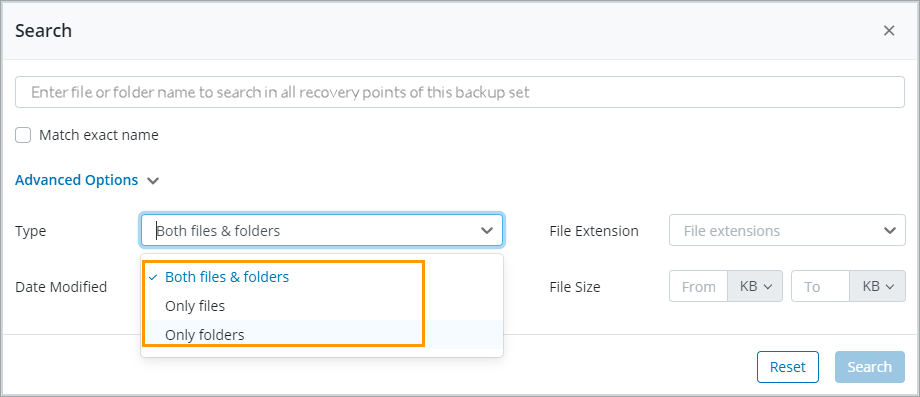
Note:
- If you choose to search for Only folders, the File Extension and File Size fields are disabled.
- The File Extension and File Size filters only apply while searching for files, even though Both Files and Folders have been selected in the Type field. The Date Modified and the Name (or Match exact name) apply to both files and folders.
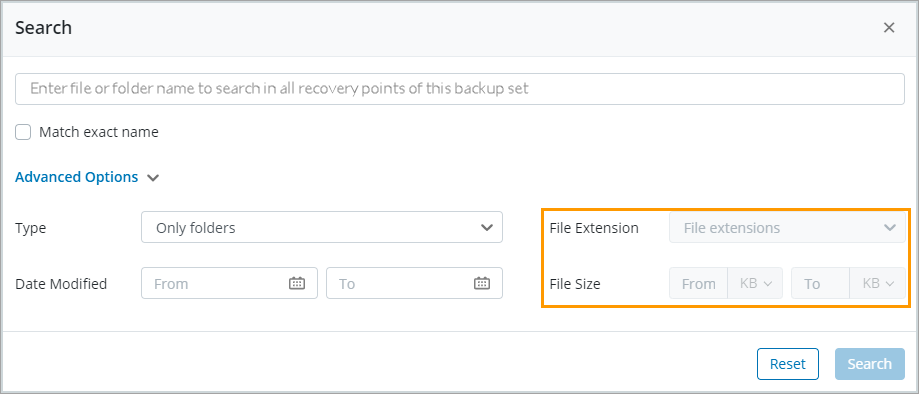
File Size
Enter a file size range to search for files by file size. You can search for file sizes in KBs, MBs, and GBs. The max size must be greater than the min size.
Date Modified
Search for files created or modified between the selected dates. For example, when you enter a date range such as 15/03/2021 (15 March 2021) to 31/03/2021 (31 March 2021), Druva searches for files modified between 15 March 2021, 12:00 am to 31 March 2021, 11:59 pm. In the Date Modified field, you can select a date in either From or To filter, or both of them. For example, if you select only the From date filter, all files created or modified after the From date are listed in the search results. You must choose a date after 1 January 1970.
Search results
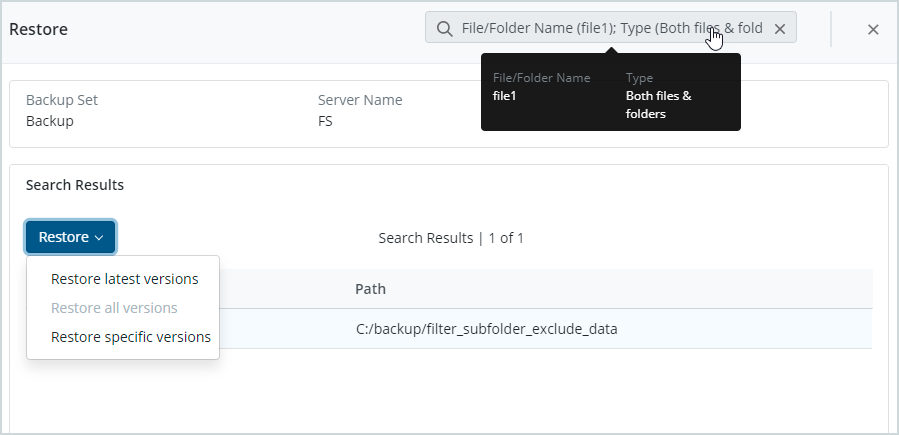
The Search Results section displays the files and folders that match the search criteria. You can hover over the search query in the search bar to view the applied search filters. You can also modify the search query (highlighted in the screenshot) at any point in time. Scroll down to see more results.
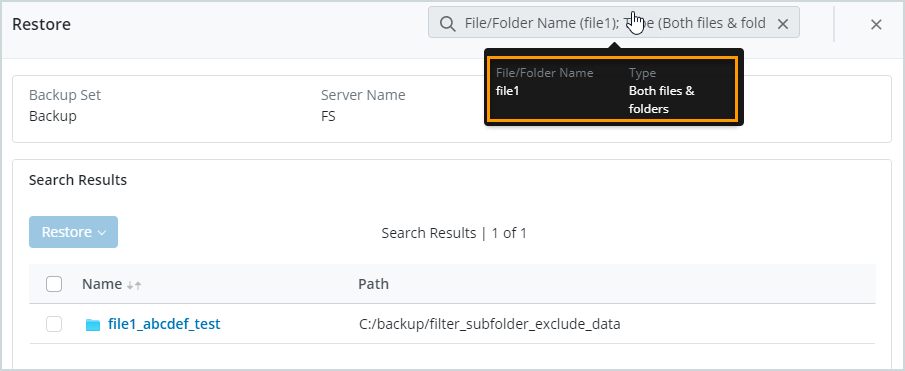
The Name field under Search Results is followed by a sort icon. Initially, the sort icon is in a neutral state, meaning the Name field is not sorted in either ascending or descending order.
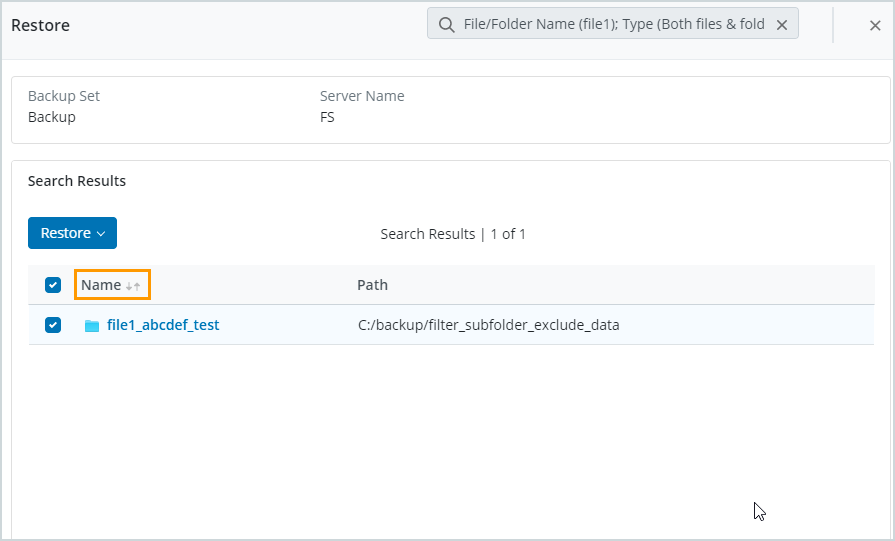
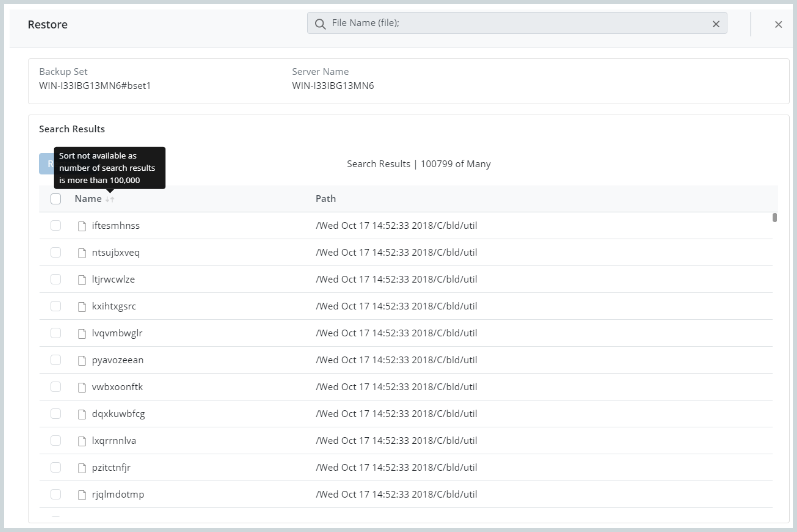
Note: You cannot sort the search results by name until all the search results are fetched. The sort icon is enabled next to the Name column once all the search results have been fetched and their count is less than one hundred thousand. Click the sort icon to sort the results in ascending or descending order.
If the number of search results exceeds one hundred thousand, then refine the search filters to reduce the results, and then sort by Name.
Note: Sort is available for both files and folders, for example,
- file/folder name that starts with numbers will be sorted as 1file, 10file, 11file, 120file, 13file, 2file instead of 1file, 2file, 10file, 11file, 13file, 120file.
- file/folder name that starts with letters will be sorted as Backup_file, Folder_file, backup_file and not Backup_file, backup_file, Folder_file.
- file/folder name containing Letters and numbers will be mixed as file 1, folder 11, file 2 and not file 1, file 2, file 11.
Select one or more files or folders from the search results and choose to restore the latest version, all versions, or specific versions of the selected file(s) or folders.
Points to be noted:
- Searching requires the data to be indexed. Post backup, the data is indexed automatically after some time. The files in the backup are available for search once the indexing completes.
- Search will be available only for those backup sets whose backup completes successfully.
- The search feature does not work for the agents that are not connected or are disabled.
- You cannot restore files and folders that belong to a quarantined recovery point. When you click Finish on the Restore Settings tab, then an informational message lets you know that you cannot restore the file since it belongs to a quarantined recovery point.
Restore files and folders from search
You can choose to restore the latest version, all versions, and specific versions of files and folders.
Note: You can search for and restore folders from recovery points created on or after 17 May 2021, if you are a new Druva customer.
You can select a file or a folder or both from the search results and click Restore.
The following table lists the restore options available when you select files, folders, or a combination of the two for restores from the search results.
| Select | Restore latest version | Restore all versions | Restore specific versions |
|---|---|---|---|
| Single file | Yes | Yes | Yes |
| Multiple files | Yes | Yes | No |
| Single folder | Yes | No | Yes |
| Multiple folders | Yes | No | No |
| Files and folders | Yes | No | No |
Note: The option to restore all versions of
- Single folder
- Multiple folders
- Files and folders
and restore specific versions of
- Multiple files
- Multiple folders
- Files and folders
are disabled because the size of the selected folder(s) is not available. All folder versions are not available until the search completes. The size of the selected folder(s) in combination with the number of folder versions available may be too large to be restored on the destination.
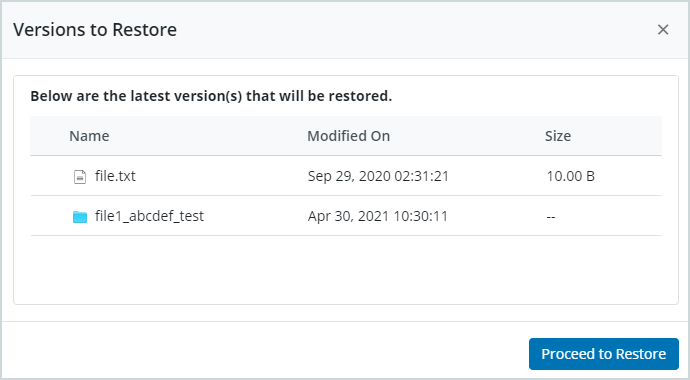
Restore latest versions
This option allows you to restore the latest version of the selected file or folder to the original server or a different server. This option is available for single or multiple files and folder selections. The latest versions of files and folders are restricted to the specified search parameters.
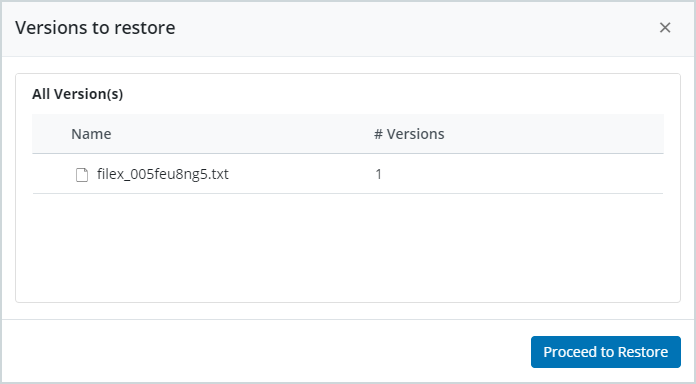
Restore all versions
This option lets you restore all versions of the selected file(s). This option is available for single and multiple file selections. This option is not available if you select one or more files with folders.
Note: If you select one or more files that have multiple versions from the search results and choose to restore all versions of those files, you can restore them to a custom location on the original server or a different server. Druva restricts you from restoring these to the original location on the original server to avoid an overwrite of the original files.
Restore specific versions
This option allows you to restore specific versions of a single file or a single folder. This option is not available if you select multiple files, multiple folders, or files and folders from the search results.
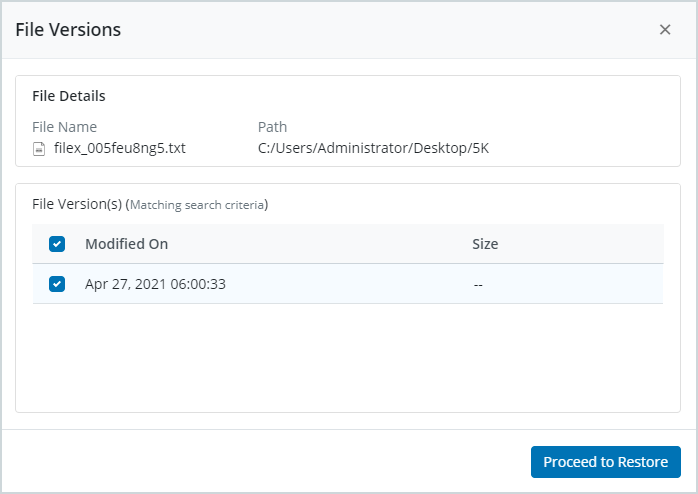
Note: If you choose to restore multiple versions of a single file, you can restore them to a custom location on the original server and a different server. Druva restricts you from restoring multiple versions of a single file to the original location on the original server to avoid an overwrite of the original file.
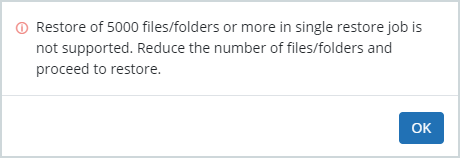
Note: Restore of 5000 or more files/folders in a single restore job is not supported. This restriction applies to restore of all versions, latest versions, and specific versions. If you select 5000 or more files/folders in a single restore job, you cannot proceed to restore without reducing the number of selected files/folders. Modify the search filters to reduce the number of files/folders and then proceed to restore.
You can restore folder versions based on the modification time. A folder can be considered modified when:
- an immediate child file is modified
- a file or folder is added directly to the folder
- an immediate child file or folder is deleted
Depending on the search criteria, the latest folder versions are displayed by default.
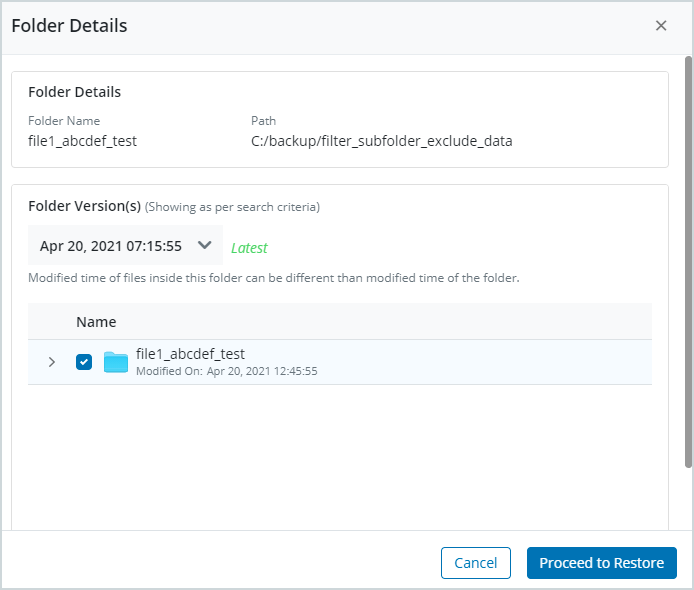
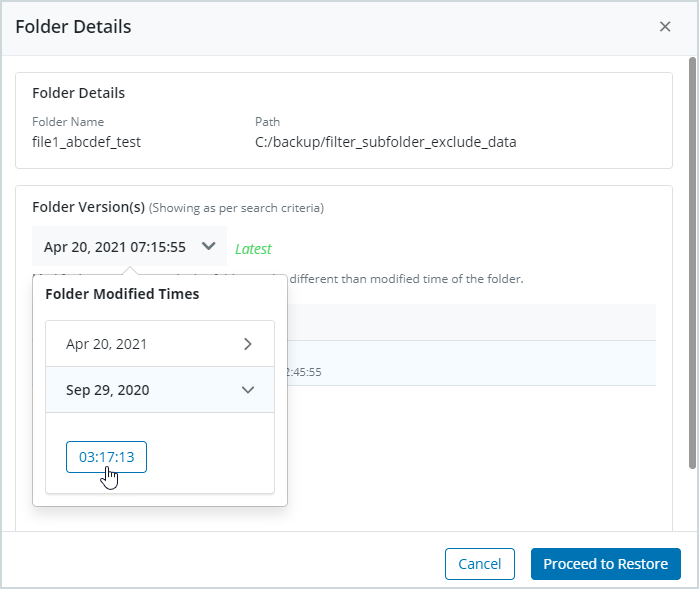
However, the modification time of files inside this folder can be different than the modification time of the folder. Therefore, you can restore specific versions of a folder by selecting the folder modified time from the drop-down.
After you select a specific date and time, the same is reflected as the latest version:
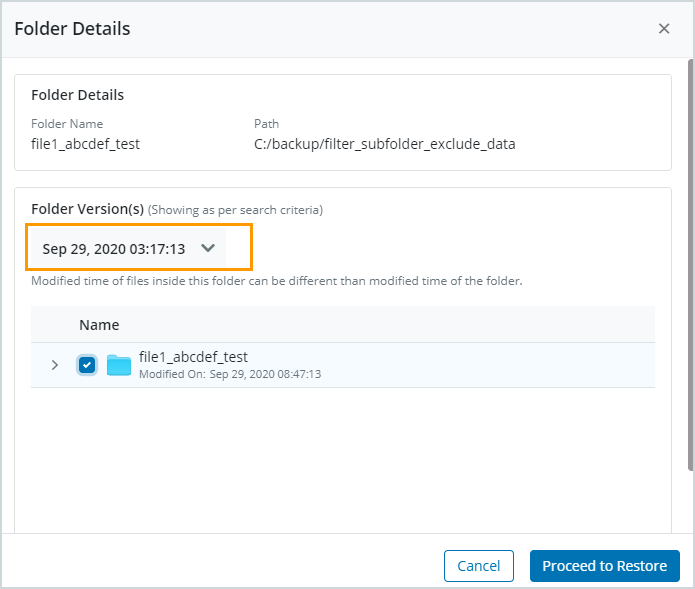
Note: You can also browse the folder on the selected modified time, and can restore any other folders/files included within it.
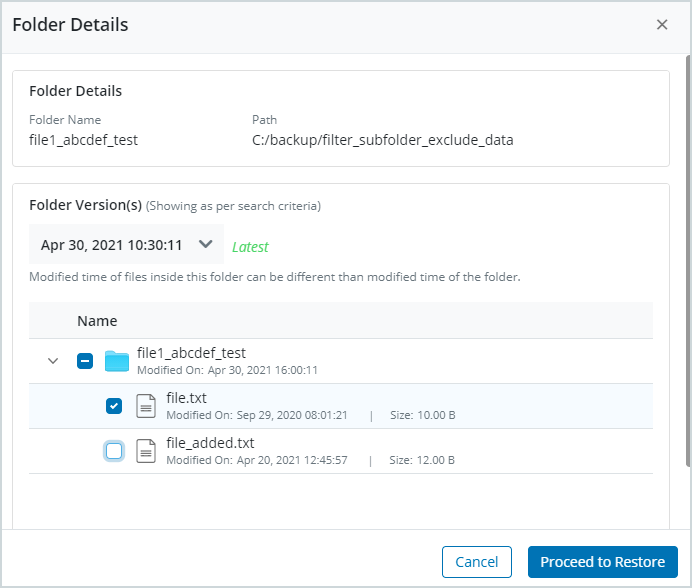
Note: In the above example, if the file1_abcdef_test folder contains more than 6144 files/folders, then the Load More option will be visible to load the next set of results.
Export File/Folder listing
The Export File/Folder listing capability in the Restore Data page allows you to export a list of all the files and folders in the selected folder to a .CSV file. Users who don’t have access to the Druva Administration console can use this exported file to determine the files or folders they want to restore. After they have identified the files that they need, the administrator can restore them from the Restore Data page.
Note: The directories and files listed in the .CSV file generated by the Export File/Folder listing option are not arranged in alphabetical order.
About Restore settings
Druva provides the following restore options:
Note: These restore settings will be displayed only if you have upgraded the File server agent to version 4.6.9 and later.
Always overwrite
This option overwrites files and folders with the same name at the destination irrespective of the file/folder version or date. This option is selected by default.
Overwrite if original is older
Druva will overwrite files/folders with the same name only if they are older than the version being restored.
Restore and move original to .orig
If the file/folders you want to restore already exists on the destination, Druva renames the existing file/folder to filename.extension.orig while the version you want to restore is saved with the same name. Subsequent restores append an incremental number to the existing file at the destination. For example filename.extension.orig1, filename.extension.orig2, and so on.
Always skip
The files with the same name will not be restored to the destination. The number of files skipped will be displayed in the progress logs.
Example: Assume that one of the files you are restoring from Druva is file.txt, which already exists at the destination. This scenario will explain the naming changes that file.txt undergoes over several restore cycles.
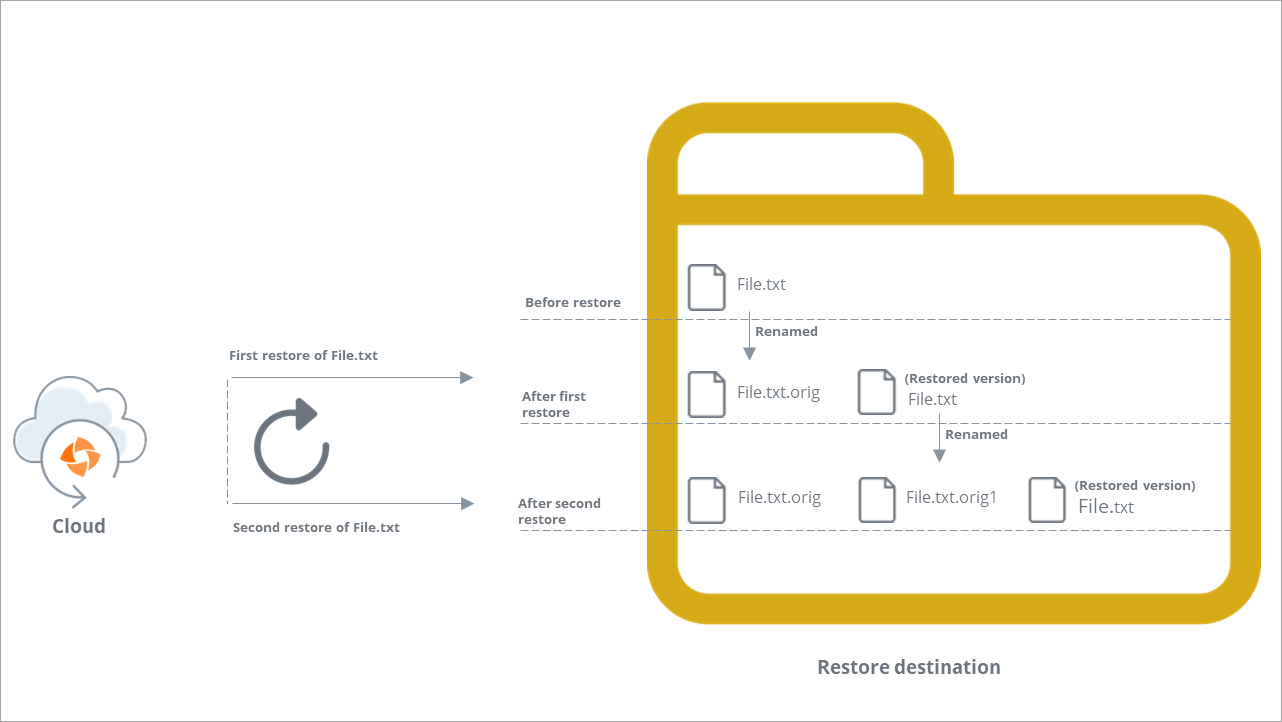
- The restore destination currently has a file called file.txt.
- After the first restore, the existing file.txt will be renamed to file.txt.orig, while the file being restored will be called file.txt.
- After the second restore, the existing file.txt will be renamed to file.txt.orig1, while the file being restored will be called file.txt. You will now see the following files at the destination:
- File.txt: The latest version restored from Druva.
- File.txt.orig1: The renamed version of the previous (first) restore operation.
- File.txt.orig: The oldest version present on the destination.
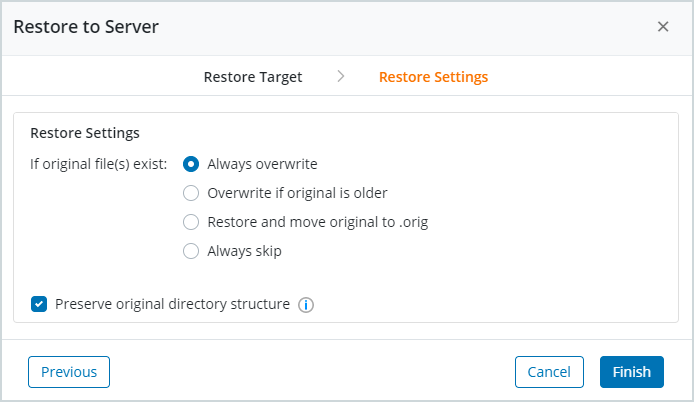
Preserve original directory structure
Recreate the source directory structure at the destination while restoring a file to an alternate location. The upward tree path of the file is always preserved while restoring to the original location. The downward tree path is always preserved by default.
An example of preserve original directory structure:
If you restore a folder called Department from the path D:\Emp Data\Department\Manager\titles at the source location to the F: drive on the destination, the restored folder hierarchy will be F:\D\Emp Data\Department\Manager\titles.
If you choose to restore to the original location on the original server, you cannot deselect the Preserve original directory structure option. If you restore to a custom location on the original server or another server, you can deselect this option. Druva does not recommend deselecting this option, as an overwrite of files can lead to potential data loss.
Note: If you select files with different parent paths to restore at a destination, for example,
\C\Program Files\Backup\ABC\samplefile1.txt
\C\Program Files\Backup\XYZ\samplefile2.txt
Destination: C:\Druvaand enable the Preserve original directory structure option on the Restore to Server page, then ideally the tree path of the files must be preserved at the set destination as follows:
C:\Druva\C\Program Files\Backup\ABC\samplefile1.txt
C:\Druva\C\Program Files\Backup\XYZ\samplefile2.txtHowever, if the CPU in use has less than 3 cores or has memory less than 3 GB, then the older version of Enterprise Workloads agent is used for restore.
As a result, it preserves the upward tree path of the first file and restores it at the set destination. But for the second file, it does not honor the selected upward tree path and restores it at the same location. Therefore both the files are getting restored at C:\Druva\C\Program Files\Backup\ABC that is,C:\Druva\C\Program Files\Backup\ABC\samplefile1.txt
C:\Druva\C\Program Files\Backup\ABC\samplefile2.txt
To view the file attributes that can or cannot be restored, see About restoring files and folders.
You cannot restore a file that you've selected from search if it belongs to a quarantined or deleted recovery point. For more information, see Recovery points that you can restore.
In case of restore after search, if you restore files to the original location or alternate location, the restore job creates a folder with the name of the selected recovery point on the destination and restores the files inside this folder. For example, a folder called Mon_Apr_13_10_46_19_2021 is created on the destination and the files are restored inside this folder.
Note: While restoring a folder with a Restore specific version option, the recovery point folder is not created.
Restoring one or many versions of single or multiple files generates multiple restore jobs. The number of restore jobs created depends upon the number of selected files and their selected versions, and also the number of recovery points that contain these files. These restore jobs will queue up and run serially. You can find job details in the Audit Trails.
Restore multiple files across folder hierarchies
If you browse the folder hierarchy, you can now select multiple files from folders across hierarchies. When you click Finish in the Restore wizard, you see a message letting you know that you've selected folders from multiple hierarchies, and this will trigger multiple restore jobs.
Restore to the File Server
- Log in to the Management Console .
- Select the workload from the Protect menu. Note that if the All Organizations menu is enabled, you have to first select an organization and then select the workload.
- In the left pane, click File Backup Sets.
- Select the backup set that you want to restore data from, and then click Restore.
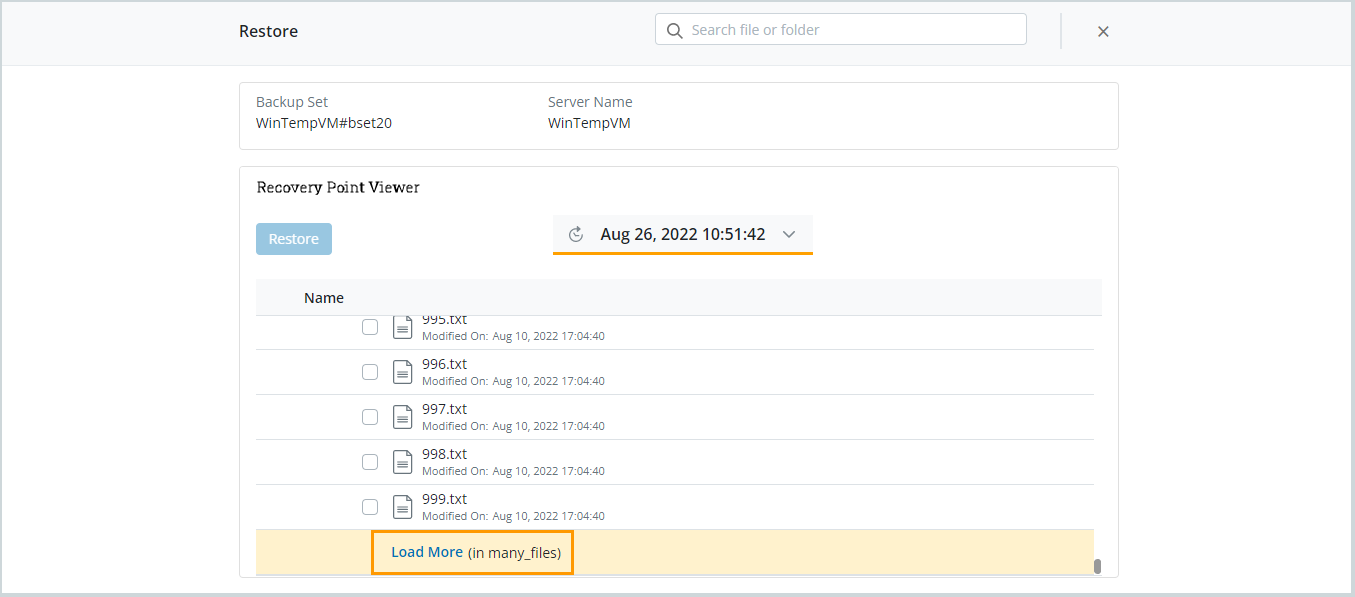
- On the Restore page, do one of the following:
- Search for a file or folder using the search bar and use the filters to narrow down search results. Select the required file or(and) folder and a version of it and then click Restore.
Note: The restore view does not display files/folders in alphabetical order. You must scroll and search for the required file/folder.
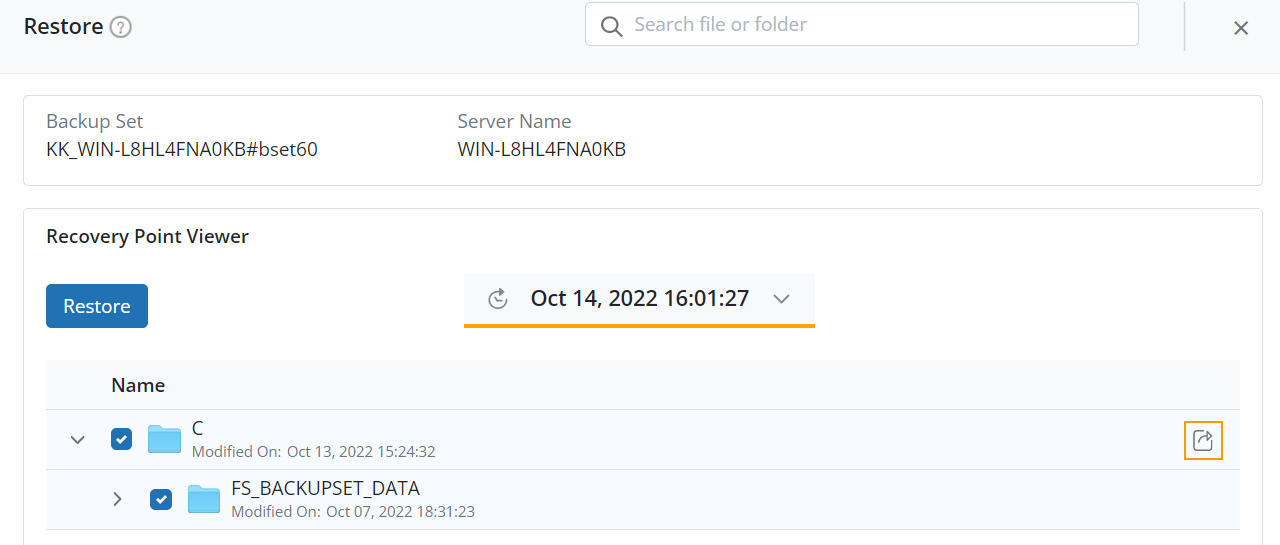
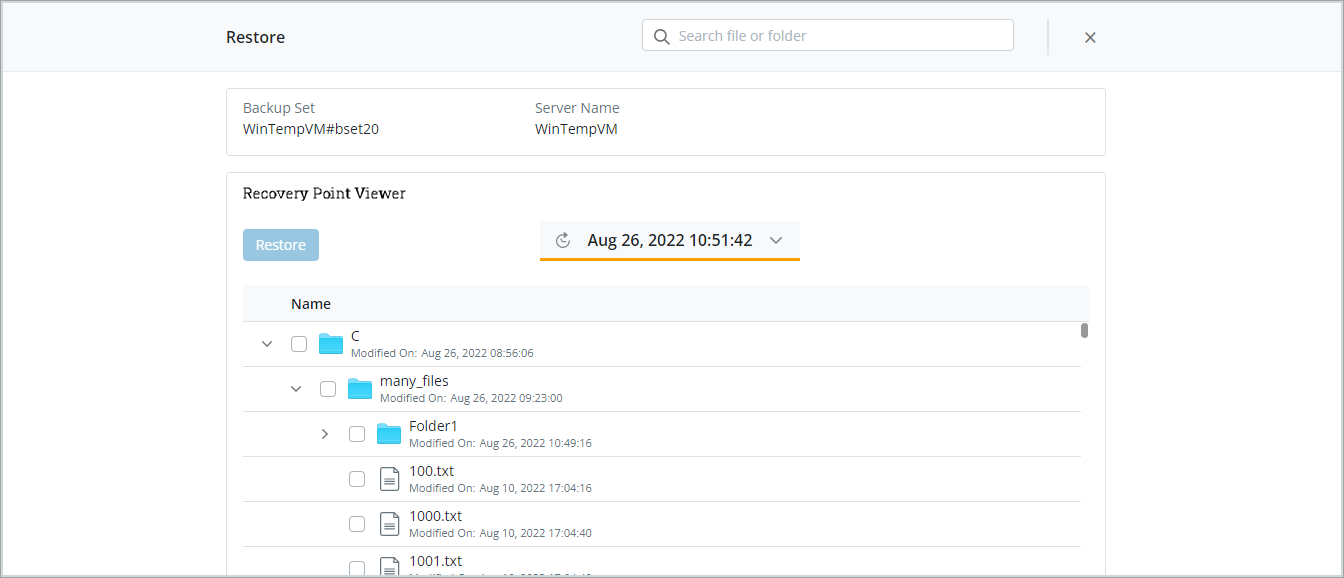
- Search for the file or folder manually by selecting the recovery point in the recovery point viewer, selecting the type of recovery point and then selecting the recovery point. Browse the folder hierarchy to select the file or folder that has to be restored and then click Restore.
A single click of expanding a particular folder will load a total of 6144 files/folders. If there are more than 6144 files/folders, then the Load more option will be visible to display the next set of results in that folder.
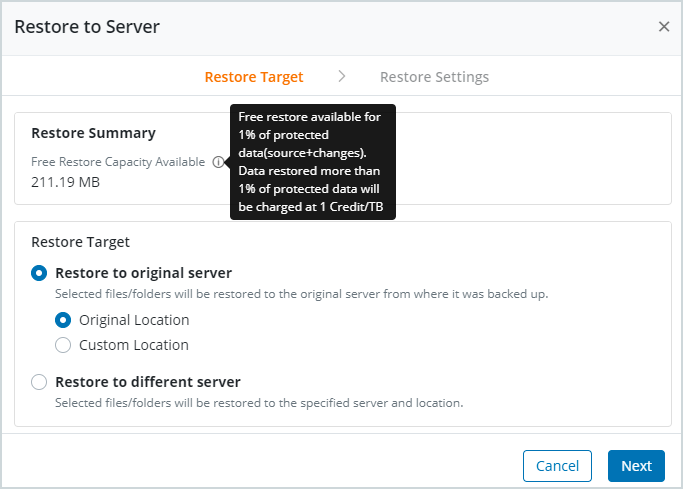
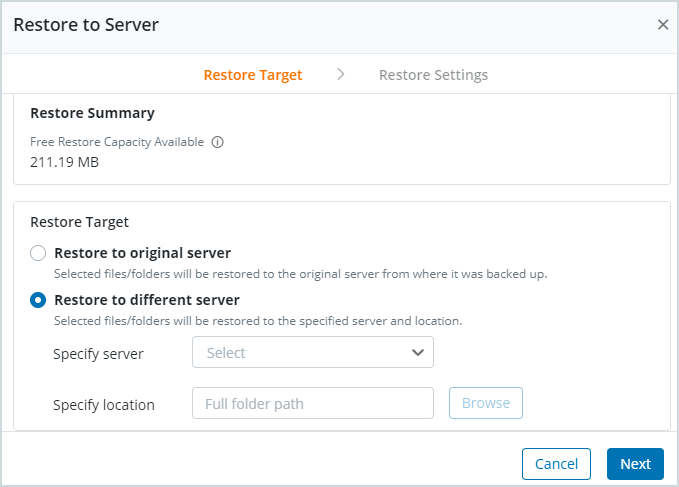
- The Restore to Server dialog box is displayed with the following information:
- Restore Summary: Displays the available free restore capacity.
Note: The Restore Summary is visible only if you have the Archive feature enabled. For more information, see Protect File Server and NAS data in Archive storage tier.
- Restore Target: Select the Restore to the original server or Restore to an alternate server.
Restore to the original server
- Log in to the Management Console.
- Select the workload from the Protect menu. Note that if the All Organizations menu is enabled, you have to first select an organization and then select the workload.
- In the left pane, click File Backup Sets.
- Select the backup set that you want to restore data from, and then click Restore.
- On the Restore Data page, do one of the following:
- Search for a file or folder using the search bar and use the filters to narrow down search results. Select the required file or(and) folder and a version of it and then click Restore.
- Search for the file or folder manually by selecting the recovery point in the recovery point viewer, selecting the type of recovery point and then selecting the recovery point. Browse the folder hierarchy to select the file or folder that has to be restored and then click Restore.
- On the Restore to Server page, click Restore to
original server and click one of the following options:- Original location: Select this option if you want to restore the selected files to its original location.
- Custom location: Select this option if you want to restore the selected files to a custom location. In the Specify custom location box, type or select the absolute path to the custom location.
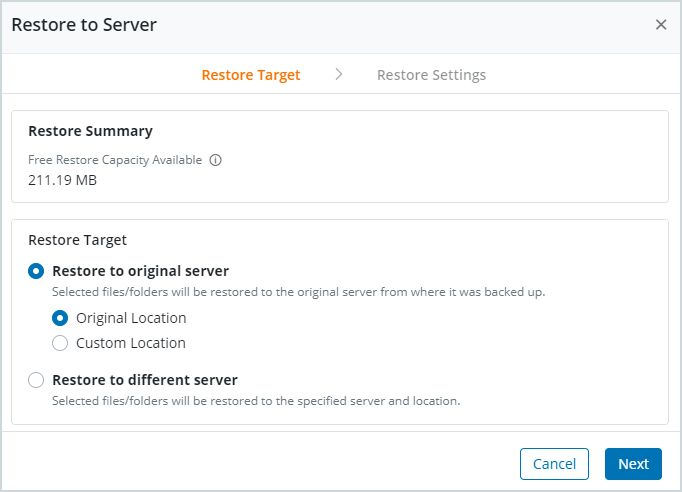
- Click Next.
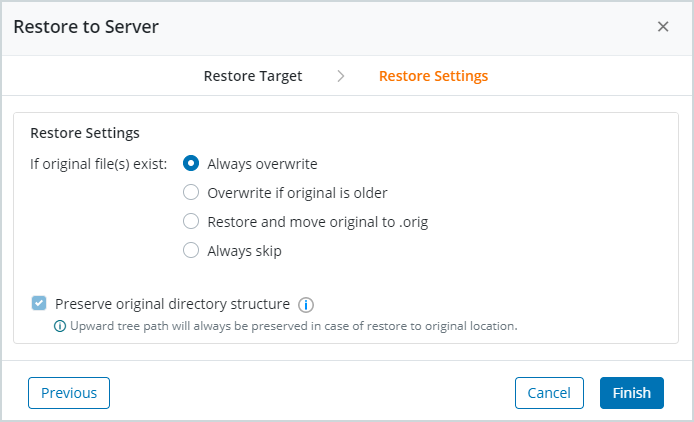
- Under Restore Settings, select one of the following options:
- Always overwrite
- Overwrite if original is older
- Restore and move
original to .orig - Always skip
For more information on the above options, see About Restore settings.
Note: Upward tree path will always be preserved while restoring to original location.
- Click Finish. After clicking Finish, Druva initiates restore pre-checks. These checks look for issues that can cause your restore job to fail before the restore has even started. Druva does not initiate a restore job if the restore pre-checks identify any issues. You must fix any identified issues before restoring your data. For more information, see File Servers restore pre-checks.
Note: Symbolic links and mounted folders do not appear in the folder structure. If the server is not connected to Druva Cloud, Druva cannot fetch the folder structure data. To initiate a restore, you must type the absolute path to the restore destination. The restore operation fails if the server is not connected to Druva Cloud with PHOENIX17 error.
Restore to an alternate server
- Log in to the Management Console.
- Select the workload from the Protect menu. Note that if the All Organizations menu is enabled, you have to first select an organization and then select the workload.
- Click the File Backup Sets tab.
- Select the backup set that you want to restore from, and then click Restore.
- On Restore Data page, do one of the following:
- Search for a file or folder using the search bar and use the filters to narrow down search results. Select the required file or (and) folder and then click Restore.
- Search for the file or folder manually by selecting the recovery point in the recovery point viewer, selecting the type of recovery point and then selecting the recovery point. Browse the folder hierarchy to select the file or folder that has to be restored and then click Restore.
Note: Symbolic links and mounted folders do not appear in the folder structure.
Note: The recovery point timestamps are displayed according to the server time zone. For example, for servers located in New York and London, the time stamps are displayed according to EST and UTC time zones, respectively.
- Click Restore to a different server and provide the following details:
|
Field |
Description |
|
Specify server |
From the drop-down list, select the server to which you want to restore this data. |
|
Specify location |
Type or select the absolute path to the restore destination on the selected server. Note that if server is not selected in the Specify server field, then the Specify location field is disabled. |
- Click Next.
Note: Servers running an earlier version of Enterprise Workloads agent , unconfigured servers, and servers belonging to a different platform do not appear in this list.
Servers that are not currently connected to Druva Cloud appear in the Specify server list, but Druva Cloud cannot fetch their folder structure data. To initiate restores to such servers, you must type the absolute path to the restore destination. The restore operation fails if the server is not connected to Druva Cloud with PHOENIX17 error.
-
Under Restore Settings, select one of the following options:
-
Always overwrite
-
Overwrite if original is older
-
Restore and move
original to .orig -
Always skip
-
For more information on the above options, see About Restore settings.
- Select the Preserve upward tree path option, if you want to restore the parent folders. For more information, see Restore a File server to the original server.
Note: Upward tree path will always be preserved while restoring to original location.
- Click Finish. After clicking Finish, Druva initiates restore pre-checks. These checks look for issues that can cause your restore job to fail before the restore has even started. Druva does not initiate a restore job if the restore pre-checks identify any issues. You must fix any identified issues before restoring your data. For more information, see File Servers restore pre-checks.
Cold recovery points are applicable to LTR and Archive customers. Customers can have only warm recovery points, if LTR and Archive are not enabled. To know more about LTR and Archive, see About long term retention and Protect File Server and NAS data in Archive Storage tier.