Provision and manage Product tenants
Overview
After creating a customer, you need to add a tenant/product to avail of the Druva data protection services.
This page walks you through how to:
Add Product Tenants
Note: MSP and Tenant administrators can add products (tenants). To know more about roles and privileges, see Role-based access.
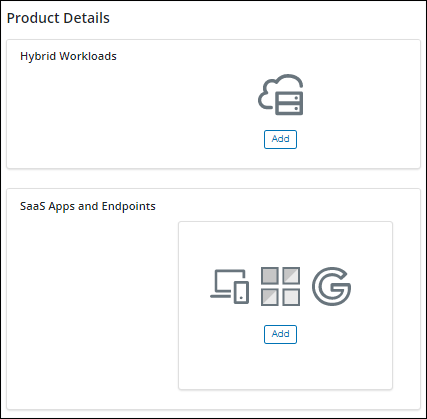
You can add Hybrid Workloads, SaaS Apps and Endpoints product licenses for the customer.
To add products:
- Log in to Managed Services Center portal (MSC) and then click Customers.
-
On the Customers page, select the customer for which you want to add products of your choice (Hybrid Workloads, SaaS Apps and Endpoints).
-
To add Hybrid Workloads or SaaS Apps and Endpoints, select the appropriate Add icon in the Product Details section.
- Enter the required details and click Save.
The following table provides information about the Add Hybrid Workloads and Add SaaS Apps and Endpoints windows.
| Field | Description |
|---|---|
|
Service Plan |
Select the service plan that meets the customer data protection requirements. Click View Plan to view the selected service plan details. For example, suppose the customer wants to protect only Hybrid Workloads data. In that case, you can select a service plan that includes a Druva product edition with Hybrid Workloads Data Protection and Governance capability. Similarly, to protect SaaS Apps and Endpoints, you can select a service plan that includes a Druva product edition with SaaS Apps and Endpoints. To view the existing service plans, see View service plan details To create a new service plan, see Create a new Service Plan |
|
Provide a value to define the consumption units you want to allocate to this customer. Quota refers to the count of consumption units (CU) allocated to customers for the configured workloads. You can view the details of the consumption units using the Tenant Quota Report. If the customer is close to breaching the allocated quota, an alert is sent to the configured email address based on the severity of the breach. The following alert types are generated:
For example, for ABC customer, if you have allocated 100 consumption units for Hybrid Workloads and 100 consumption units for SaaS Apps and Endpoints workload with a Quota Effective Date (April 1, 2022) and end date (May 1, 2022) for both.
|
|
|
Quota Effective Date (Optional) |
Select the start date from when the quota limit applies to the customer and storage consumption usage begins. |
|
Quota End Date (Optional) |
Select the end date when the quota limit expires. Once the quota limit expires, customers cannot back up their data. Contact the Druva representative to allocate the consumption units. |
|
Tenant Type |
Select the tenant type. It can be either of the following:
|
|
License Expiry Date |
Select the date when the service plan will expire for the customer. If you have chosen the tenant type as Evaluation, the license expiry date is automatically displayed. |
|
Storage Region |
Select the storage region you want to assign to the customer for data backup. |
| User Count | Provide the maximum count of users you want to allocate to this customer for backup. The maximum user count allowed is 999999. |
| Preserved User Count |
Provide a limit for the number of preserved users the customer can have. Druva SaaS Apps and Endpoints automatically provision additional preserved users equivalent to 10% of user count over and above the defined value. For example, if you enter 10 as the preserved user count, Druva SaaS Apps and Endpoints adds 10% to make the total preserved user count 11. For more information about Preserve Users, see Preserve Users. |
Next Steps
After adding the products, you can click ![]() to access the Druva Console for a customer and view the summary of data protection, service utilization, storage growth, and cloud status. For more information, see Access Tenant Console.
to access the Druva Console for a customer and view the summary of data protection, service utilization, storage growth, and cloud status. For more information, see Access Tenant Console.
Manage Products Tenants
Here's how you can manage products (tenants)
Edit Product Details
To edit Hybrid Workloads or SaaS Apps and Endpoints details:
1. On the Customers page, select the customer that is associated with the product.
2. In the Product Details section, click > Hybrid Workloads or SaaS Apps and Endpoints > Edit.
3. Edit the required information in the Edit dialog box and click Save.

Suspend Product
Note: After the tenant or product is suspended, you cannot access the tenant's console.
To suspend Hybrid Workloads or SaaS Apps and Endpoints products:
-
On the Customers page, select the customer that is associated with the product.
-
In the Product Details section, click
 > Suspend.
 - In the confirmation dialog box, click the Suspend button to confirm the suspension of the product. After suspension, you will see the
 icon with the text Suspended suffixed to the product name.
To reverse the suspension, you must activate the product.

Activate Product
After suspending the product (tenant) if you want to reverse the access, you need to activate the product.
To activate Hybrid Workloads or SaaS Apps and Endpoints product/tenant:
-
On the Customers page, select the customer that is associated with the product.
-
In the Product Details section, click
> Activate. After the product is activated, you can access the tenant's console.

Delete Product
To delete Hybrid Workloads or SaaS Apps and Endpoints products:
1. On the Customers page, select the customer that is associated with the product.
2. In the Product Details section, click  > Delete.

3. In the Delete Confirmation dialog box, select one of the following options based on the requirement and click Save.
The Delete product for customer and Delete product for customer now features are unavailable by default. Contact Support to enable this feature.
- Select the Delete product for customer option and click Delete to confirm the deletion of the product after 30 days.
After selecting this option:
- The product gets suspended for 30 days.
- All the associations, storage, and data are scheduled to be permanently deleted after 30 days.
- After scheduling for deletion, you will see the icon

with the text Marked for Deletion suffixed to the product name.
- Select the Delete product for customer now option and click Delete to confirm the deletion of the product after 24 hours. The Delete product for customer now action has multi-factor authentication through customer acknowledgments and OTP via email.
After selecting this option:
- The product is set in a suspended state until the deletion process is initiated.
- All the customer associations, storage, and data are scheduled to be permanently deleted after 24 hours.
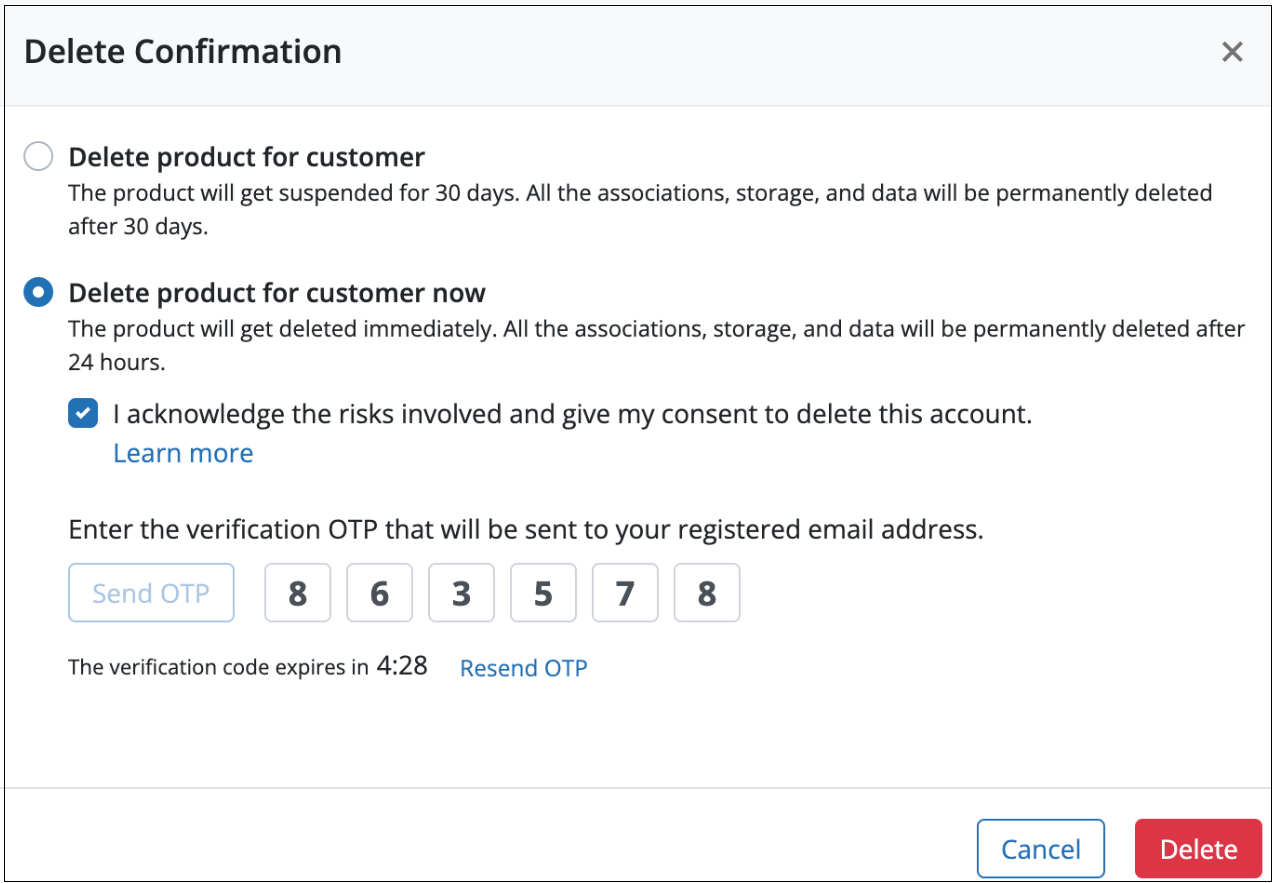
- Select the acknowledgment checkbox to confirm your action.
- Click Send OTP for authentication.
- Enter the OTP sent to your email ID and click Delete.
- After scheduling for deletion, you will see the icon with the text Marked for Deletion suffixed to the product name.
Undelete Product
You can use the undelete option to revert a delete action for a customer within the suspension period (before 30 days or 24 hours).
To undelete a product:
- On the Customers page select the customer that is associated with the product.
- In the Product Details section, click
 > Undelete.
 - In the Undelete confirmation dialog box, click Yes to confirm.

The following alerts will be generated to update you about the status of deletion and cancelation for a tenant and customer.
- Delete Initiated - Tenant: When you mark the product for deletion.
- Deletion - Customer: When you delete the customer.
- Deletion - Tenant: When the tenant/product, its storage, and data are permanently deleted.
- Undeleted - Tenant: When you have canceled the deletion of a product/tenant using the Undelete option within the suspension period (before 30 days or 24 hours).
Audit Trails
The following audit trails related to deletion will be captured for auditing.
- Delete Initiated (Product)
- Undelete (Product)
For more information, see Audit Trails.
Access Tenant Console
Use the access tenant console to view the data protection summary, service utilization, storage growth, and cloud status.
Note: You cannot access the tenant console for a suspended or deleted customer.
Download extensions if you wish to access multiple tenants' consoles concurrently. Only the MSP and Tenant administrators can download extensions from the ![]() > Download Extension.
> Download Extension.
To access the tenant console:
- On the Customers listing page, click the
 icon.
icon. - When you access the tenant console for the first time, the Cloud Services Customer Agreement window is displayed that lists the terms and conditions to access the tenant console.
- Read the Cloud Services Agreement carefully and click Accept & Continue to proceed. The Druva Console opens in a new tab in the browser.
- From the Druva console, click the
 > Administration > Manage Administrators to create a Druva Cloud Administrator account for customer. For more information about how to create a Druva Cloud Administrator, see Create New Administrator. After creating an administrator, an email will be sent to the customer's specified email address, and the recipient can log in using the details mentioned in the email.
 - Click SaaS Apps > Microsoft 365 to avail of Microsoft 365 data protection services. For more information about how to configure Microsoft 365 data, see Configure Druva insync for Microsoft 365.
- Click Endpoints to avail Endpoints data protection services. For more information, see Set up inSync for Endpoints.
- Click Hybrid Workloads to avail of Hybrid Workloads data protection services. For more information about how to protect Hybrid Workloads data, see Hybrid Workloads.

Note: In the Druva Console, the options under the CloudRanger (Native Workloads) product are enabled by default. However, these options are not accessible as the license is only enabled for Phoenix (Hybrid Workloads).