Create and Manage Customers
Overview
The Customers tab enables you to create and manage customers and associate them with the service plan for data protection.
Access Path
Log in to Managed Services Center portal (MSC) and then click Customers.
By default, a list of existing customers is displayed.
You can perform the following actions on the Customer page.
- Create a customer
- View customer details
- Edit customer details
- Delete a customer account
- Filter customers list
- Search a customer
- Sandbox customer
- Export data to a CSV file
- Customize table column
Create a customer
This section walks you through the process of creating a new customer. You can associate products (tenants) later when you have all the information available.
Note: In the MSC portal, a Sandbox customer with Default Service Plan is created when the first MSP administrator is created.
To create a new customer:
- Log in to Managed Services Center portal (MSC) and click Customers > Create Customer.
- On the Create Customer dialog box, enter all the required values and click Save. You will receive an email confirmation on the registered email address after successful customer creation. You can view the newly added customer on the Customers listing page.
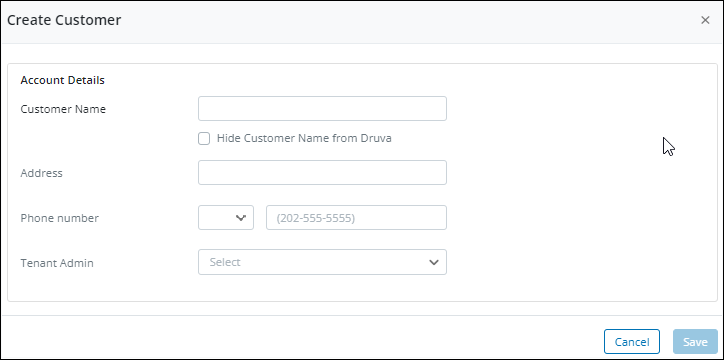
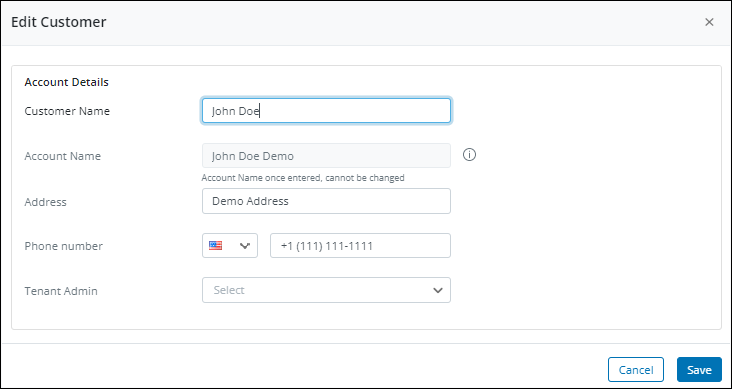
The following table provides information about the fields on the Create Customer dialog box.
| Field | Description |
|---|---|
| Account Details | |
| Customer Name |
Provide the name of the customer. Select the Hide Customer Name from Druva option if you want to hide the customer name from Druva. However, you must provide an alternate name in the Account Name field that will help Druva identify customers internally. |
| Account Name |
The Account Name field will be displayed if you have selected the Hide Customer Name from Druva option in the Customer Name field. Provide an account name by which Druva should identify the customer. This field will help you create an identity that does not reveal the actual customer name to Druva.
|
| Address | Provide the physical address of the customer. |
| Phone Number | Provide the phone number of the customer. |
| Tenant Admin | A Tenant administrator can manage the tasks only for the assigned tenants. You can assign multiple tenant administrators to a single customer account. For more information about the roles and privileges of a tenant administrator, see Role-based access |
View customer details
To view the customer details:
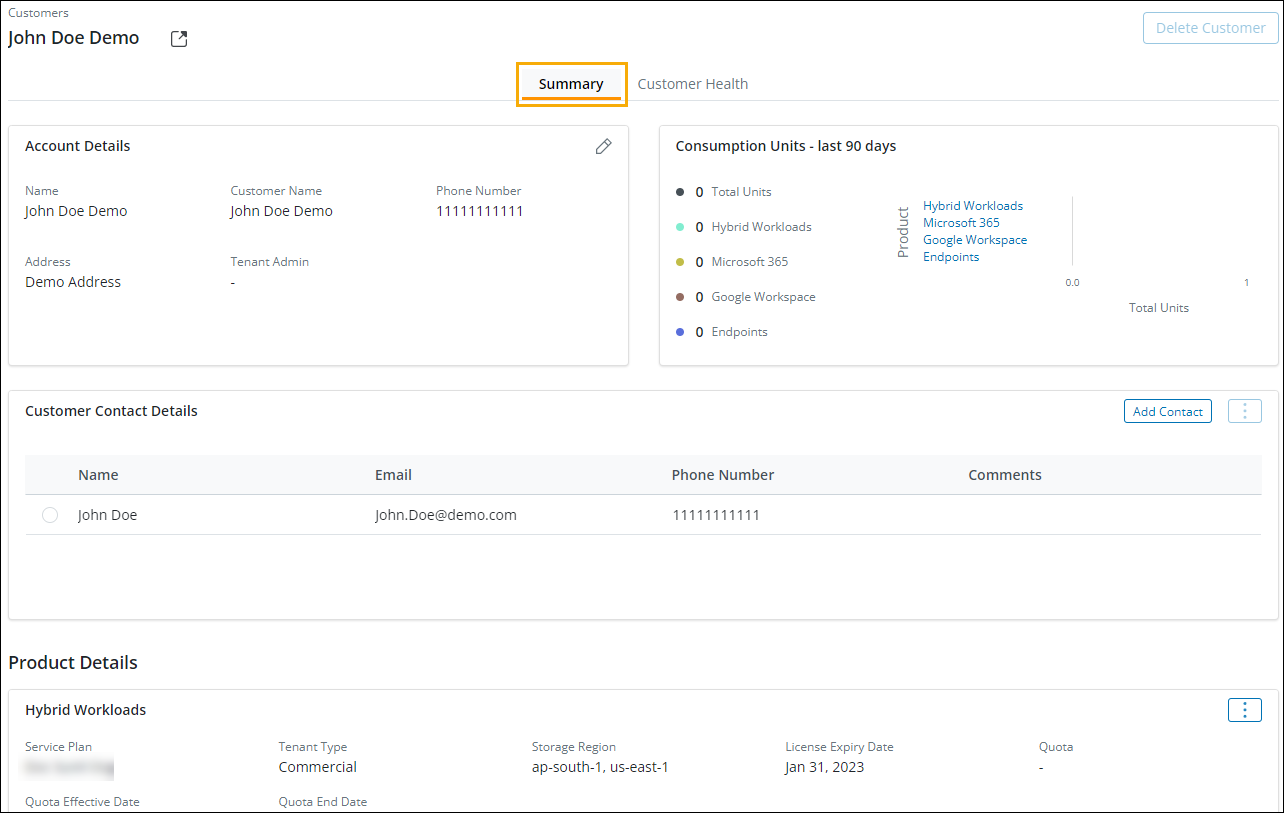
- Log in to Managed Services Center (MSC) portal and click Customers. By default, the Summary tab is displayed.
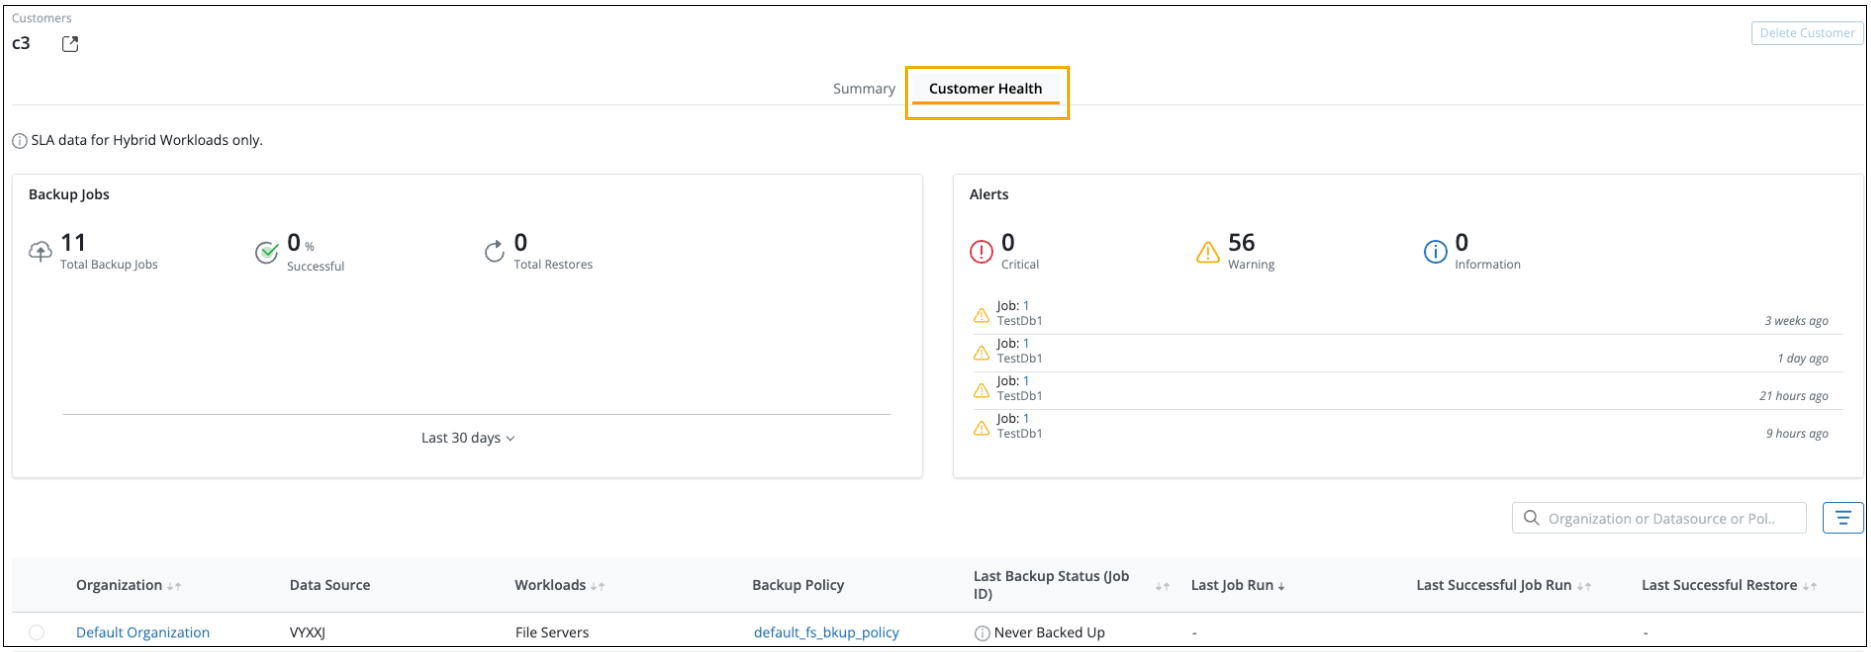
- Click the Customer Health tab to view customers’ backup jobs and alerts for Hybrid Workloads.
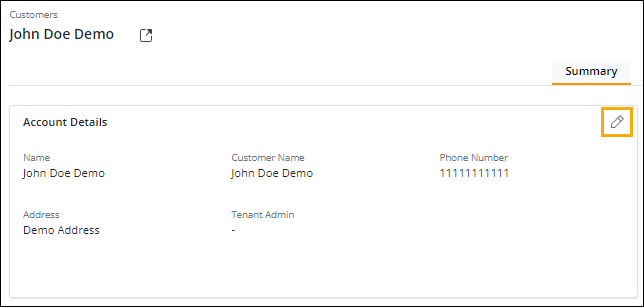
Summary tab
The following section provides information about the Summary tab.
| Field | Description |
|---|---|
| Account Details |
Displays account details for the selected customer. Name - The Account name by which Druva identifies the customer. Customer Name - The customer name mapped to the Account Name. Phone Number - The phone number of the customer. Address - The physical address of the customer. Tenant Admin - The name of the Tenant Admin. |
| Consumption Units | Displays the consumption units usage of the customer for the last 90 days. |
| Customer Contact Details |
Displays the name and details of the contact person who would be a representative from the customer's organization.
|
| Product Details |
This section enables you to:
|
Customer Health tab
This tab provides insights into the statistics related to the customer's backup jobs and alerts. It also provides a view of the data source (backup set) listing along with the last successful backup and restore job statuses.
The following table provides information about the Customer Health tab.
| Field | Description |
|---|---|
| SLA data for Hybrid Workloads only | |
| Backup Jobs |
Displays the following details for backup jobs in the last 30 days.
|
| Organization | Displays the name of the Customer's organization. |
| Data Source | Displays the Data Source assigned to the customer. |
| Workloads | Displays the details of the workloads that are protected for the customer. |
| Backup Policy | Displays the details of the backup frequency configured for the customer. |
| Last Backup Status (Job ID) |
Displays the following details about the status of the last backup job:
|
| Last Job Run | Displays the data and timestamp when the last job was initiated. |
| Last Successful Job Run | Displays the number of days along with Job ID when the last successful job was completed for backup. This field is applicable only if the current backup job is in a failed state. |
| Last Successful Restore | Displays the number of days along with Job ID when the last successful job was completed for restore. |
| Alerts |
Displays the count and detailed statistics of different types of alerts generated for Hybrid Workloads, SaaS Apps and Endpoints. Alerts can be of the following types: For more information, see Alerts. |
Edit customer details
To edit customer details:
- On the Customers listing page, select a customer that you want to edit and click
 > Edit.
 - In the Edit Customer dialog box, edit the required information and click Save.

Alternatively, you can also edit the customer details from the Customers page > Account details >  .
.
Delete a customer account
You can delete stale instances of the customer who no longer has an association with the MSP and is not associated with any tenant or product.
To delete a customer:
- On the Customers listing page, select a customer you want to delete and click > Delete.
- In the delete confirmation dialog box, select Yes, Delete.
Note: You cannot delete a customer that has a product associated with it.
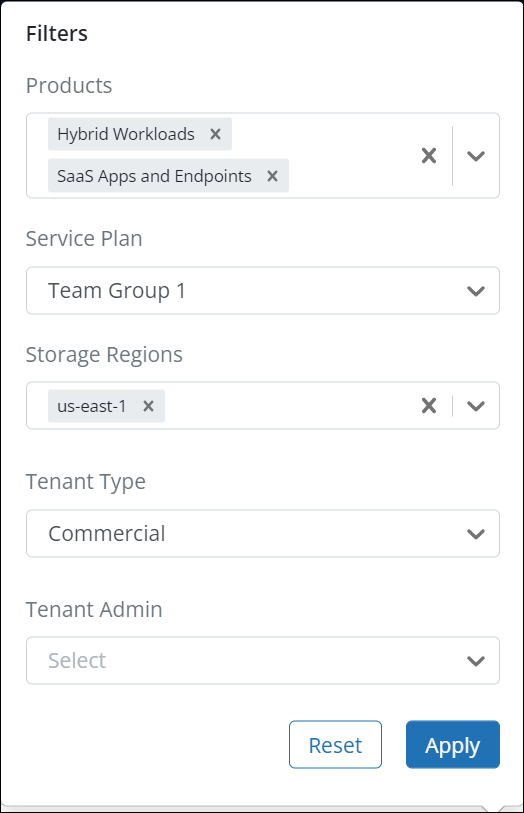
Filter customers list
You can narrow the list and view required customers by using the filter option and specifying the Products, Service Plans, Storage Regions, Tenant Type, and Tenant Admin parameters.
To filter the customer list:
-
On the Customers listing page, click
 icon.
icon. -
Provide the required parameters and click Apply to apply the filters. You can filter the list of service plans by specifying the Products, Editions, and Workloads parameters.
-
Click Reset if you wish to make any changes to your filter parameter selection.
Search for a customer
You can use the search option to narrow down the search and view required customer details.
To find and view customer details:
- On the Customers listing page, enter the customer name in the Customer Name search box.
- Press Enter to view specific details of a customer.
Sandbox customer
A Sandbox customer is a default customer, created along with a Default Service Plan. Managed Service Partners can use the sandbox customer for internal demonstrations and training.
Editing Sandbox customer details
You can edit only the following details of a sandbox customer:
- Service Plan
- Add any missing product license. For example, for the MSP instance, if you have enabled Hybrid Workloads at the beginning and Microsoft 365 later, then you can also add Microsoft 365 product license to Sandbox customer later.
- Quota, quota effective date, and end date.
- Storage region - You can only add a storage region to the product/tenant, but cannot remove it.
- User count and preserved user count
You cannot:
- Delete a sandbox customer.
- Delete, suspend, activate the products or edit the tenant type of the product associated with the sandbox customer.
Export customer details
To export the customer listing page details to a CSV format:
-
On the Customers page, click the Export to CSV button.
-
On the Select Exportable columns window, select the required column you want to export and click Export to CSV.
Use the Select All option to export all customer details simultaneously.
Customize table columns
MSC portal enables you to customize the table layout of the Customers listing page to display the required information. You can show and hide the columns and resize a column in the table.
- To show and hide the columns:
- On the Customers listing page, click the

icon.
- On the Edit Columns window, select the column name you want to add and deselect the column name you want to hide.
- On the Customers listing page, click the
Note: The Name, Product, and Service Plan columns are default columns, and cannot be edited.
-
To resize a column in the table on the Customers listing page, drag the column border to the desired location to display the required information.
Here is a glimpse of these features: