How to configure inSync GovCloud SSO for users using PingFederate as IdP
This article applies to inSync GovCloud (https://loginfederal.druva.com).
Configure inSync GovCloud SSO for users using PingFederate as IdP
This configuration is performed in the following order:
- Generate SSO authentication token
- Configure the PingOne app
- Configure Druva inSync GovCloud to use PingOne
- Enable SAML in Druva inSync GovCloud
Generate SSO authentication token
You need to keep the SSO authentication token handy, generated through this procedure when you configure the PingOne app. To generate the SSO token:
- Go to Druva Console > Druva Cloud Settings > Access Settings.
- Click on the Ellipses (three dots) next to Single Sign-On.
- Click Generate SSO Token.

4. Click Copy to save the token to the clipboard or copy it to a notepad for future use.
Configure the PingOne app
Prerequisites:
- Administrator credentials of PingOne
- SSO authentication token generated from the {{Adminconsole}
Procedure:
- Log on to PingOne console using the administrator credentials (https://admin.pingone.com).
- On the dashboard, go to the Applications page and click Application Catalog.
- Check for Druva and click ► against the entry, as shown in the image below.
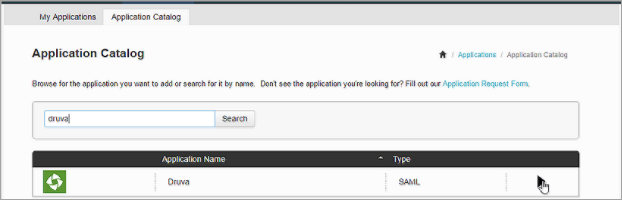
- Click Setup from the drop-down menu to begin configuration. The SSO Instructions page is displayed.
- Skip the SSO Instructions page by clicking on Continue to Next Step
- Click Continue to Next Step. The Configure your connection page is displayed.
- Edit the following fields as mentioned below.
ACS URL: https://govcloud.druva.com/wrsaml/consume Entity ID: druva-govcloud
Single Logout Endpoint: https://govcloud.druva.com/webrestore/dologout - Click Continue to Next Step.
- Select SAML_SUBJECT as Identity Bridge Attribute for application attributes 1, 3 and 4, as shown in the image below.
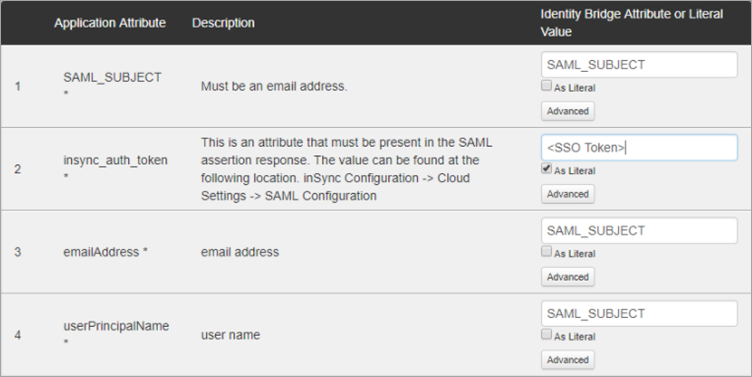
- For application attribute 2 insync_auth_token, enter the SSO authentication token generated from the inSync Management Console and also select As Literal. If you do not wish to use As Literal, enclose the authentication token in double quotation ("") marks, such as "X-XXXXX-XXXX-S-A-M-P-L-E+TXOXKXEXNX=" .
- Click Continue to next Step.
- Change the name of the app to suit your requirement. For example, you can enter Druva inSync-GovCloud.
- Change the Icon, Description, Category as required and click Save and Public.
- On the Review Setup page, perform the below activities and keep the details handy for future use:
- Copy the idpid value from Initiate Single Sign-On (SSO) URL to a notepad, as shown below.

- Download the Signing Certificate.
- Copy the idpid value from Initiate Single Sign-On (SSO) URL to a notepad, as shown below.
Configure Druva inSync GovCloud to use PingOne
Go to Druva Console > Druva Cloud Settings > Access Settings.
Click on the Edit next to Single Sign-On.
On the Single Sign-On Configuration window, update the following details:
ID Provider Login URL: Append the idpid value from the notepad at the end of the following URL and copy the entire URL to this field.
https://sso.connect.pingidentity.com...O.saml2?idpid=
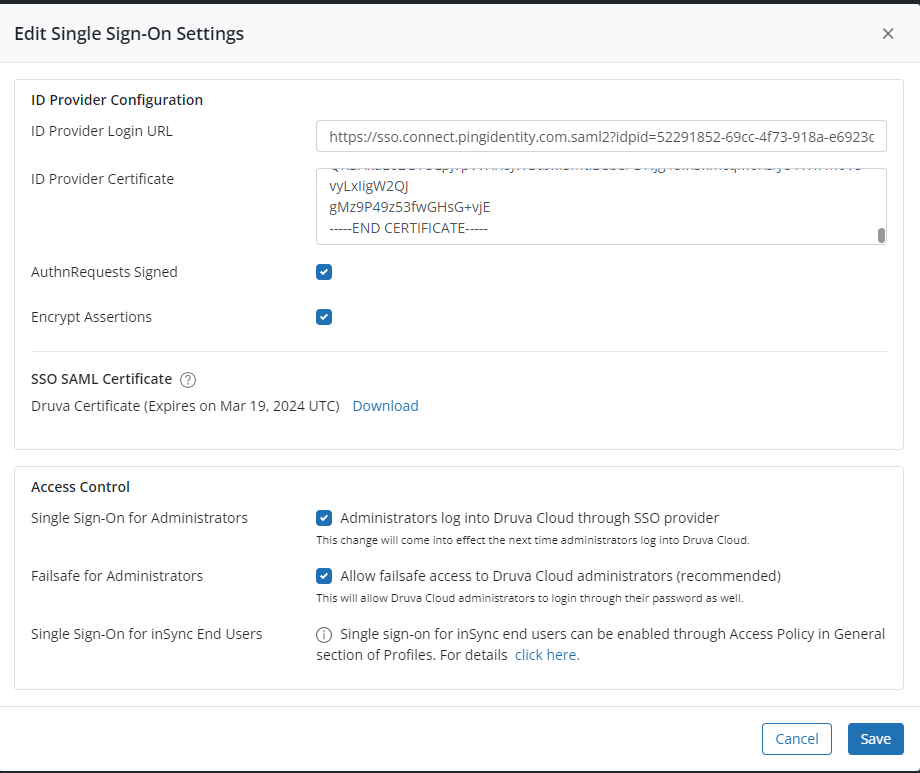
ID Provider Certificate: Open the "Signing Certificate" downloaded in the last section with a notepad and copy its content to this field. Make sure that the formatting of the certificate remains intact while opening it in a text editor.
4. Click Save.
Enable SAML in Druva inSync GovCloud
Enable Single Sign-On for the desired users from the Druva GovCloud portal. This can be done at the profile level. Hence, it is necessary to assign the users with a profile enabled with the SSO instead of inSync Password or Active Directory.
- Login to the inSync GovCloud Console.
- Go to Manage > Profiles.
- Click Backup Policies and click Edit.
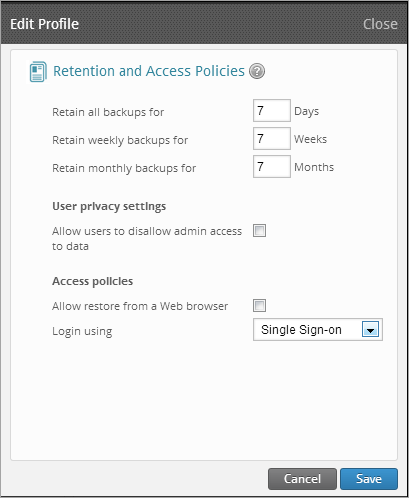
- Under Access policies set Log-in using to Single Sign-on.
- Click Save.