How to enable Virus or file hash scan on restores
Overview
As an Infosec IT admin, you can perform Anti Virus scans on datasets before restoring so that the malicious dataset is blocked from getting restored accidentally.
Procedure to enable virus or file hash scan on restores
- Log into the Druva Cloud Platform Console.
- Click the Menu
> Cyber Resilience > Ransomware Recovery.
- Click Scan Settings.
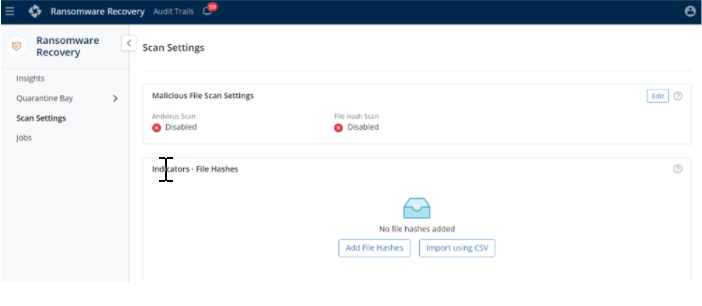
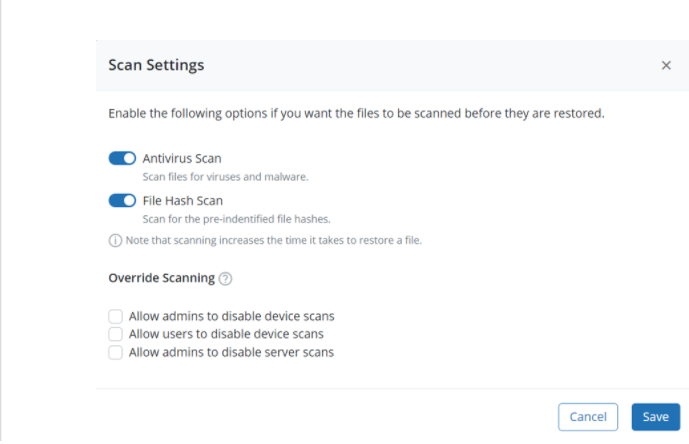
- To enable the Antivirus Scan and File Hash Scan, click Edit next to Malicious File Scan Settings.
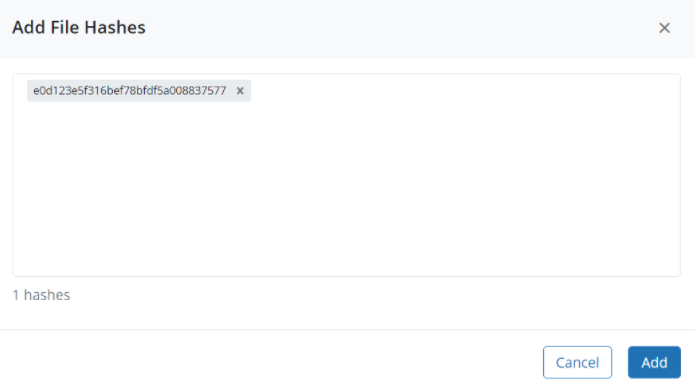
You can add file hashes manually or by importing from a CSV file. You can add Up to 2000 file hashes. - Click on Add File Hashes and add the file hash as required. Press the ‘Enter’ key after adding the hash value to save it. Separate multiple SHA1 hash values by commas.
Snapshots are scanned before the data is downloaded at the destination. If there is any malicious code it will be removed before the restore is done. There is also an option to allow admins to disable the scan for servers during the restore operations.