How to deploy Phoenix AWS Proxy using CloudFormation Template
This article applies to:
- Product edition: Phoenix
Overview
This article helps Phoenix Cloud Administrators to automate the deployment process of Phoenix AWS Proxy. It includes deploying the EC2 insrance, creating the IAM role/policy, and activating the Phoenix AWS Proxy.
Procedure title
Prerequisite: Stack location link provided by Druva Support.
- Login to the AWS account.
- Select the region where you want tdeploy the Phoenix AWS Proxy.
- Select CloudFormation from the services menu.
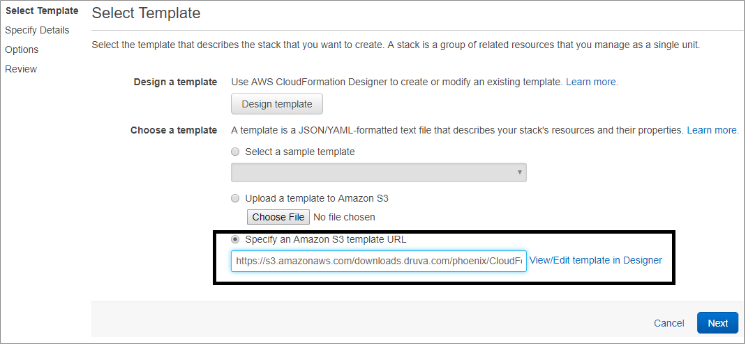
- Click Create Stack and select the URL option to enter the link provided by Druva Support and click Next.
- Select the Deployment Type as required using one of the below templates:
- InfraAndProxyDeployment: Use this template to deploy Proxy instance(s) and create the required IAM policies and roles for this AWS account,
- ProxyDeployment: Use this template to deploy only the Proxy instance(s) and reuse IAM policies and roles created during previous deployments.
- Update the below details on the CloudFormation Stack and click Next.
- Stack name
- Deployment Type
- PhoenixActivationToken
- InstanceCount (Minimum is 1 and Maximum is 5)
- VPC
- Subnet
- Instance Type (Druva recommends C4.2xLarge for Phoenix AWS Proxy)
- KeyPair
- AutoAssignPublicIP (Druva recommends this setting to be true as PhoenixAWSProxy needs to connect to Phoenix Cloud.)
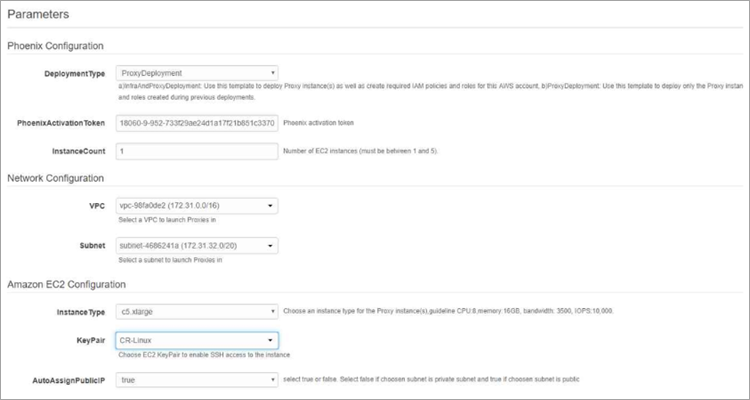
- Retain the default values of Advance Settings and click Next.
- Review the details again and acknowledge AWS conditions.
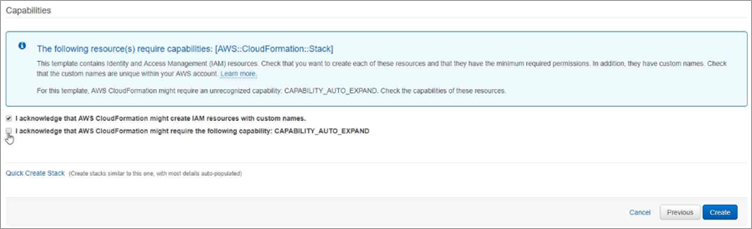
- Click Create to create the CloudFormation stack to deploy the Phoenix AWS Proxy. You can check progress of this stack under the stack list.

Verification
- Check if the EC2 instance is deployed. Naming convention of the AWS Proxy would be – “DruvaProxyInstance1_<stack name>-ProxyDeploymentStack-< --UUID-->
- Check if the AWS Phoenix appears in the Phoenix Console as the final step is to activate the AWS Proxy.