How to configure Phoenix agent to take live backup
This article applies to:
- OS: Windows
- Product edition: Phoenix
Overview
By default, Phoenix uses snapshots created by the native Microsoft Volume Shadow Copy Service (VSS). If you face any issue with VSS which results in backup failures, you must fix the VSS issue encountered on the server.
At times fixing the VSS issue might require a server restart or change in OS configurations which may not be immediately possible . In that case you can use this document to configure Phoenix agent to take a live backup as a workaround until the VSS issue is fixed on the server.
Druva recommends using Microsoft VSS as far as possible. You can follow the steps provided in this article to configure live backup only as a workaround until the VSS issue is fixed. Contact Druva Support if in doubt or if you require any help in making changes to the config file.
Configure live backup
- Follow these steps to stop the VSS to force the Phoenix agent to perform live backups:
- Open the Run app and enter services.msc to view the services list.
- Locate Volume Shadow Copy, and observe its current status.
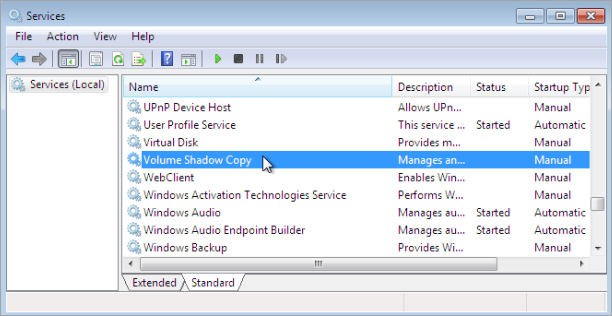
- Double-click Volume Shadow Copy to view its properties.
- From the General tab, stop the service is it is found running.
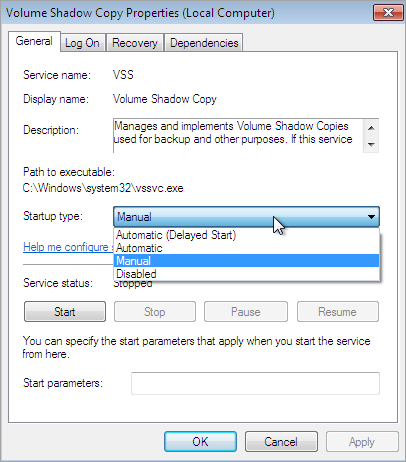
- Click OK to save the changes made to the VSS service.
- Configure live backup for all drives:
- Stop the Hybrid workloads Agent Client service.
- Open the Phoenix.cfg file in a text editor from the following location:
Windows 2012 and 2008: C:\ProgramData\Phoenix\FS
- Add the VSS_PROVIDER_ID parameter, and set its value to reflect an invalid VSS provider GUID. Hence when the backup runs, it fails to initialize VSS and falls back to back up live data.
VSS_PROVIDER_ID = '{Provider ID}'
Example:
VSS_PROVIDER_ID = '{12345678-7b9f-4925-af80-51abd60b20d5}'
Ensure there is no whitespace between the curly braces and the quotation marks. - Save the Phoenix.cfg file.
- Start the Hybrid workloads Agent client service.
Configure live backup for specific drives
- Stop the Hybrid workloads Agent client service.
- Open the Phonix.cfg file in a text editor.
On Windows 2012 and 2008, the file is available from C:\ProgramData\Phoenix\FS - Add the VSS_PROVIDER_ID_VOLUMES parameter and set its value to reflect an invalid VSS provider GUID. Hence when the backup runs, it fails to initialize VSS and will fallback to back up Live Data.
VSS_PROVIDER_ID_VOLUMES = {"<Drive>": "{<Provider ID>}", "Drive": "{<Provider ID>}"}
For example: To set this VSS provider for C and D drives respectively, the parameter can look like:
VSS_PROVIDER_ID_VOLUMES = {"C:\\": "{12345678-7b9f-4925-af80-51abd60b20d5}", "D:\\": "{12345678-7b9f-4925-af80-51abd60b20d5}"} - Save the Pheonix.cfg file.
- Start the Hybrid workloads Agent client service.
Files that are open or are being updated during the backup are skipped from the backup. The backup status is displayed as Successful with errors at the end of the backup since a few files were skipped.