Perform a System State and bare metal backup with Druva Phoenix
This article applies to:
- OS: Windows Server 2008, Windows Server 2008 R2, Windows Server 2012 R2, Windows Server 2012, Windows 8.
- Product edition: Phoenix Cloud
Prerequisites
- Druva Phoenix agent for Windows version 4.6.9 or later must be configured.
- Windows Server Backup feature must be enabled on the Windows Server to back up (see installation instructions).
- A non-system drive as the backup destination.
- Backup Policy in Phoenix to back up the target location of the System State Backup.
Process
To understand the backup process, refer: Pre-backup and post-backup scripts for File server
Sample pre_script.bat:
:: The backup will be written to the location specified in the SET TARGET_LOCATION line below
:: The actions of the script will be written to the file defined in the SET LOGGING_LOCATION line below@echo off
:: Define the target location for the system state backup. It cannot be the system drive of this machine
SET TARGET_LOCATION=\\10.10.1.97\Parentfolder:: Define the location for the output of the commands to be written for logging purposes
SET LOGGING_LOCATION=c:\programdata\phoenix\logs\SystemStateBackup.log:: Add header to make searching for the start of a backup easier
echo -----Start of Backup----- >> %LOGGING_LOCATION%:: Add start timestamp to the log file
date /T >> %LOGGING_LOCATION%:: Run the command to perform the backup to TARGET_LOCATION
:: The -quiet parameter supresses user prompts and you need the username and password if the target is a file share.
wbadmin START BACKUP -backupTarget:%TARGET_LOCATION% -allCritical -systemstate -user: -password: -quiet >> %LOGGING_LOCATION%
:: Add footer to make searching for the end of a backup easier
echo -----End of Backup----- >> %LOGGING_LOCATION%:: Add end timestamp to the log file
date /T >> %LOGGING_LOCATION%::end
Using the above pre-script, you can run a bare metal backup with Phoenix.
Considerations
When you use a pre-backup script:
- The target location can also be a remote network share.
- The target location can be a local drive, but it must not be a system drive.
For more information: https://technet.microsoft.com/en-us/library/cc742083(v=ws.11).aspx - If the target location is a network share, you must specify a username and password in the wbadmin command.
Install or verify installation of the Windows Server Backup feature
Using the Add Roles and Features Wizard, verify Windows Server Backup is installed (indicated by a checkbox). If it is not installed, select the checkbox for it and proceed with the installation.
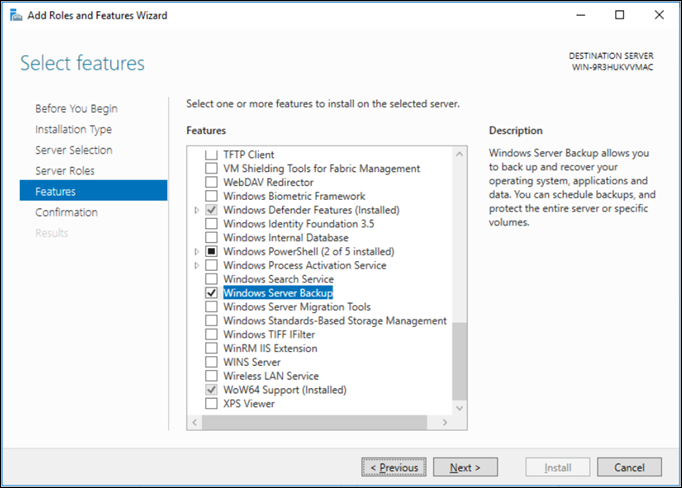
Note: Adding this feature alone does not require a reboot of the system. However, a reboot may be required if other features are selected either directly or automatically as prerequisites.
Restore process
- Restore the data backed up to Phoenix Cloud to a temporary location. You can restore the data to a temporary file server.
- Once the data has been recovered, this data can be used to perform a bare metal recovery.
Procedure
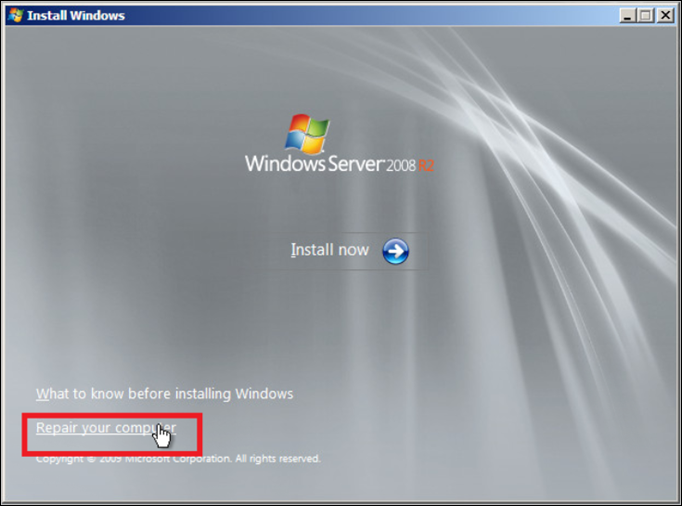
- Start the BMR target PC with the Windows installation DVD and click the Repair your computer link.
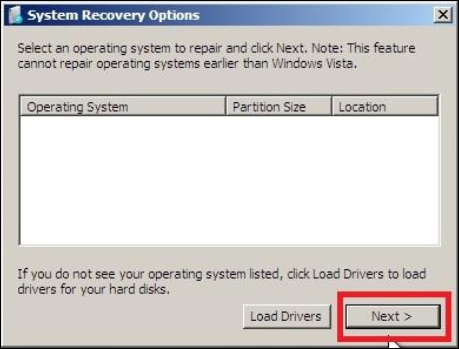
- On the first System Recovery Options page, click Next.
- On the second System Recovery Options page, click the Windows Complete PC Restore link.
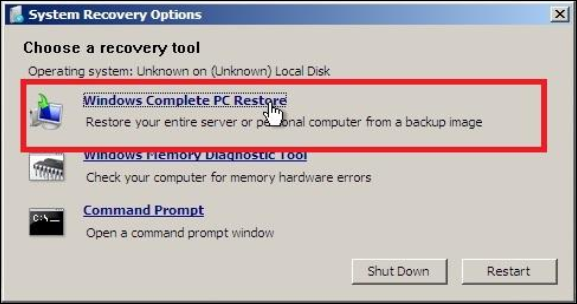
The Windows Complete PC Restore wizard is launched. The wizard searches your machine for a suitable snapshot to restore from. If your USB drive is connected, it is detected only if the appropriate USB drivers are available. You can also install its drivers if required.
If the restored WindowsImageBackup snapshot resides on a network share, the wizard displays the following message.
A valid backup location could not be found.
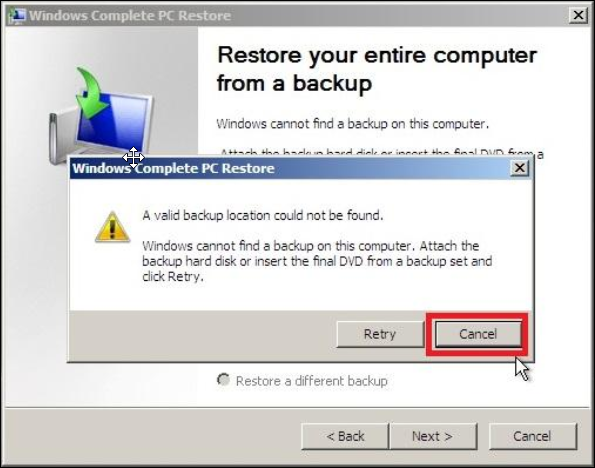
- Click Cancel, select Restore a different backup, and then click Next.
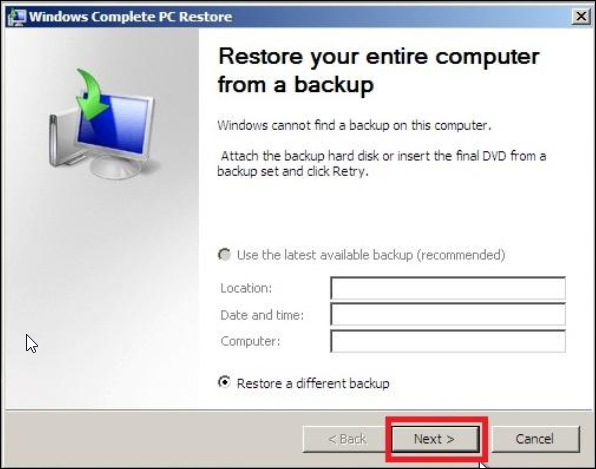
- Click Advanced on the Select the location of the backup page.

- Click Search for a backup on the network.
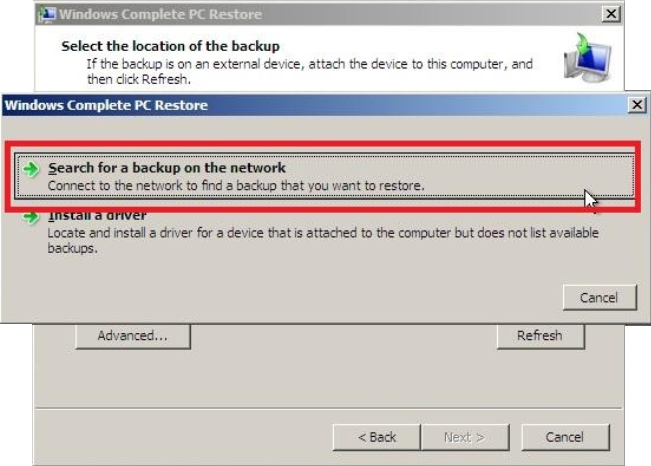
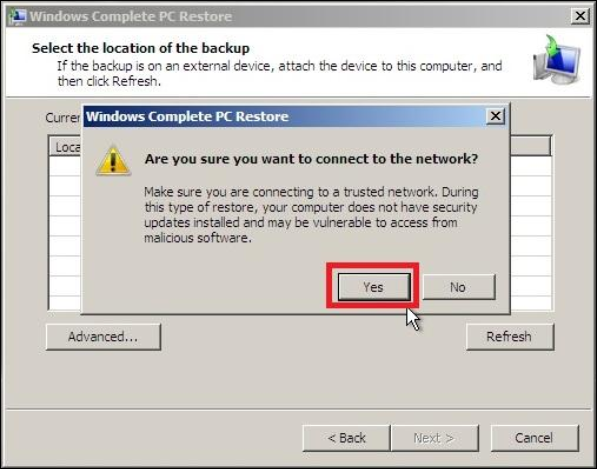
Tip: If you have a USB and chipset drivers available for your machine, you can also alternatively click Install a driver. - Click Yes to confirm that the network is trusted.
- On your source machine, make sure the WindowsImageBackup is located within a shared folder.
Example: If Y:\Share is a shared folder, WindowsImageBackup must be present at the path shown below.
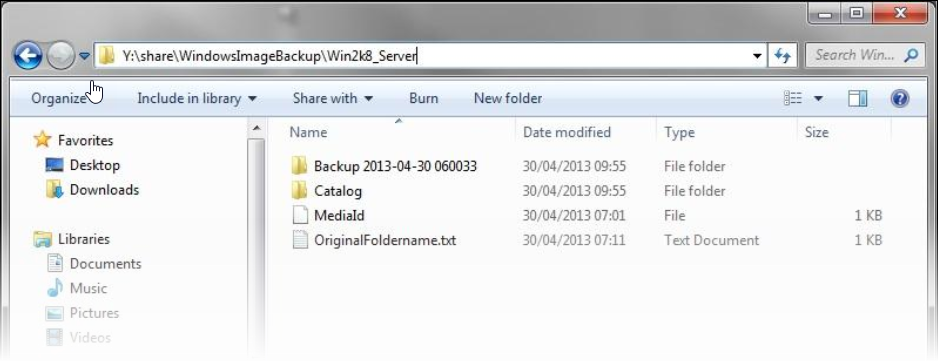
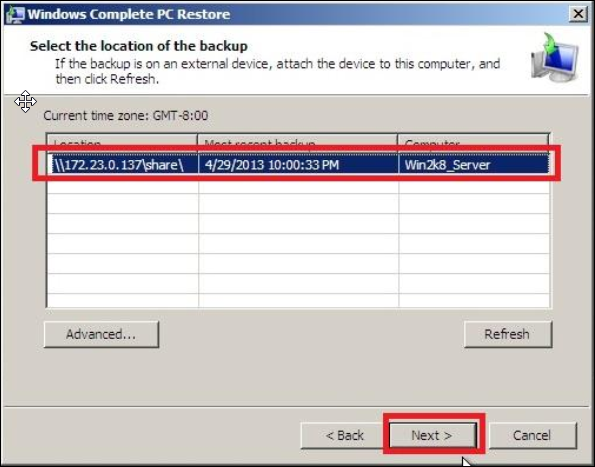
- On the target machine, enter the path to UNC share, where the WindowsImageBackup folder resides.
Note: Specify IP addresses instead of hostnames to avoid any name resolution issues.
-
Click Next when the available backup gets listed.
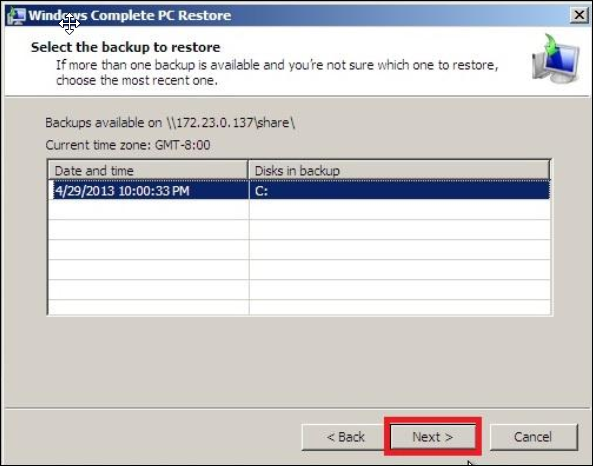
-
The Select the backup to restore page displays a single available backup. Click Next.

-
On Choose how to restore the backup page, click Next.
You can also choose to install additional drivers if your target hardware is different, exclude disks from the backup, or set advanced options.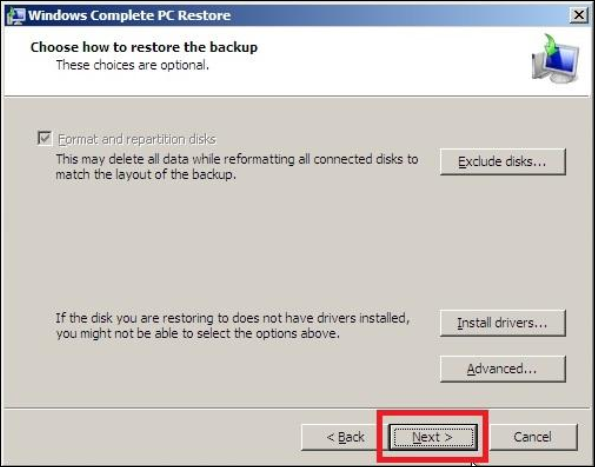
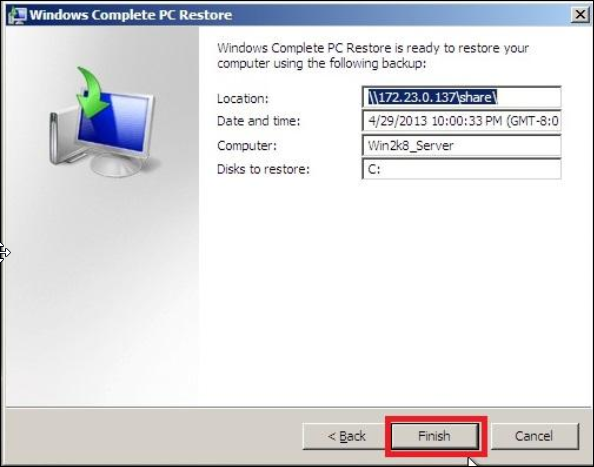
- Verify the backup details on the summarized on the last page and click Finish.
-
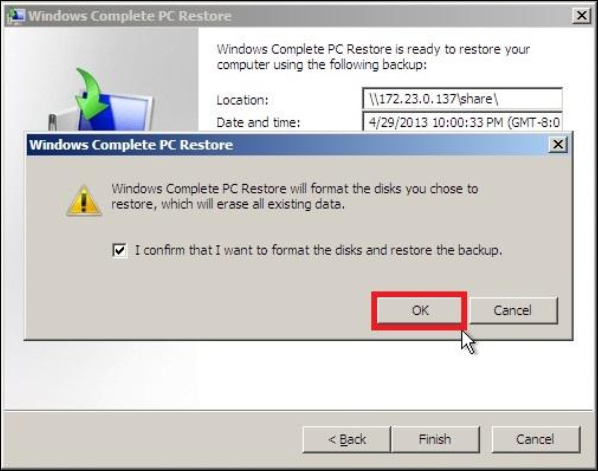
Select I confirm that I want to format the disks and restore the backup and click OK to start the BMR restore.
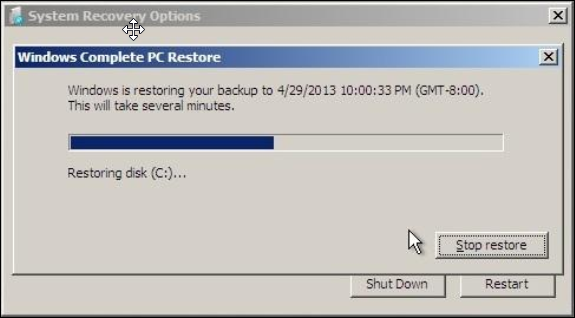
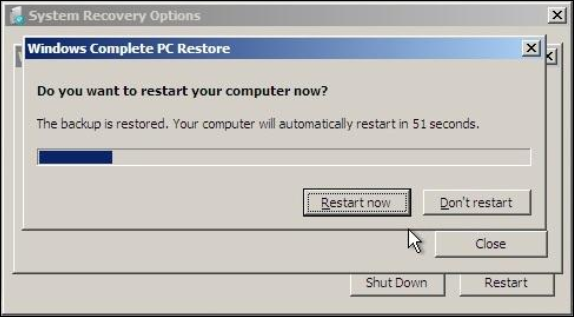
The recovery can last for anything between a few minutes to a few hours. After completing the recovery, the machine will restart with Windows.
References
- System State Recovery using wbadmin: https://technet.microsoft.com/en-us/...(v=ws.11).aspx
- Installing Windows Server Backup Feature (Server 2012): https://technet.microsoft.com/en-us/...(v=ws.11).aspx
- Bare Metal Recovery using wbadmin: https://www.backup-utility.com/wbadm...very-4348.html
- wbadmin documentation: https://technet.microsoft.com/en-us/...(v=ws.11).aspx