How to restore RDS instances using CloudRanger
This article applies to:
- Product edition: CloudRanger
Overview
You can configure a backup policy in Druva CloudRanger to perform AWS Snapshot backups for RDS instances. This article provides the steps to restore an RDS snapshot to an Instance with Druva CloudRanger.
Prerequisite
You should have a service-linked role for Amazon RDS in the AWS account on which you are attempting the restore.
However, you don’t have to manually create the RDS service-linked role, if it has not been created previously. Instead, Amazon RDS creates a new service-linked role for you when you create your first DB instance. You can then delete the DB instance once the service-linked role is active.
Restore RDS instance
On the Druva CloudRanger console:
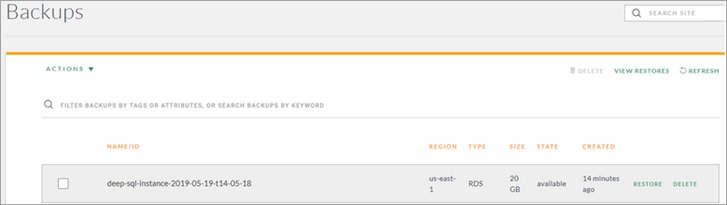
- Go to the Backups section that lists all the snapshots. Each snapshot has RESTORE and DELETE options next to the snapshot details.
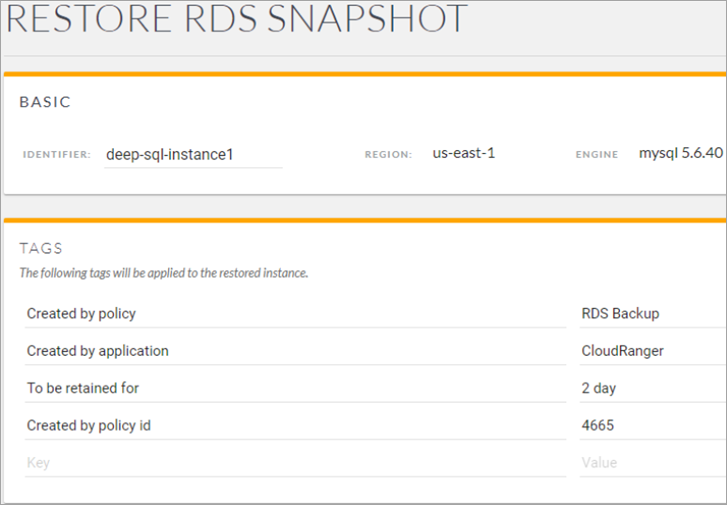
- Click RESTORE against the snapshot that you wish to restore. A restore window is displayed with the details of the snapshot that you have selected for restore. The window allows you to rename the identifier and the associated tags with the new instance. Druva recommends that you rename the identifier in case the RDS instance with the same name already exists.
- Select the restore location from the following options:
- VPC
- Subnet Group
- Availability Zone
- Port
- Select the instance type from:
- Parameter group
- Option groiup
- VPC security groups
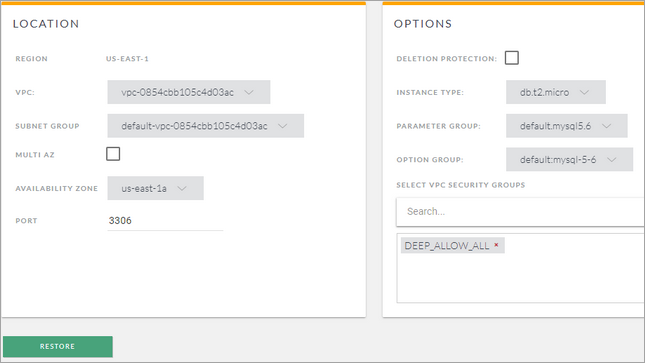
- Click Restore to launch your instance. The Servers screen opens and displays the new instance.